How 2D and 3D workflows are merging
Adobe and Maxon team up to join the CG convergence revolution and produce some industry-changing results that are sure to be noticed.
Sign up to Creative Bloq's daily newsletter, which brings you the latest news and inspiration from the worlds of art, design and technology.
You are now subscribed
Your newsletter sign-up was successful
Want to add more newsletters?

Five times a week
CreativeBloq
Sign up to Creative Bloq's daily newsletter, which brings you the latest news and inspiration from the worlds of art, design and technology.

Once a week
By Design
Sign up to Creative Bloq's daily newsletter, which brings you the latest news and inspiration from the worlds of art, design and technology.

Once a week
State of the Art
Sign up to Creative Bloq's daily newsletter, which brings you the latest news and inspiration from the worlds of art, design and technology.

Seasonal (around events)
Brand Impact Awards
Sign up to Creative Bloq's daily newsletter, which brings you the latest news and inspiration from the worlds of art, design and technology.

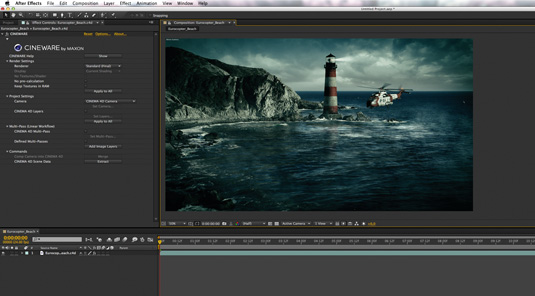
Over the last few years, After Effects and Cinema 4D have become a potent pairing of 2D and 3D applications, especially when it comes to motion graphics. The exchange plugins have been popular, with their easing of getting 3D scene data into a 2D workspace. Cineware is both a natural progression of that sort of workflow, but also a new beast altogether.
The new tools come in two main parts. First up is the inclusion of Cinema 4D Lite, a version of the 3D software which will ship alongside After Effects. This is in itself a big deal and will open the doors for non-3D artists to try out CG within their existing tool sets. The version of Cinema 4D doesn’t have all the bells and whistles of Maxon’s studio version but is more than serviceable, with excellent modelling and texturing tools.
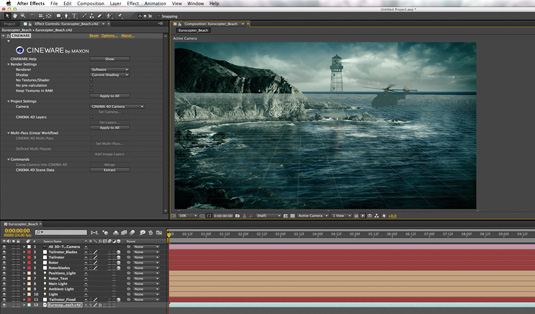
The big news, though, is Cineware itself. This is more than your usual plug-in and is deeply embedded in After Effects, enabling you to simply drag and drop a .c4d file to open and manipulate it natively in After Effects. For long-time users, this feels both magical and awesome but also natural, and has a shallow learning curve.

Impressive features
After Effects can take scene information from the 3D scene directly, including cameras, lights, objects and animation. What is impressive is that After Effects items can be added to the scene between objects in the .c4d file, allowing very fast scene creation. This uses Cinema 4D's layers system, which integrates almost seemlessly with AE’s.
It's also exceptionally impressive that both 3D and 2D scenes can be worked on simultaneously, letting artists or small teams collaborate much more efficiently. All these elements combine to create a versatile, fluid and efficient workflow, which is sure to make the life of motionographers and VFX artists significantly easier.
Words: Rob Redman
This article first appeared in 3D World magazine issue 169.
Sign up to Creative Bloq's daily newsletter, which brings you the latest news and inspiration from the worlds of art, design and technology.
Liked this? Read these!
- Top free 3D models
- Best 3D movies of 2013
- Blender tutorials: ways to create cool effects

The Creative Bloq team is made up of a group of art and design enthusiasts, and has changed and evolved since Creative Bloq began back in 2012. The current website team consists of eight full-time members of staff: Editor Georgia Coggan, Deputy Editor Rosie Hilder, Ecommerce Editor Beren Neale, Senior News Editor Daniel Piper, Editor, Digital Art and 3D Ian Dean, Tech Reviews Editor Erlingur Einarsson, Ecommerce Writer Beth Nicholls and Staff Writer Natalie Fear, as well as a roster of freelancers from around the world. The ImagineFX magazine team also pitch in, ensuring that content from leading digital art publication ImagineFX is represented on Creative Bloq.
