How to create photoreal renders from CAD data
Joseph Thomas of Wonder Vision explains how to optimise a CGI pipeline to accommodate CAD data.
- Main renders HDRI background courtsey of Maground
We’ve recently delivered CG campaign imagery for Triumph Motorcycles showcasing the new Tiger XC and XR range of adventure bikes. Using CGI has many well-known advantages, namely the ability to create otherwise very challenging and time-consuming shots using traditional techniques – shots such as engine cutaways and environments.
Using CGI, Wonder Vision’s artists can drop the CAD data into high quality stock backplates, like the main image (above) which is courtesy of Maground, then the lighting is matched with the HRDI.
The total production time from kick-off to asset delivery was just over six weeks, delivering high-res CGI press shots, configurable layered .png assets for the online configurator, key feature reveals and isolated engine shots.
Here we want to share our insights from this unique CGI production pipeline along with our workflow process and provide you with tips along the way...
File sizes
When working with large CAD data sets the first thing which can quickly become unmanageable is the size of the data files. We worked closely with Triumph to find the optimum data quality to file size ratio before exporting/ importing full bike data. We had the best results using either .stp or .iges files.
The data was split into small sub-assemblies, for example frame, bodywork, engine, and built around a common reference system. Once the CAD sub-assemblies were imported into our parametric CAD package we could begin to optimise the data.
Our optimisation process involves adjusting the quality of the visible surface data and stripping out unseen geometry to reduce the file size.
Sign up to Creative Bloq's daily newsletter, which brings you the latest news and inspiration from the worlds of art, design and technology.
We increase the quality of the surface data for visualisation using a number of techniques. Most importantly we add a small radius or fillet to take away any sharp edges. This small fillet will pick up a highlight and add realism to the final renderings.
Next steps
Rather than re-modelling corrupt or basic geometry items, such as straps and soft goods that don't have highly detailed CAD data, just block basic shapes to outline their position and presence on the bike.
We remodel these items in 3ds Max. Polygon modelling allows us to carve in the finer details, such as material creases and fabric stitching.
Next we need to add gravity to the bike so the suspension is slightly compressed, as a result of the weight of the bike. This effects the rear wheel position and swing arm, which helps add to the photorealism.
The final stage is to increase the surface quality settings for the export. We export the optimised MXS data into Maxwell Render Studio. We find Maxwell Render gives the greatest levels of control, freedom and consistency with the scene set-up.
01. File referencing
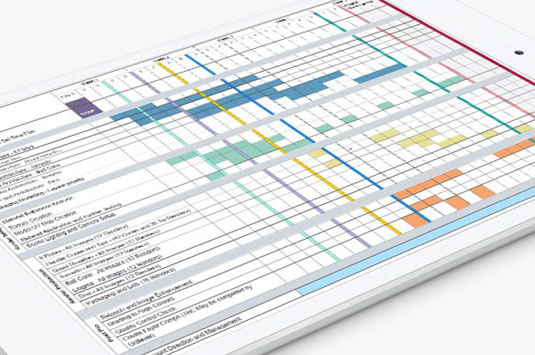
It's vital to develop a coherent file structure. This minor point has saved many hours when revisiting projects. I matched the same component naming system and file structure as the native CAD data. This ensures I'm talking the same language as the client before we start.
It is essential to use a common reference coordinate system for the CAD data. Any potential, revised or updated CAD data that may be required and added to the assembly will then snap into the correct intended position.
02. CAD Data Conversion
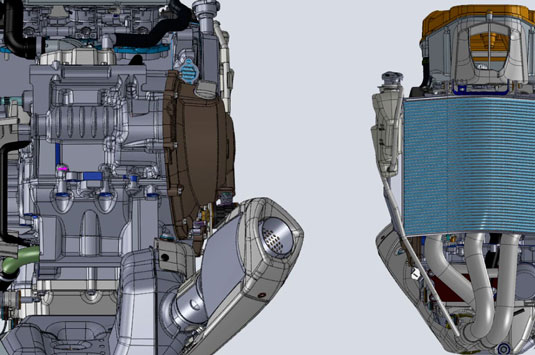
Large automotive data sets often contain a blend of 3D data modelled in a variety of dimension-driven parametric and 3D poly packages – from CAD hard surface data to 3D scanned data and low poly data.
It's worth spending time working on the most efficient data file conversion process, to bring the data into your CG application and/or render engine. I look for the optimum file size to data quality/editability ratio. In my experience I have the best results importing .stp or .iges files, importing them into Maxwell Studio ready .mxs files.
03. CAD Data Optermisation
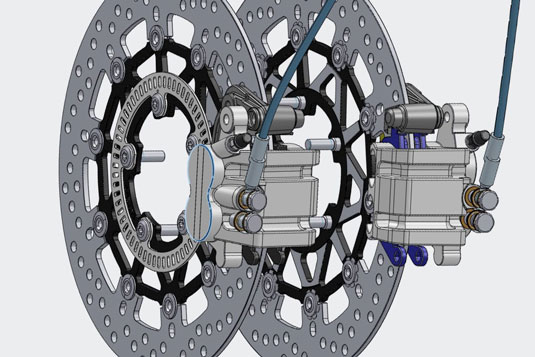
Adding finer details – such as a small radius to soften the hard sharp edges – adds to the photorealism. The edge will then be picked up during rendering and shown with a subtle highlight.
Some features in the CAD data set will not be representative of the final component, for example the data may not be available as it will come directly from a supplier, so a 'fit sleeve' will be present in its place. In this case I then remodel the components in 3ds Max.
04. Remodelling soft items
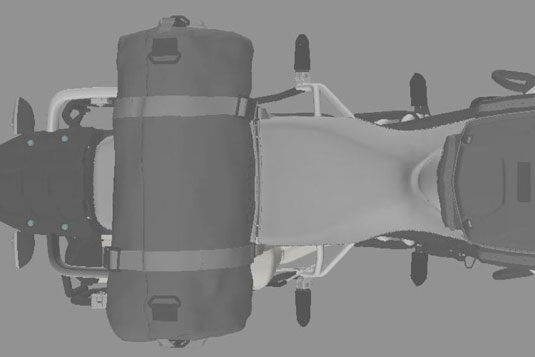
I remodel all the soft items such as the seat, luggage and straps in 3ds Max, creating a high poly UVd mesh suitable for close-up detailed rendering. This process allows you to carve in the organic forms and elements, such as fabric creases, folds and seams.
These items are modelled using a mixture of reference images, technical drawings and product samples. I create custom UV maps in 3ds Max ready to snap the bespoke textures into place within the Maxwell Render material application.
05. Material creation
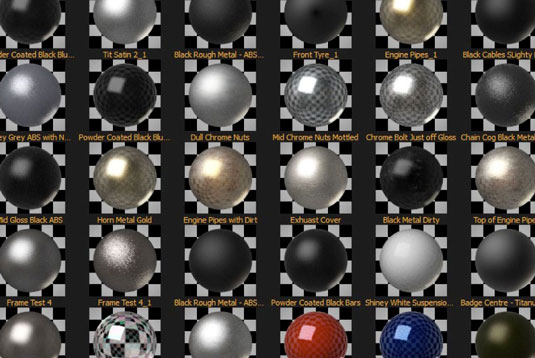
Using reference photos and physical samples, create high-res custom texture maps. To achieve photorealism create imperfection maps, such as dirt, oil stains and light wear. Don't overdo this as the CGI is intended to showcase a showroom bike model, but adding subtleties sells the realism.
All textures are referenced within the scene so an update in material finish can be controlled with an image texture change. Use lab measured IOR values for all IOR values to achieve maximum accuracy.
06. Material application
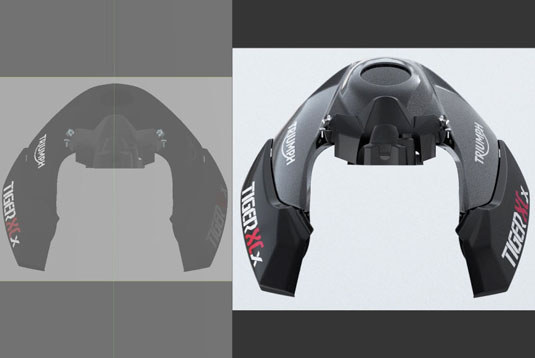
With all geometry suppressed, each component is unsuppressed and individually materialled, taking time to ensure texture maps are correctly scaled on the component.
At this point I have Maxwell Render's Fire activated to ensure the final appearance of the renders are truly representative of the physical component. Constantly tweak the material properties during this process to improve the real-time preview renders. I consider the manual input and consistent tweaking an essential part of perfecting the CGI.
07. Lighting
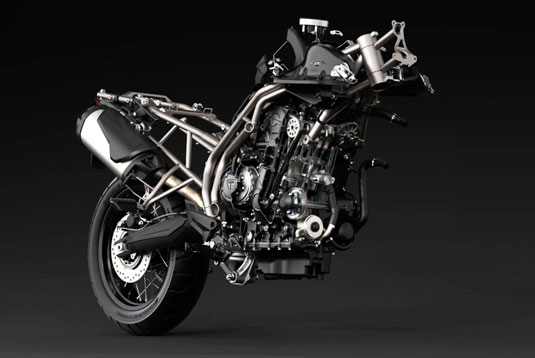
The lighting process is key to outputting photorealistic CGI and it's where the CG bike really starts to come to life. Here I decided to light each shot individually using a combination of emitter planes, HDRI light studio and Maxwell Fire to preview the lighting process in real time.
Due to the size of the bike data I preview the images through Maxwell Fire with only the main reflective components visible, for example the bodywork, wheels and windscreen. This speeds up the voxilization and preview process dramatically.
08. Render composition
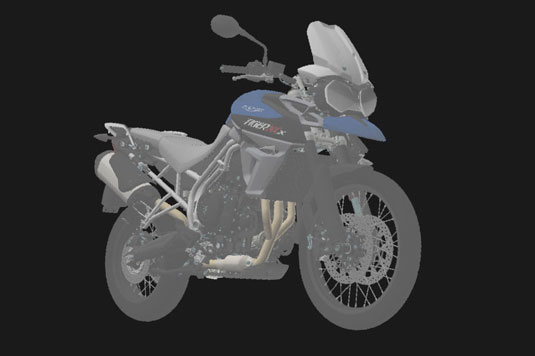
I always present a range of camera compositions that best showcase the features of the bike. At this stage I group the front wheel and handlebars in a sub configuration group. This allows me to rotate these components together around a pivot coordinate system. This gives the impression the front wheel isn't perfectly straight, adding realism to certain shots.
With the composition confirmed I run low-res test renders to check all materials and lighting are perfected before running the final high-quality production images.
09. Render Production

Increase the final render settings and export the packaged Maxwell .mxs scene file into the internal render hub. With all referenced files within one folder this limits the potential for asset tracking problems.
This is an area on the network where our final scenes are temporally queued, ready to be racked on our purpose built internal render farm. We export an .mxs file for every base bike, colourway and accessory layer. For the accessory layers we process a region of the render to keep render times to an absolute minimum.
10. Post-production
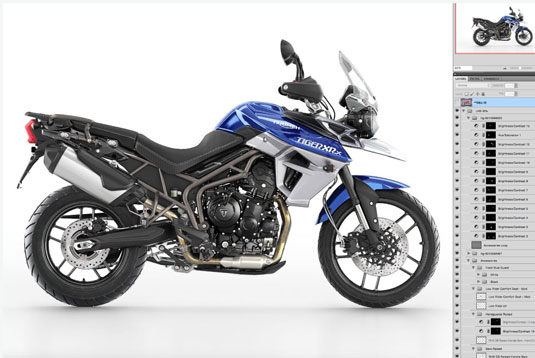
The final stage is to retouch the rendered layers and cut out the accessories, adding them as separate configurable layers above the base layers. I start retouching the stripped down base bikes and their colourways, alpha masking out the backgrounds, and adding custom shadow passes to the floor.
The accessories are then comped and retouched into the base bikes, matching brightness contrasts and colour balances. Finally, I set up the layer comps for all accessories and export the final .png layers.
Words: Joseph Thomas
Joseph is co-founder and director of Wonder Vision. He has driven the revolutionary creative CG field since the studio's inception in 2009. Wonder Vision is a high-end digital creative agency that crafts stunning one-of-a-kind CGI and bespoke digital solutions. Founded in 2009, Wonder Vision has seen organic double-digit growth annually, and puts this down to its distilled focus on delivering work that excites their clients. Their highly energetic team thrives on deep engagement with their clients to build meaningful, lasting relationships.

The Creative Bloq team is made up of a group of art and design enthusiasts, and has changed and evolved since Creative Bloq began back in 2012. The current website team consists of eight full-time members of staff: Editor Georgia Coggan, Deputy Editor Rosie Hilder, Ecommerce Editor Beren Neale, Senior News Editor Daniel Piper, Editor, Digital Art and 3D Ian Dean, Tech Reviews Editor Erlingur Einarsson, Ecommerce Writer Beth Nicholls and Staff Writer Natalie Fear, as well as a roster of freelancers from around the world. The ImagineFX magazine team also pitch in, ensuring that content from leading digital art publication ImagineFX is represented on Creative Bloq.
