How to integrate 3D renders into a photo
Digital artist Aiman Akhtar explains the process behind integrating a 3D render into a photograph.
Daily design news, reviews, how-tos and more, as picked by the editors.
You are now subscribed
Your newsletter sign-up was successful
Want to add more newsletters?

Five times a week
CreativeBloq
Your daily dose of creative inspiration: unmissable art, design and tech news, reviews, expert commentary and buying advice.

Once a week
By Design
The design newsletter from Creative Bloq, bringing you the latest news and inspiration from the worlds of graphic design, branding, typography and more.

Once a week
State of the Art
Our digital art newsletter is your go-to source for the latest news, trends, and inspiration from the worlds of art, illustration, 3D modelling, game design, animation, and beyond.

Seasonal (around events)
Brand Impact Awards
Make an impression. Sign up to learn more about this prestigious award scheme, which celebrates the best of branding.
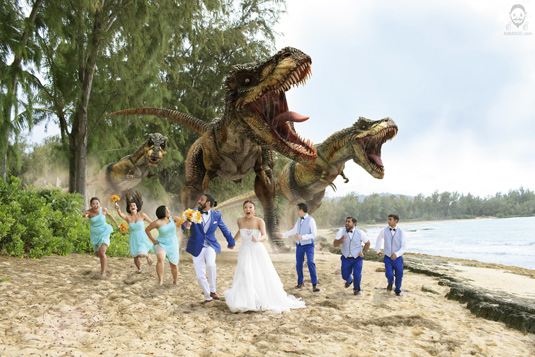
This image was created for my wedding. First Chris Simons, our wedding photographer, found the location near our wedding venue at a beach on Turtle Bay resort on the North Shore of Oahu. Chris set up his tripod and shot the clean backplate, with none of us in the shot. After this, the bridal party was briefed - run for your lives!
Start by gathering a lot of reference. For my image I found an excellent T-Rex skeleton rig posted by Joel Anderson on Creative Crash. I emailed him to ask if he would mind me using the rig for an integration project, and he consented. I took Joel's skeleton into ZBrush, appended a ZSphere and used ZSketch to create a base mesh on top. I modelled the eyes, claws, teeth and tongue in Modo and appended them as subtools in ZBrush for detailed sculpting.
Skillful sculpting
Next I used DynaMesh, and sculpted muscular structure and the overall shapes, trying to decide the look I was after. I added high-res detail, including scales and wrinkles, using the Standard brush with the Drag Rectangle stroke and several scale alphas. I used different brushstrokes to add variation, including Raking, Crosshatching, and Spray strokes in a circular pattern to add vague detail, and then masked and carved using the Dam Standard brush.
After sculpting, I used the ZRemesher to add some guides and speedily created an excellent retopologised mesh. I exported this as an .obj to make my UVs in Modo, then took it back into ZBrush to project all of my sculpting detail from my DynaMesh onto the new mesh with UVs and subdivisions.
Next I Polypainted and used Cavity Mask, which enhances the look of the wrinkles and scales. I generated a displacement map and base texture map, then flattened the model to reflect the UVs and apply the displacement. I applied various materials onto the model and exported them as layers in Photoshop to create the final diffuse texture map. The final step was to integrate it with the photo!
Top tips
01. Real-world and CG cameras
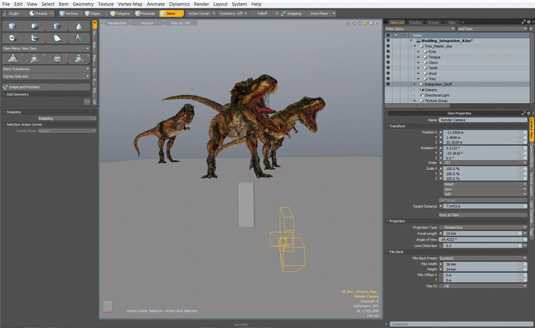
Successful 3D/photo integration requires aligning your software camera properly with the real-world camera. I had the tripod height from the shoot and Chris’s RAW images had the frame size, focal length, camera and lens type data.
I input these parameters in my Modo camera and one of the photos as my environment colour set to frontal projection through the same camera. This enables me to see the backplate in the render preview window.
Daily design news, reviews, how-tos and more, as picked by the editors.
02. Rigging and posing
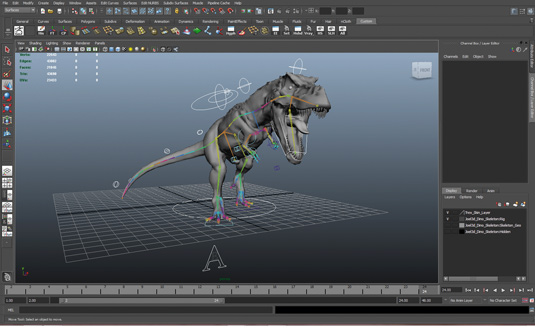
The T-Rex skeleton rig works as a base mesh for my ZSketching, and is a perfect way to pose my sculpted T-Rex. I export my T-posed T-Rex into Maya and add a smooth bind to the skeleton. After painting weights, I do a 30-frame animation of a T-Rex chase and create three key poses.
That's when I decide to have more than one T-Rex. I export out the three poses as .objs, assemble them in Modo and observe the impact they have working together.
03. Directional lighting
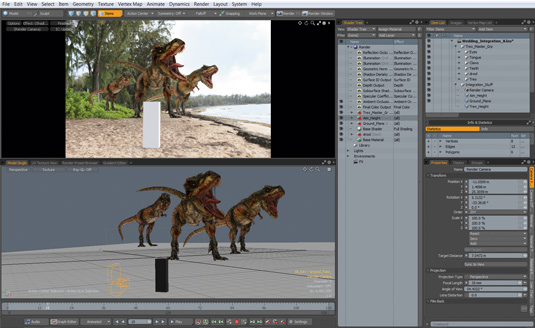
Once I have the T-Rexes positioned and scaled, I create a directional light for the sun and set the shader of the ground plane to Shadow Catcher. For an ideal integration, it’s best to shoot a spherical panorama at your photo location. (I had to make do with HDR sphericals I could find online to approximate the lighting and reflections.)
The new Modo HDR Light Studio plug-in allowed me to click right onto my models in 3D space to create a custom-lit and coloured HDR image.
04. Finishing touches
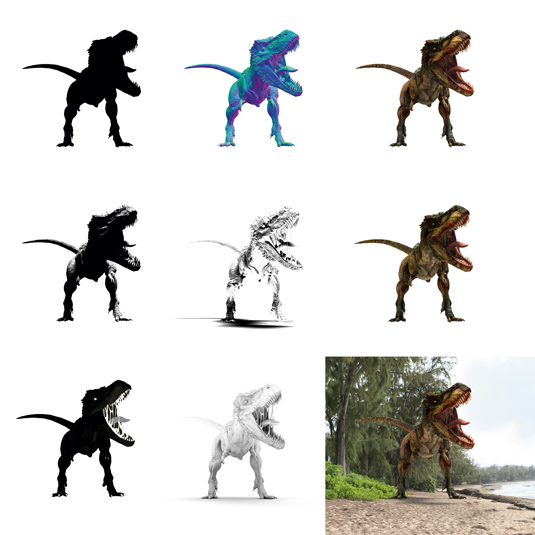
After lighting I rendered out several passes for compositing. In Photoshop, I used Import Files Into Stack Script to bring in all the renders. (Adjust the layer order, opacity and mode to suit.)
I also bring in the clean backplate photo and use that as my base, with the backplate above, then a layer for sand effects, then the bridal party in the foreground. On top are overall effects. I use several ID passes and paint masks to enhance the shadows and highlights.
Words: Aiman Akhtar
Currently working for Clutch Studios, Aiman Akhtar creates visuals for the advertising industry doing high-end 3D photo integration work. This article originally appeared in 3D World issue 180.

The Creative Bloq team is made up of a group of art and design enthusiasts, and has changed and evolved since Creative Bloq began back in 2012. The current website team consists of eight full-time members of staff: Editor Georgia Coggan, Deputy Editor Rosie Hilder, Ecommerce Editor Beren Neale, Senior News Editor Daniel Piper, Editor, Digital Art and 3D Ian Dean, Tech Reviews Editor Erlingur Einarsson, Ecommerce Writer Beth Nicholls and Staff Writer Natalie Fear, as well as a roster of freelancers from around the world. The ImagineFX magazine team also pitch in, ensuring that content from leading digital art publication ImagineFX is represented on Creative Bloq.
