How to model photoreal 3D glass objects
3D artist Francesca Forzoni explains how to render glass in three easy steps.
Daily design news, reviews, how-tos and more, as picked by the editors.
You are now subscribed
Your newsletter sign-up was successful
Want to add more newsletters?

Five times a week
CreativeBloq
Your daily dose of creative inspiration: unmissable art, design and tech news, reviews, expert commentary and buying advice.

Once a week
By Design
The design newsletter from Creative Bloq, bringing you the latest news and inspiration from the worlds of graphic design, branding, typography and more.

Once a week
State of the Art
Our digital art newsletter is your go-to source for the latest news, trends, and inspiration from the worlds of art, illustration, 3D modelling, game design, animation, and beyond.

Seasonal (around events)
Brand Impact Awards
Make an impression. Sign up to learn more about this prestigious award scheme, which celebrates the best of branding.
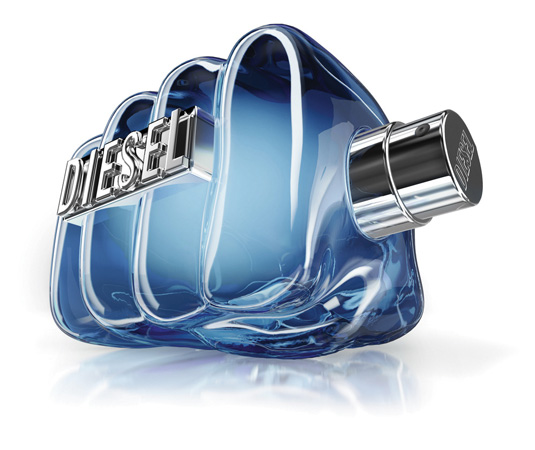
I’ve always found that it's best to render out as much information as possible so that when you composite your render in Photoshop or Nuke, you have everything you need to recreate your image and achieve the result you want.
Be inspired by these incredible examples of 3D art
This Diesel bottle was the first glass product I'd ever attempted to build in 3D, so there was a multitude of things I had to learn. Before you get to the retouch stage though, there are a few things I'd recommend – especially when modelling glass objects.
Have the object you're building to hand, if at all possible. Look at how the light shines through the object, and how light affects the colours that can be seen within the glass and the liquid.
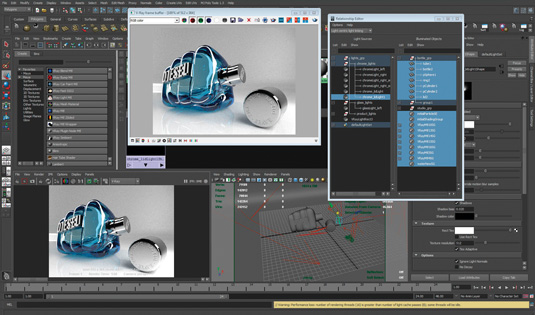
I'd also recommend taking some photographs at this point, as you will find it useful to incorporate these when it comes to retouching your final image. When you start modelling in 3D, build to real-world scale – this will create more accurate lighting results, as well as helping if you need to move your model in and out of different applications, especially if you're using RealFlow.
Make sure you have a clean mesh and double check your normals to avoid any inconsistencies when lighting glass objects. And if you are filling your glass with liquid, ensure that the liquid mesh lies in between the interior and exterior of your glass model.
When it comes to lighting glass objects I normally try a few different HDRs for a base lighting, then set up three-point lighting to mimic traditional lighting setups. However, to achieve more intricate strip lighting you can build upon your basic setup if need be.
Daily design news, reviews, how-tos and more, as picked by the editors.
01. Light linking
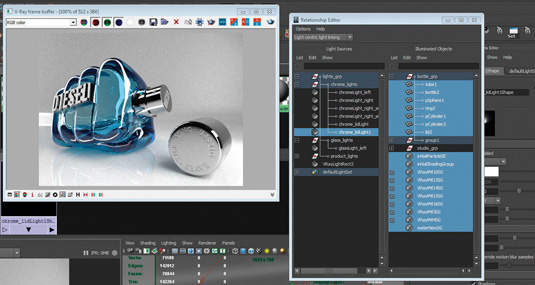
Linking up lights to objects separately allows you to tailor each part of your model to achieve the highlights you want. I find this really helps when doing glass products and cars in particular.
For my Diesel bottle, I had lights purely for the glass and lights linked only to the chrome lid. You have a lot more control this way, and when rendering you can render individual passes for each light, which again helps so much when retouching.
02. V-Ray multi-pass rendering
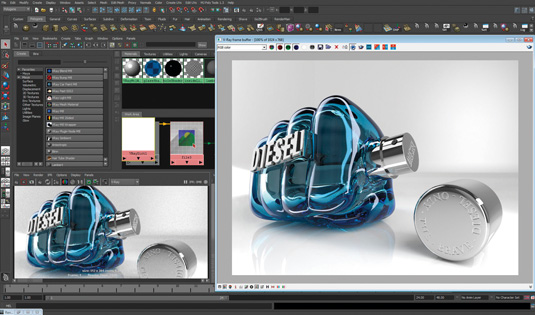
Making use of multi-passes allows you to retouch your render with maximum control. Material or objects IDs are a must for creating quick masks when retouching.
I like to render out a ZDepth pass (to create depth of field in my shots) by inputting it into the Lens Blur in Photoshop. Here’s a good tutorial on compositing in Photoshop I'd recommend.
03. render objects separately
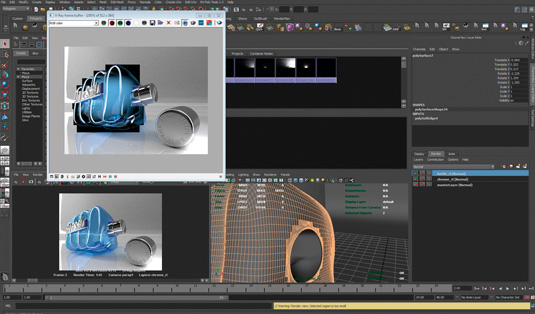
Once everything is set up with lights, cameras and multi-passes, I find it really helpful to set up render layers. With glass bottles I normally render a master layer, then the glass with the floor, without the floor, and the lid separately if you're getting too many reflections from your bottle.
That, combined with your multi-passes, should provide you with enough information to create a final product composition you're happy with.
Expert tip: Render all options
Render in layers, separate out your main objects (if there are a lot of reflections) and make use of multi-passes. This allows you to rebuild your image from scratch in Photoshop and gives you optimum control overall aspects.
Words: Francesca Forzoni
Frankie Forzoni is a 3D artist and visualiser in London. She has recently moved from working in post-production to branding and packaging.
This article first appeared in issue 184 of 3D World magazine.
Like this? Read these!
- How to create a basic game environment
- How to land your dream job in animation
- Download free textures: high resolution and ready to use now

The Creative Bloq team is made up of a group of art and design enthusiasts, and has changed and evolved since Creative Bloq began back in 2012. The current website team consists of eight full-time members of staff: Editor Georgia Coggan, Deputy Editor Rosie Hilder, Ecommerce Editor Beren Neale, Senior News Editor Daniel Piper, Editor, Digital Art and 3D Ian Dean, Tech Reviews Editor Erlingur Einarsson, Ecommerce Writer Beth Nicholls and Staff Writer Natalie Fear, as well as a roster of freelancers from around the world. The ImagineFX magazine team also pitch in, ensuring that content from leading digital art publication ImagineFX is represented on Creative Bloq.
