How to paint model textures directly in 3ds Max
3D artist Paul Hatton reveals how to use the Viewport Canvas toolset to adjust your textures in 3ds Max.
Sign up to Creative Bloq's daily newsletter, which brings you the latest news and inspiration from the worlds of art, design and technology.
You are now subscribed
Your newsletter sign-up was successful
Want to add more newsletters?
The Viewport Canvas toolset in 3ds Max enables you to interact with your textures within the viewport. The toolset has been around for quite a few years now, but it seems there are only relatively few people who actually make use of it. This is a shame: it's a fantastic set of tools that will help you to work quicker and more efficiently, and also enable you to make more accurate and realistic textures.
It has tools for painting colour and pattern onto any bitmap in an object's material right inside the viewport itself. You also have the ability to paint in multiple layers directly on to a 3D object, or onto a 2D canvas superimposed on the viewport. All your edits can then be exported from 3ds Max in the .psd file format, enabling you to move straight into Photoshop.
Once you're familiar with it, you'll find the Viewport Canvas toolset indispensable. Its synchronisation capabilities with Photoshop alone make it a hit. It saves time, and it makes the process of custom texturing much easier.
Article continues below01. Launching the Viewport Canvas toolset
Let's kick off by getting the toolset viewable. Go to Tools>Viewport Canvas. This acts like any other tool panel, so you can dock it wherever you want. The panel is made up of buttons, spinners, colour selectors and rollouts, so this should all be familiar to you.
All the primary tools are located at the top, with the standard paint tools such as Paint, Erase, Clone, Fill, Gradient, and so on. Just underneath these are the layer settings, which I'll come to later. Then you have the colour and brush settings. You can adjust the settings of the spinners when working using shortcut keys, but it's always nice to be able to see what the values are as well.
The first rollout you come to is the Brush Images area. This gives you the ability to use predefined brush types as well as custom ones of your own. The next rollout enables you to define what you're painting on, and the channel you use. The remaining rollouts cover paint behaviour, randomisation of the painting effect and tablet pressure settings. Finally, you can load and save your settings to ensure that you don't waste time setting them up every time you come to them.
02. Unwrap your object
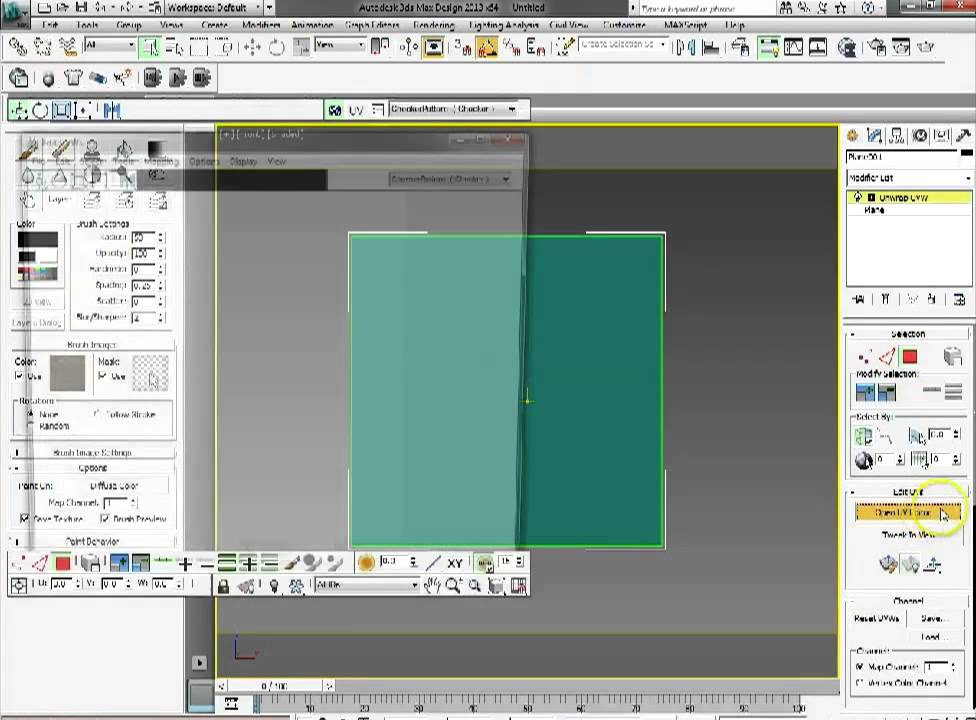
To use the Viewport Canvas tools on an object, you first need to unwrap your object so that all your geometry is flattened into 2D space. Thankfully, there's a modifier for this called Unwrap UVW. Go ahead and add it to your object. Hit the Open UV Editor button in the Edit UVs panel to bring up the Edit UVWs window. You could attempt to texture your object now, but it would look horrible. Once you've got over how much of a mess your UVs are in, let's get on and sort them out.
Sign up to Creative Bloq's daily newsletter, which brings you the latest news and inspiration from the worlds of art, design and technology.
The easiest way is to use the built-in Flatten Mapping tool. Within your modifier, select Face, then select all the polygons either by using drag select or by pressing Ctrl+A. Now you're ready to flatten the map, so go to Mapping>Flatten Mapping.
This isn't an unwrapping tutorial, so you can just leave the settings at the defaults. However, unwrapping is an essential skill, so I would encourage you to read up on it, and then to experiment with the toolset offered inside 3ds Max.
The resulting UV layout is now much cleaner and understandable. The reality, though, is that it still isn't perfect. Technically you should stitch the different parts together using tools such as Relax, but as I've said, that's beyond the bounds of this tutorial. So let's move to the Viewport Canvas tools.
03. Let's start painting
Convert the object to an editable poly. Note that the UV layout will be retained. Start by applying a material to the object. This is the material you'll be painting onto. For this project, keep things separate from mental ray or V-Ray and just apply a boring Standard material. Make sure your object is selected and click the Paint tool. This will bring up a list of channels for you to paint on.
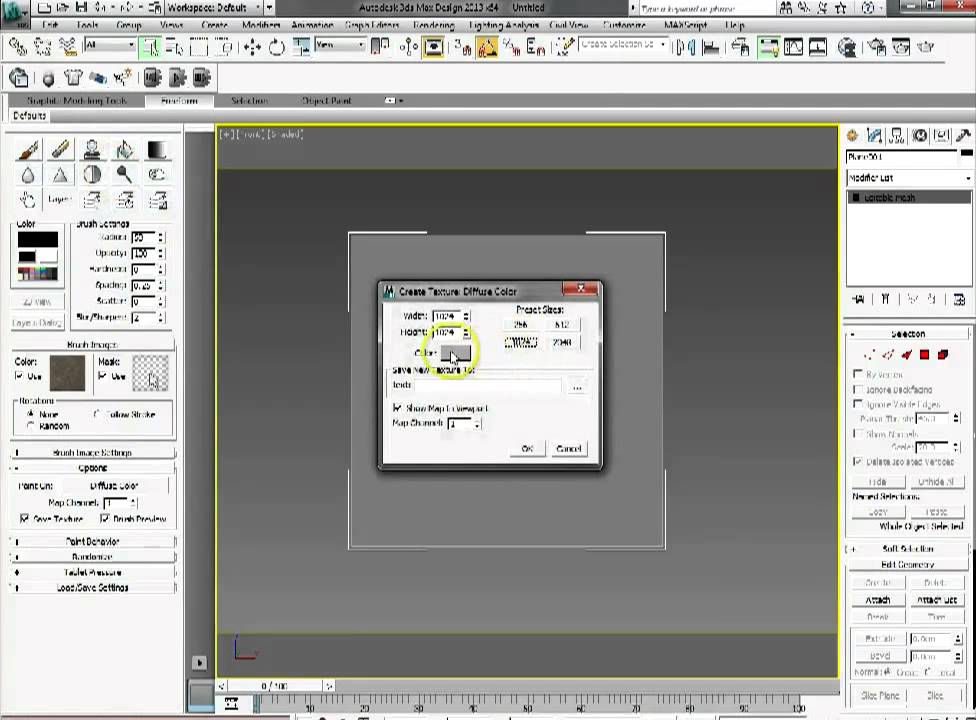
Let's begin by painting on the Diffuse Color layer. The resulting window enables you to create a texture to apply to that diffuse channel and set some of its parameters. For example, you can adjust its resolution as well as its default colour.
You can also set the map channel you want to paint onto, and define which file format all of this information will be stored with. You can choose whatever settings you want, but for this example I chose 1024x1024 and saved the texture as a JPEG. Click OK, then click any object in the viewport to paint.
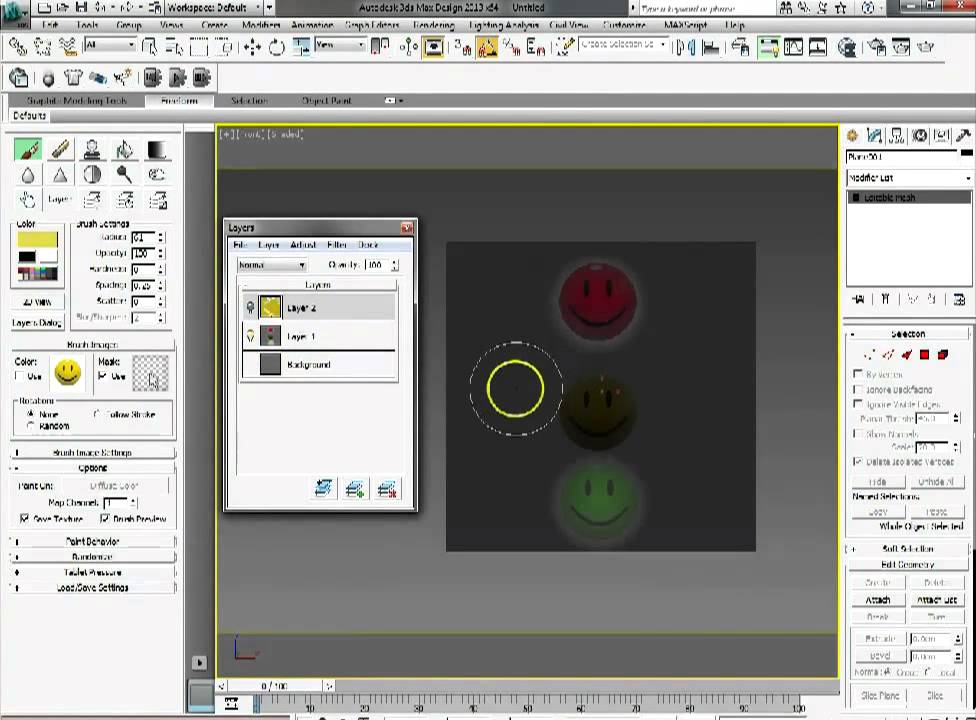
You can navigate around your scene and apply your painting skills to any side of a 3D object. The Eraser tool can be used by selecting it, or you could simply hold down Shift to toggle it on. Try experimenting with colours and brush settings.
04. Brush images
You might want to use different types of brushes or masks to create different effects. These can be found in the Brush Images rollout of the Viewport Canvas tools. When choosing a brush image, you'll notice that you have a row of preset colour brushes and a row of preset mask images. These are really useful – hover over the thumbnails to reveal the descriptions.
My favourite brush colour preset is probably the rust one. It enables you to paint the effects of age. Because you're in the viewport, you can paint the effects exactly where you want them. There's also a set of custom maps with two presets – a yellow star on a black background and a star- shaped mask. I've never found these particularly useful, but maybe you will!
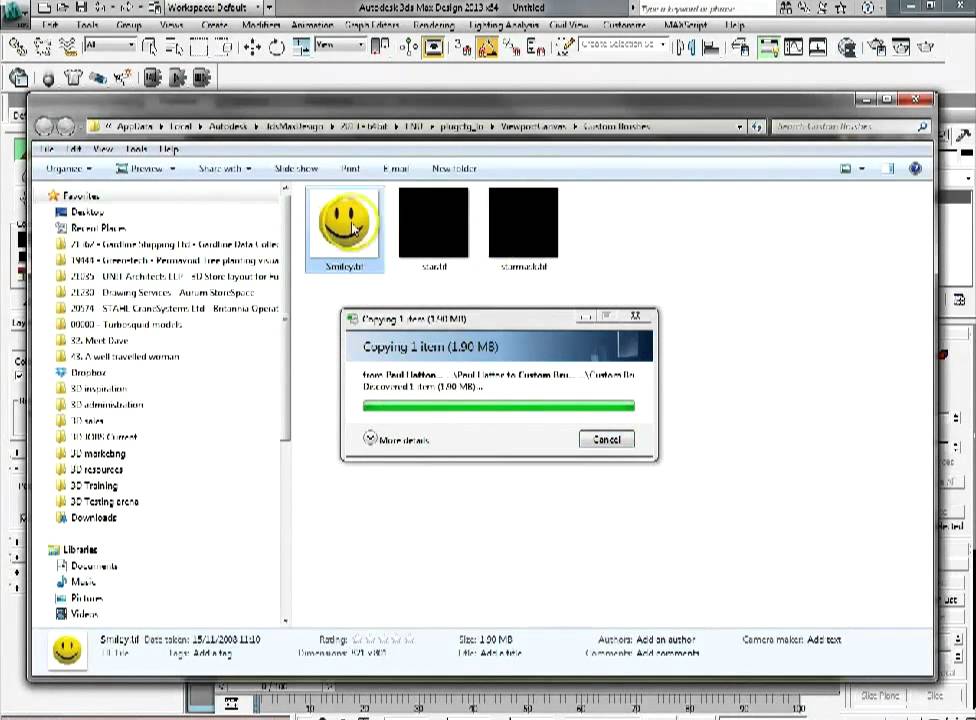
To make a custom map, create your square tile (colour or mask) and save it in the Custom Maps directory. This location can be found by clicking Browse Custom Maps Dir. Make sure you save the image as a TIFF. The new brush appears in your list the next time you open the Brush Selection dialog, or after you click Reload Custom Maps. There's no real difference between a brush image and a mask: you can use a greyscale image as a brush as well as a colour image as a mask.
05. Layers overview
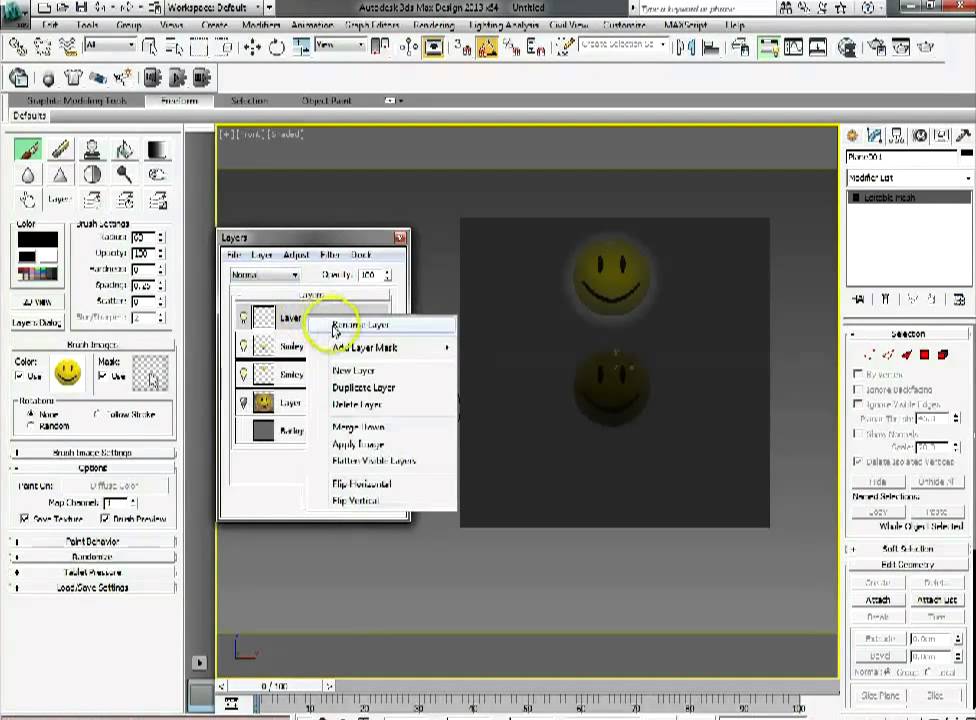
So far you've only painted on the default layer. This has been fine for now, but it's a destructive way of working. 3ds Max has a layer-based system, similar to any other paint program. In the Viewport Canvas panel, you'll notice a Layers Dialog button just above the Brush Images rollout. Click this to open the Layers dialog.
So far you just have a background layer with all your painting on it. Start by creating a new layer using the button at the bottom. Rename the layer to something sensible by double-clicking it. It also has a light bulb next to it: this enables you to toggle the layer on and off. Notice that the background layer is permanent and therefore can't be hidden. If you want your layer to have less of an effect on the overall texture, you can also adjust the layer opacity.
The final thing to discuss in this basic introduction to the Layers dialog is the layer blend modes. These enable you to adjust how the layers interact with the layers below it. For example, if it's set to Multiply then the layer's pixels will be multiplied by the pixels of the layer below, then divided by 255 to create a new value.
06. Layers in detail
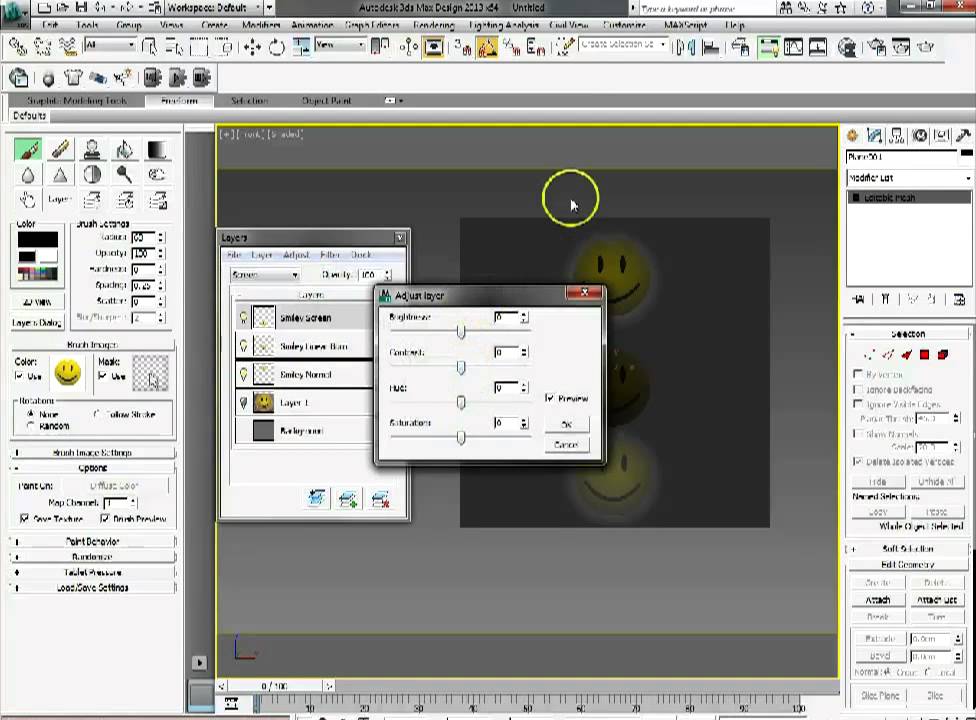
Let's look at some of the layer features that aren't so obvious. These are the adjustment effects and the filter effects. To use these, go to the Adjust or Filter menu and choose an option from the list. These are stripped down from what you would find in Photoshop, but they still have their uses.
One of my favourite adjustments is Brightness/Contrast/Hue/Saturation. This is useful if you paint in one colour, for example, but then you want to adjust the overall hue of the layer. I find this helpful in a scene where I want two key colours. If I have a blue and yellow theme but want to see what it will look like as blue and green, I can easily grab the orange layer and apply the hue adjustment to quickly turn it green.
As for filters, I make most use of the Blur filter. I might, for example, paint with sharp edges, but then decide that I want everything to be feathered. I can do this by grabbing the layer, applying the filter and specifying the Blur amount. Prior to the Viewport Canvas tools, you would have loaded the texture into Photoshop, made the changes, then reloaded the texture back to 3ds Max.
07. Save and load PSDs
The primary benefit of saving in the Photoshop file format is that all the layer information is maintained. That includes the layer names, their blending modes and the opacity of each layer. Therefore, everything you do in 3ds Max translates across to Photoshop, so you can carry on working on the texture in Photoshop if you need to make any finer adjustments.
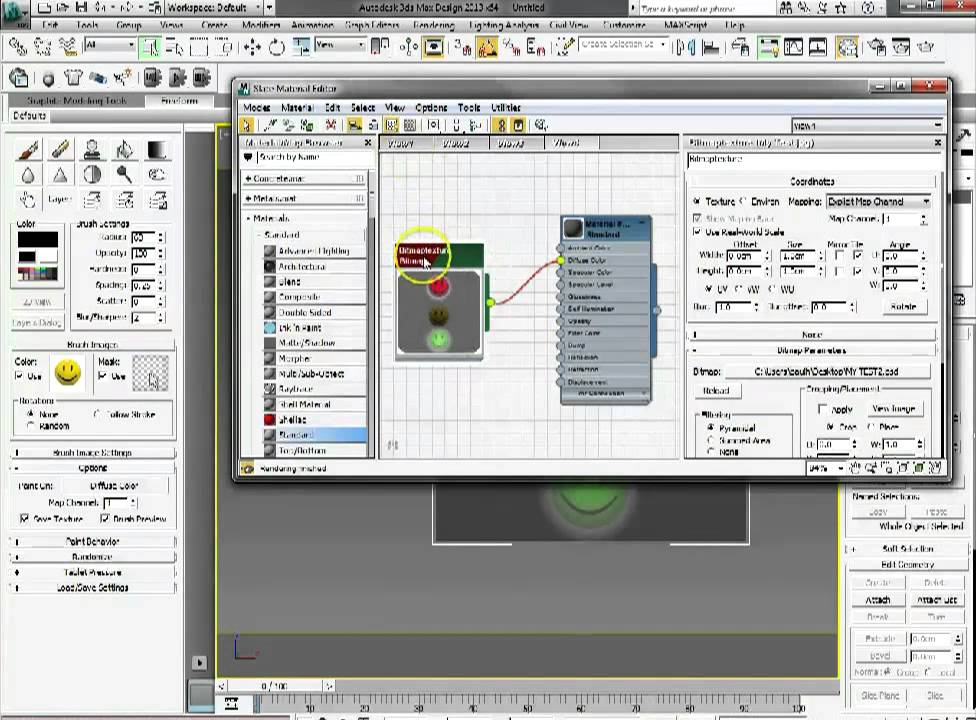
Even better, when importing .psd files into 3ds Max, you can load them into a material channel. You do this by going into the material editor and assigning your PSD file to the desired channel. Then, apply the material to the object, go to the Paint tool and select the channel your PSD is attached to. You'll notice that the Layers dialog now displays all your preset layers. Brilliant!
One final thing to bear in mind while I'm talking about saving is that you can save your texture as a flattened image. To do so, go to File>Save Bitmap (Flattened) As.
08. Use time-saving shortcuts
As with any toolset, it's handy to know what all the Viewport Canvas shortcuts are so that you can work quickly, especially when you're on deadline, but having to find specific shortcuts can be tiresome and unproductive. I find that if I spend a few minutes just experimenting with shortcuts, they soon become ingrained into my fingers. Ask me what they are and I won't be able to tell you - you'd be better off watching my fingers!
A few vital shortcuts readily spring to mind, however. Shift turns on the Eraser. Perhaps you don't make mistakes, but I use this all the time. Ctrl toggles on an eyedropper, enabling you to sample the colour from a single pixel at the centre of the brush. Holding down the Space bar and clicking paints a straight line from the last painted point.
There are also shortcuts that enable you to adjust various settings very quickly. Hold down Ctrl+Shift and drag vertically to change the brush radius. Do the same with Alt+Shift to change the brush opacity. Finally, do the same with Ctrl+Alt to change the brush hardness.
To exit a tool and apply your painting to the model's texture, simply right-click. Your work will be immediately applied and saved to the bitmap texture.
Words: Paul Hatton
Paul Hatton is the 3D team leader at CADS 3D studio, based on the east coast in Great Yarmouth, UK.
This article first appeared in 3D World magazine issue 169.
Liked this? Read these!
- Top free 3D models
- Best 3D movies of 2013
- Blender tutorials: ways to create cool effects

The Creative Bloq team is made up of a group of art and design enthusiasts, and has changed and evolved since Creative Bloq began back in 2012. The current website team consists of eight full-time members of staff: Editor Georgia Coggan, Deputy Editor Rosie Hilder, Ecommerce Editor Beren Neale, Senior News Editor Daniel Piper, Editor, Digital Art and 3D Ian Dean, Tech Reviews Editor Erlingur Einarsson, Ecommerce Writer Beth Nicholls and Staff Writer Natalie Fear, as well as a roster of freelancers from around the world. The ImagineFX magazine team also pitch in, ensuring that content from leading digital art publication ImagineFX is represented on Creative Bloq.
