A Disney artist's guide to mixed media
Use a hybrid paint and CGI technique to create a dynamic look.
Daily design news, reviews, how-tos and more, as picked by the editors.
You are now subscribed
Your newsletter sign-up was successful
Want to add more newsletters?

Five times a week
CreativeBloq
Your daily dose of creative inspiration: unmissable art, design and tech news, reviews, expert commentary and buying advice.

Once a week
By Design
The design newsletter from Creative Bloq, bringing you the latest news and inspiration from the worlds of graphic design, branding, typography and more.

Once a week
State of the Art
Our digital art newsletter is your go-to source for the latest news, trends, and inspiration from the worlds of art, illustration, 3D modelling, game design, animation, and beyond.

Seasonal (around events)
Brand Impact Awards
Make an impression. Sign up to learn more about this prestigious award scheme, which celebrates the best of branding.
As a Disney interpretive artist, I wouldn’t be doing Walt justice if I wasn’t pushing the boundaries of art.
Walt Disney himself introduced us to the multiplane technique and countless other painting techniques and innovations that offered an artistic excellence, giving audiences a more realistic perception of animation. My new Believable Fantasy technique came from the desire to get 3D and digital artists a little more recognition when competing with tradition oil and acrylic painters, who can offer up their original works for thousands of dollars.
Digital artists, on the other hand, don’t have originals. We have Giclée prints of our work, while the originals remain in the digital realm. So I had to come up with a hybrid mixed-media solution. The results afford me the opportunity to have more originals than the traditional artists and more value than artists that are 100 per cent digital. Join me and I’ll take you through my process.
01. Painting on canvas
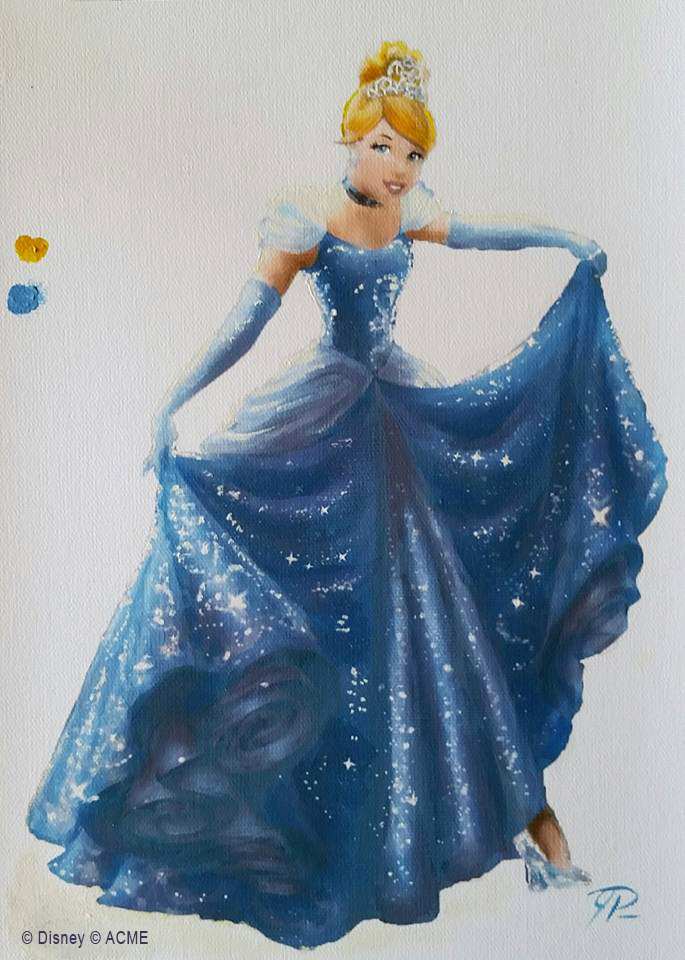
At the first stage, I paint the character and textures in the scene on real-world mini canvas using either traditional oil or acrylic paint. This takes a lot of forethought, so I tend to sketch out the scene and do research before I begin the paint process. All of my Disney pieces are approved by Disney for ACME China and are featured in the new Shanghai Park, so both Disney and ACME are a part of the process at every stage. The integrity of the Disney Characters is paramount moving forward.
I begin painting the characters and various surfaces that I know I’ll need in the scene. For this particular scene I only painted the characters because the scene I wanted to interpret had solid colours on all of the surfaces. If it had say, a cobble stone street, or a fantastic sky, those elements would be hand painted with real paint on 8x10 canvases.
02. Moving into 3D
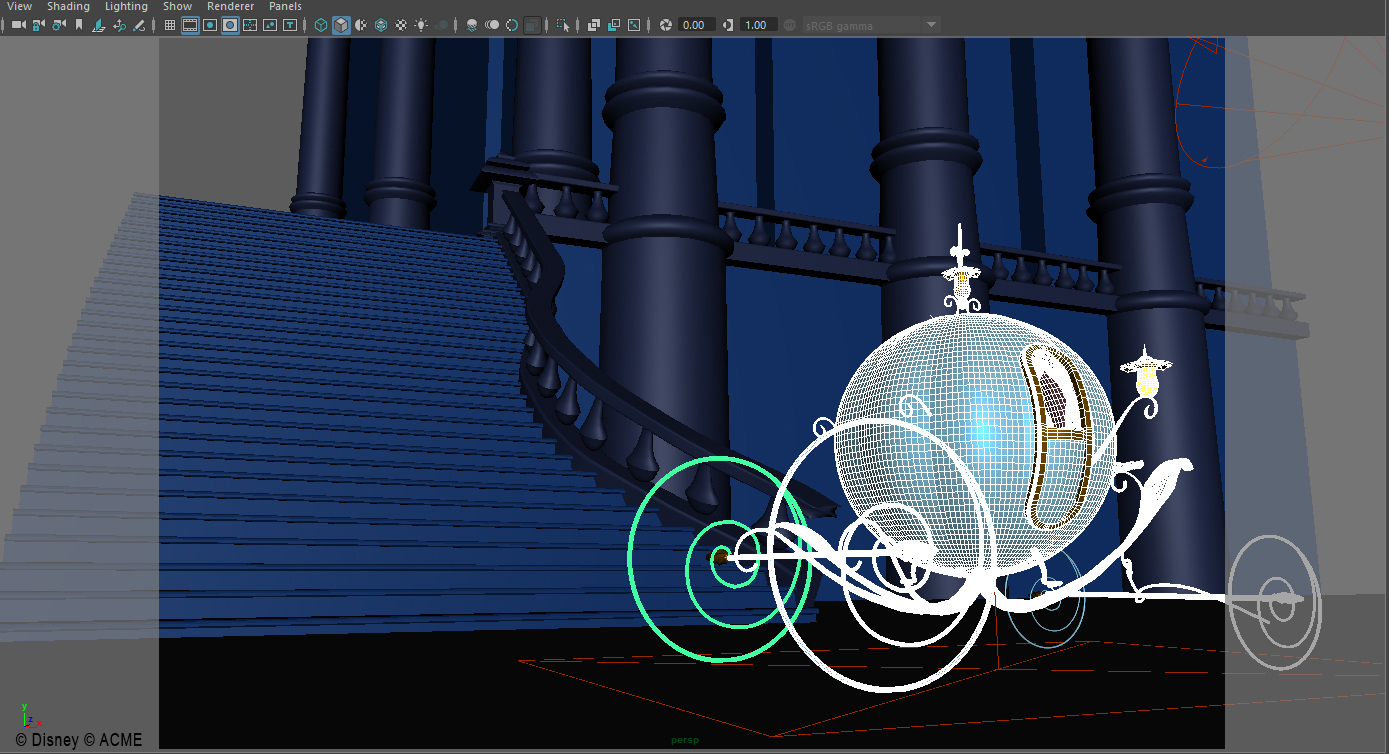
Once the paintings are scanned into the computer, I move on to the second stage where Autodesk’s Maya is my weapon of choice. There really isn’t a more powerful tool out there and I’ve used it as a video game artist for the last 15 years. I’ll spend several days modelling out the scene in great detail, sometimes going so far as to model the keyholes in the doors.
While I paint mostly Classic Disney movies, my contribution and purpose for the technique is that I wanted to believe these places are real locations. So imagine traveling to the Dwarves cottage with an HD camera. I want to give these classic scenes a level of realism as if Walt had been alive today with today’s advancements in technology, without compromising the integrity of the original style of the picture.
Daily design news, reviews, how-tos and more, as picked by the editors.
03. Up next: Corel Painter
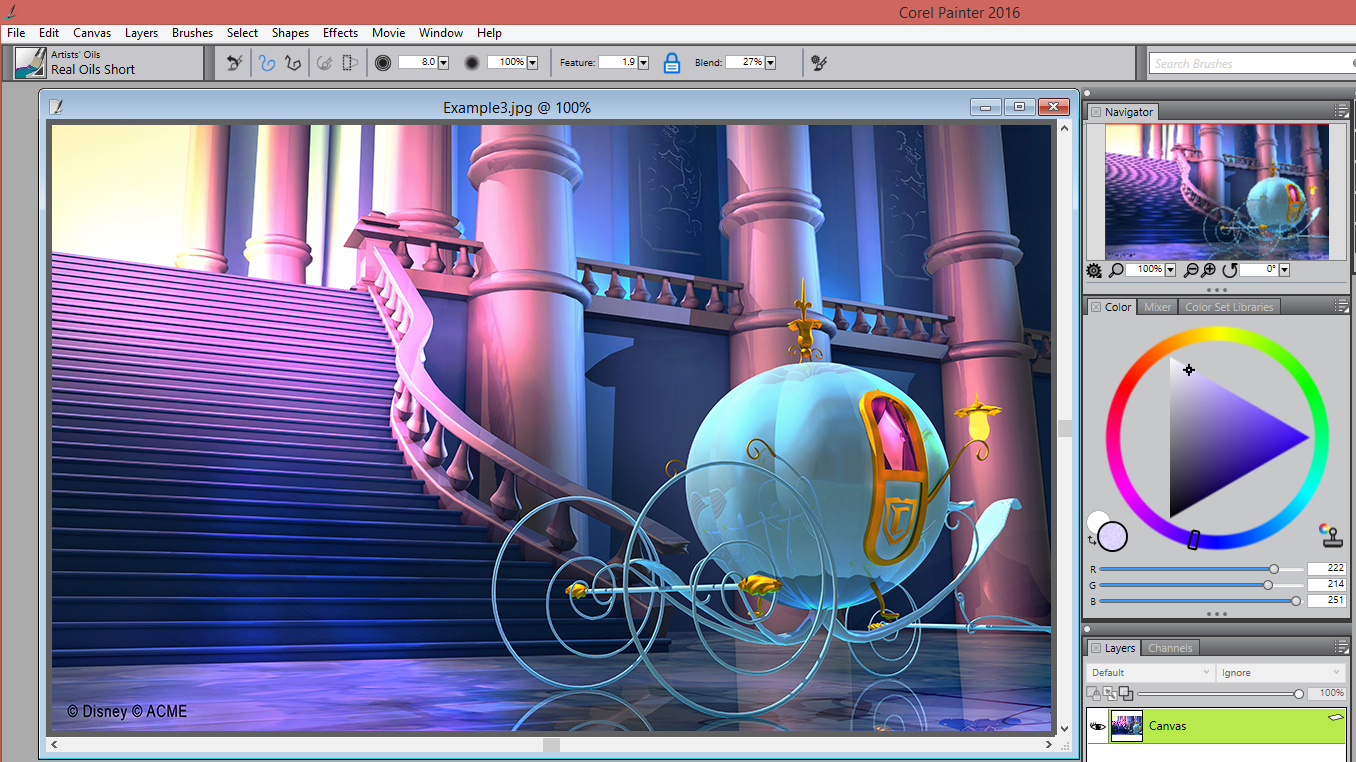
After extensive modelling, lighting and texturing using my real world paintings, the result is rendered out and brought into Corel Painter. At this stage, the geometry has a very hard edge look to it and is devoid of the painterly look that you see on the acrylic painted characters.
04. Digitally repainting the image
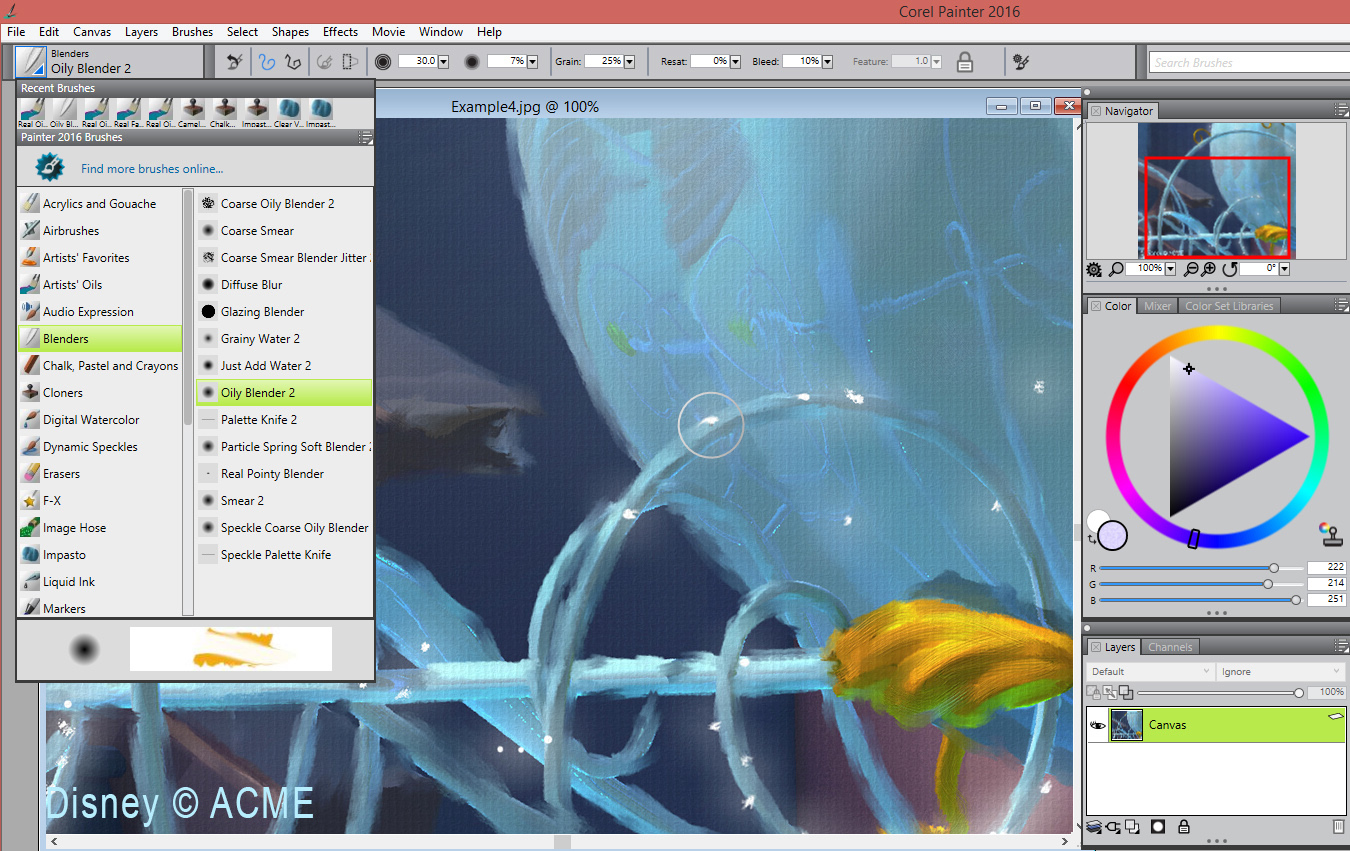
In Corel Painter, I use a number of different brushes in order to achieve a look that is consistent with my real world paintings. I use the “Oil blender” brushes to rough up the edges and then I use digital Oil brushes, “real oil short” for example to add more hand painted details. I hit everything with blenders and digital oil brushes literally repainting the entire image. This can take anywhere from two days to a week.
In some cases, if the background has a sky that I’ve hand painted in acrylics and scanned in, I’ll use this for reflections in the scene. The goal is to keep the integrity of the traditionally painted textures while matching the other surfaces to them so that they have a consistent painterly look.
05. Fine detail
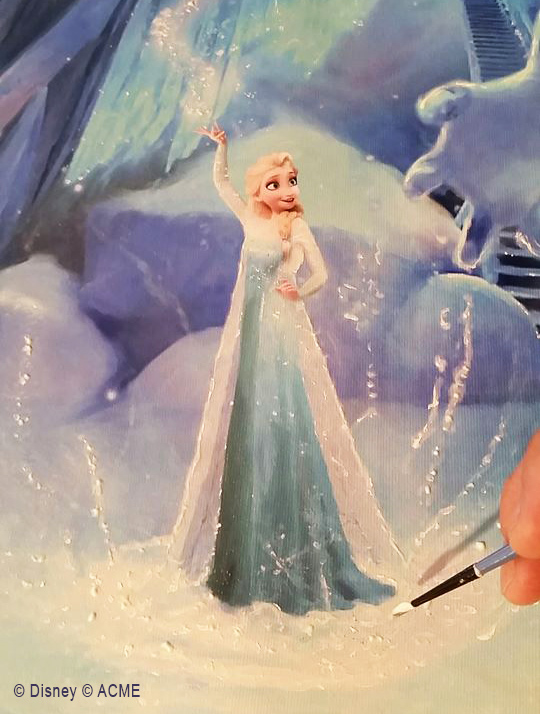
Once I’ve added the character to the scene and blended the edges, made final adjustments, I send the digital file to ACME where it is handled by their Print Masters for final proofing. At this stage, we check colour values and contrast to make sure that the archival ink print is at the highest standards of quality and excellence.
This Giclée print isn’t quite ready for primetime yet though, there is one more important stage. In order for the painting to qualify as a mix-media original, I do a minimum of at least 50% coverage of real acrylic paint on the final master, adding even more hand painted details to the final painting. The benefit of this technique achieves a level of colour, contrast and detail never before seen in the galleries. It also allows me to offer collectors a mixed-media original that can come with the making of process, the sketches, and the mini canvases.
06. Nearly there...
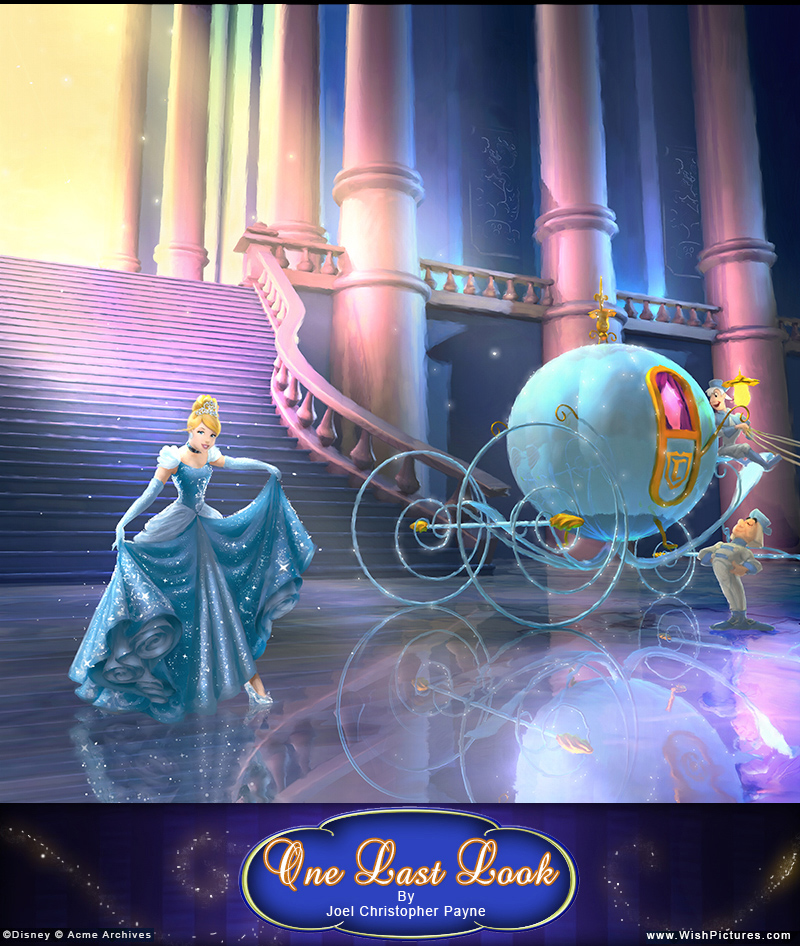
Above, you’ll see the final result. But – believe it or not – we’re still not done! I do something special on my artist proofs. I hand embellish the work and paint many of them with a luminescent paint that can be seen in the dark revealing hidden secrets within the art, while adding gold or platinum dust for subtle sparkle. In this particular piece, I hand-laid tiny Swarovski crystal on the shoe and dress. Each painting can take anywhere from three weeks to five months to complete.
Related articles:
