Animate text with the Bone tool
Jing Zhang shows you how to animate a series of 2D graphics using inverse kinematics
Sign up to Creative Bloq's daily newsletter, which brings you the latest news and inspiration from the worlds of art, design and technology.
You are now subscribed
Your newsletter sign-up was successful
Want to add more newsletters?
The term ‘inverse kinematics’ refers to the process of animating objects using bones chained into linear armatures.
These, when subjected to a force, will transfer movement much like a skeleton. Since the introduction of inverse kinematics in Flash CS4, creatives have waved farewell to frame-by-frame character animation: it’s the intelligent feature we were all waiting for.
In this tutorial I’ll walk you through the basics of the Bone tool, using it to animate a section of static text. You’ll find the basic rods used here in the support files, but feel free to follow the project with your own text components.
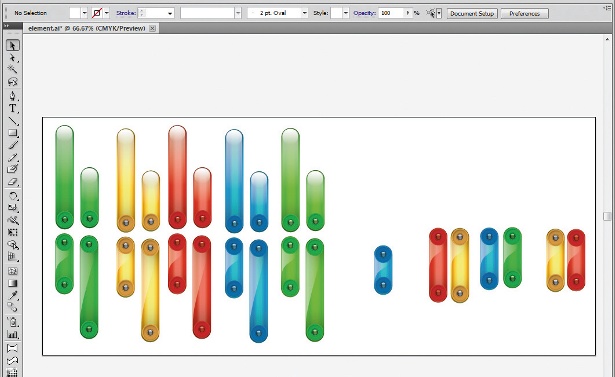
01 Before animating our text, we need to first create its look and style in Illustrator. Design the elements – my text here is constructed from a series of rods – using different colours and a range of sizes to give yourself more options. Then save your Illustrator file and leave it open.
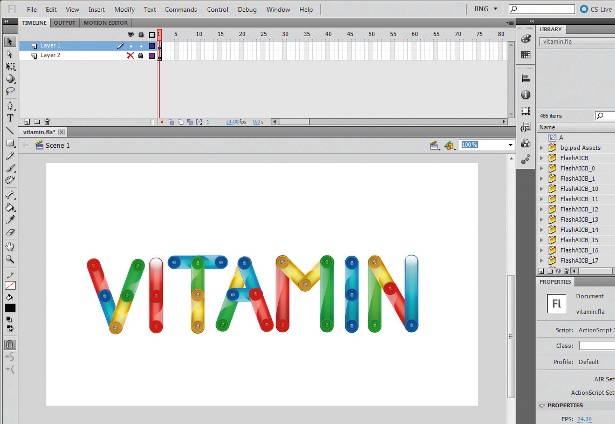
02 Open Flash CS4 or CS5, create a new file (mine is 800x450) and form a composition of the final frame on your stage. To do this, drag the parts from Illustrator to Flash one by one. Note that the Bone tool can be applied only to a symbol or a shape object, so convert each rod into a symbol by hitting F8, or Ctrl/ right-click and select Convert to Symbol. In this project, I’ve created the word ‘VITAMIN’.
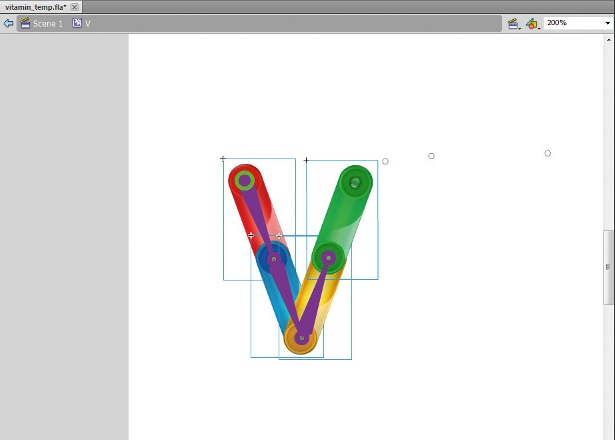
03 Open the supporting file vitamin.fla, which has all the static objects prepared for this project. Go into the ‘V’ movie clip by double-clicking it, and select the Bone tool (M). Decide which symbol will be the first to appear, click on it and drag it to the end of the next symbol. When you release the mouse, an IK bone symbol should appear. Repeat, dragging the end of each symbol to the end of the next, until you finish linking all the symbols together in one chain.

04 Extend your timeline, and position the time indicator at the last frame, then manipulate the armature at the end of the chain. Glide through the timeline and you’ll find that Flash will interpolate the positions of the armatures between the starting points and the end. Finally, Ctrl/right-click on any frame and select Reverse Frames. If you’re not happy with the movement, hit Ctrl/Cmd, click on the keyframe and select Clear Pose.
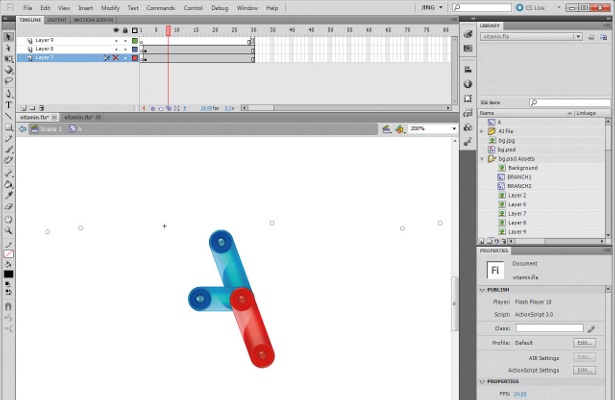
05 The letter ‘V’ animation is simple because it’s linear. But what happens if you want to animate something more complicated, such as the letter ‘A’? Go into the ‘A’ movie clip. Put the two symbols on the left-hand side onto a different layer, and hide them to prevent any mistaken linkage caused by the Bone tool.
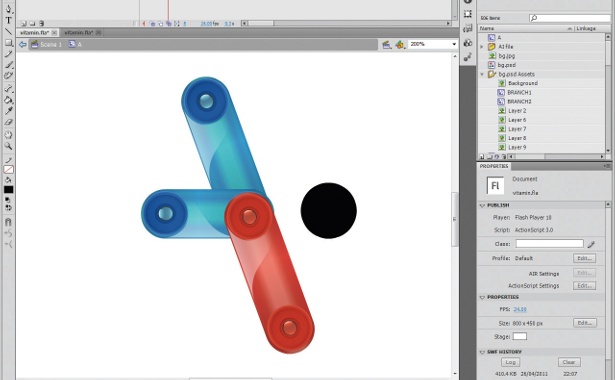
06 Now focus on what’s visible. We have one hub but more than two branches: therefore we need a null object to help, which can be a black circle created with the Oval tool (O). Make this circle a movie clip called ‘Blank’, before then placing Blank next to the hub – but not on it.
Sign up to Creative Bloq's daily newsletter, which brings you the latest news and inspiration from the worlds of art, design and technology.
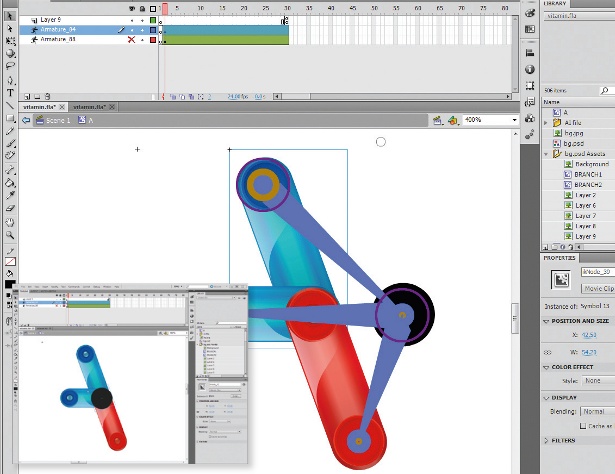
07 Next, use the Bone tool to link up the black circle with the far ends of each of the three symbols. Hold down Ctrl/Cmd and drag the Blank movie clip back onto the hub. By doing this, we can liberate each symbol and go on to animate them all separately.
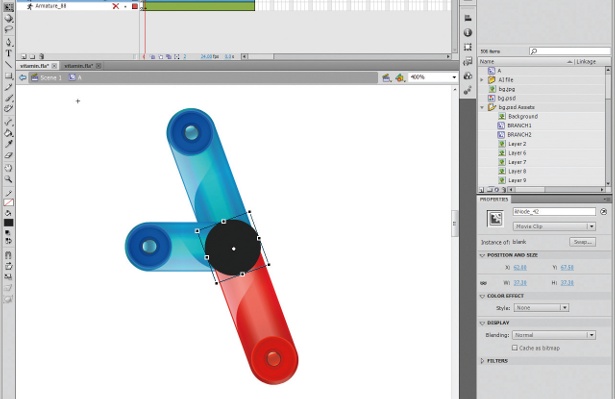
08 You can amend the bones easily without other elements being affected. You can nudge the symbol while holding down the Alt/Opt key, for example, change the symbol’s depth property (arrangement) with the up/down keys whilst pressing Ctrl/Cmd or change the symbol’s anchor points with the Free Transform tool if you’re not happy with the position of the bone.
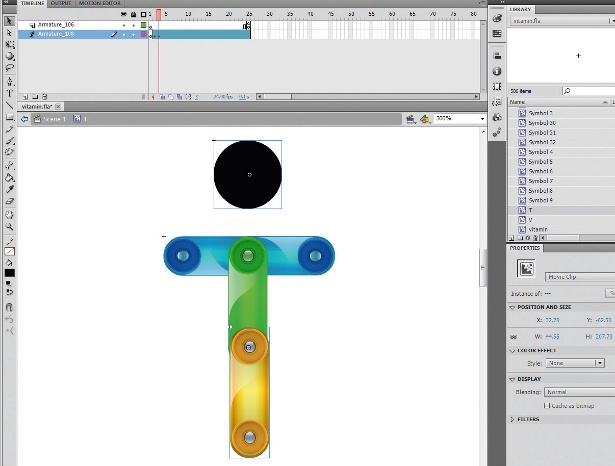
09 As with the letter ‘A’, you’ll find other letters in your word that aren’t linear shapes, as here with the ‘T’, which also has multiple branches. Go through your word and use the methods described in steps 06 and 07 where necessary.
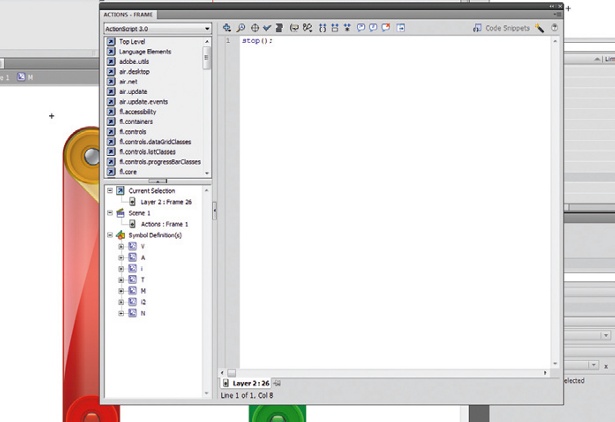
10 Animate all the letters by manipulating the armatures as we did before, in step 04. When you finish doing this, make the first frame of each animation blank, and stop at the last frame by inserting stop(); to your Action window, as you don’t want them to loop.
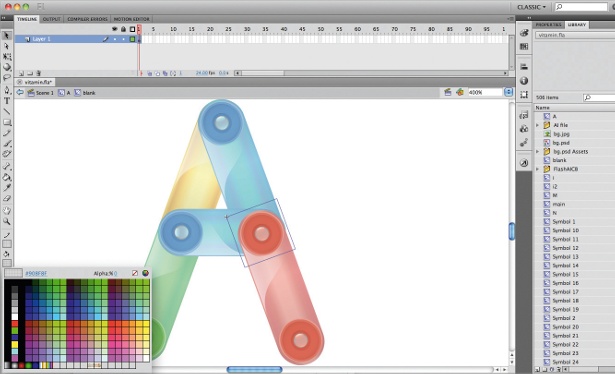
11 Open the Library, find your Blank movie clip, and change its Alpha value to 0, to make sure that no black circles will be seen.

12 If you need a background animation, this can also be created with inverse kinetics. However, it’ll need to be very subtle in motion, so make it as slow as possible. Make Movie Clip ‘BRANCH1’ 135 frames long, and give ‘BRANCH2’ a different duration, such as 120 frames, for a more natural movement.

13 We want the letters to appear one by one, so for the final step we need to use ActionScript to tell Flash how it should work. This has to be in ActionScript 3.0 to support the Bone tool. I’ve used an EnterFrame handler to control the animation order. Simply copy the script that’s in the Script.pdf document to your Action window, and the animation should work perfectly.

The Creative Bloq team is made up of a group of art and design enthusiasts, and has changed and evolved since Creative Bloq began back in 2012. The current website team consists of eight full-time members of staff: Editor Georgia Coggan, Deputy Editor Rosie Hilder, Ecommerce Editor Beren Neale, Senior News Editor Daniel Piper, Editor, Digital Art and 3D Ian Dean, Tech Reviews Editor Erlingur Einarsson, Ecommerce Writer Beth Nicholls and Staff Writer Natalie Fear, as well as a roster of freelancers from around the world. The ImagineFX magazine team also pitch in, ensuring that content from leading digital art publication ImagineFX is represented on Creative Bloq.
