Animate your fonts in Cinema 4D
Illustrator Jaume Osman explains how to breathe life into your 3D text
In this tutorial, we are going to learn how to create and animate 3D text in Cinema 4D R12.
First, we'll use the MoGraph Cloner effector to build a word with letters consisting of many small, repeated spheres. After that, gravity will be added to each sphere using Rigid Body Dynamics, and we'll create a floor under the text. We'll then make an animation with the spheres, which hold together as a legible letter for a few seconds before the word breaks up, with each sphere tumbling downwards and bouncing across the floor. To follow, you need either the Studio or Broadcast edition of Cinema 4D.
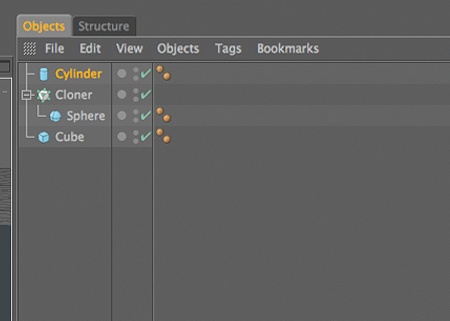
01 In Cinema 4D, go to Objects> Primitives>Cube. In Object Properties, insert the following values: X: 5000cm, Y:20cm and Z: 5000cm. This is your floor. Now go to Objects>Primitives>Sphere. In Attributes' Object tab, set Radius to 4cm. Now go to MoGraph>Cloner. In the Objects tab, drag Sphere onto Cloner until the cursor shows a downwards arrow to parent it.
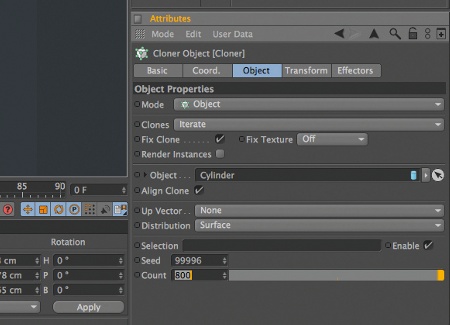
02 Create a cylinder via Objects> Primitives>Cylinder. In Attributes' Coord. tab, set P.X to 0, P.Y to 95cm and P.Z to -652cm. Set the Rotation value R.P to -89. Hide the Cylinder via its two small visibility dots. Next, go to the Object Properties for the Cloner: change Mode to Object, and drag Cylinder into the Object text field. For Distribution, choose Surface. Make the Seed value 99996 and the Count value 800.
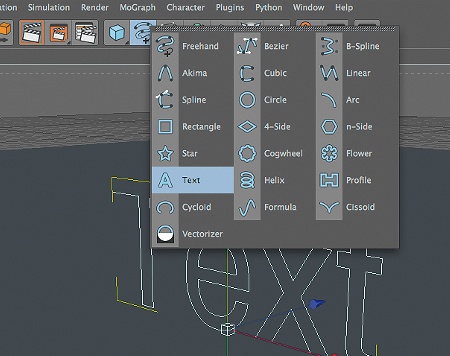
03 Now to create our text. Go to Objects> Spline Primitive>Text. In Attributes' Object tab, add the text you want to use. Change P.Y to 45cm. You can also change the font, size and so on.

04 Click the Cloner object. Go to MoGraph> Effector>Spline. In Attributes' Effector tab, drag your Text object from Objects into the Spline text field. The balls will cluster around the first letter of the text. Change Segment Mode to Full Spacing.
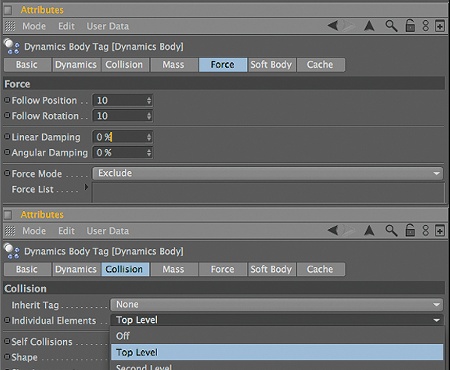
05 Select your Cloner and go to Simulation>Dynamics>Create Rigid Body. Next, select the Cube and go to Simulation>Dynamics>Create Collider. Now you have a new tag for the Cloner object: the Rigid Body. Select this tag. In Attributes' Force tab, set both Follow Position and Follow Rotation to 10. In the Collision tab, change Individual Elements to Top Level.
Daily design news, reviews, how-tos and more, as picked by the editors.
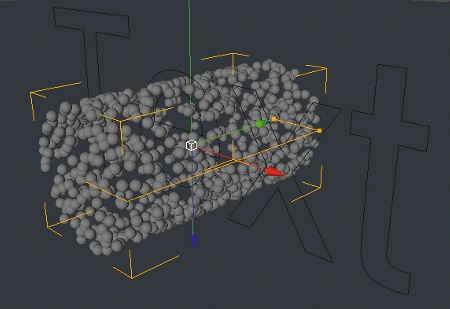
06 Select the Spline effector. In the Falloff tab, change Shape to Linear. In the Coord. tab, set the values P.Y: 100cm and P.Z: -1000cm. Now your balls are in the cylinder: you can verify this by temporarily adjusting the Cylinder's P.Z value to bring it into the viewport.
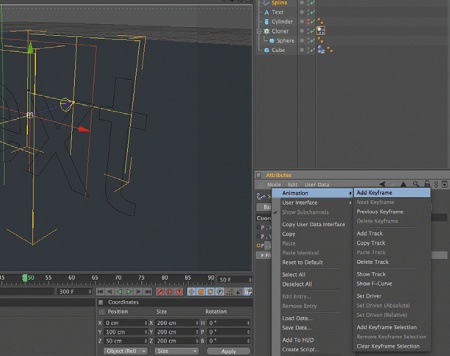
07 Now to get animating. Select the Spline effector. Go to the Timeline and set it to 300 frames. In Attributes' Coord. tab, select P.Z by its label, then Ctrl/right-click and choose Animation> Add Keyframe. In the Timeline, go to frame 50, and set P.Z to 50cm. Ctrl/ right-click and choose Animation> Add Keyframe from the options.
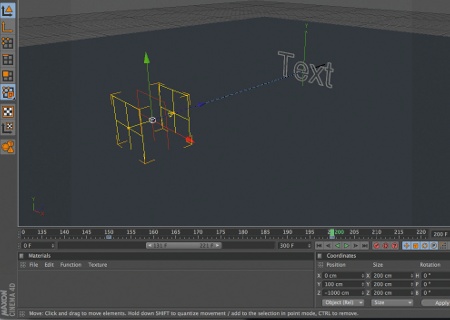
08 In the Timeline, go to frame 150. Ctrl/right-click P.Z in Attributes' Coord. tab and choose Animation>Add Key Frame. Go to frame 200 and set P.Z to -1000cm. Ctrl/right-click, then choose Animation>Add Keyframe.
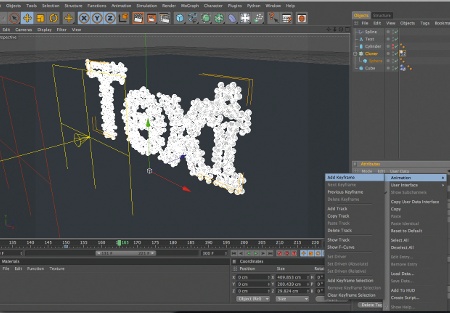
09 Go back to frame 150 in the Timeline. Select the Cloner, then go to Attributes' Dynamics Body tab; under Force, select both Follow Position and Follow Rotation. Ctrl/right-click, then choose Animation>Add Key Frame. Go to frame 165, and change both the Follow Position and Follow Rotation values to 0. Ctrl/right-click and select Animation>Add Keyframe.
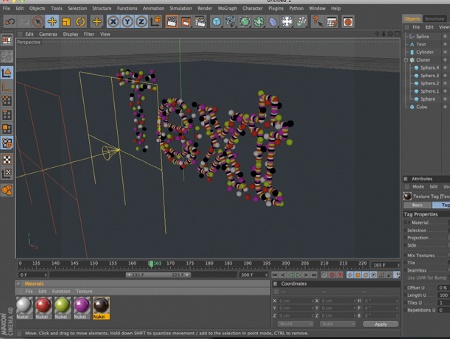
10 Select the Sphere object, and copy and paste it four times. Put all the Sphere copies inside the Cloner object. Open the Material Manager, then go to File>Shader>Nukei. Copy and paste this material four times. In turn, double-click on each copy, click Diffuse A in the Material Editor and change the Color value. Once you've finished doing this, drag a material onto each of the five Sphere objects.
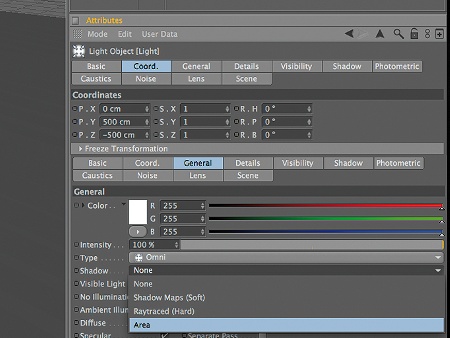
11 Next, you need to add a light source to the scene. Go to Objects> Scene>Light. In Attributes' Coord. tab, set the values P.Y: 500cm and P.Z: -500cm. In the Shadow tab, change Shadow to Area, then set Density to 50%.
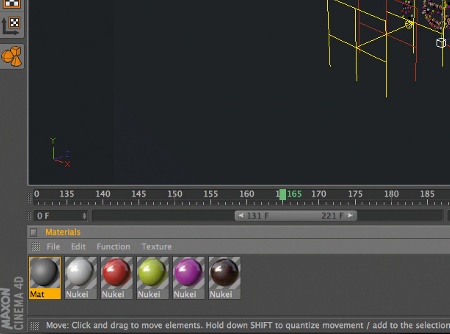
12 To add a background colour, go to Objects>Scene>Background. In the Material Manager, go to File>New Material, then double-click to open the Material Editor. Change the Color swatch to a mid-grey. Drag this material onto the Background object.
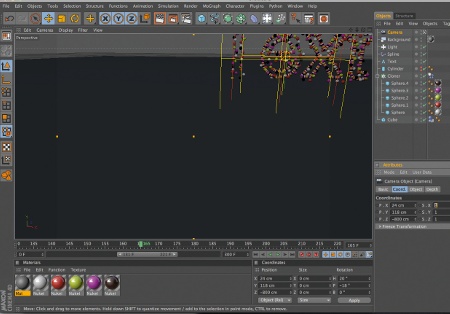
13 Now we'll create the animation with a camera scene. Go to Objects>Scene>Camera, then go to the viewport's Cameras menu and select Scene Cameras>Camera. The camera is now active. To change the camera position, select the Camera object, go to Attributes' Coord. tab and set the values P.X: 24cm, P.Y: 118cm, P.Z: -800cm, R.H: 20 and R.P: -18.
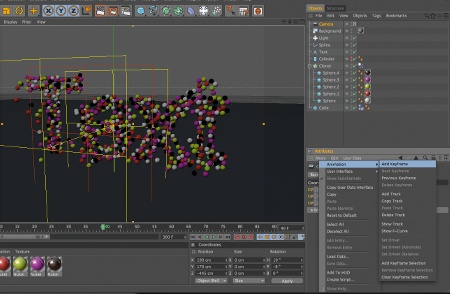
14 In the Timeline, go back to the first frame. In the Camera's Coord. tab, select the five positions you just edited and add a keyframe (Animation>Add Key Frame). Go to frame 40, and change the position values to P.X: 190cm, P.Y: 170cm, P.Z: -445cm, R.H: 19 and R.P: -8. Add another keyframe.
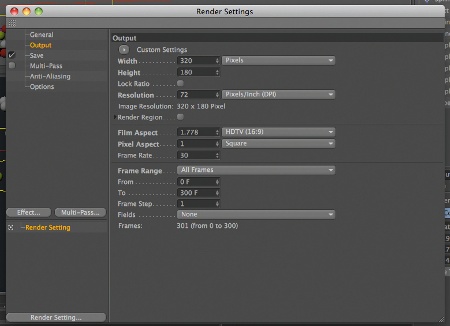
15 Now you can go to Render>Render Settings. In the Render Settings dialog, click Output and set Film Aspect to HDTV (16:9). Change Frame Range to All Frames. In the Save tab, click File then select a folder in which to put the render animation. Now select a format and go to Render> Render to Picture Viewer. Now your animation is complete.
Jaume Osman Granda
Barcelona-based designer Jaume studied multimedia programming at the Polytechnic University in Terrassa, and now works as a freelancer. Gominola, OnionLab and Pornographics are just some of the studios he's worked with over his career. See more at: www.osmangranda.com

The Creative Bloq team is made up of a group of art and design enthusiasts, and has changed and evolved since Creative Bloq began back in 2012. The current website team consists of eight full-time members of staff: Editor Georgia Coggan, Deputy Editor Rosie Hilder, Ecommerce Editor Beren Neale, Senior News Editor Daniel Piper, Editor, Digital Art and 3D Ian Dean, Tech Reviews Editor Erlingur Einarsson, Ecommerce Writer Beth Nicholls and Staff Writer Natalie Fear, as well as a roster of freelancers from around the world. The ImagineFX magazine team also pitch in, ensuring that content from leading digital art publication ImagineFX is represented on Creative Bloq.
