Get started with kirigami
Kirigami is a fantastic art form that requires nothing more than paper, a knife and your imagination. Follow our getting-started tutorial to learn the basic techniques.
Daily design news, reviews, how-tos and more, as picked by the editors.
You are now subscribed
Your newsletter sign-up was successful
Want to add more newsletters?

Five times a week
CreativeBloq
Your daily dose of creative inspiration: unmissable art, design and tech news, reviews, expert commentary and buying advice.

Once a week
By Design
The design newsletter from Creative Bloq, bringing you the latest news and inspiration from the worlds of graphic design, branding, typography and more.

Once a week
State of the Art
Our digital art newsletter is your go-to source for the latest news, trends, and inspiration from the worlds of art, illustration, 3D modelling, game design, animation, and beyond.

Seasonal (around events)
Brand Impact Awards
Make an impression. Sign up to learn more about this prestigious award scheme, which celebrates the best of branding.
Like origami, its sister form, kirigami is a paper art concerned with the folding of a single sheet of paper to create sculpture. Unlike the better known paper craft, however, kirigami allows for cuts to the paper as well as folding.
In the pure sense, kirigami should continue to use only a single sheet of paper; no sticking additional bits on to create complicated forms is allowed. Despite, or perhaps because of this, kirigami is a hugely creative and rewarding pursuit, and is becoming ever more popular for both the novice and professional. A surge in kirigami-based greetings cards filled the shops last Christmas, while Pinterest is full of inspiring examples of 3D paper sculptures crafted only with folds and cuts.
One of the best aspects of kirigami is that it has an incredibly low barrier to entry. Children are more than capable of creating fantastic works with just a little patience, and some very basic materials. Once the principles are understood, however, there are boundless possibilities for the artwork that can be crafted. And the resultant sculptures are incredibly tactile and aesthetically pleasing to look at!
With all this in mind, we're going to show you how to get started in kirigami. If you've never created a paper sculpture before, you'll find this will involve a little lateral thinking but it's all grounded in simple measuring, alongside the creativity to think in terms of planes (of depth, not of the flying variety!).
Check out our step-by-step below, and download the template PDF we've provided to create the same sculpture we've shown in our example project. Let us know what you think, and share any tips you have in the comments!
01. Get your tools together
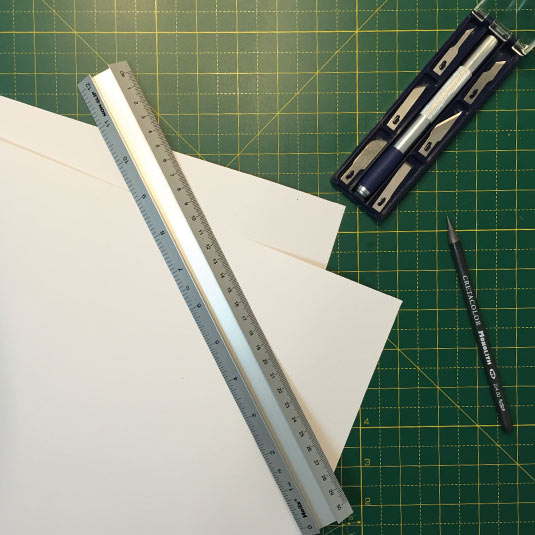
Kirigami doesn't require much in the way of tools and materials, but you can make your life easier by choosing quality over budget. And even then, you can create some stunning work for an upfront investment in tools of less than £15. Get a good size cutting mat – we like the self-healing type, and would recommend buying a size bigger than you think you'll need for future-proofing.
More important still is the knife you use. An X-acto style knife is essential, and it needs to be sharp! Finally, a steel ruler is a useful (but not essential) bit of kit for helping with straight line cuts. Once you've got this, you're all set. Choose a piece of paper stock to work with, and keep in mind that depending upon your artwork you'll want to choose a heavier or lighter weight card. We've used 240gsm card stock for our project.
Daily design news, reviews, how-tos and more, as picked by the editors.
02. Draw or plot your design
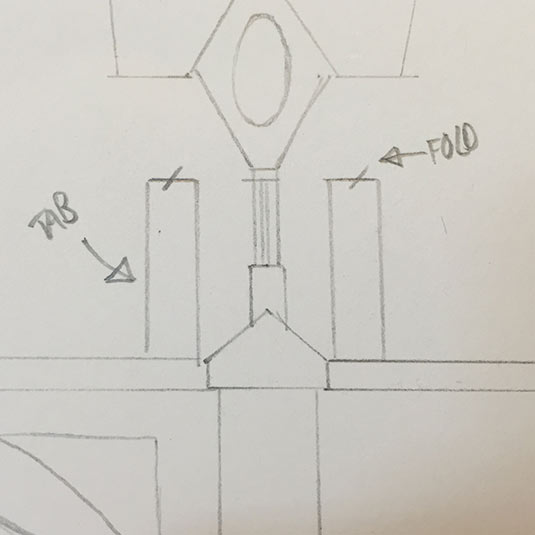
Everything in kirigami works along a principal fold which creates a point of tension in the card stock. Imagine a piece of card folded to form an L shape, so that one part of the paper is perpendicular to the other, assuming a 90 degree angle between the two parts. When we make cuts in our paper, this allows us to fold parts of our card in a different way, creating additional form that sits above or below the principal fold. This is easiest demonstrated with a diagram.
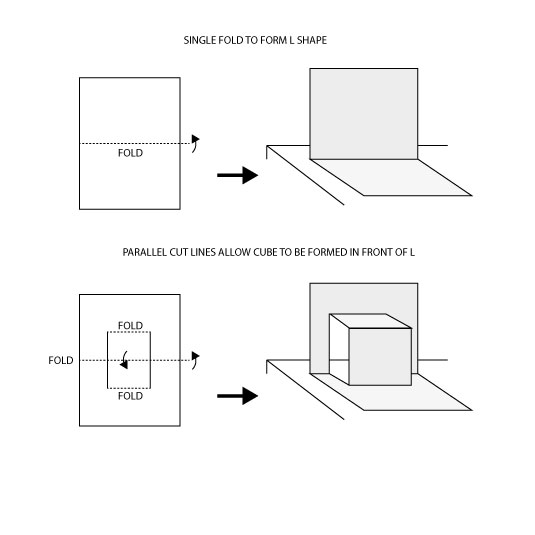
Here we've cut two parallel lines across the principal fold, and used these cuts to fold the paper in the opposite direction so that a cube is formed, sitting in front of the principal fold. The front face of the cube sits parallel to the back plane of the L formed by our principal fold, and the distance from the back plane is determined by how far forward of the principal fold the cuts extend.
03. Check your planes
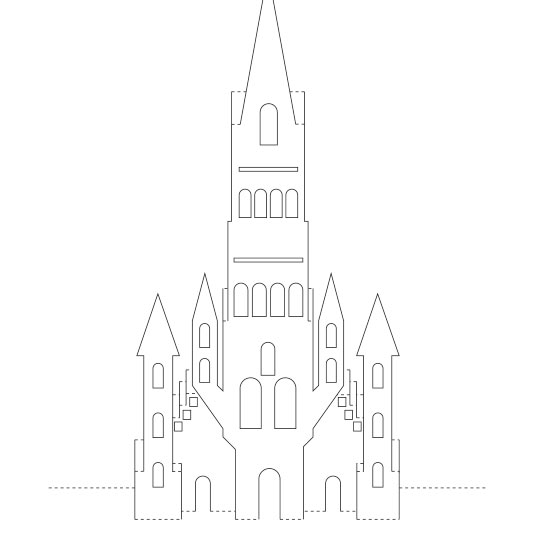
When drawing your design, the creativity comes from placing different elements at different depth planes. A simple pop-out cube isn't nearly so much fun as a design incorporating multiple planes. This does mean that you need to be careful about the way elements will fold, however.
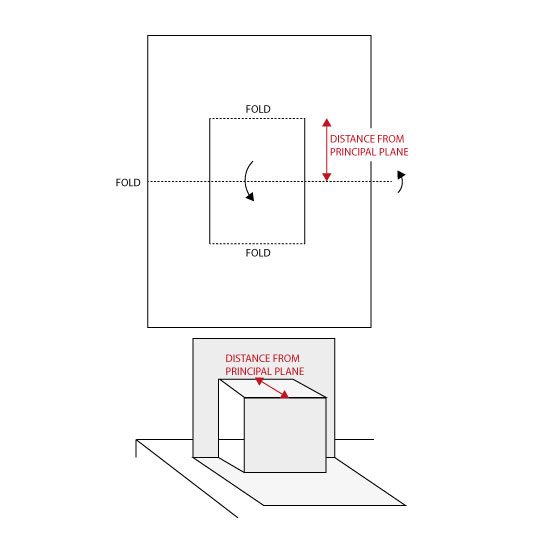
Planes that sit in front of other planes should still have the total distance from the principal fold equal to other elements on that plane. In our design we're creating a church or castle tower with a couple planes. We need to ensure that the folds and distances will all align to the principal plane by carefully measuring our lines.
04. Cut along your template lines
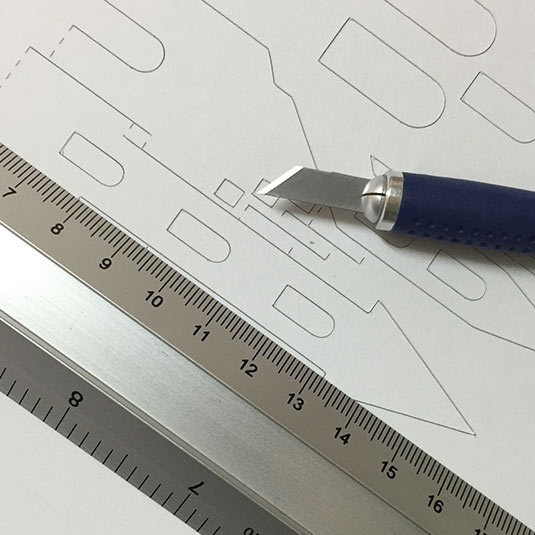
For the best hand-finish use your exacto knife to cut along the lines you've sketched. You can either print onto copy paper and tape your paper to the final card stock before cutting through both, or print onto the reverse of your final stock and cut back-to-front.
Alternatively, if you've got a cutting machine you can simply import your artwork into the cutting software and let the machine do the work but do note that nothing beats hand cuts. For the fold lines, either score carefully, or cut a dashed line to make for easier and crisper fold lines. This is a crucial stage in the development of a kirigami sculpture, so take your time and make sure you cut accurately!
05. Fold, display and illuminate
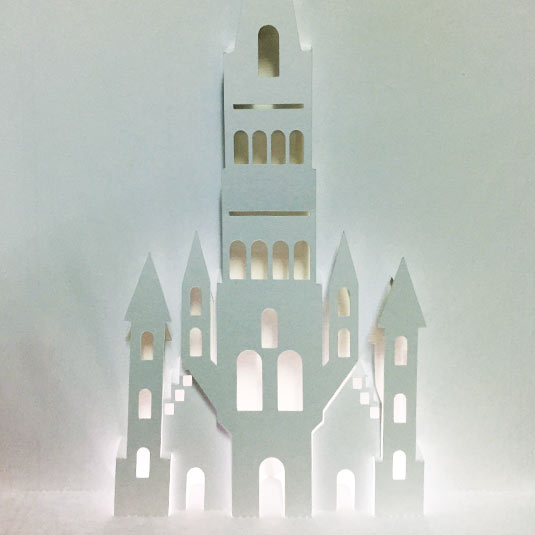
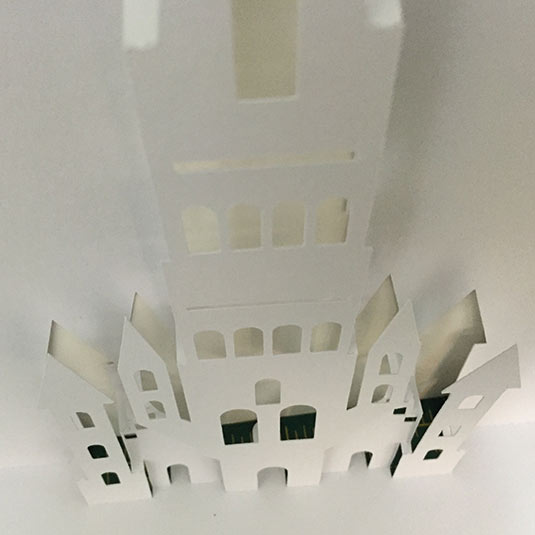
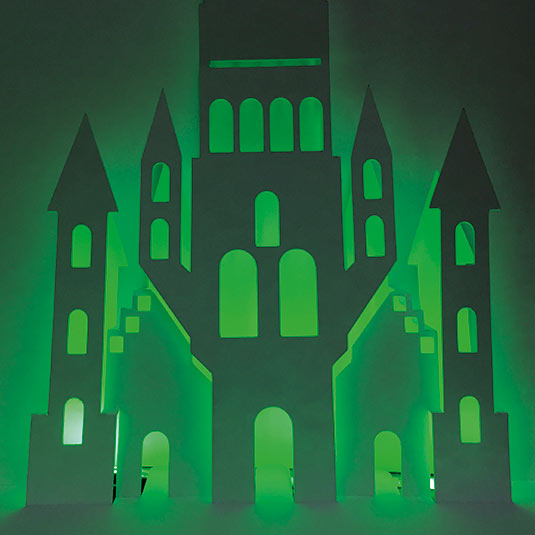
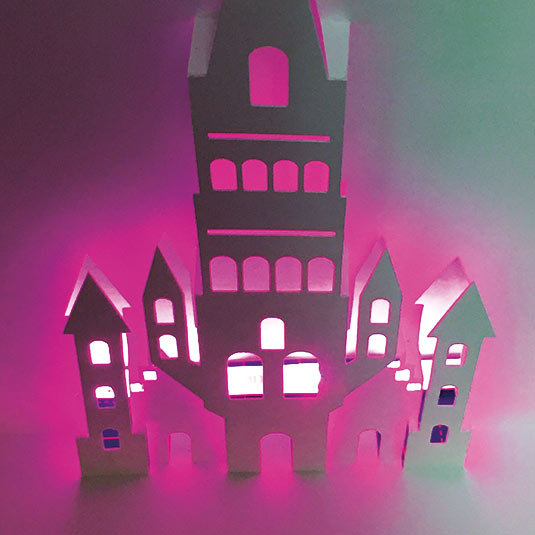
Once you have completed all your cuts, you can start to bring out the design into three dimensions. This can be incredibly fiddly work, especially once you move onto more complicated and intricate designs. As with the cutting stage, you'll need to exercise patience and take your time to ensure best results. When it's all folded successfully, some simple LED lighting can help describe and illuminate the different planes within your design, and heighten the drama of your sculpture.
Download our template
If you'd like to create your own sculpture like the one we've cut and folded here, download the template here. It's a symmetrical design so you can cut directly onto a printed copy of this template and fold so that the unprinted side is on display. Grab the PDF here.
If you'd like some inspiration on what is possible in kirigami, check out our must-see inspirational kirigami roundup, and let us see what you've created in the comments below, on Twitter or via Facebook.
Related articles:
- Kirigami Star Wars scenes are a Han-crafted delight
- Check out these Halloween-inspired kirigami scenes
- The 15 best Adobe Illustrator plugins

Sam is a designer and illustrator based in Scotland, UK. He splits his time between art and design, motion and video and writing for various creative titles. He has written a book about web design, Pro CSS3 Layout Techniques and contributed to typography book, Fonts and Typefaces Made Easy.
