Create organic textures in ink
Build beautiful and realistic natural textures using ink liners and a brush pen.

Daily design news, reviews, how-tos and more, as picked by the editors.
You are now subscribed
Your newsletter sign-up was successful
Want to add more newsletters?

Five times a week
CreativeBloq
Your daily dose of creative inspiration: unmissable art, design and tech news, reviews, expert commentary and buying advice.

Once a week
By Design
The design newsletter from Creative Bloq, bringing you the latest news and inspiration from the worlds of graphic design, branding, typography and more.

Once a week
State of the Art
Our digital art newsletter is your go-to source for the latest news, trends, and inspiration from the worlds of art, illustration, 3D modelling, game design, animation, and beyond.

Seasonal (around events)
Brand Impact Awards
Make an impression. Sign up to learn more about this prestigious award scheme, which celebrates the best of branding.
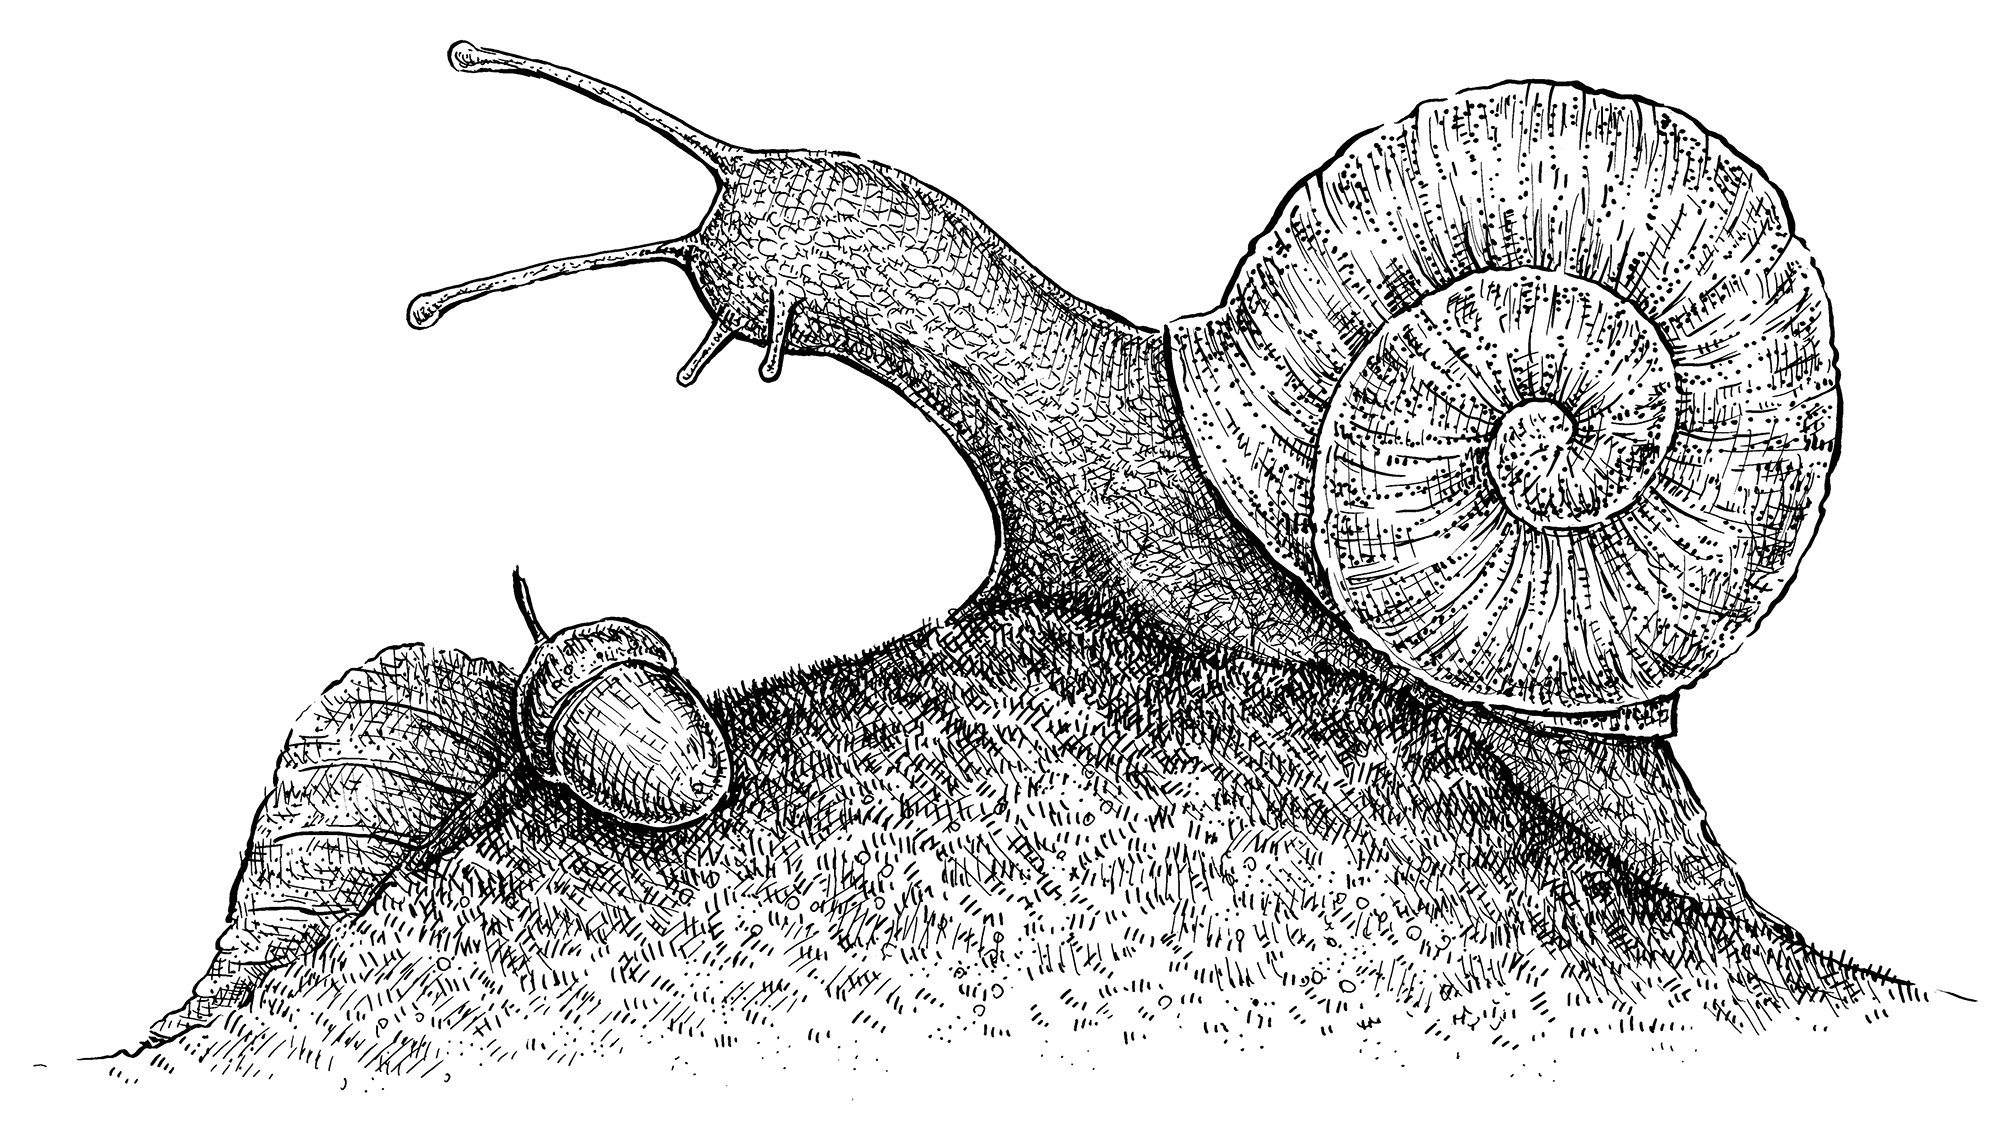
Drawing with ink produces vast possibilities. There are simple yet effective ways to create beautiful, organic textures, using only one colour of ink, which we'll explain in this workshop's text and in the video at the end.
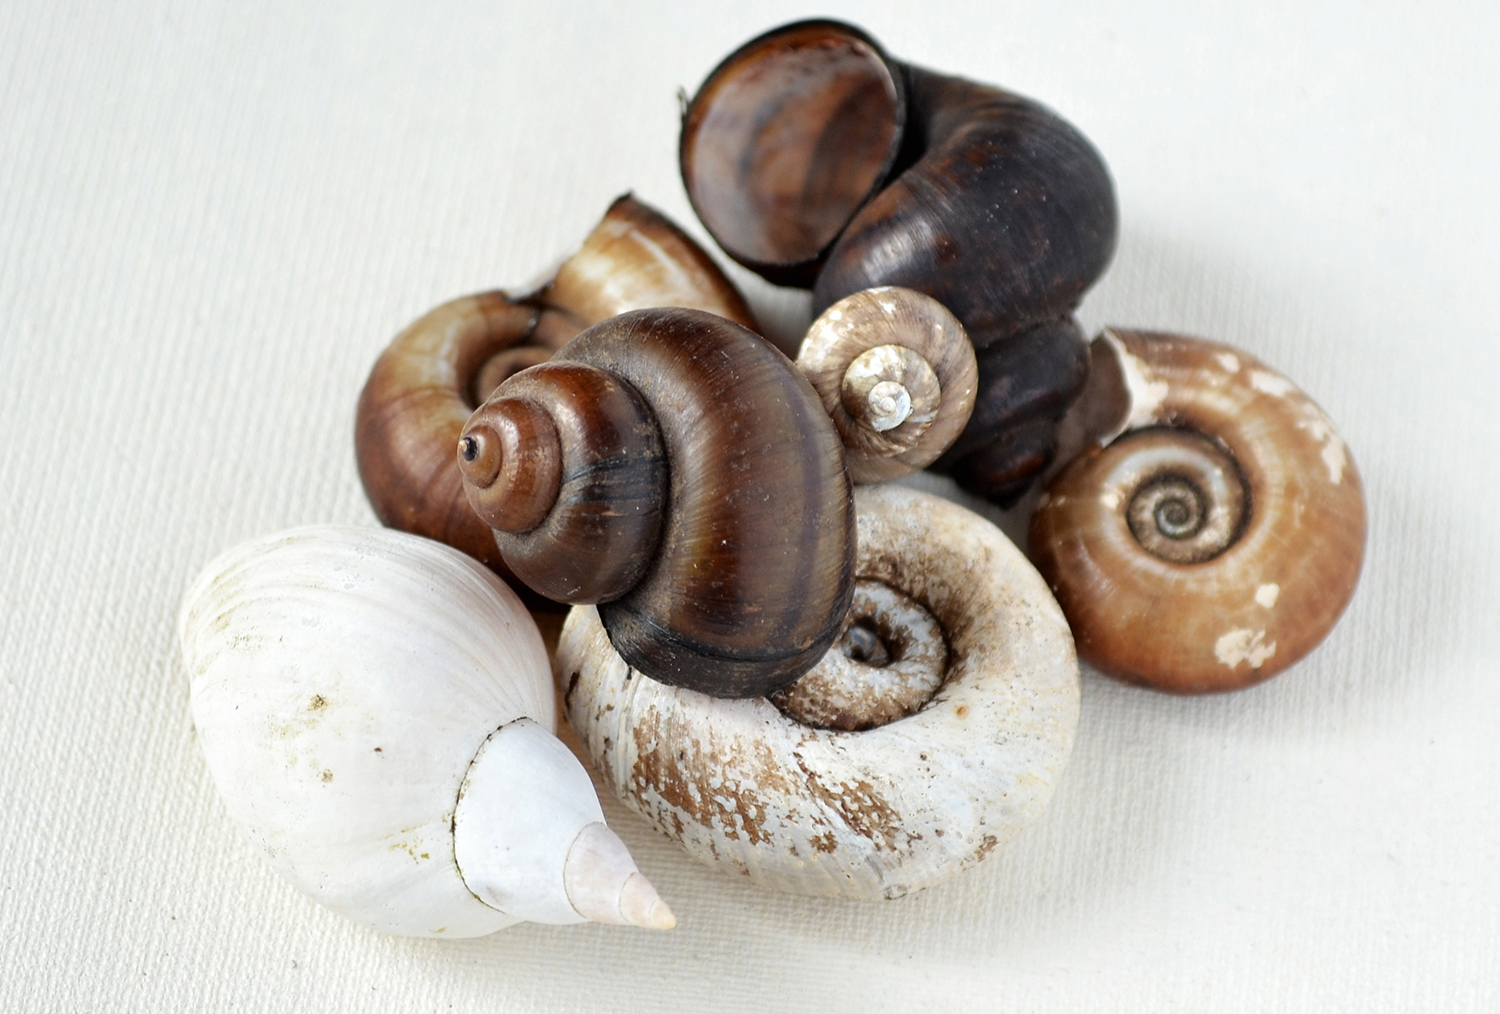
The theme of this black and white drawing is nature – an incredible source of inspiration. Use real objects for your artworks as often as you can. Collecting various natural objects – such as sea shells and snails' shells – make it possible for you to take a closer look, to touch and feel the surface.
If you don’t have a real object, it’s great to use reference photos. Gather as many visual materials as you feel necessary, since they will nourish your artistic imagination and give you useful information about the texture and details.

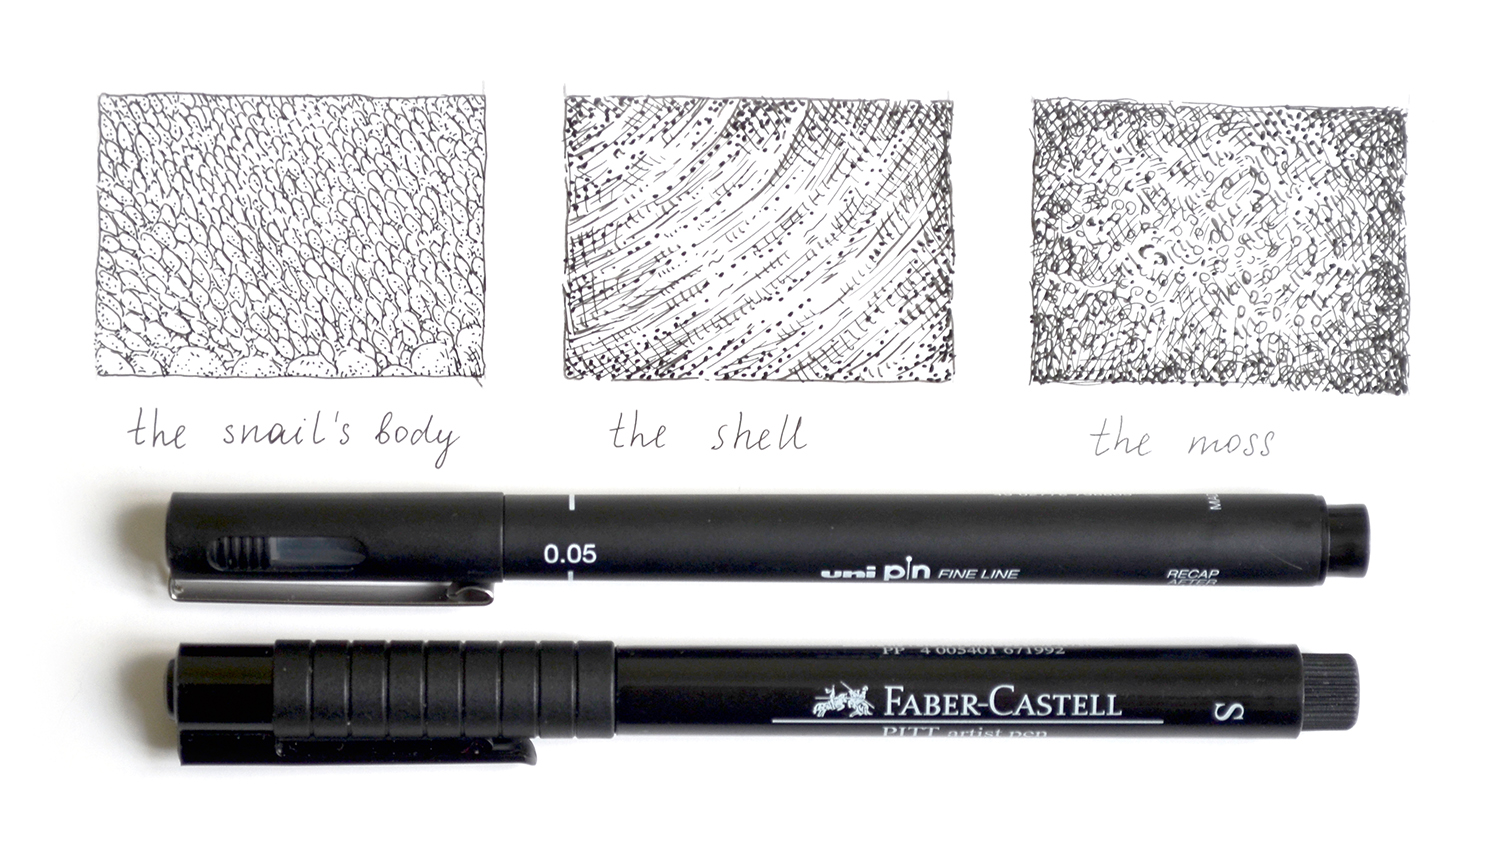
You could use these reference images and objects to create samples of textures before proceeding to the clean copy drawing. This is an excellent exercise for developing your artistic skills and power of observation.
Ink liners are convenient because they are portable and clean, but if you would prefer, you can also follow the steps in this tutorial using nibs and liquid inks, because the principles are similar for both materials.
Follow these 13 steps to create your own organic textured ink drawing.
01. Make an underdrawing
We'll begin this ink artwork with a pencil underdrawing. This method enables you to build the composition thoughtfully. Start drawing with light pencil lines and general shapes, then add the smaller features. As soon as you feel confident with your sketch and detailing, it’s time to start inking.
Daily design news, reviews, how-tos and more, as picked by the editors.
So to create a pencil underdrawing, first mark the hill and add rough shapes for the snail’s body and shell. Then draw the leaf and the acorn. The peculiarity of this composition is that the snail is looking at the acorn, as if with curiosity. As a final touch, refine the snail, adding the spiral of the shell and the horns.
02. Outline the contours
Using an SB brush pen, outline the contours with organic lines, varying the width from thin to thick (SB means ‘soft brush’ and provides a thin, flexible brush-like tip). Let your hand be relaxed and have fun. There is no need to draw all the contours with this tool, so leave some pencil lines uncovered. We will come back to them very soon.
03. Work on the shell
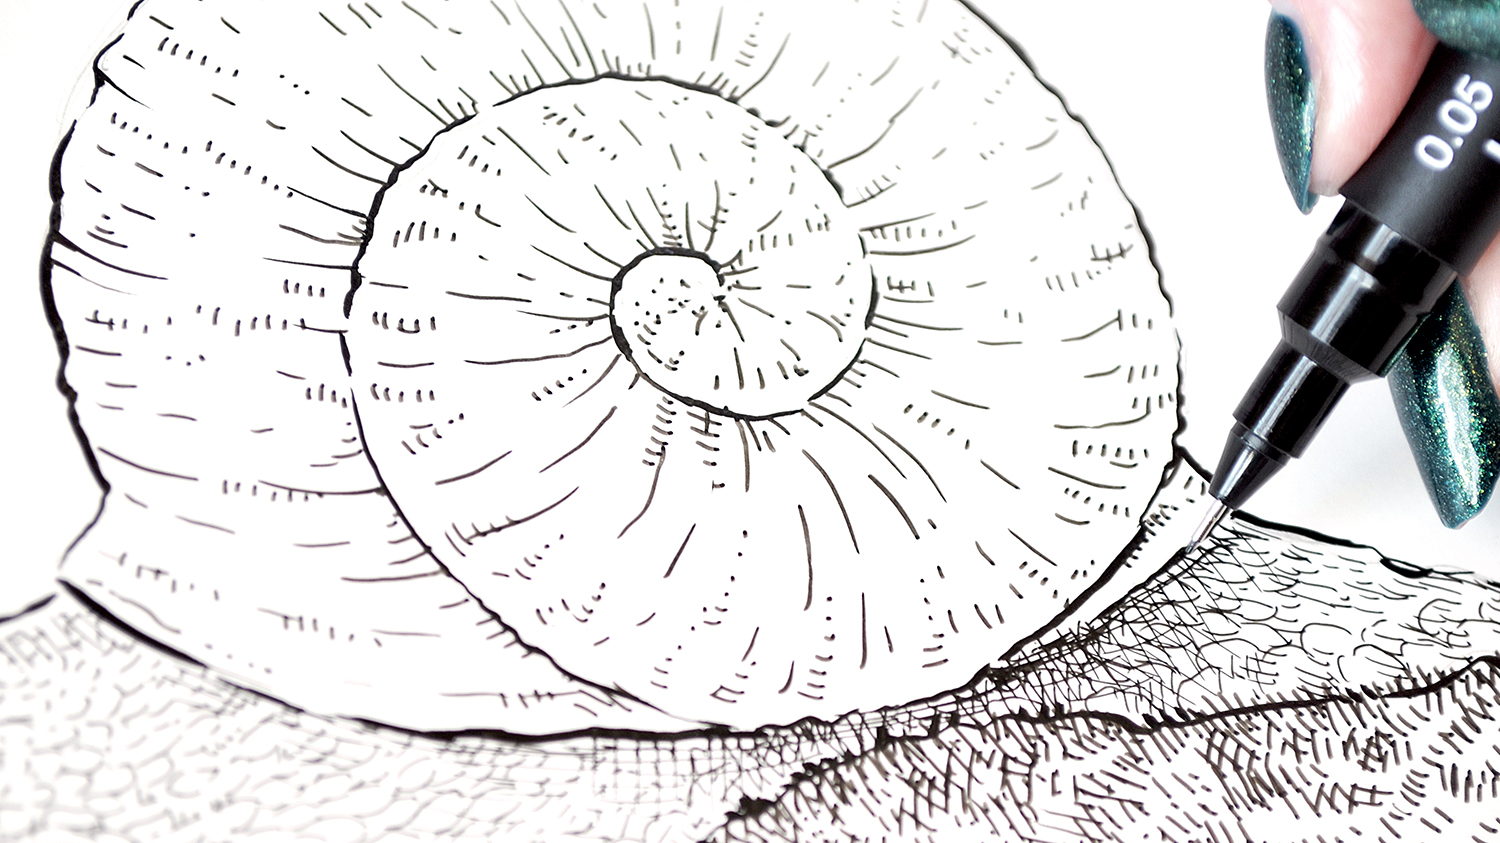
Use a small (0.3mm thick) ink liner such as this Faber-Castell Pitt Artist Pen, size S, to reveal the relief of the snail’s shell. On the image above, you can see two types of ink strokes: long rounded lines accent the prominent points of the shell, and groups of short hatches unobtrusively emphasise the three-dimensional aspect of this object.
04. Draw the moss
Begin the work on the texture of the moss that the snail is crawling along. With the S ink liner again, add groups of short hatches and dots to the hill area. The layering of hatches creates interesting effects and increases the contrast in the drawing. The closer you get to the bottom part of the artwork, the fewer hatches you should apply. This trick helps to create a beautiful fading effect.
05. Create the texture on the snail


Add the texture of the snail’s body using an ultra-thin liner such as this 0.05mm Uni-Ball Pin Fineliner. This texture consists of small oblong elements that are closely adjacent to each other. Also add thin hatches to the area of the snail’s body under the shell. By carefully accenting the shadows like this, the drawing starts to look more realistic.
06. Add dots
Draw dots onto the shell using an ink liner like the Faber-Castell Pitt Artist Pen F liner. The groups of big dots will make the texture more interesting and credible. Then accent the sides of the shell and the borders of the spiral to give it more contrast and make it varied in terms of value (this means that you have darker and lighter objects).
07. Finish the shell marks
Add rounded hatches to the sides of the shell and near the spiral line, using the 0.05mm ink liner again. This type of hatching is also known as contour hatching, and it works perfectly for accenting the three-dimensional aspect of objects.
08. Refine the snail's body
Using the 0.05mm ink liner again, work on the snail’s body. Thin hatches help to reveal the relief of the animal and emphasise its three-dimensional qualities. The groups of parallel lines can go in different directions to form layers of hatching. This way of creating shadows is particularly good for black-and-white ink graphics.
09. Draw an acorn
With the S liner again, add dots and rounded hatches to the acorn, accenting the sides of the object. It is important to leave a thin white line on the edge because that will separate the acorn from other objects in the drawing. Having this in place guarantees that the artwork will look realistic and three-dimensional.
10. Develop the acorn
Add thin hatches to the acorn, using the 0.05mm liner. The goal is to give the acorn some contrast but to leave the highlights. Drawing with ink is a process of gradually raising the value and contrast, so it is better to apply fewer strokes at a time than too many of them at once.
11. Create a leaf texture
Now work on the leaf. With the S liner again, add some dots to create an organic, velvety texture. Dots always work well when it comes to natural objects and smooth surfaces; you can also use dots of different sizes in your artwork to achieve amazing graphic effects.
12. Accent the leaf
Using the 0.05 liner, mark all of the dark places of the leaf. It is important to separate the leaf from the acorn with a distinct contrast shadow. Trust your eyes and hand; they will suggest the direction of hatching and the level of value in your drawing.
13. Refine the mossy texture
Lastly, work on the relief of the mossy hill. Hatch with the 0.05 liner to create darker spots. Especially accent the shadow from the acorn and ensure that the borders between the objects in the drawing are clearly visible. Once that's done, the artwork is complete.
Watch the video of this snail artwork coming together below.
This article originally appeared in Paint & Draw issue 10. Buy it here.
Related articles:
![Sketch your composition in pencil first [click the icon in the top-right to enlarge the image]](https://cdn.mos.cms.futurecdn.net/FVmcNB4bagvH6L8rkGfb4h.jpg)
![Vary the width of your lines with the soft brush pen [click the icon in the top-right to enlarge the image]](https://cdn.mos.cms.futurecdn.net/jiyzLrtjWSUD9JEzU4Sogj.jpg)
![Use long rounded lines to accent prominent parts, and short hatches to convey a 3D shape [click the icon in the top-right to enlarge the image]](https://cdn.mos.cms.futurecdn.net/vCRMEsmQQiCj3rd9rGN9Bo.jpg)
![Use short hatches for the moss [click the icon in the top-right to enlarge the image]](https://cdn.mos.cms.futurecdn.net/ASTv6yK4U788ScmVFbSxP5.jpg)
![Groups of dots make the texture on the shell more interesting [click the icon in the top-right to enlarge the image]](https://cdn.mos.cms.futurecdn.net/JdxxfrthitEfNQN5L487DH.jpg)
![Use contour hatching for depth [click the icon in the top-right to enlarge the image]](https://cdn.mos.cms.futurecdn.net/qtJhgzE45e8cETnehksLnK.jpg)
![Drawing shadows with hatches works well in black and white ink drawings [click the icon in the top-right to enlarge the image]](https://cdn.mos.cms.futurecdn.net/qg6NdUwPuxkPVPsi3fPBWN.jpg)
![Leave a thin white edge around the acorn to help it stand out [click the icon in the top-right to enlarge the image]](https://cdn.mos.cms.futurecdn.net/Q2b2gTF5kojmHSfATWP5jR.jpg)
![Add a few strokes at a time to avoid overdoing it [click the icon in the top-right to enlarge the image]](https://cdn.mos.cms.futurecdn.net/WDaHBjJYrR8QhvySLZXFsV.jpg)
![Add small dots to create a velvety texture [click the icon in the top-right to enlarge the image]](https://cdn.mos.cms.futurecdn.net/yzbbFJbwcnxRw8EfwAabjZ.jpg)
![Add a shadow under objects to separate them [click the icon in the top-right to enlarge the image]](https://cdn.mos.cms.futurecdn.net/wd9hHGDvjs9pz4oi8jKKhc.jpg)
![Make sure each object in your ink drawing is separate [click the icon in the top-right to enlarge the image]](https://cdn.mos.cms.futurecdn.net/cJnnRhsdS9RiZ6pBRnasef.jpg)
