How to use digital tools to create a hand-drawn look
Pro advice for sketching using an Apple Pencil and iPad Pro.
Sign up to Creative Bloq's daily newsletter, which brings you the latest news and inspiration from the worlds of art, design and technology.
You are now subscribed
Your newsletter sign-up was successful
Want to add more newsletters?

Five times a week
CreativeBloq
Sign up to Creative Bloq's daily newsletter, which brings you the latest news and inspiration from the worlds of art, design and technology.

Once a week
By Design
Sign up to Creative Bloq's daily newsletter, which brings you the latest news and inspiration from the worlds of art, design and technology.

Once a week
State of the Art
Sign up to Creative Bloq's daily newsletter, which brings you the latest news and inspiration from the worlds of art, design and technology.

Seasonal (around events)
Brand Impact Awards
Sign up to Creative Bloq's daily newsletter, which brings you the latest news and inspiration from the worlds of art, design and technology.
Editing and illustrating digitally makes a lot of sense, especially for commercial illustration projects. Last year, I first started working on a tablet – the iPad Pro. Despite having worked in traditional pencil for over a decade, using Apple Pencil and the Procreate app came surprising naturally to me.
You can work on the iPad in the same way that you work on paper, using a very basic approach – an initial sketch outline layer, which you can then build up in colour. I stick to a maximum of three layers, but often just work on one.
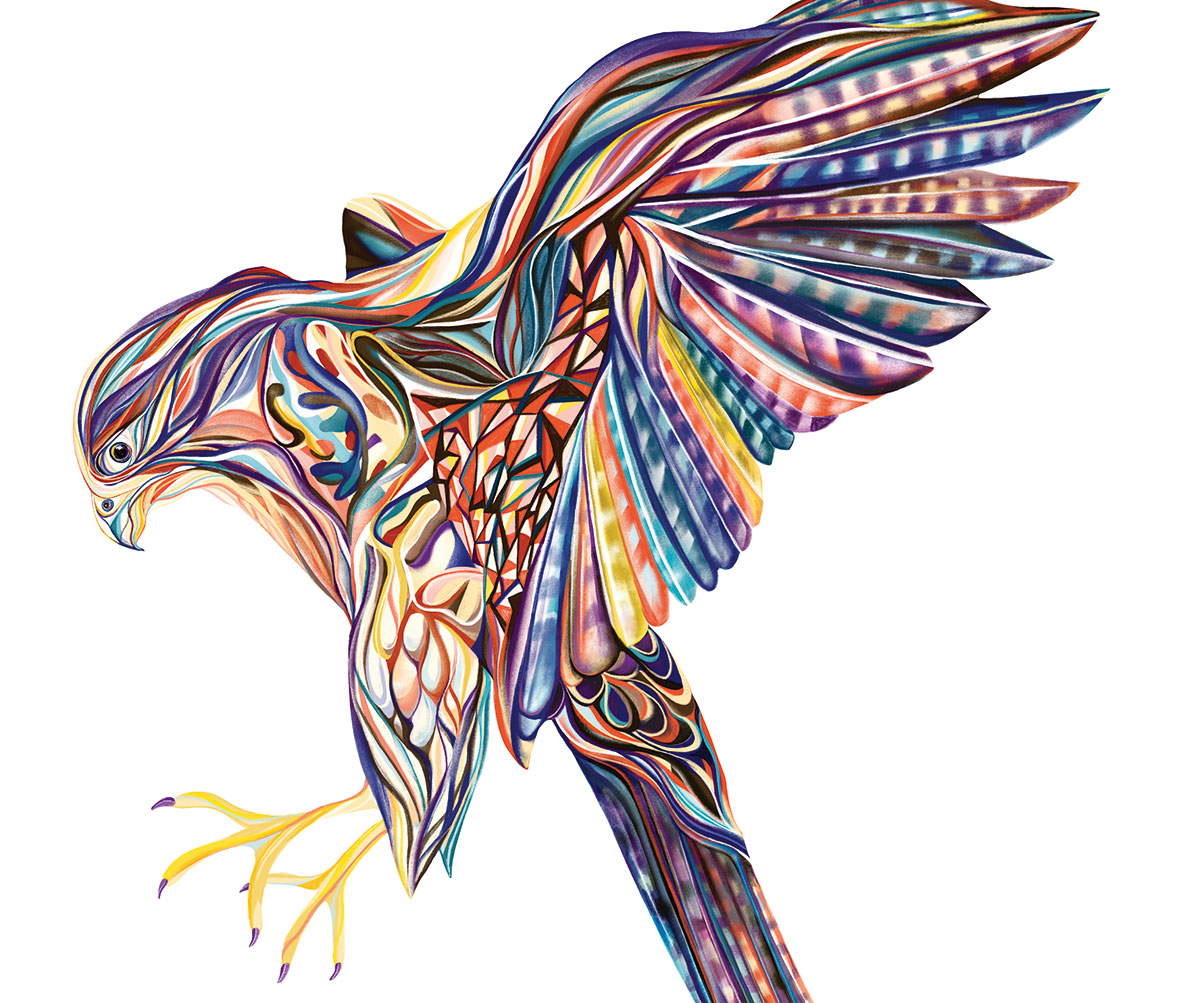
Here, I'll walk through how to draw a tiercel peregrine falcon...
01. Seek inspiration
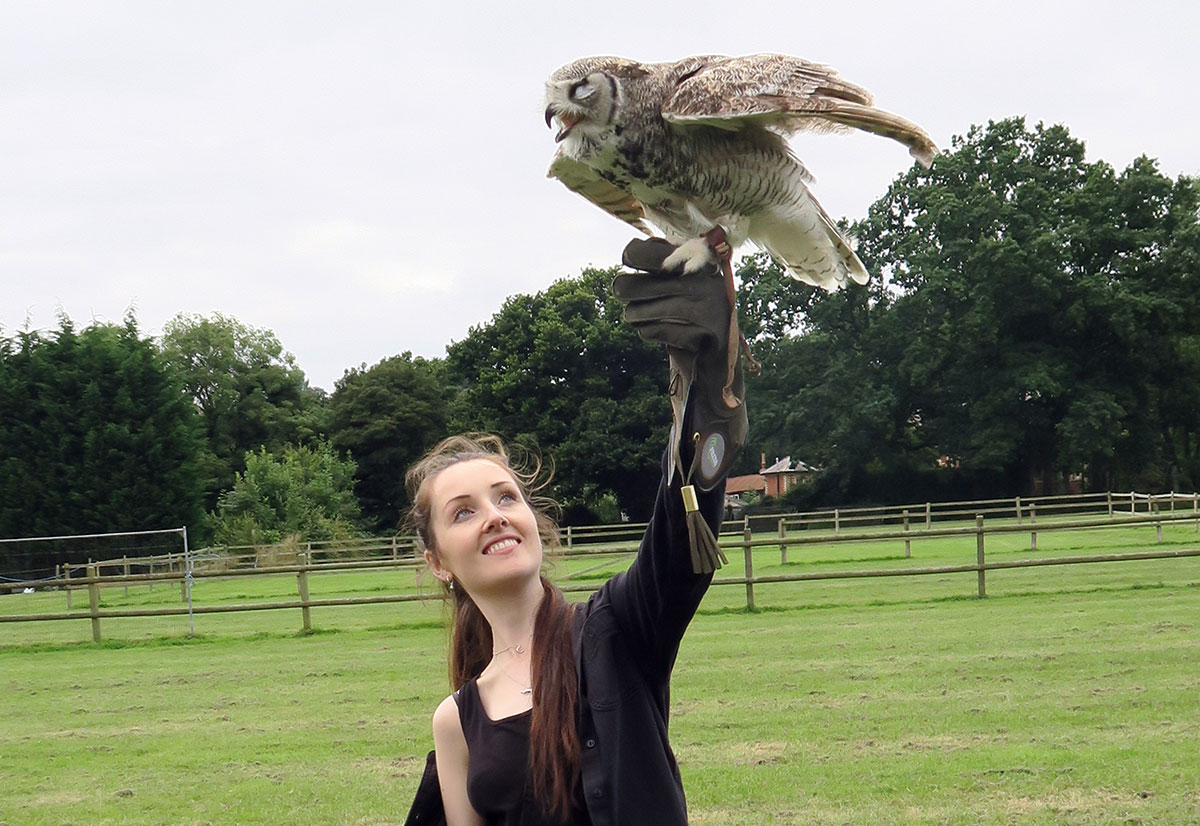
The first step is to find subjects that inspire you to draw. A lot of my work is nature-based. I'm a huge animal lover, but living in London, getting up close and personal with nature can be a struggle. To get around this, I travel and attend Wild Life Drawing classes every few weeks. They're much like normal life drawing classes, but with animals, and are an amazing opportunity to create quick observational sketches and take lots of reference photos.
The piece I've created for this tutorial stems from a mix of reference photos and sketches of a tiercel peregrine falcon. These are from a drawing day trip out to Kent, which was organised by Wild Life Drawing and Sky Birds of Prey.
02. Set up your canvas
Perhaps the most appealing thing about working digitally is the ability to zoom. Depending on what the illustration is being used for, take some time to chose a canvas size. If you want this to be a printable image, make sure the resolution is high enough.
I usually work at 6144 x 8196 pixels, which is huge! This means I'm limited to six Layers, but it enables me to zoom in on tiny details, and to potentially print to billboard size.
Sign up to Creative Bloq's daily newsletter, which brings you the latest news and inspiration from the worlds of art, design and technology.
Go to Settings > Preferences > Advanced Gesture Controls to ensure that Apple Pencil is the selected tool, and that Touch is set to Gestures Only. This helps avoid accidental finger painting.
03. Find your brush
If you're making the transition from paper to digital, it's important not to rush into your first piece. Take some time to play around and customise the different Brush settings.
Depending on your style, and which mediums you use on paper, different Brushes will suit you. Each Brush type is fully adaptable, so spend time tweaking it until you achieve a setting you're comfortable with, and don't forget to save it.
I mostly stick to one customised Pencil setting, which perfectly mimics the physical colouring pencils that I use. You can also customise a fine tip to create a slight bleed (mimicking ink on paper) or create a Brush to realistically mimic the running of watercolour or ink on paper.
04. Create a rough sketch
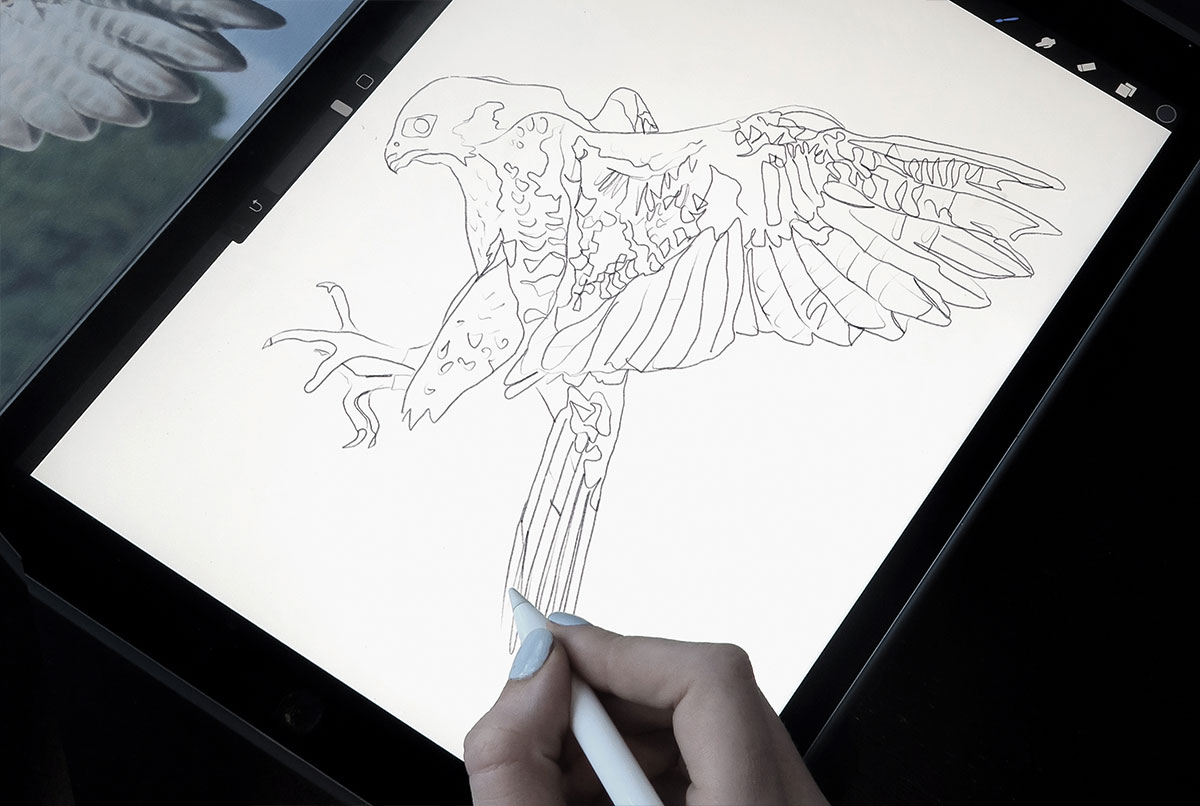
The first step in creating a piece is to make a quick observational sketch. You can either sketch this directly onto the iPad or draw in your sketchbook then scan this in to use as a base Layer.
For this example, I've sketched a simplified version of my paper sketch directly onto the iPad. I find it useful at this stage to reduce the Layer Opacity, so that my sketch is only faintly visible.
I also have a number of photo references to hand. The beauty and challenge of drawing wildlife is that your subject is never quite still, so I combine a number of sketches and different photos, to hopefully capture the movement and essence of my subject.
05. Play with colour
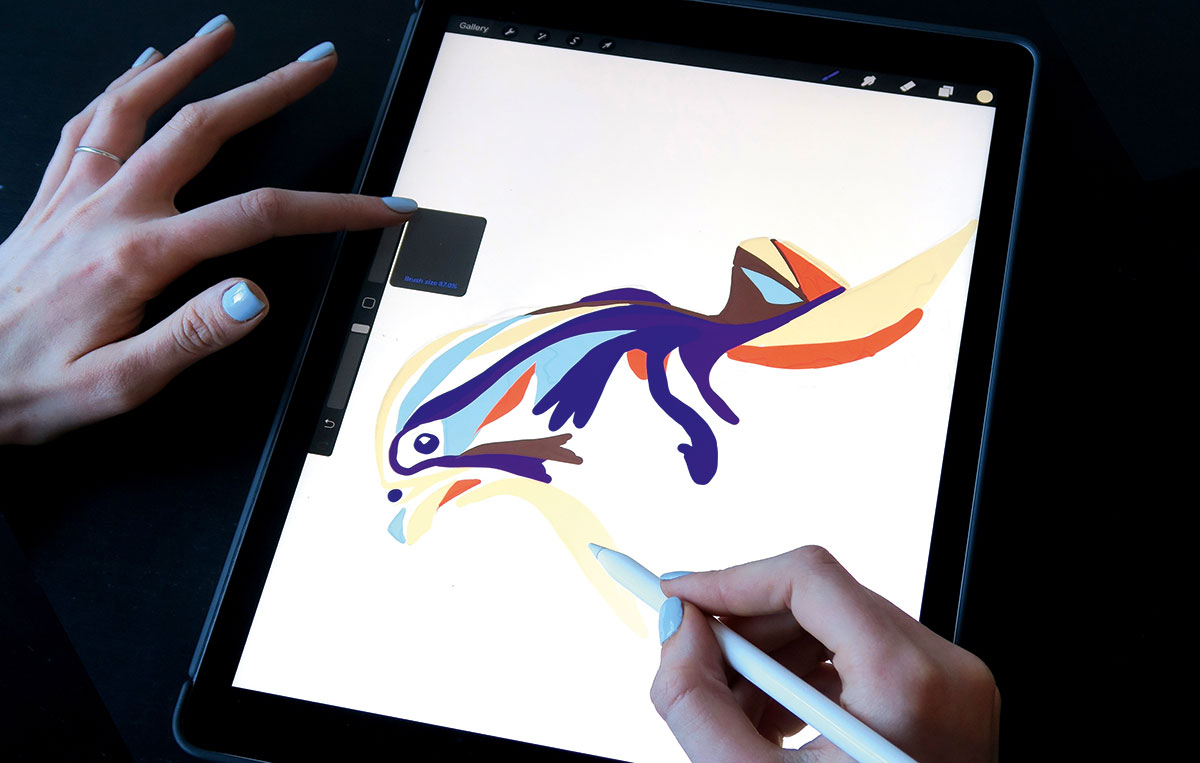
Playing around with colours in illustration work can create distinctive results. Before starting, take time to look at areas of light and shade, and pick out certain tones to exaggerate within the piece. Choose an initial colour palette of about five main colours that work well together.
Try to get these down as quickly as possible on a new layer of flat colours, under the baseline sketch Layer, using a large HB Pencil (under Sketching) or Studio Pen (under Inking). The goal is to create a sense of form, focusing on light and shade and expressing this through different colours.
You can then choose different shades or tones and introduce more colours using the colour wheel. As you work, switch between colours by double-tapping the illustration.
06. Add detail
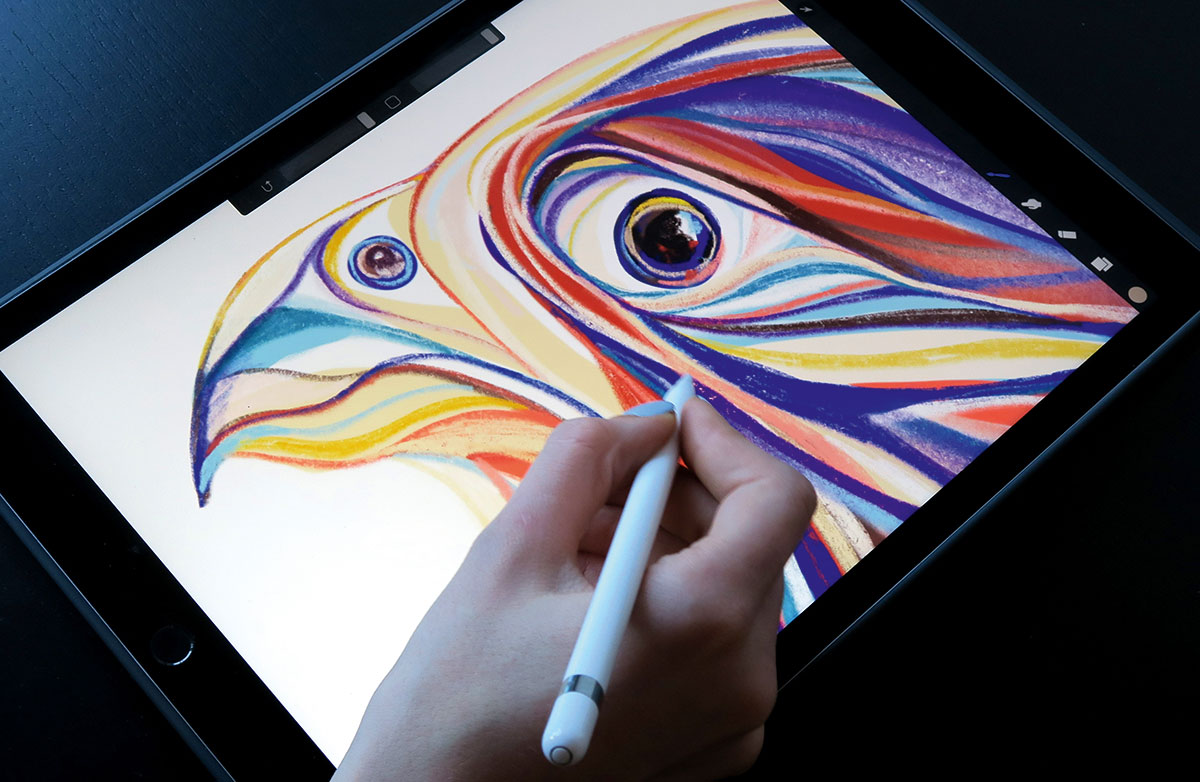
Once you have the base colour Layer, switch to a customised Pencil. You can change the Opacity and Size using the slider controls. Create a new top Layer on which to pick out key details from the sketch Layer. Once these are in place, you can turn off the sketch Layer.
Then I usually flatten the whole piece to one Layer so I can treat the drawing as if it's pencil on paper – but that's up to you, you may prefer to blend your Layers at the end.
Pick a point of most detail, such as an eye or a beak, and work your way out from there, adding detail and introducing different shades and tones from the base colours.
Birds are fascinating to draw as their anatomy is so interesting, and you can break them down into key shapes and patterns in an abstract way using different line patterns and colours.
07. Resist the Undo button
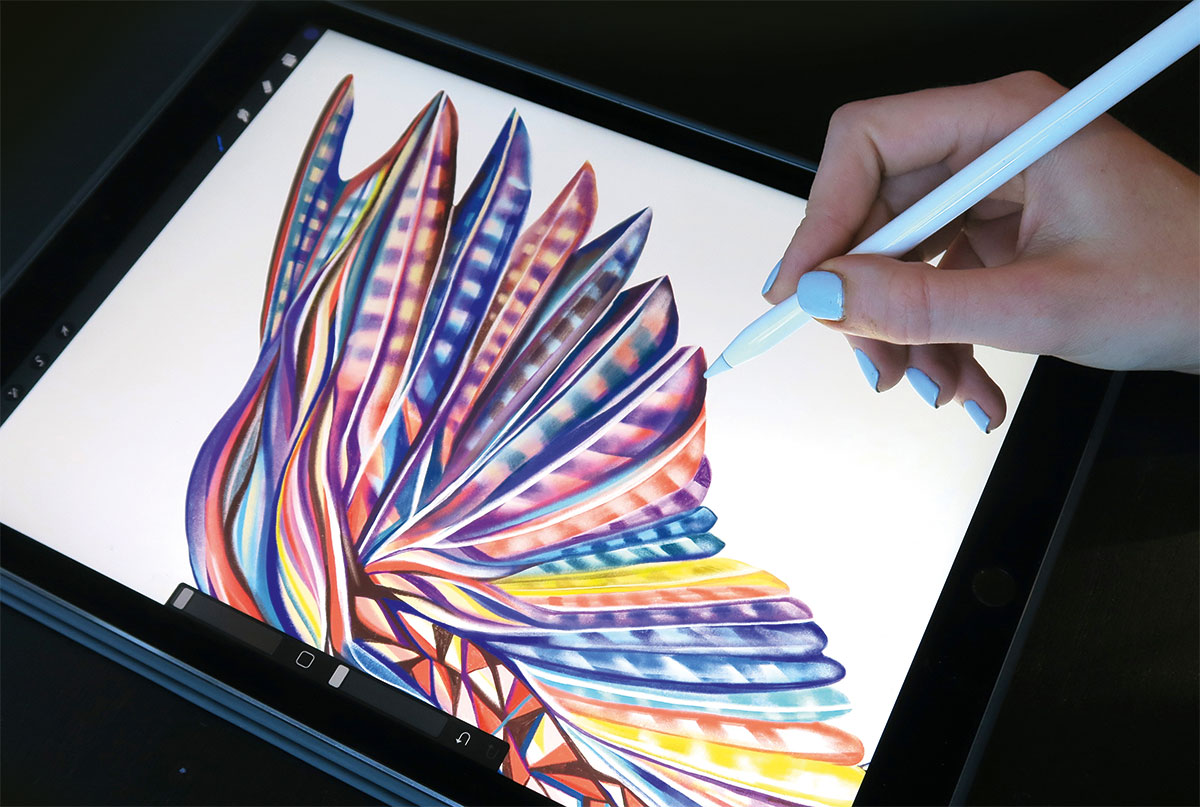
Being able to zoom in and edit are huge benefits of working digitally, but you should resist perfection. Working in real colouring pencils means it's difficult to rub out marks and start again, so you accept all the little mistakes – my illustrations are never perfect, and I don't strive for perfection.
For me, the main appeal of the iPad is being able to create art in the same way I do on paper. So I continue to resist perfection and leave in the accidents. These can make an illustration come alive, both on paper and tablet.
This article originally appeared in Computer Arts issue 268. Buy it here.
Related articles:
- The best drawing apps for iPad art
- 50 tips that will make you a better illustrator
- best apps for Apple Pencil
