How to control multiple page sizes in InDesign
Discover an easy way to create gatefolds and add a spine in a single document.
Sign up to Creative Bloq's daily newsletter, which brings you the latest news and inspiration from the worlds of art, design and technology.
You are now subscribed
Your newsletter sign-up was successful
Want to add more newsletters?
InDesign is typically useful for laying out large documents that contain more than one page. However, CS5 and beyond have opened the door to new possibilities, with features that make some tasks much more intuitive. In previous iterations, for example, there was always the need to start a new document when creating a different page size. In recent years, however, Adobe has made our lives a lot easier with the Page tool.
Using a fake magazine layout as an example, we'll look at how to manipulate page size, create gatefolds and add a spine to an editorial design. After mastering these simple steps, you'll be able to apply the Page tool in many different ways to any project.
- Software: InDesign CS5 or later
- Project time: 1 hour
- Skills: Manipulate page sizes, create gatefolds and centrefolds, add a spine, master basic editorial design
01. Design the covers
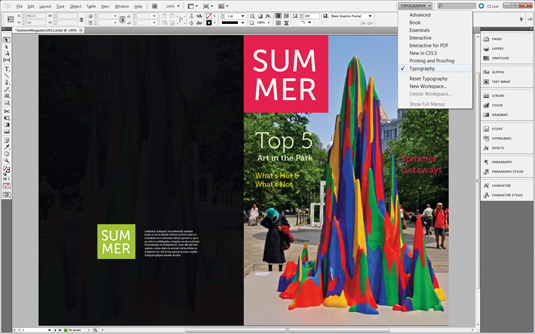
Start by designing the front and back cover for your magazine. Switch your screen workspace to the Typography setting under Workspace or through the drop-down menu. I prefer using this because it gives you access to more options when typesetting an editorial piece. All the tools are under your fingertips and enable you to work efficiently.
02. Add a gatefold
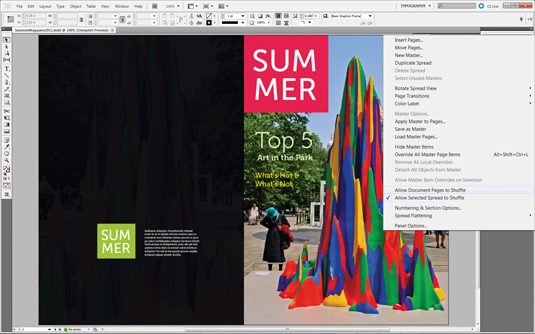
Let's give the magazine some dimension by adding a gatefold to the cover. First, select the drop-down menu from Pages and turn off 'Allow Document Pages to Shuffle'. This prevents the page from automatically dropping down to the next spread and attaches it to where you'd like it to go instead.
03. Create new page
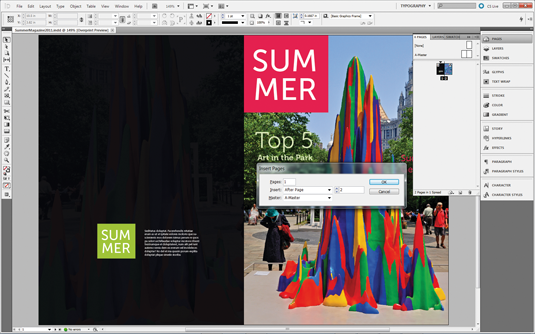
Select page two to insert the gatefold after it. Click on Insert Pages under the same drop-down menu. Set Pages to 1, Insert to After Page, choose 2 and set Master to A-Master. Click OK and you should see a new page appear beside page two.
04. Change size
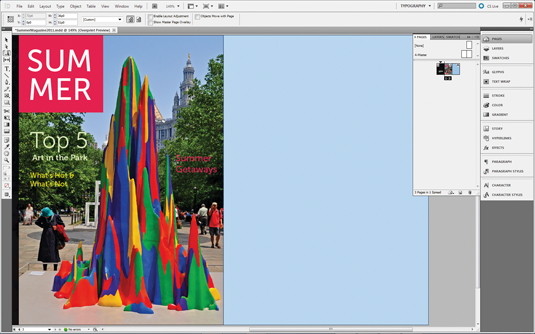
This page is too large for a gatefold, so let's change the size by clicking the Page tool on the toolbar and selecting the new page that we just created. When you select it, you get a blue overlay and the Control panel changes. You'll notice that you're able to set it to either a specific size given by InDesign or a custom size. In this case, we'll go with a custom size.
05. Create flap
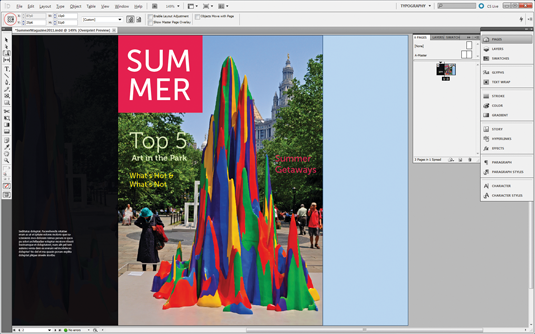
Select the Reference Point to be on the right-hand side, as you specifically want it to shrink horizontally. Enter 15p in the Width field and the page size will change. You now have a flap to work with.
Sign up to Creative Bloq's daily newsletter, which brings you the latest news and inspiration from the worlds of art, design and technology.
06. Expand cover
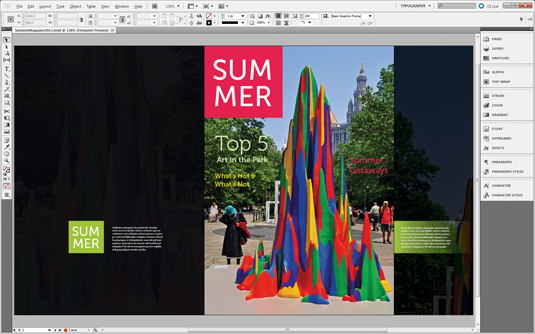
You can then expand the content to cover the gatefold that was created or add new content. In this case, we're choosing to highlight the story behind the cover image seen on the gatefold.
07. Add a spine
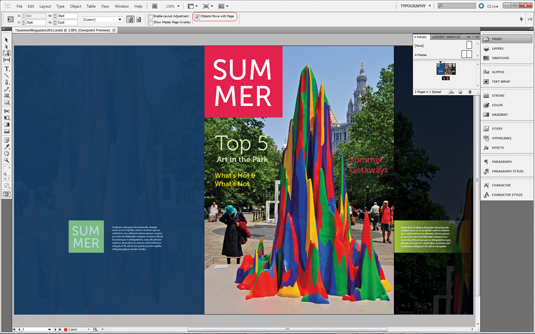
Now that our gatefold is done, let's add a spine to the magazine. This time, select the Page tool and click on the back cover of the publication. In the Control panel, uncheck the 'Objects Move With Page' box to prevent the elements on your layout from shifting around or dropping out of the page.
08. Position spine
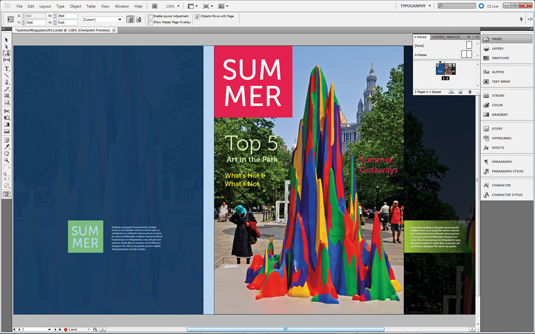
Next, let's set the Reference Point to be on the left side, because we want our spine to appear between the back and front cover. If this isn't set then you'll end up with a back cover that's expanded equally on both sides. Now set the Width to 38p and you'll notice that your layout automatically shifts to the left, with the spine appearing in the centre.
09. Add content to spine
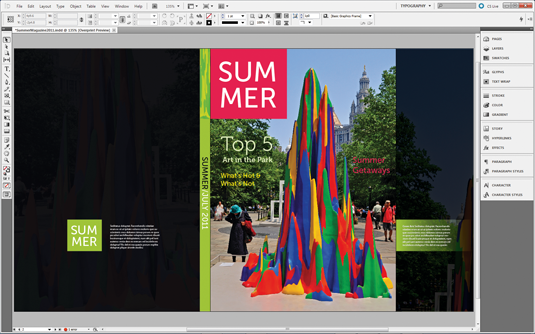
Choose the Selection tool and then click on the back cover to continue designing the spine with the magazine name and date of publication.
10. Drag and drop new pages
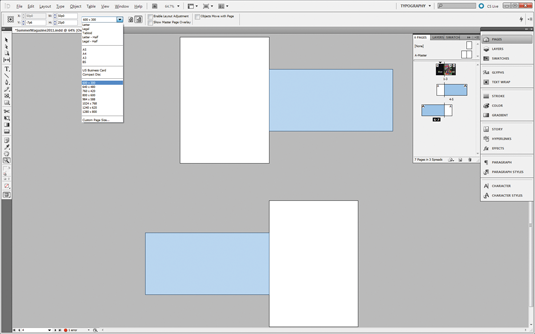
Let's now add pages to our magazine by dragging and dropping the A-Master spread into the Pages window, so we can see the different possibilities for a magazine layout.
Click on the Page tool and select pages five and six, so you can manipulate the page size at the same time. Select a set size of 600x300 in the drop-down menu. This might just turn out to be a unique size for an ad in the magazine. You can continue using the Page tool to manipulate multiple page sizes within this single document.
This article first appeared in Computer Arts magazine.
Liked this? Read these!
- Free Photoshop brushes every creative must have!
- Illustrator tutorials: amazing ideas to try today!
- Free Photoshop actions to create stunning effects

The Creative Bloq team is made up of a group of art and design enthusiasts, and has changed and evolved since Creative Bloq began back in 2012. The current website team consists of eight full-time members of staff: Editor Georgia Coggan, Deputy Editor Rosie Hilder, Ecommerce Editor Beren Neale, Senior News Editor Daniel Piper, Editor, Digital Art and 3D Ian Dean, Tech Reviews Editor Erlingur Einarsson, Ecommerce Writer Beth Nicholls and Staff Writer Natalie Fear, as well as a roster of freelancers from around the world. The ImagineFX magazine team also pitch in, ensuring that content from leading digital art publication ImagineFX is represented on Creative Bloq.
