How to animate a character with blend shapes
Blend shapes are among the most useful deformers available to Maya artists. Pat Imrie reveals how they work...
Sign up to Creative Bloq's daily newsletter, which brings you the latest news and inspiration from the worlds of art, design and technology.
You are now subscribed
Your newsletter sign-up was successful
Want to add more newsletters?
Blend shapes are an incredibly useful and powerful feature in a 3D artist's toolset. In this tutorial, I'll look at what blend shapes are and how they work, as well as looking at any considerations you have to be aware of when creating them within a production environment. I'll also look at combining blend shapes with Maya's Set Driven Key features to create a more efficient workflow.
Finally, I'll reveal how to use the more advanced blend shape features to create a more complex flame effect. Along the way we'll also cover how to address the most common production hiccups associated with blend shapes.
01. What is a blend shape?
If you're a complete newcomer to 3D, new to modelling and facial rigging or just looking to expand your skill set, the first concept to learn is exactly what a blend shape is and what it does.
Article continues belowMaya has features known as deformers, which enable you to change the shape (by bending, inflating, or undulating, for example) of a piece of geometry in your scene. Deformers can be used as modelling tools, animation tools or as a mix of the two. A blend shape is a member of this family of features, and is one of the most powerful and useful deformers available to you as an artist.
Blend shapes create the illusion that one shape changes into another in a natural-looking way. You might use one, for example, to animate a character’s mouth moving from a neutral shape into a smile.
This works by using a duplicated version of the object, which is then manually adjusted to another shape. You can then use blend shapes to blend or morph between these, and it creates the illusion of an object changing its form.
The Blend Shape tool and the rest of the deformer family are found under the Animation menu, and the blend shape creation and editing tools are found under Create Deformers and Edit Deformers respectively.
Sign up to Creative Bloq's daily newsletter, which brings you the latest news and inspiration from the worlds of art, design and technology.
02. Create a blend shape
Before you create a blend shape, you first have to take into account a few considerations about the geometry that you want to blend between. The first and possibly the most important of these considerations is the vertex count.
In order for a blend shape command to be successful, the base mesh and any target shapes being used must have the same vertex count, otherwise Maya will kick out an error or simply not carry out the operation.
The way to ensure that you have the same vertex count on the base and target meshes is to duplicate the base mesh and use that as the target mesh, which is standard practice for creating blend shapes. If you’re unsure about the vertex count, you can check it by going to Display>Heads Up Display>Poly Count. Now, when you select an object you can see its vertex count.
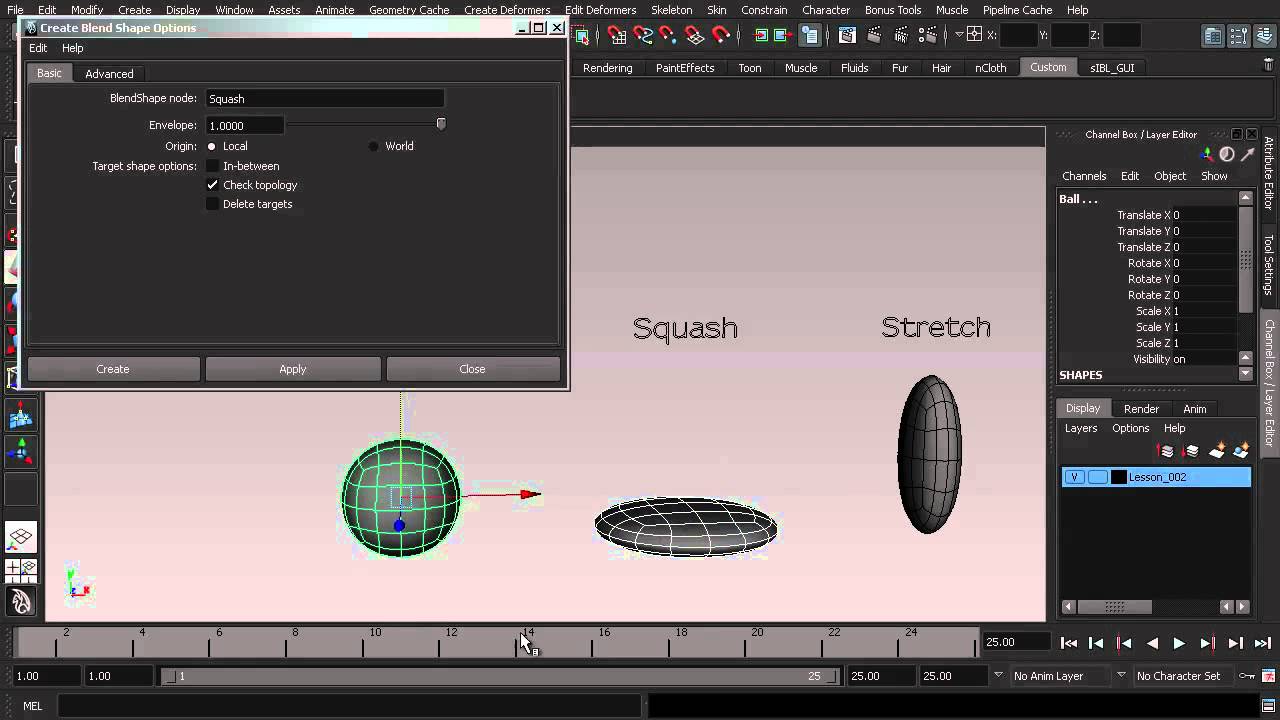
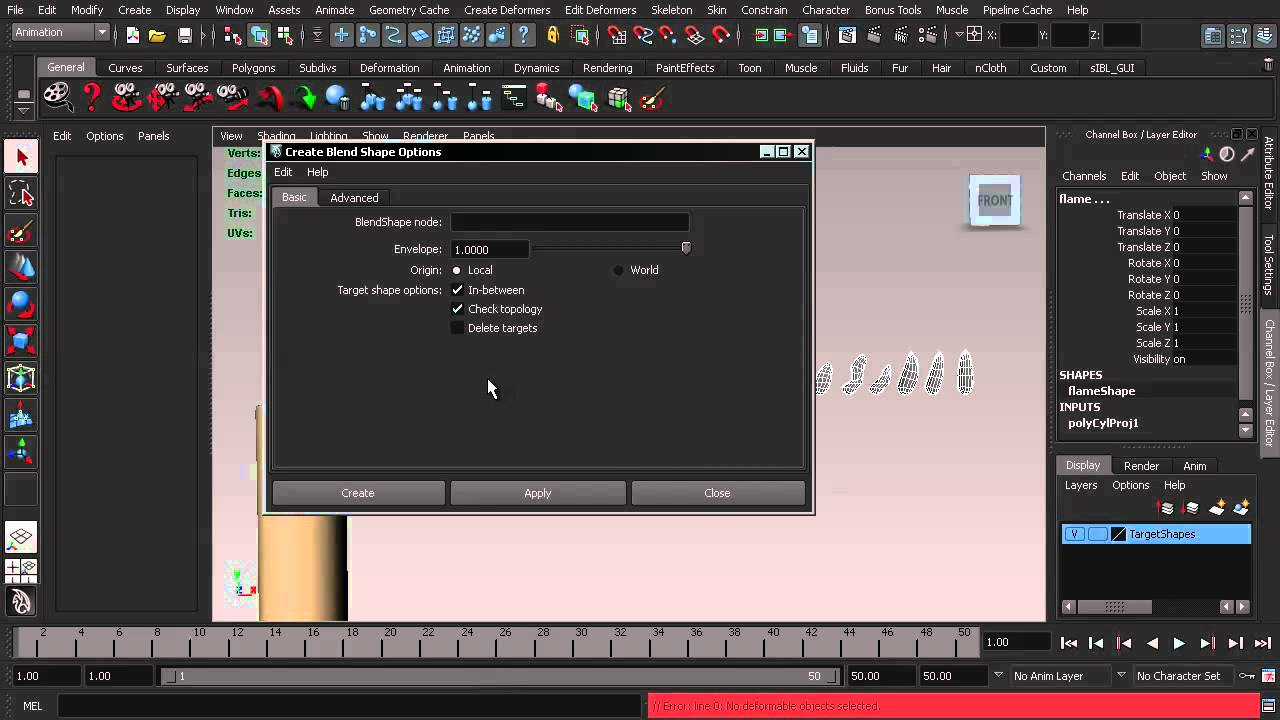
Creating a blend shape is a straightforward process. Simply select one or more of the target meshes, then hold down Shift and click your base mesh. Now go to Create Deformer>blend shape>Option. Enter a name for your blend shape, leave the settings at their defaults and click Create.
03. Key blend shapes
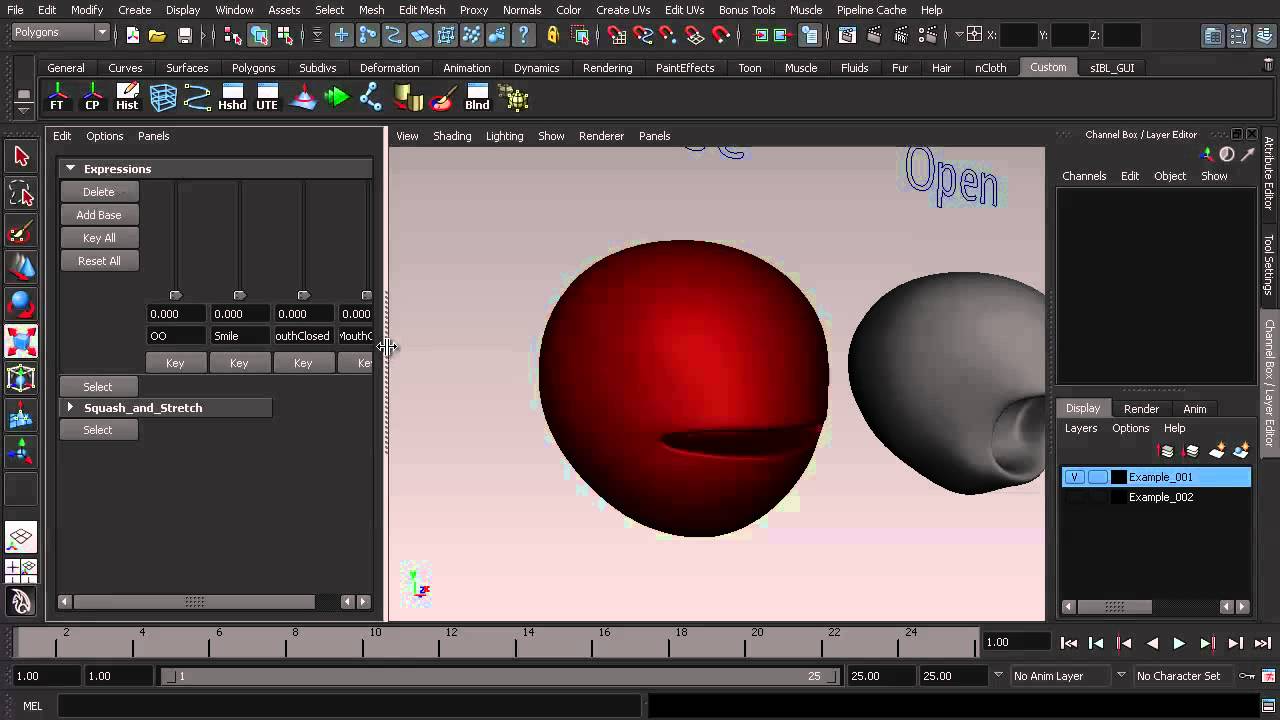
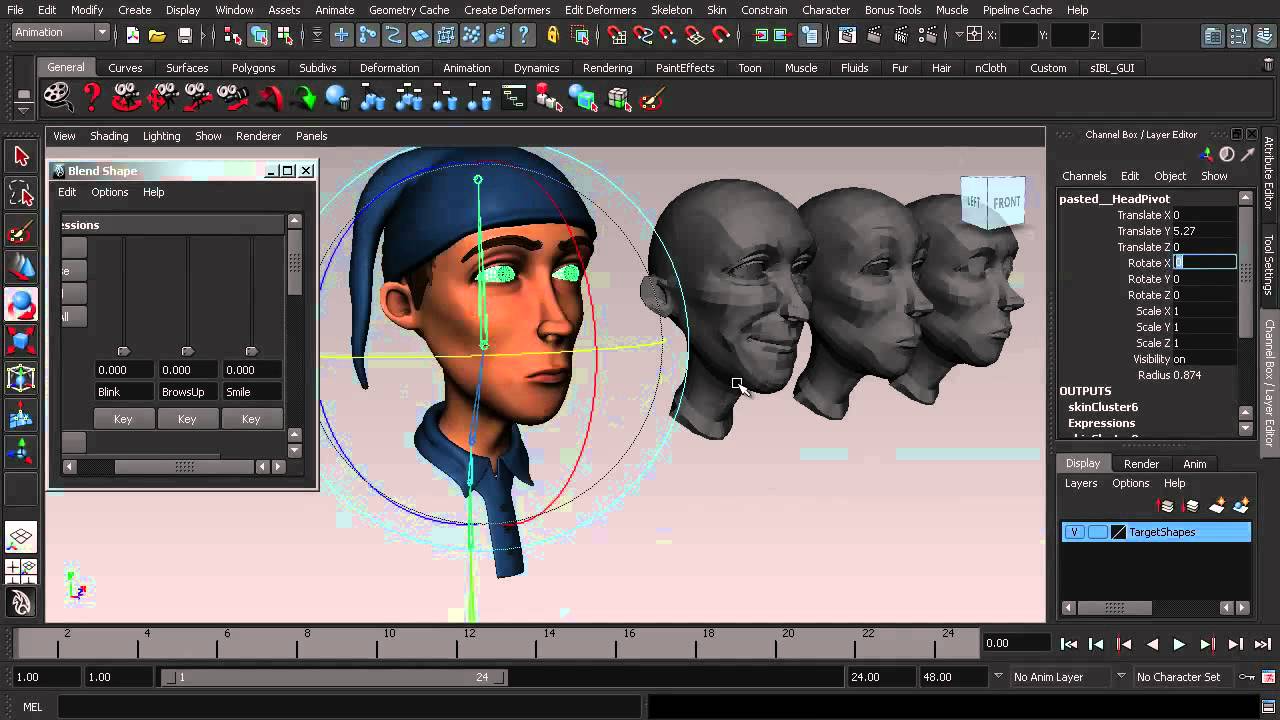
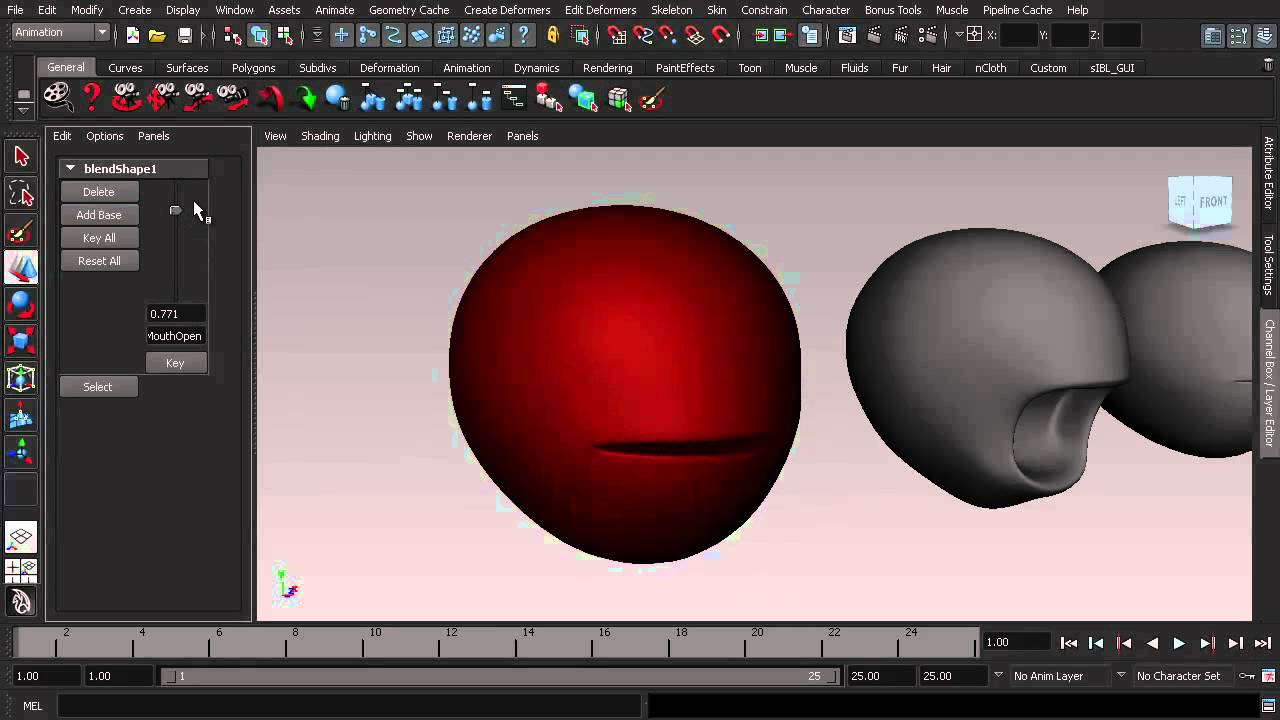
Adding keys to a blend shape is also a very straightforward process. First, open up the Blend Shape dialog by going to Window>Animation Editors>Blend Shape.
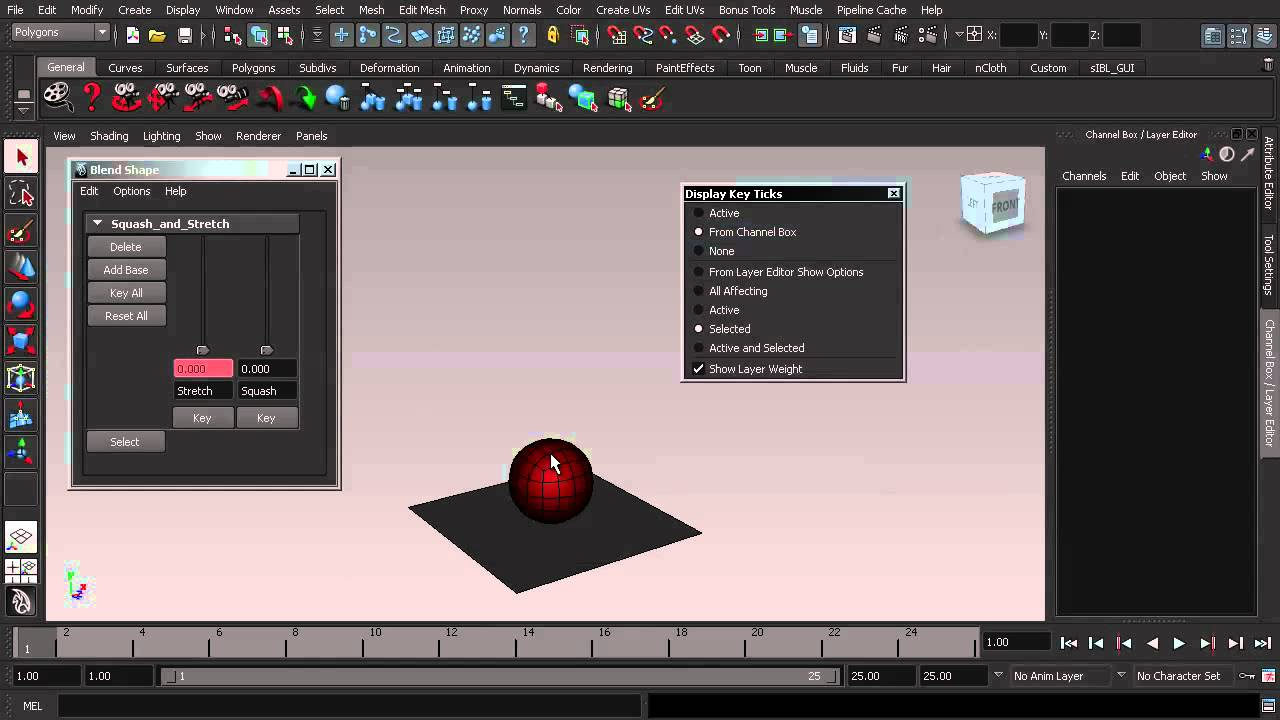
This dialog contains the sliders associated with your blend shape, and under these sliders you'll see a Key button that enables you to control the amount of influence each shape has along the time slider. The main issue with this method of keyframing is that unlike normal animation in Maya, the key ticks don't appear by default.
To display the key ticks, right-click the timeline, and go to Display Key Ticks. In the pop-up menu make sure you highlight From Channel Box and Selected. Now select your mesh, go to the Channel box and select the keyed blend shapes. You'll now see keyframes associated with each shape appear in the timeline.
While this is useful, the recommended way to adjust and edit blend shapes is through the Graph Editor. By default you'll only see a curve for normal meshes or joints. To access the blend shape curves you have to open up the mesh hierarchy. Doing so will reveal the curves for any blend shape that has keys on it.
04. Animate a smile
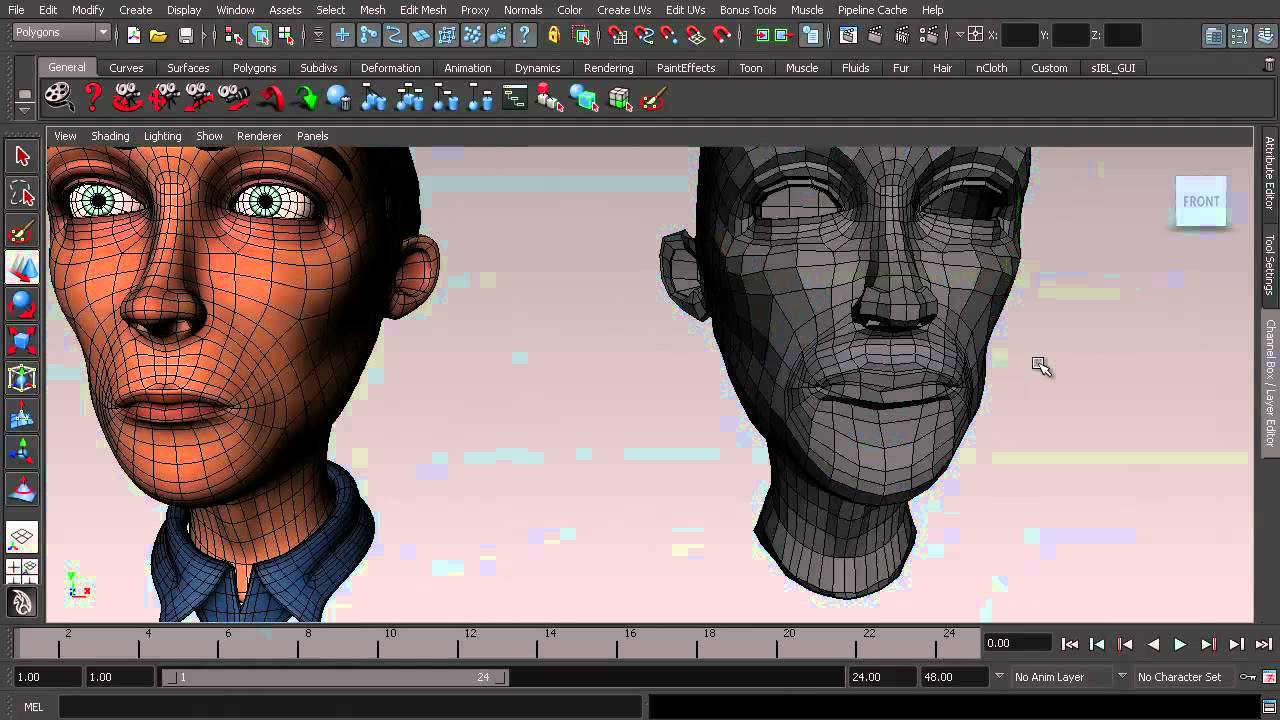
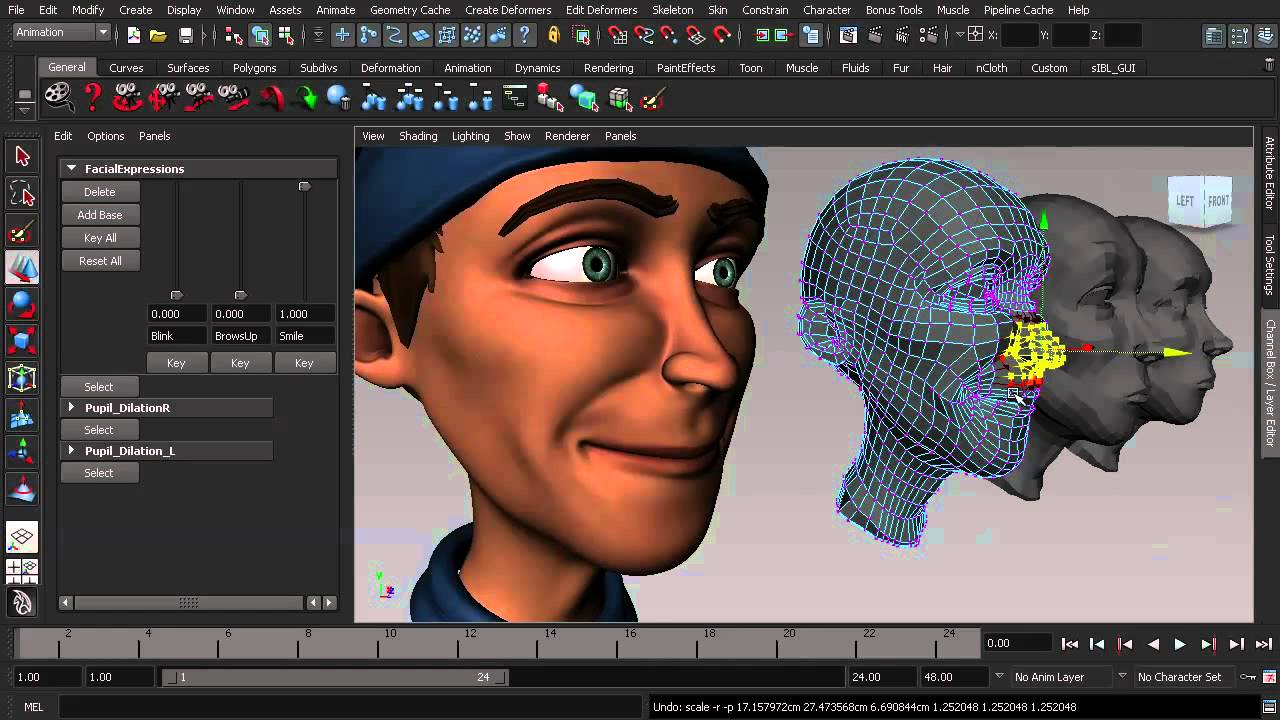
Building a facial target shape for a character may seem like a simple task, but you'd be surprised how many mistakes are easily made. The key aspect to remember is that there's muscle and bone underneath your character's skin. For this character, you're going to build a basic smile. I've found that the key to making an effective blend shape is to block out the main areas of deformation first and then refine the shape.
First, turn on Soft Selection and select the vertices around the mouth. Move these up and rotate downwards very slightly. Next, turn on Reflection in the tool settings and select the corners of the mouth. You want to move these back and up into the face while making sure to retain volume.
Now select the vertices around the nose and rotate it down slightly while also pushing it back into the face a small amount. At this stage you'll inflate the top of the cheeks slightly. Blocking out the shape this way replicates the way skin compresses and stretches as we make facial expressions. Finally, take some time to refine the shape of the smile, cleaning up any pinching of the geometry.
05. Edit the target shapes
There are two main ways to edit your blend shapes. The first option is to turn on the shape that you wish to edit, then select the target mesh you created for it. As you start to edit the shape through the process of pushing and pulling vertices, the blend shape will update. Because you turned the shape on to begin with, it will update in real time, making it an effective way to edit the shape.
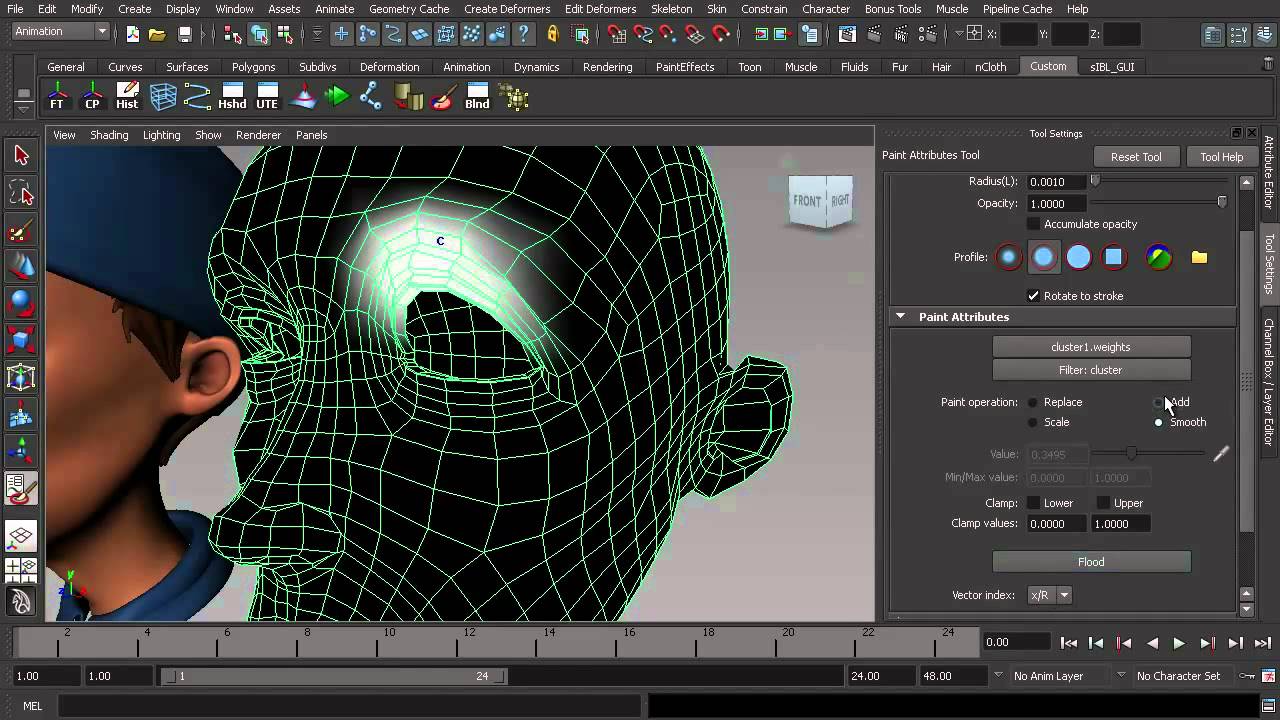
The second option is to select the main mesh and go to Edit Deformers>Paint Blend Shape Weights. Here you can use the Artisan brushes similar to the way you adjust the weights on a rigged character to remove and addinfluencetoashape. This is an excellent way to smooth out shapes to create more natural-looking expressions and shapes.
06. Use Set Driven Key to link blend shapes
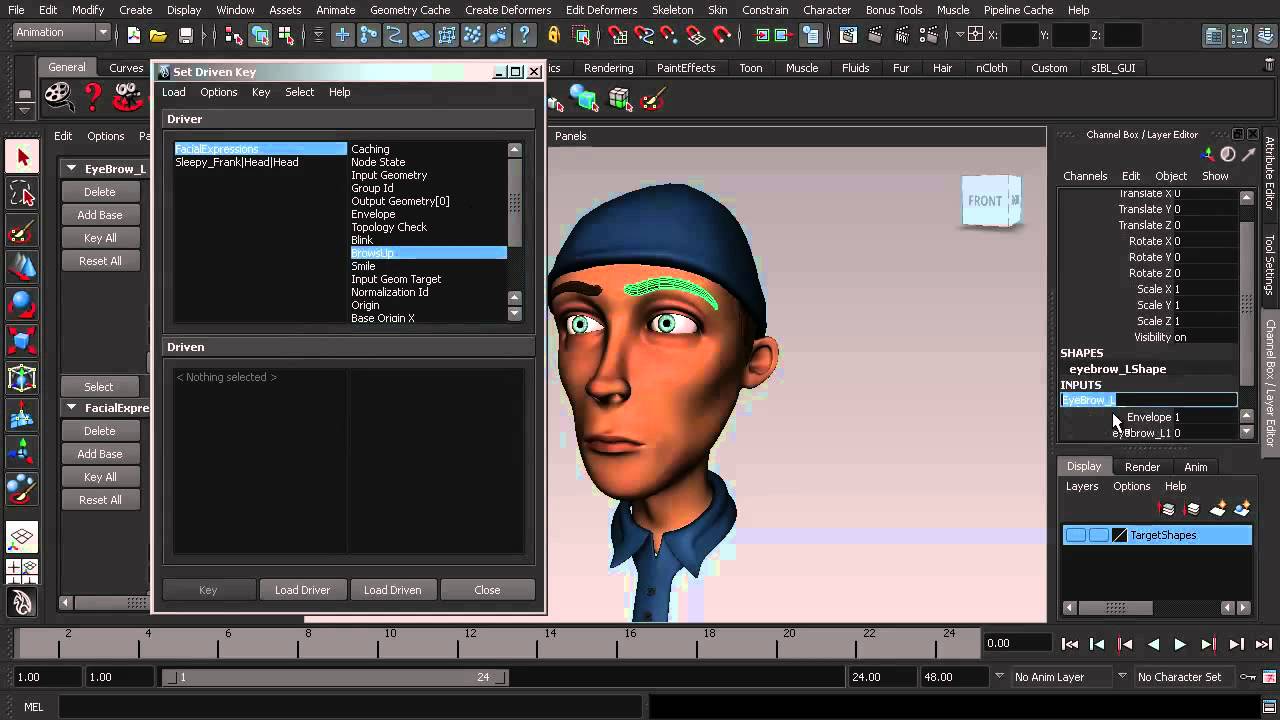
Sometimes you want two separate blend shapes to work in conjunction with one another. In the case of this character, you want to link the Eyebrow shape with the BrowsUp shape. To accomplish this, you’ll use Set Driven Key to link them together and allow them to be animated at the same time.
Open the Set Driven Key window by going to Animate>Set Driven Key>Set, and load the BrowsUp shape into the Driver column. Next, load the Eyebrow shape into the Driven column.
Now click the Key button. This will set a key with both influences set to 0. Open up the Blend Shape window and set the influence of both shapes to 1, then return to the Set Driven Key window and click the Key button again. If you turn on the BrowsUp shape, the Eyebrow shape will turn on at the same time, enabling you to save a lot of time when animating facial expressions.
07. Clusters and wire deformers
I've looked at one way of creating a target shape, but there are other options available to you that can in some cases speed up the process. The first option is to use a Cluster deformer, which involves selecting a group of vertices and going to Create Deformer>Cluster. You now have a handle attached to your mesh that enables you to reselect those vertices at any time.
You can also use the Artisan options and the Paint Cluster Weights tool to edit your selection. The normal workflow for this is to make a change to a shape using a cluster and then smooth out the influence using the Artisan operation.
Another option, and my preferred method, is to use a Wire deformer, which enables influence over an area of a mesh using a NURBS curve. You can create curves of any shape to meet your requirements. These can also be edited using the Artisan operations through the Paint Wire Weights tool.
08. Adding blend shapes
The task of adding new blend shapes used to be tricky, and would sometimes result in instability. It's also a common issue that newcomers to blend shapes encounter, particularly when attempting to add a blend shape into a pre-rigged character. To add a new blend shape is simple enough.
With a newly created blend shape, hold down Shift and click the base mesh, then go to Edit Deformers>Blend Shapes>Add>Options. Select Specify Node and choose the blend shape node you want to add the shape to, then click Apply and Close.
It's normally at this stage that some animators begin to get lost, because adding a blend shape is only half the battle. If you were to move your character's rig and then turn on a blend shape, it would create a strange result.
To make everything work as it should, you need to swap our deformation order. Select the mesh, then pick All Inputs from the inputs list. In the dialog that appears next, use the middle mouse button to move the SkinCluster to the top of the list. If Maya won't move the order, select the blend shape and move it to the middle. Now the rig and blend shapes should work correctly.
09. Advanced blend shape settings
I'm now going to take a look at the rest of the settings in the Create Blend Shape dialog. The last of the basic settings is called In-Between. This enables you to create a continuous deformation or a blend from a selection of targets.
The workflow for it is the same as with a standard blend shape, where you create the target shapes we require, select them and add them into the deformer. The only main difference with In-Between is that you select the target shapes in the order you want them to deform. You also only get one slider when the blend shape is created.
In the Advanced tab, you have a list of different deformation orders for your shapes. 99 per cent of the time, you’ll be using the default setting of Front of Chain, but there are times when you may need to use another form of deformation order to complete your task, for example in the use of corrective blend shapes.
10. In-between blend shapes
Finally, I'll look at a practical example of an in-between blend shape, revealing why it's such a useful production tool. Using video reference of a candle flame, I created a selection of target shapes showing the candle being caught in a slight draught.
These shapes are selected in the order that the action happens, and in-between blend shapes are created. It's important to note that careful observation of the source materials is key to creating a believable effect.
What makes this approach so useful is that the effect is very easily directed and can be adjusted more easily, bypassing the need for extensive dynamics, for which some projects have neither the time nor the budget. Combine this effect with a glow shader and motion blur at render time, and you end up with a very believable candle flame effect.
Pat Imrie is a freelance 3D artist and trainer, specialising in modelling and digital sculpture across TV, film and games. He also offers 3D training for students and professionals.
This article originally appeared in 3D World issue 168.
Liked this? Read these!
- ZBrush tutorials: ways to paint and sculpt in 3D
- Top free 3D models
- Best 3D movies of 2013

The Creative Bloq team is made up of a group of art and design enthusiasts, and has changed and evolved since Creative Bloq began back in 2012. The current website team consists of eight full-time members of staff: Editor Georgia Coggan, Deputy Editor Rosie Hilder, Ecommerce Editor Beren Neale, Senior News Editor Daniel Piper, Editor, Digital Art and 3D Ian Dean, Tech Reviews Editor Erlingur Einarsson, Ecommerce Writer Beth Nicholls and Staff Writer Natalie Fear, as well as a roster of freelancers from around the world. The ImagineFX magazine team also pitch in, ensuring that content from leading digital art publication ImagineFX is represented on Creative Bloq.
