Add the hipster vintage look to photos with Photoshop CS6
Learn how to utilise Adobe Camera Raw as a creative tool, and add cool retro effects to your shots.
Sign up to Creative Bloq's daily newsletter, which brings you the latest news and inspiration from the worlds of art, design and technology.
You are now subscribed
Your newsletter sign-up was successful
Want to add more newsletters?
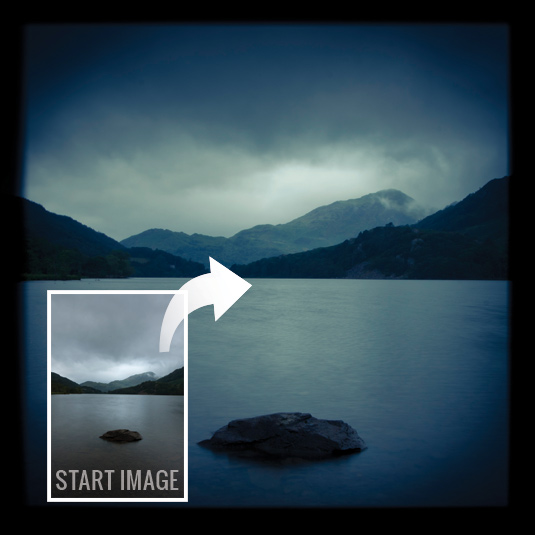
The option to add retro effects to your photographs is now a required tool in any self-respecting photo editor on the App Store. In fact, adding retro effects to photos on your mobile phone has made a few people as rich as Croesus.
- Don't forget to check out our Photoshop CS6 review
Forget these automated apps, though! In this tutorial we'll show you how to add these effects manually, using Adobe Camera Raw in Photoshop CS6 (and earlier versions), to any photo you choose. Not happy with the final result? You have the option to tweak your settings until you get the right result.
So, get ready to dive in. We've even supplied an image to help you get started.
01. Square crop
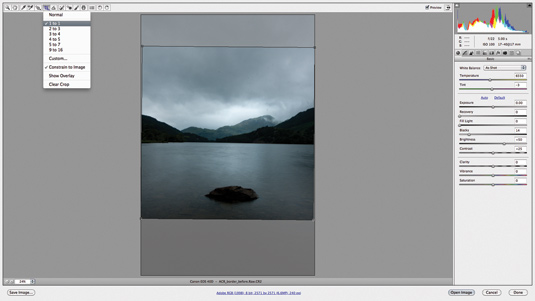
Open the image from the link above in Adobe Camera Raw (ACR). Click onthe Crop tool and select 1:1 aspect ratio fromthe drop-down. Select the Straighten tool and mark a line along the horizon of the lake.
02. Split tone
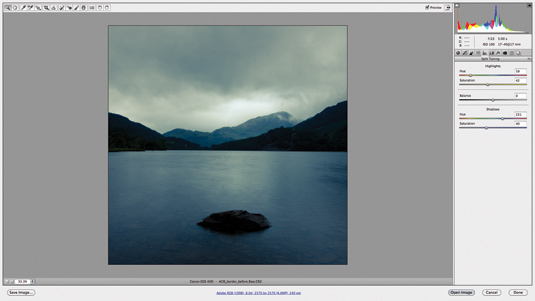
Move to the Split Tone tab and select a yellowish hue for the highlights (about 60) and set Saturation to about 40. Set the shadows’ Hue slider to about 230 and the Saturation slider to 40 to give the darker tones a blue tint.
03. Border effects
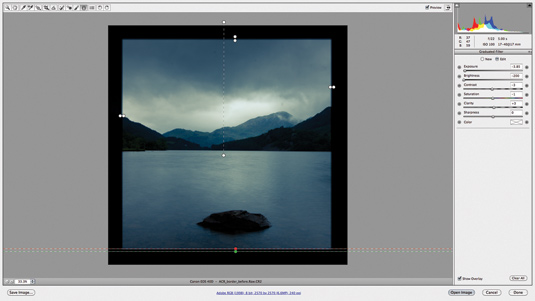
Select the Graduated Filter from the main menu. Set Exposure to -4.00 and Brightness to -200. Make a mark about 10mm in from one edge and create a very small gradient of about 2mm. Repeat this on all four sides to make a thick black border.
04. Add a vignette
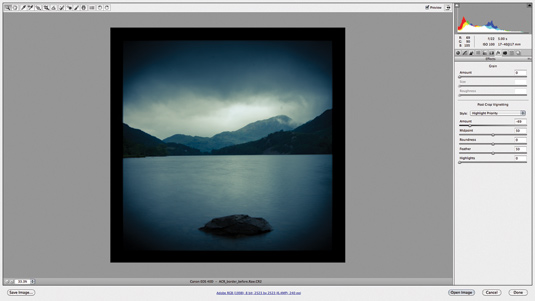
For the finishing touches to the image, we’ll darken the corners to help draw the viewer’s eye into the frame and add to the retro style. Go to the Effects tab and set the Post Crop Vignette Amount to about -50.
Sign up to Creative Bloq's daily newsletter, which brings you the latest news and inspiration from the worlds of art, design and technology.
This article first appeared in Practical Photoshop magazine, the ultimate resource for creating sensational images!

The Creative Bloq team is made up of a group of art and design enthusiasts, and has changed and evolved since Creative Bloq began back in 2012. The current website team consists of eight full-time members of staff: Editor Georgia Coggan, Deputy Editor Rosie Hilder, Ecommerce Editor Beren Neale, Senior News Editor Daniel Piper, Editor, Digital Art and 3D Ian Dean, Tech Reviews Editor Erlingur Einarsson, Ecommerce Writer Beth Nicholls and Staff Writer Natalie Fear, as well as a roster of freelancers from around the world. The ImagineFX magazine team also pitch in, ensuring that content from leading digital art publication ImagineFX is represented on Creative Bloq.
