How to manage your animation assets
Director, designer and animator Thiago Maia explains how to prepare and organise Photoshop assets for animation.
Sign up to Creative Bloq's daily newsletter, which brings you the latest news and inspiration from the worlds of art, design and technology.
You are now subscribed
Your newsletter sign-up was successful
Want to add more newsletters?
Many designers work on projects that will be animated. With long hours and tough deadlines, it's easy to let organisation slide, but picking up a job in which nothing makes sense – with folders and layers all over the place – is an animator's worst nightmare.
It doesn't matter whether you'll be animating the project or someone else. Knowing how to prepare assets and keep them organised is good practice and makes it easy for other people to work on the project.
In this tutorial, we're going to cover some key asset management skills. To do so, we're going to use an example PSD that's badly set up for animating – so, first of all, download the relevant PSD file...
Article continues below01. Open the PSD file
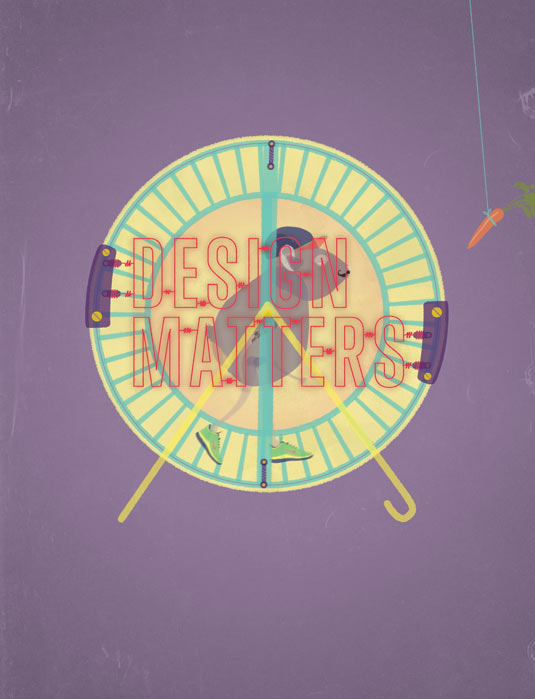
Open your downloaded designmatters_prep.psd file. Notice that the layer names are confusing and there are clipping and layer masks that need removing. Save a copy of the project to work on. Save the file as something like 'designmatters_ready.psd' (or choose a filename that fits with your workflow).
02. Start to clean it up
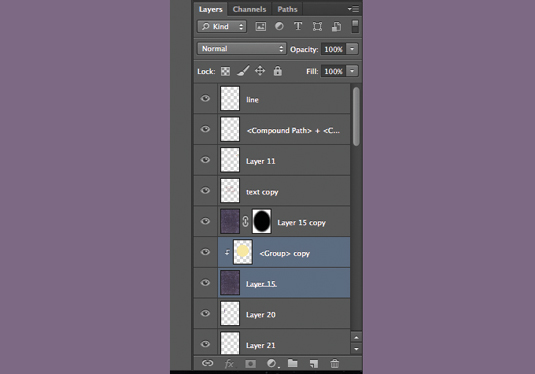
On the example file, we have a clipping mask on <Group> copy and Layer 15. Merge these layers. Analyse what's actually in the layers and give them names that relate to their content. You can isolate your layers by Opt/Alt-clicking on the eye icon next to a layer. Name everything up accordingly.
03. Merge your layers
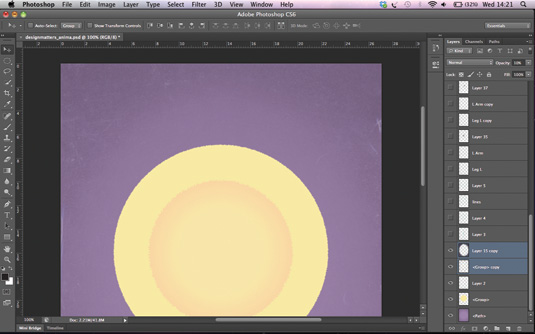
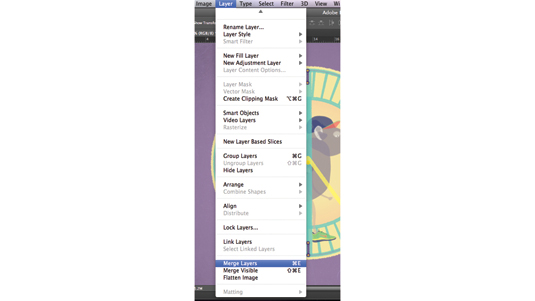
The Design Matters Text layer contains the background texture. Select both layers and move them so they are above Layer 2. Now select the bottom three layers so that five are highlighted. Shift-select the last layer, <Path>. Merge these using Cmd/Ctrl+E and rename the new layer 'Background'.
04. Animate mutliple layers as one
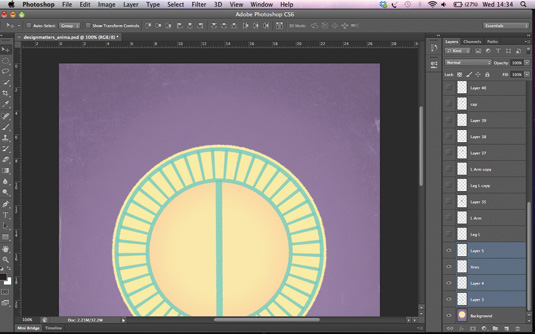
The four layers above the background layer are part of the character wheel which will animate as one. Select all four layers (Layer 3, Layer 4, line and Layer 5) and merge them. Name the layer something easy to understand – we've called it 'Wheel'. You can put simple notes to the animator in the layer name.
Sign up to Creative Bloq's daily newsletter, which brings you the latest news and inspiration from the worlds of art, design and technology.
05. Set-up a pre-comp
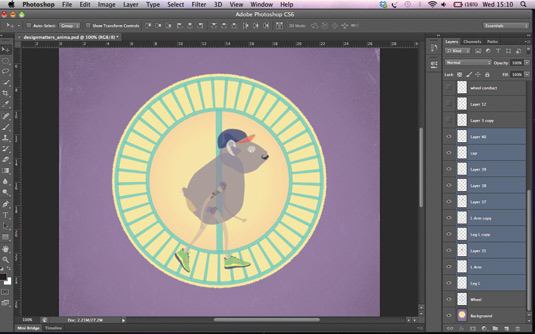
When you group layers in Photoshop the group comes into After Effects as a pre-comp – this is helpful when animating characters. Select the 10 (our character layers) above the Wheel layer. In the Layer menu go to New>Group from Layers…. In the pop-up menu, name the group Character.
06. Manage your layers
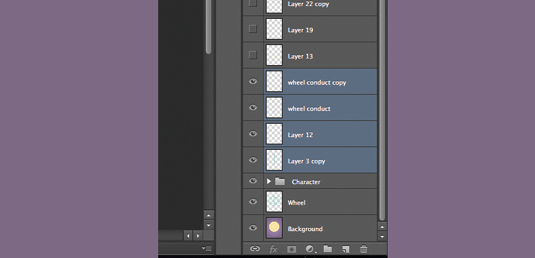
The four layers above our Character group are from the front part of our animating wheel. We need them separated from the wheel, as they need to be on the top of our Character. Select and merge the four layers (you can use the flyout from the Layers panel). Rename the new merged layer to 'Wheel Front'.
07. Look at non-animating layers
Select the two layers above Wheel Front, merge and rename them 'Wheel Support'. Rename the layers above: 'Layer 22 copy' to 'Right_Neon Support', 'Layer 21 copy' to 'Right_Neon' and 'Layer 22 copy' to 'Right Magnetic'. Likewise, rename the three layers above 'Right_Magnetic', this time using a Left_ prefix.
08. Finalise your Groups
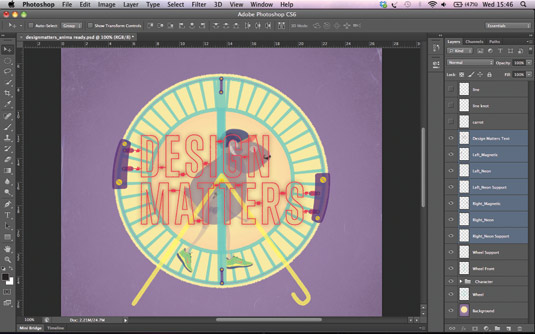
Group all the layers related to the neon text and magnetic parts. Select the Design Matters Text layer down to the layer Right_Neon Support. Make a new group. Assign a colour to the group if you like. You can also change the opacity of the group as a whole from the Layer>New>Group from Layers… panel.
09. Separate your characters
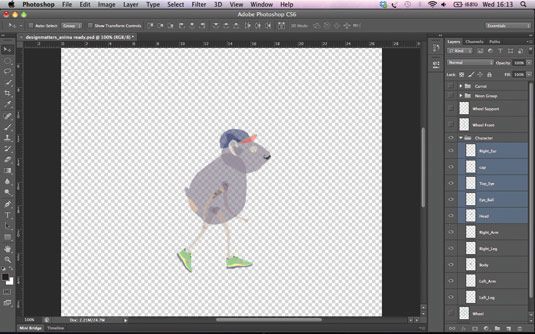
Expand the Character group in the Layers panel using the dropdown arrow. Rename the elements to indicate parts of the character's anatomy. Select the top five layers of the group and create a group called 'Head'. Save the file and you have an animation-ready PSD. See our example here.
Words: Thiago Maia
This article first appeared in the showcase section of Computer Arts issue 231, Self-Promo to Suit You – 100 pages on how to win more design work by playing to the strengths of your personality, and much more.

The Creative Bloq team is made up of a group of art and design enthusiasts, and has changed and evolved since Creative Bloq began back in 2012. The current website team consists of eight full-time members of staff: Editor Georgia Coggan, Deputy Editor Rosie Hilder, Ecommerce Editor Beren Neale, Senior News Editor Daniel Piper, Editor, Digital Art and 3D Ian Dean, Tech Reviews Editor Erlingur Einarsson, Ecommerce Writer Beth Nicholls and Staff Writer Natalie Fear, as well as a roster of freelancers from around the world. The ImagineFX magazine team also pitch in, ensuring that content from leading digital art publication ImagineFX is represented on Creative Bloq.
