Give a portrait a soft-focus background
Bring your subject to the forefront by creating a soft-focus background with a little help from filters and customised brush tips.
Daily design news, reviews, how-tos and more, as picked by the editors.
You are now subscribed
Your newsletter sign-up was successful
Want to add more newsletters?

Five times a week
CreativeBloq
Your daily dose of creative inspiration: unmissable art, design and tech news, reviews, expert commentary and buying advice.

Once a week
By Design
The design newsletter from Creative Bloq, bringing you the latest news and inspiration from the worlds of graphic design, branding, typography and more.

Once a week
State of the Art
Our digital art newsletter is your go-to source for the latest news, trends, and inspiration from the worlds of art, illustration, 3D modelling, game design, animation, and beyond.

Seasonal (around events)
Brand Impact Awards
Make an impression. Sign up to learn more about this prestigious award scheme, which celebrates the best of branding.
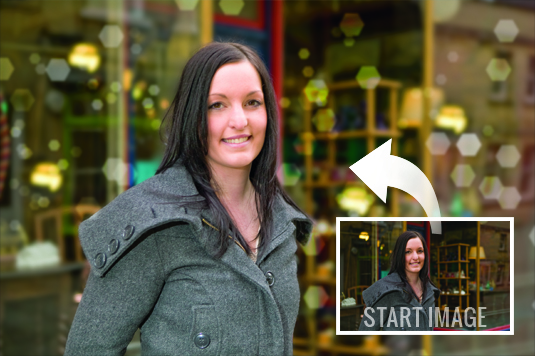
By shooting a portrait with a wide aperture setting you can keep your subject looking sharp while blurring out the background. This blur (or bokeh) effect can turn background clutter into a wash of abstract colours and delicate shapes that complement the subject rather than distract the eye.
If you use your camera’s Mode dial to select the preset Portrait mode the camera will use a wide aperture (such as f/4), but you’ll have no control over the strength of the background blur. Indeed, parts of the foreground subject may also appear blurred.
For this reason, it makes sense to take control of the bokeh effect in Photoshop. It’s easy enough to select and protect the subject, then blur the background to make it less distracting, but this won’t necessarily create a realistic bokeh effect.
Blurred highlights
When you shoot bright light sources with a wide aperture you’ll sometimes see blurred highlights as soft polygonal shapes. These polygonal highlights add colour and texture to the blurred background.
We've shown you previously how to quickly create a bokeh effect, but this time we’ll show you a simple way to blur the background of a portrait before modifying a brush tip’s attributes in order to create complex and authentic-looking bokeh highlights.
The guide below shows how to get the look using Photoshop Elements 8 or above, but you can use Photoshop CS up to and including Photoshop CS6 too.
Click here to download start image
01. Make a selection
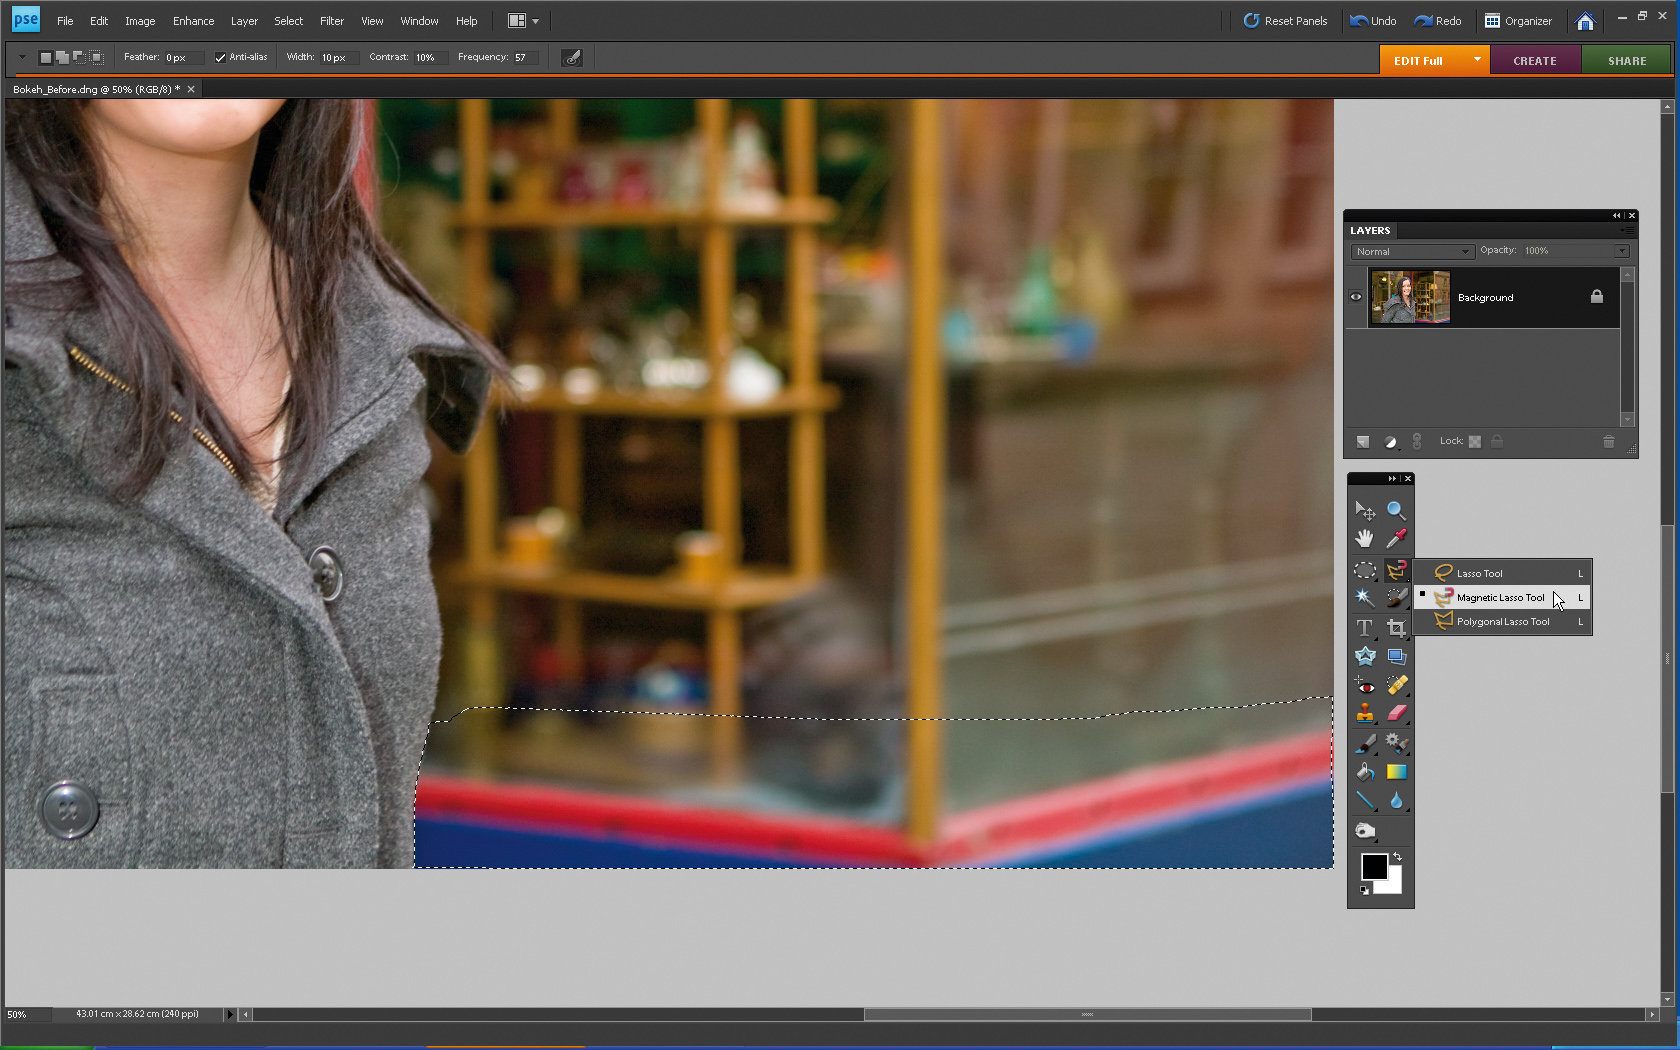
In Photoshop Elements, open the image named bokeh_before.jpg. Go to Window and choose Layers from the drop-down menu to open the Layers palette. You’ll see that the bottom-right of the shop window is a little distracting, so we’ll clone it out. Use the Magnetic Lasso tool to select the bottom-right edge of the girl and the lower section of the shop (as above). Grab the Clone Stamp tool.
Daily design news, reviews, how-tos and more, as picked by the editors.
02. Clone out the distractions
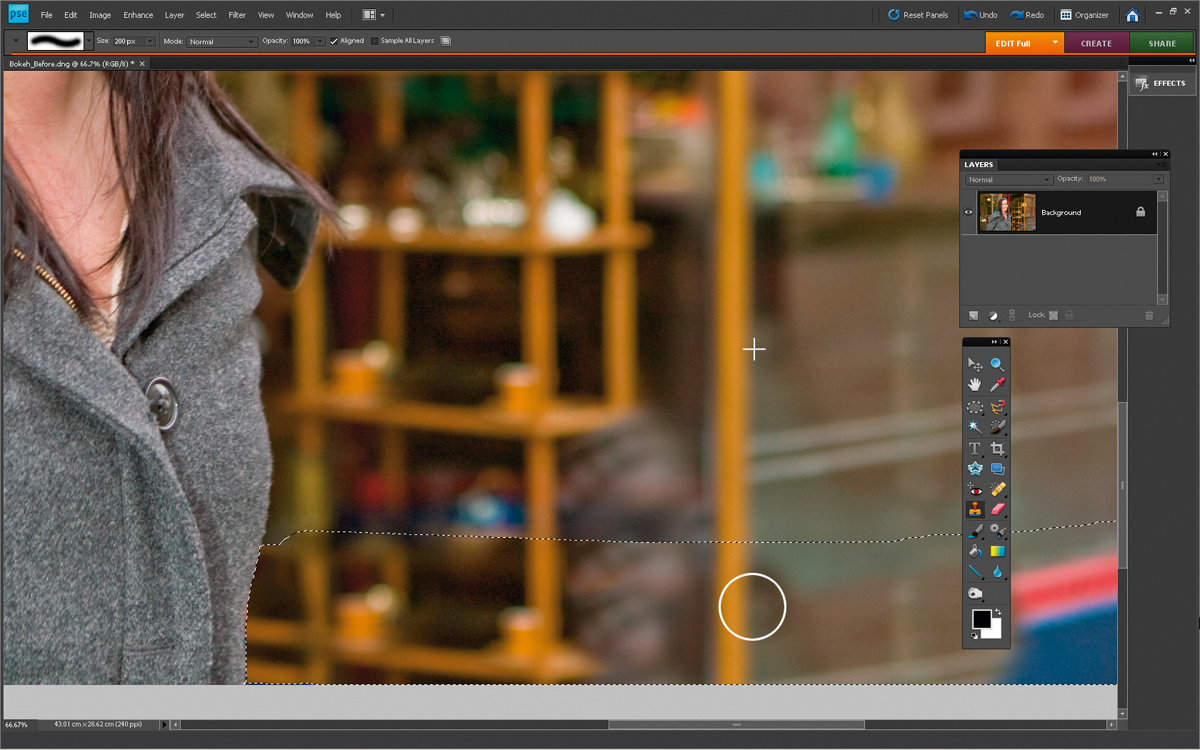
Click on the Brush preset picker in the top Options bar and choose a soft-edged brush tip with a Size of 200 pixels. Position the cursor over the orange vertical window frame and press the Alt key to sample it. Place the cursor over the unwanted red and blue area, then click to extend the sampled window down into the selected area.
03. Add a blur
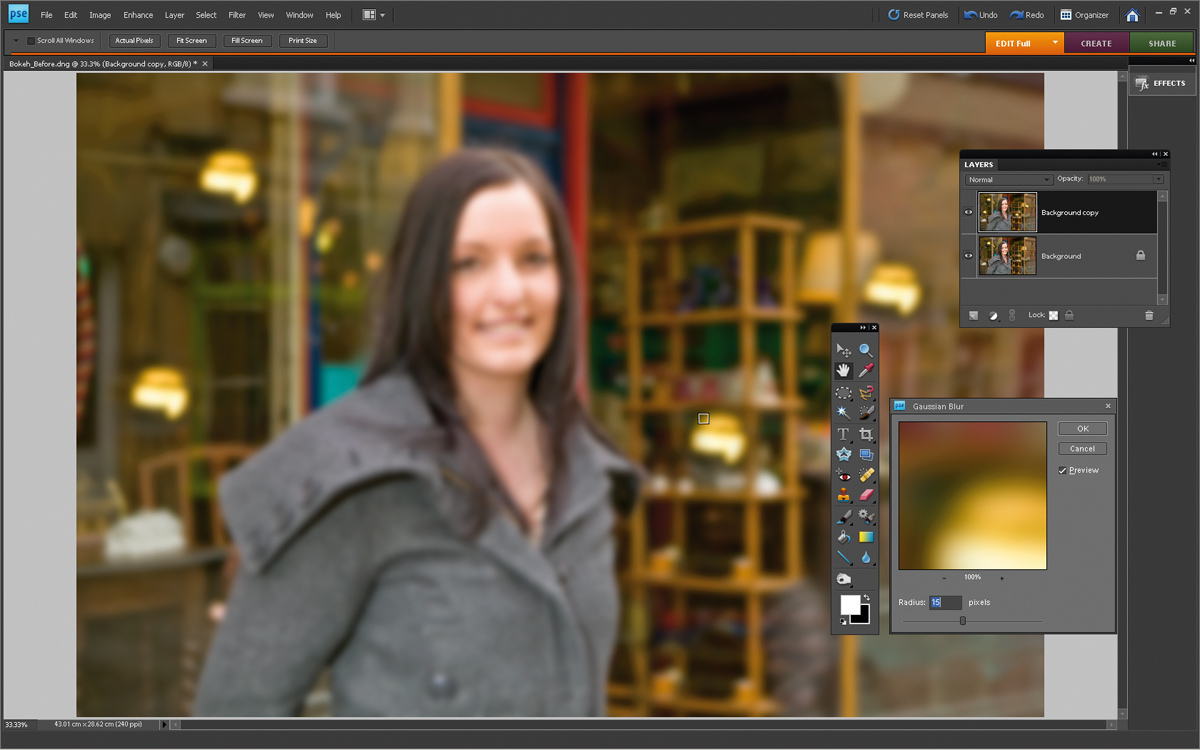
To add more light sources to the background, Alt-click on the yellow light and clone it into other parts of the shot. Duplicate the image by dragging the ‘Background’ layer onto the Create A New Layer icon at the bottom of the Layers palette. Next, go to Filter>Blur>GaussianBlur. A value of 15 will create a nice, soft bokeh.
04. Reveal the girl
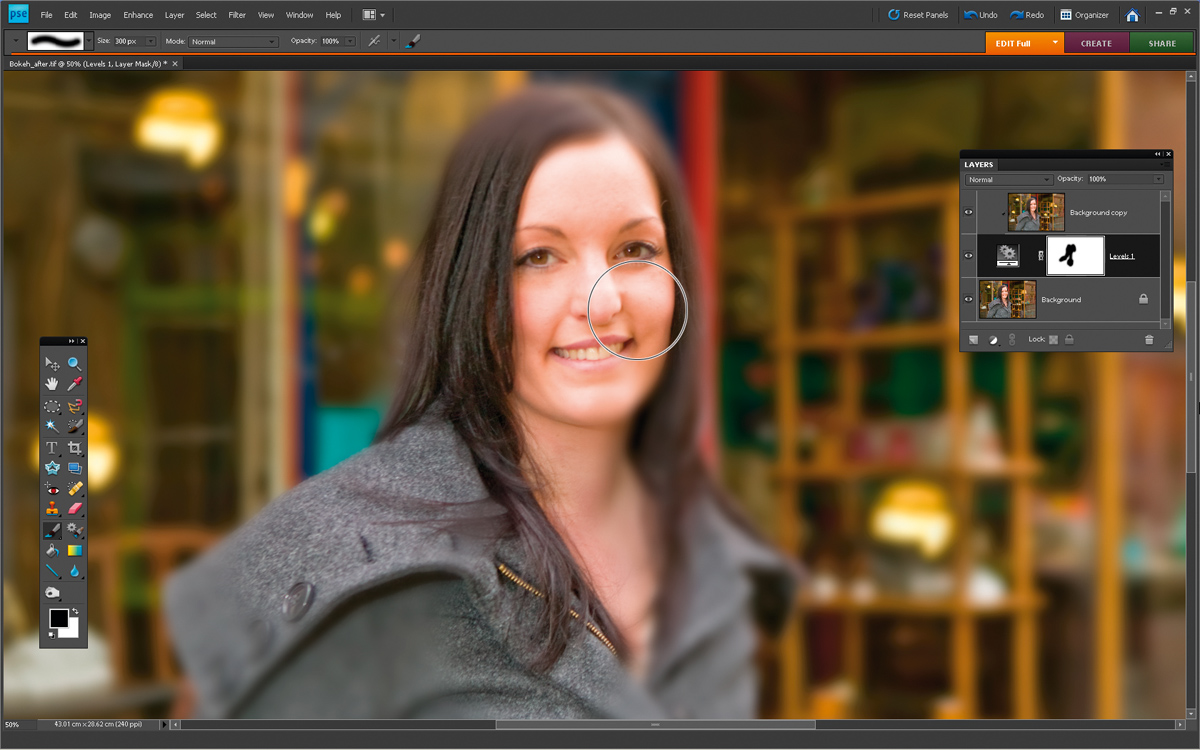
Add a Layer Mask to the blurred ‘Background copy’ layer. Grab the Brush tool from the Tools palette, then select a soft-edged brush with a Size of 300 pixels. Set the foreground colour to black, then click on the white ‘Levels 1’ mask before spraying over the girl to reveal the sharper version on the layer below.
05. Create a new document
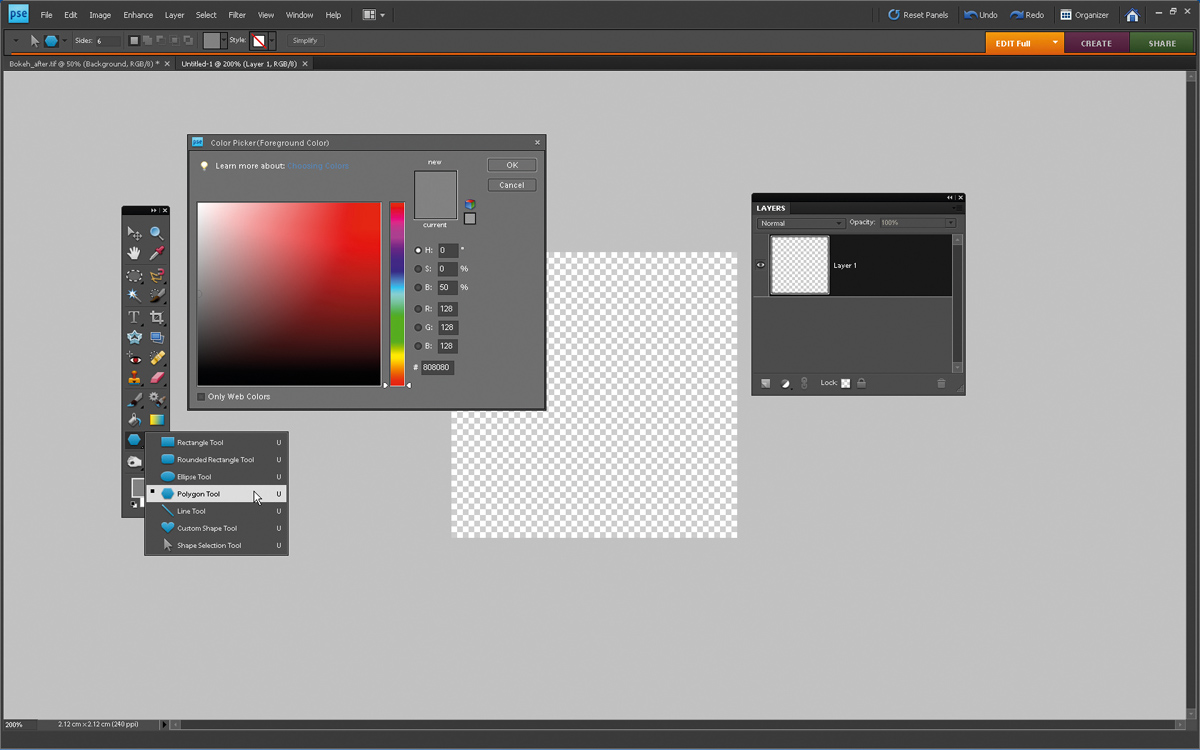
Go to File>New>BlankFile, then set Width and Height to 200 pixels. Set Background Contents to Transparent and click OK. Click on the Foreground Colour icon in the Tools palette. In the Colour Picker that appears, choose a grey with R, G and B values of 128. Click OK. Now select the Polygon tool from the Tools palette.
06. Draw a brush tip
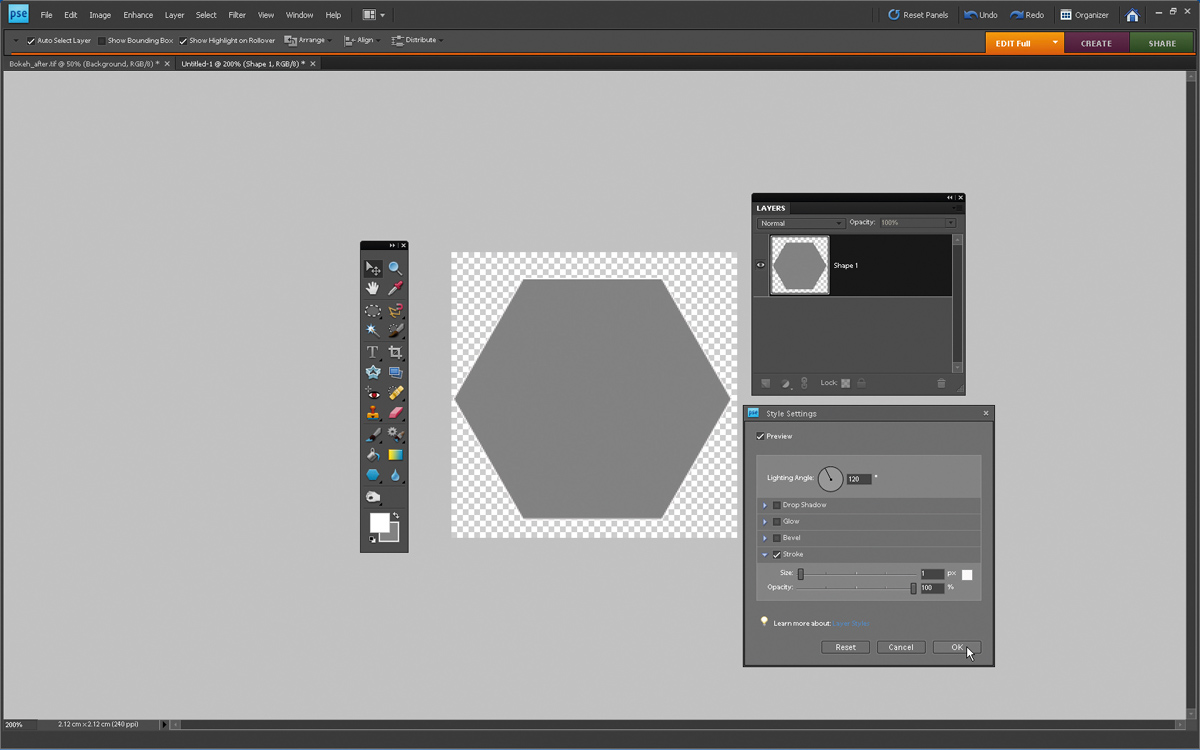
In the top Options bar, set Sides to 6. Click and draw a hexagon. In the Layers palette, right-click on the Shape layer’s thumbnail and choose Simplify Layer from the menu that appears. Go to Layer>LayerStyle>StyleSettings, tick Stroke, set Size to 1, Colour to White and click OK.
07. Modify the brush tip
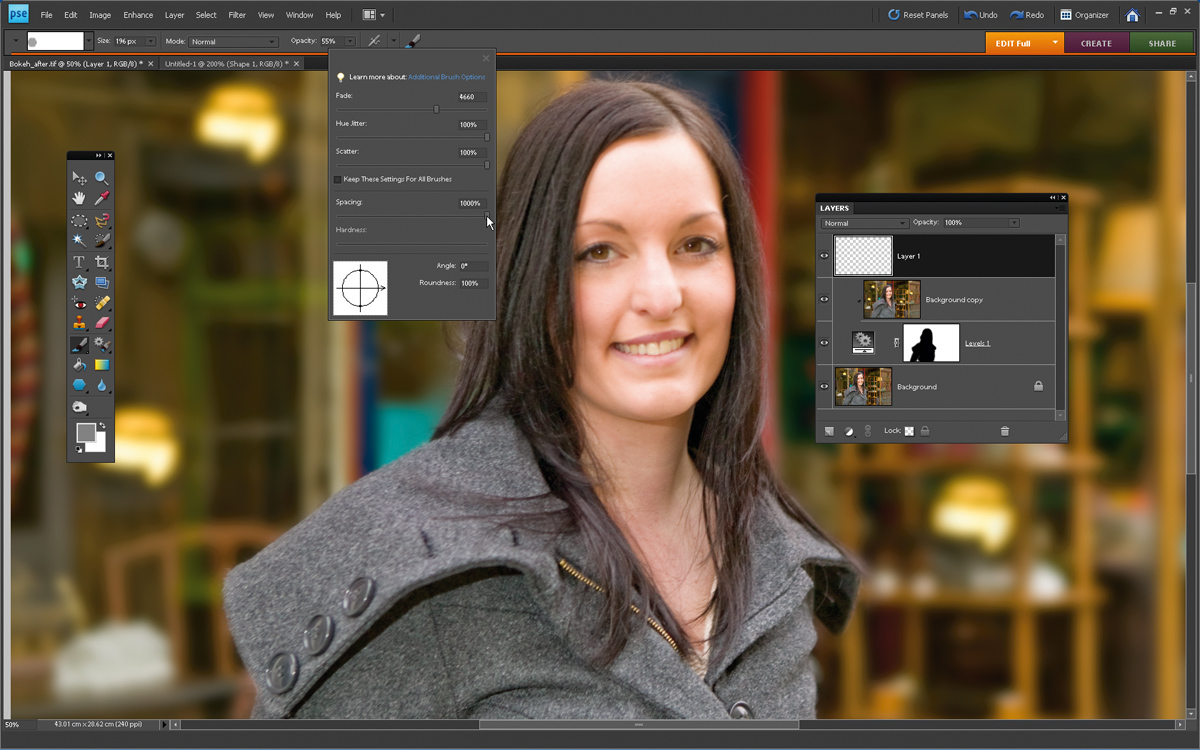
Go to Edit>DefineBrush and label the new brush ‘Bokeh Brush’. Click OK. Next, go back to the portrait and select the Brush tool. Select the Bokeh Brush from the bottom of the Brush Preset picker. Click Brush Dynamics and set Fade to 4600, Hue Jitter and Scatter to 100%, and Spacing to 1000%.
08. Add bokeh highlight shapes
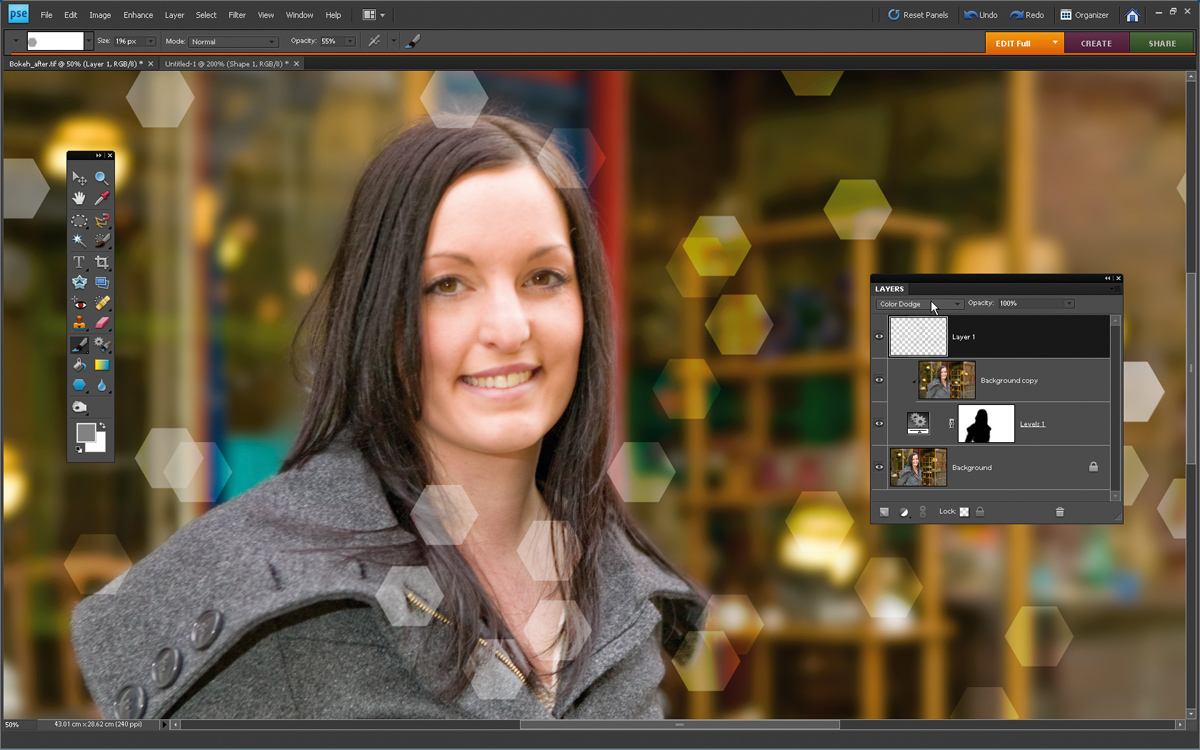
Create a new layer, then drag it to the top of the layer stack. Click and spray the Bokeh Brush over the image. A couple of clicks will add dozens of hexagonal highlights. To get the grey shapes to take on the colours of the background, set the brush layer’s Blending Mode to Colour Dodge using the menu at the top of the Layers palette.
09. Tidy up and blur
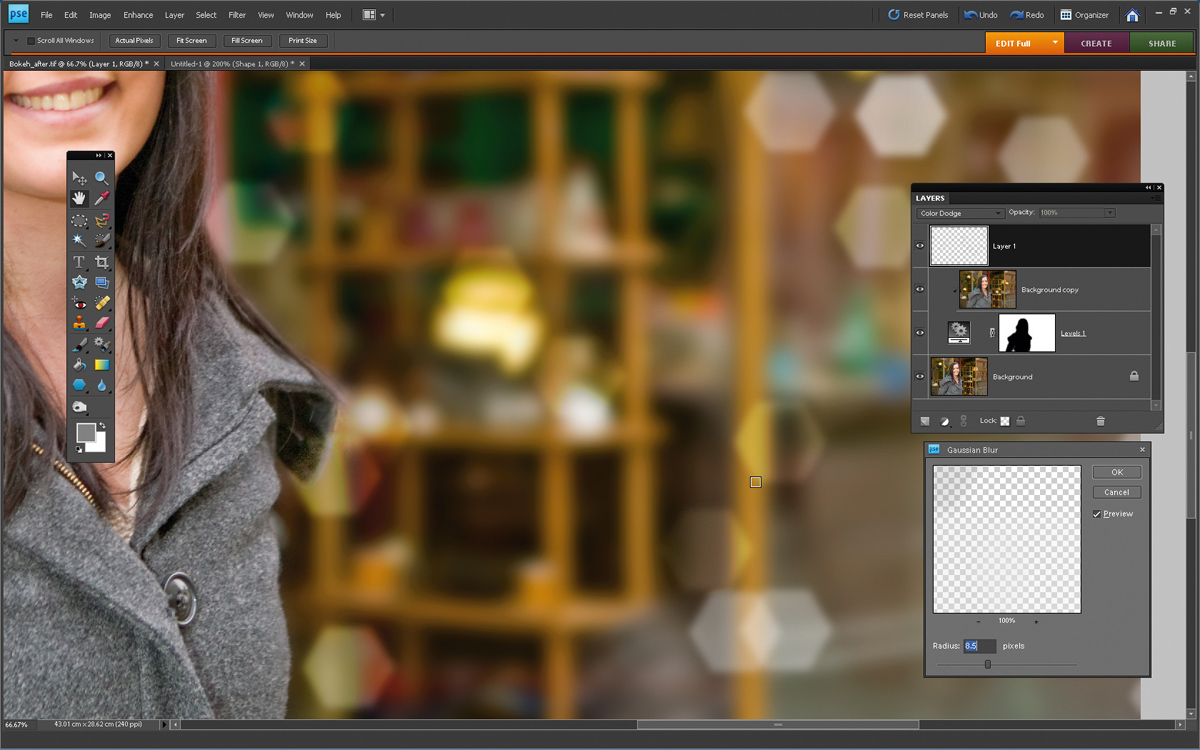
Grab the Eraser tool and then use it to spray over any of your added highlights that overlap the model. To create more authentic-looking soft-focus bokeh highlights, go to Filter>Blur>GaussianBlur and set Radius to 8.5. The hexagonal-shaped highlights will merge more naturally with the background blur.
10. Add extra layers
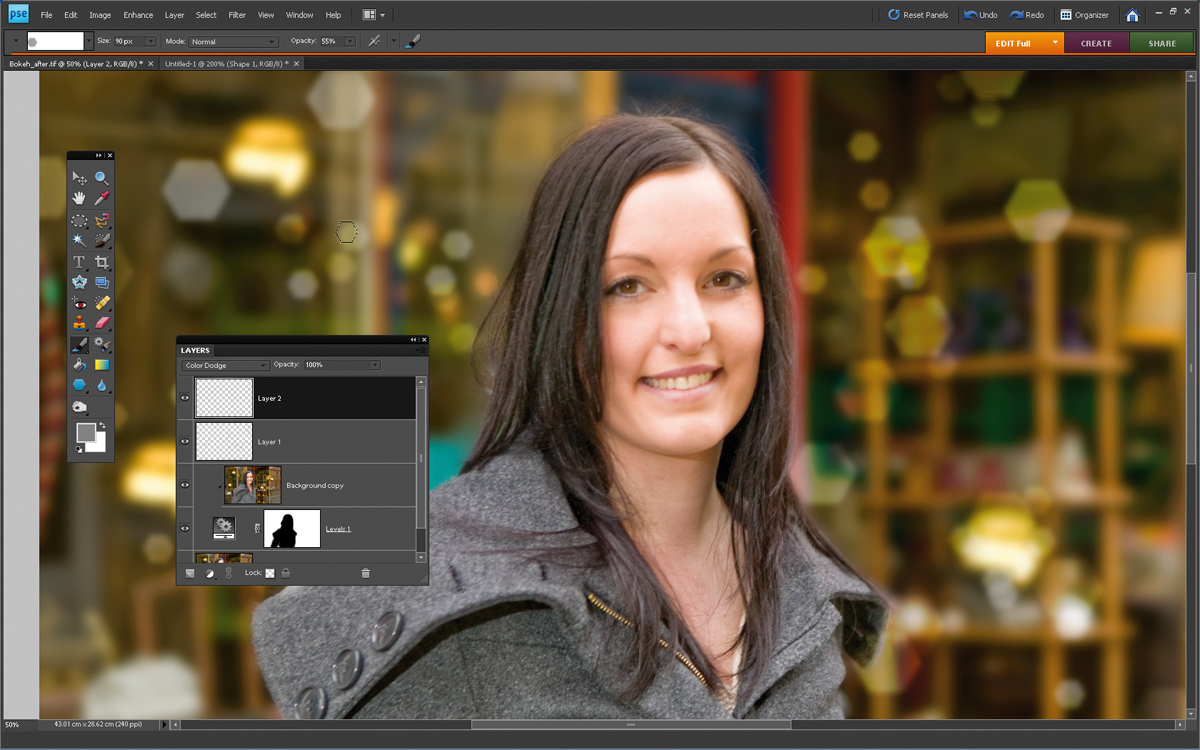
Create a new blank layer and reduce the Bokeh Brush tip’s Size to 90 in the top options bar to produce smaller specular highlights. Spray the tip on the new layer and repeat steps 8 and 9 to blend and blur the new shapes. This allows you to build up a more complex and realistic bokeh highlight effect.
This tutorial first appeared in Portrait Photography Made Easy - a bookazine from the makers of PhotoPlus.
Now read:
- 30 free Photoshop brushes every creative must have!
- 101 Photoshop tutorials
- 20 best Photoshop plugins

The Creative Bloq team is made up of a group of art and design enthusiasts, and has changed and evolved since Creative Bloq began back in 2012. The current website team consists of eight full-time members of staff: Editor Georgia Coggan, Deputy Editor Rosie Hilder, Ecommerce Editor Beren Neale, Senior News Editor Daniel Piper, Editor, Digital Art and 3D Ian Dean, Tech Reviews Editor Erlingur Einarsson, Ecommerce Writer Beth Nicholls and Staff Writer Natalie Fear, as well as a roster of freelancers from around the world. The ImagineFX magazine team also pitch in, ensuring that content from leading digital art publication ImagineFX is represented on Creative Bloq.
