I built my own laptop, and you can do it, too
Here's how.
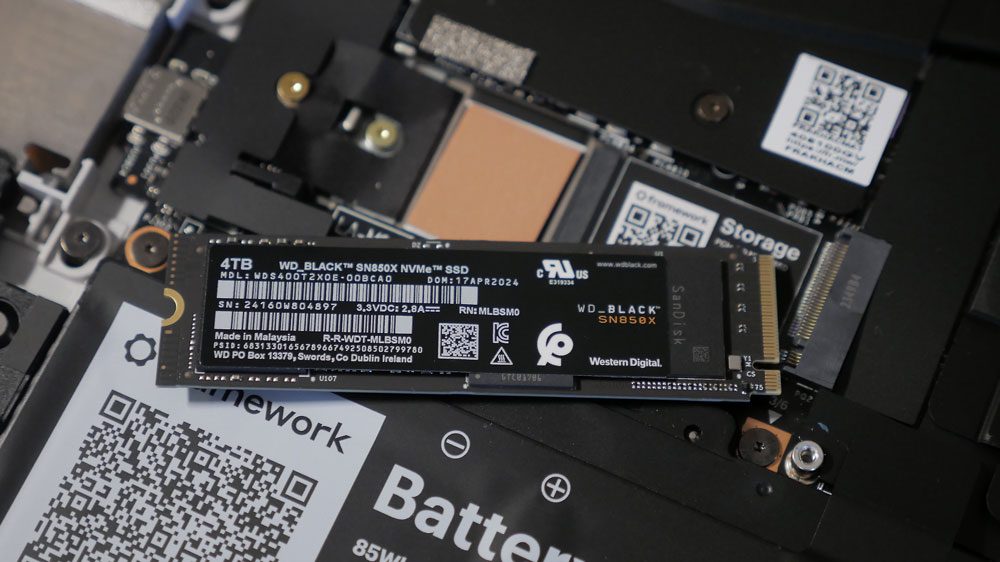
Earlier this season we brought you an article on building your own workstation. While not for the terminally clumsy, putting together the handful of parts that make up a modern computer has gotten easier and easier. And we still get to save a lot of money in the process.
But building your own laptop, for all intents and purposes, has never really been a thing (none of the best graphic design laptops are built in this way, for example). Why? Because the miniaturisation required to create a modern laptop necessitated a lot of custom design so the parts were rarely “industry standard” as desktop components (such as the best computers for graphic design) have long been.
Enter Framework
As with many product categories, modern design has put an end to tinkerers. Gone are the days when your Dad could spend Saturday afternoon tuning up the family car himself. It’s largely the same with computers. Apple Macs and some others even solder ram in, eliminating any upgrades later.
So it’s with a huge breath of fresh air that a company like Framework entered the market in 2020, lead by one Nariv Patel, who had been the head of hardware at Meta’s (aka Facebook) Oculus division. An American company based in California, Framework’s main claim to fame, as I understood it at the time, was to bring to market a laptop computer that could once again be the weekend joy of hardware tinkerers. And that in many ways could compete with the versatility of a desktop machine.
It was a lot more recently I became aware that the very modular Framework laptops, offered in either a 13” or 16” variety, were available as either “Pre-built”, or the very unusual “DIY Edition”. Yep, we can now build our own laptops. Mind blown!
So follow along in this short tutorial as I build my very first laptop, the Framework 16” model. This unit normally sells in its assembled form for $1,699US with Windows 11 installed from the Framework website. The DIY version gives us a rather significant $300 discount as it sells for $1,399. But keep in mind that is without any operating system included. A great option if you plan on installing some flavour of Linux, which is free. Or if you can transfer an existing seat of Windows from another computer. It’s less of a savings if you then need to buy a new license for Windows 11 at $139US. But heck, it’s still a $160+ savings for about an hour of work.
NOTE: As Framework does such a good job with its own step-by-step plus video directions, my goal here will be to add additional thoughts and suggestions along the way.
01. The Unpack
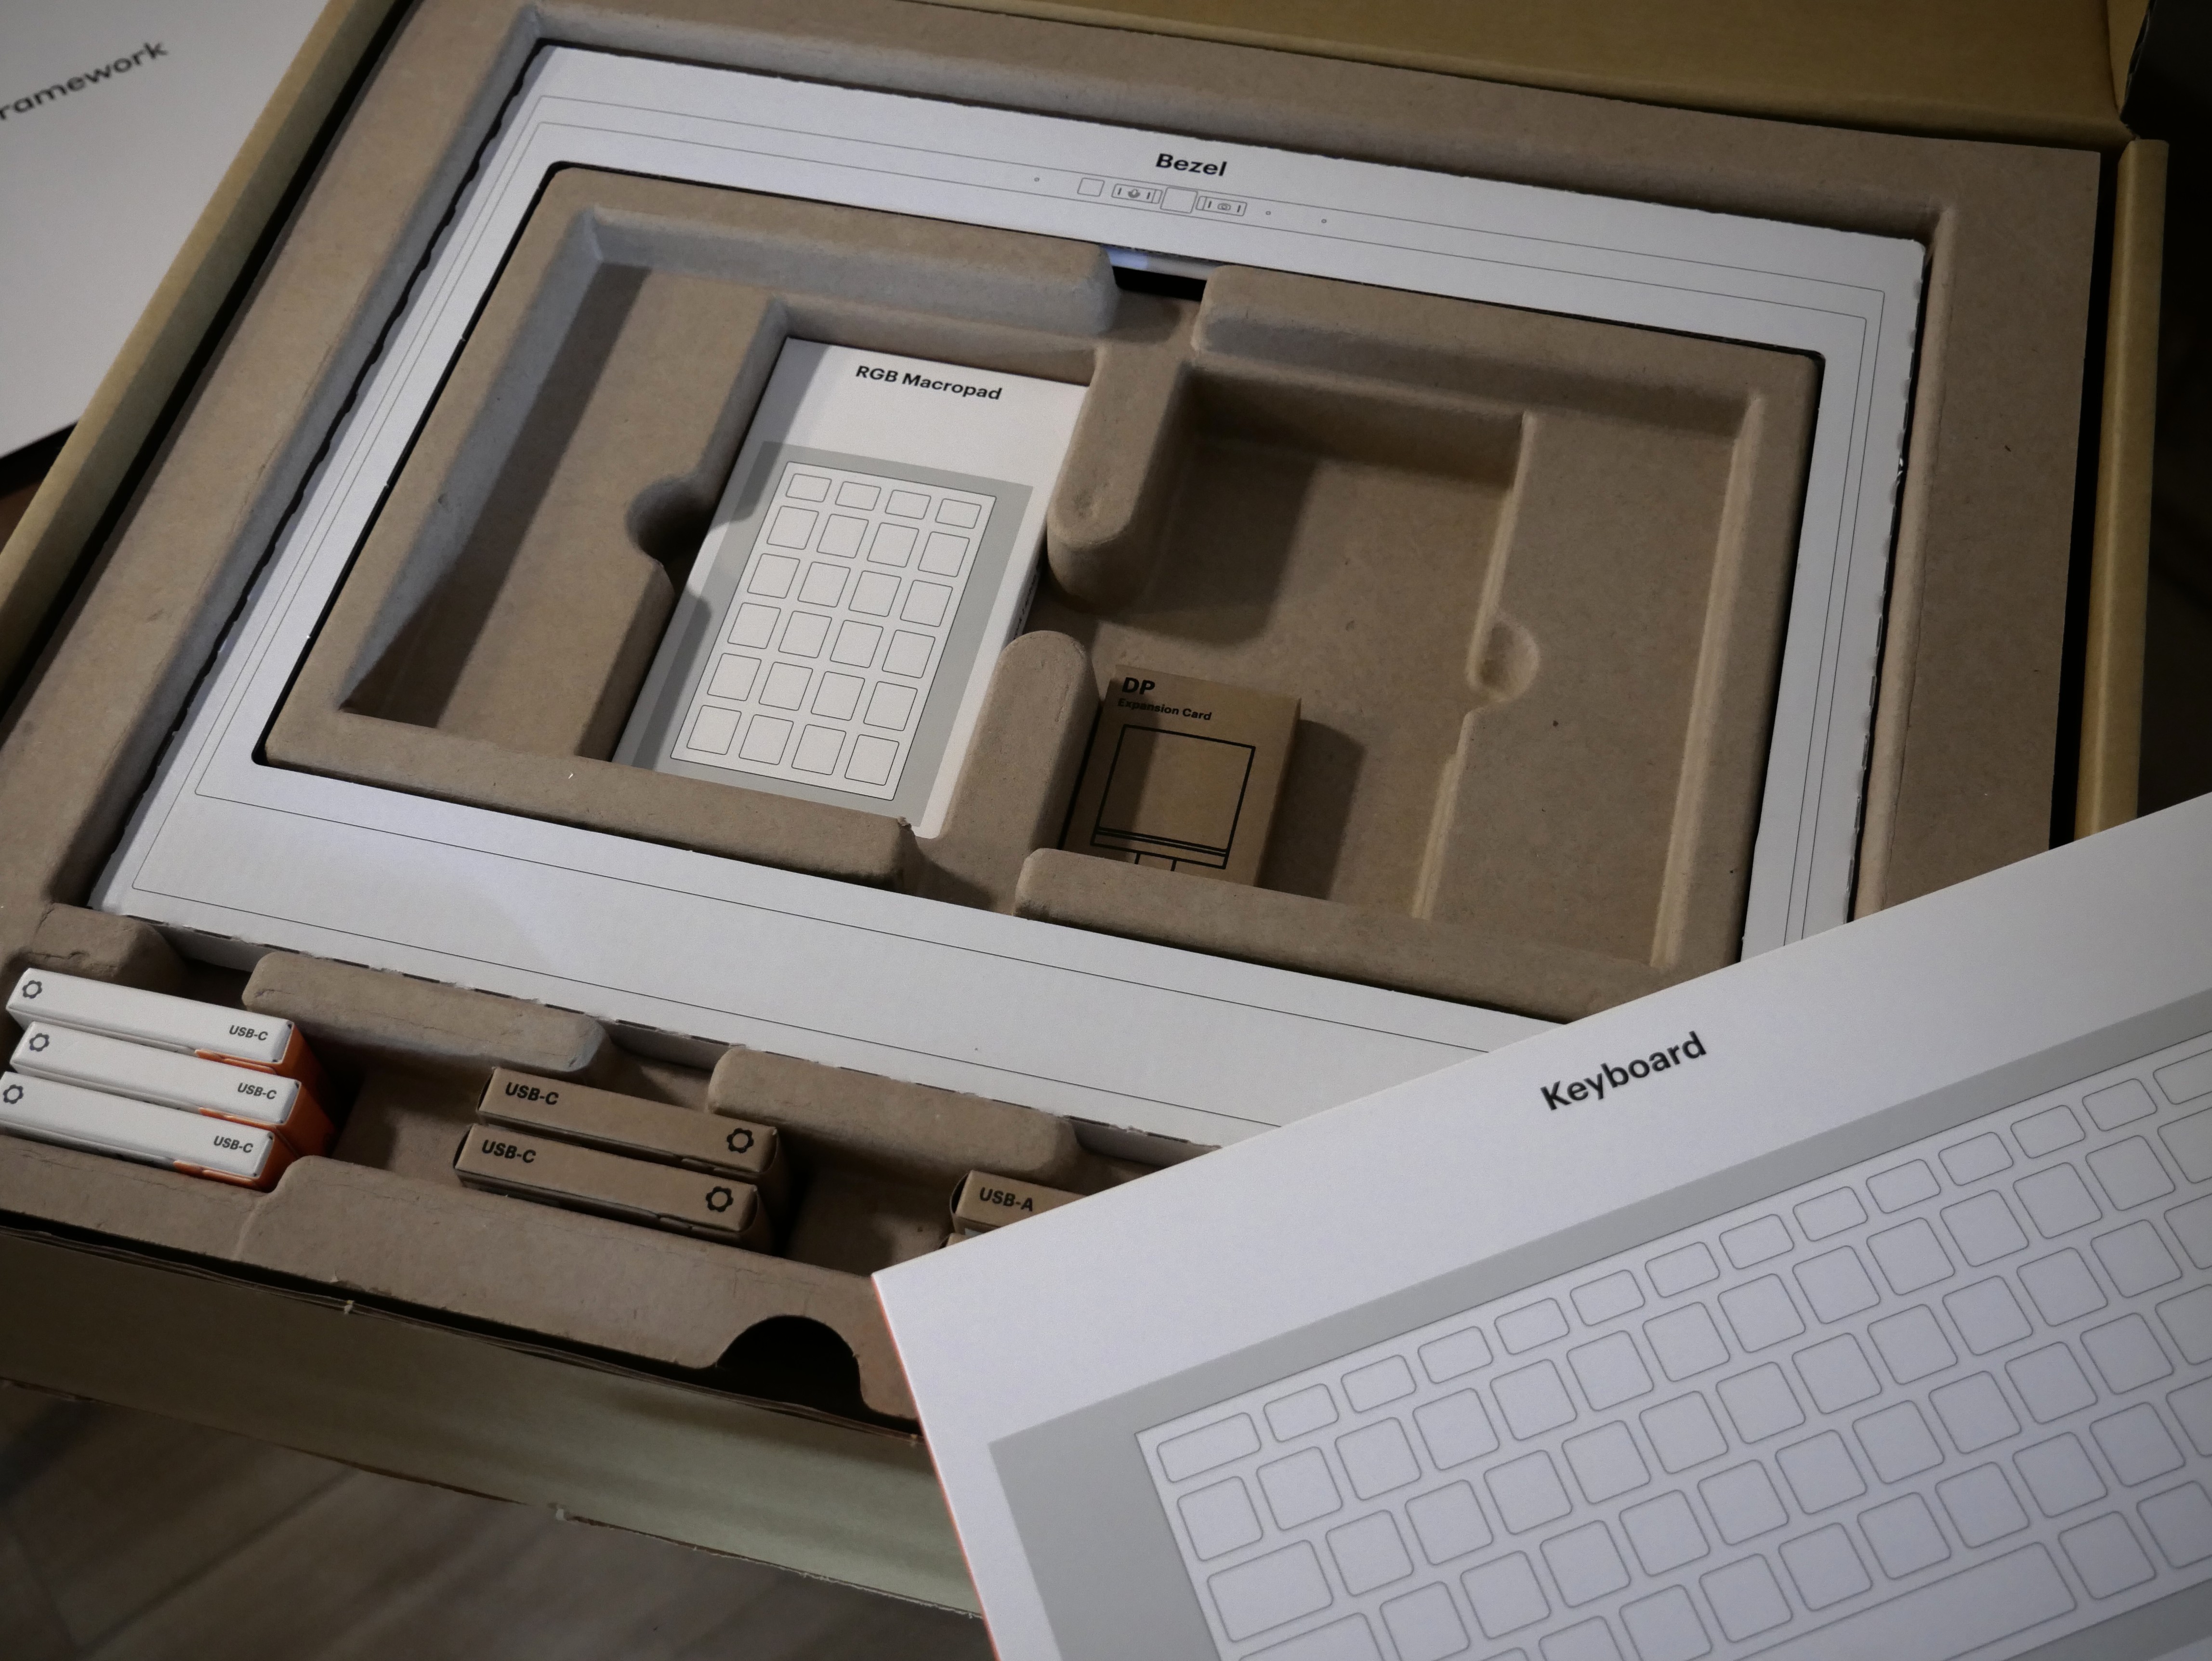
It was no surprise that the unit was well packed using eco-friendly materials. There were no gotchas in unpacking the parts. The only glitch was that looking through the small amount of paperwork included, I could not find assembly instructions, or even a link to any online.
Daily design news, reviews, how-tos and more, as picked by the editors.
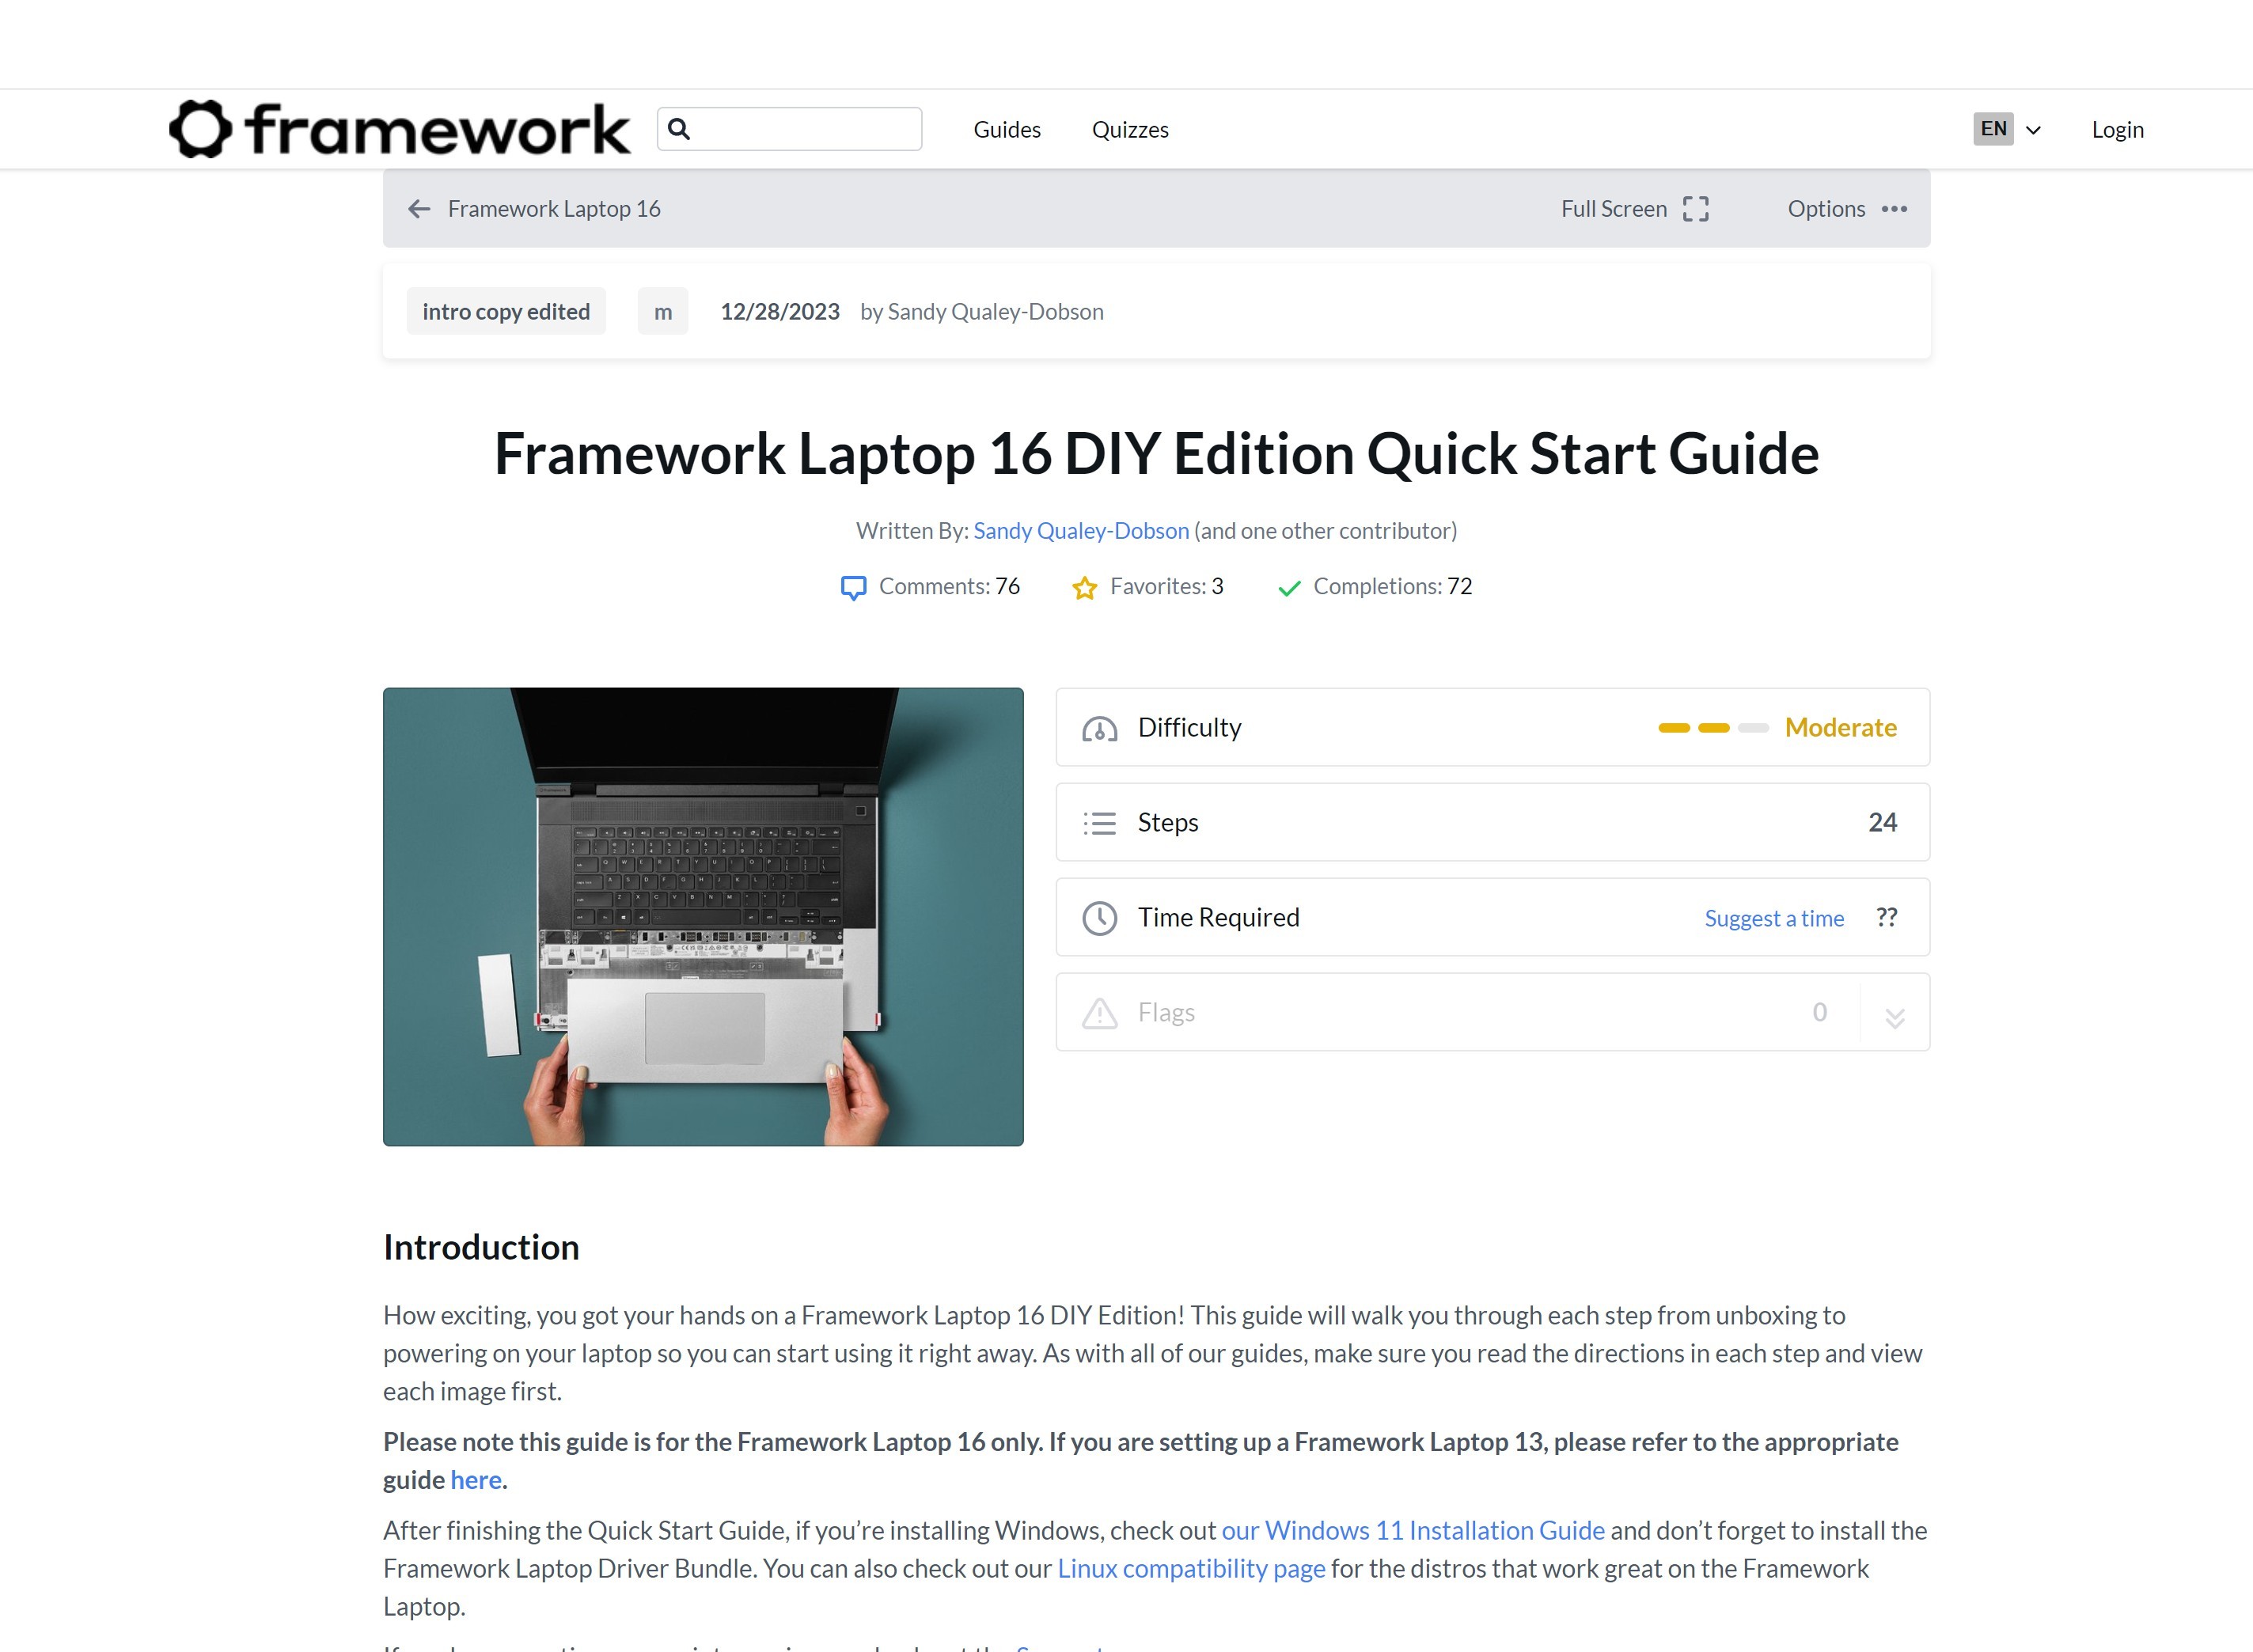
But going to the Framework website was a bit of a revelation. Unlike most product websites that feel like one big advertising opportunity, Framework’s site was clean, lean and mean. Filled with guides on upgrades, how to install Windows, various Linux distros, and the assembly instructions, “Framework Laptop 16 DIY Edition Quick Start Guide”. Videos are provided for most steps to avoid confusion. It is labeled as “Moderate Difficulty”, with 24 steps. The doc says that the power adapter should be included in the box, however in my case that came in a separate package. The “Framework Screwdriver”, a lesser known “torx” tool, was the only tool included, or needed.
02. Power Block
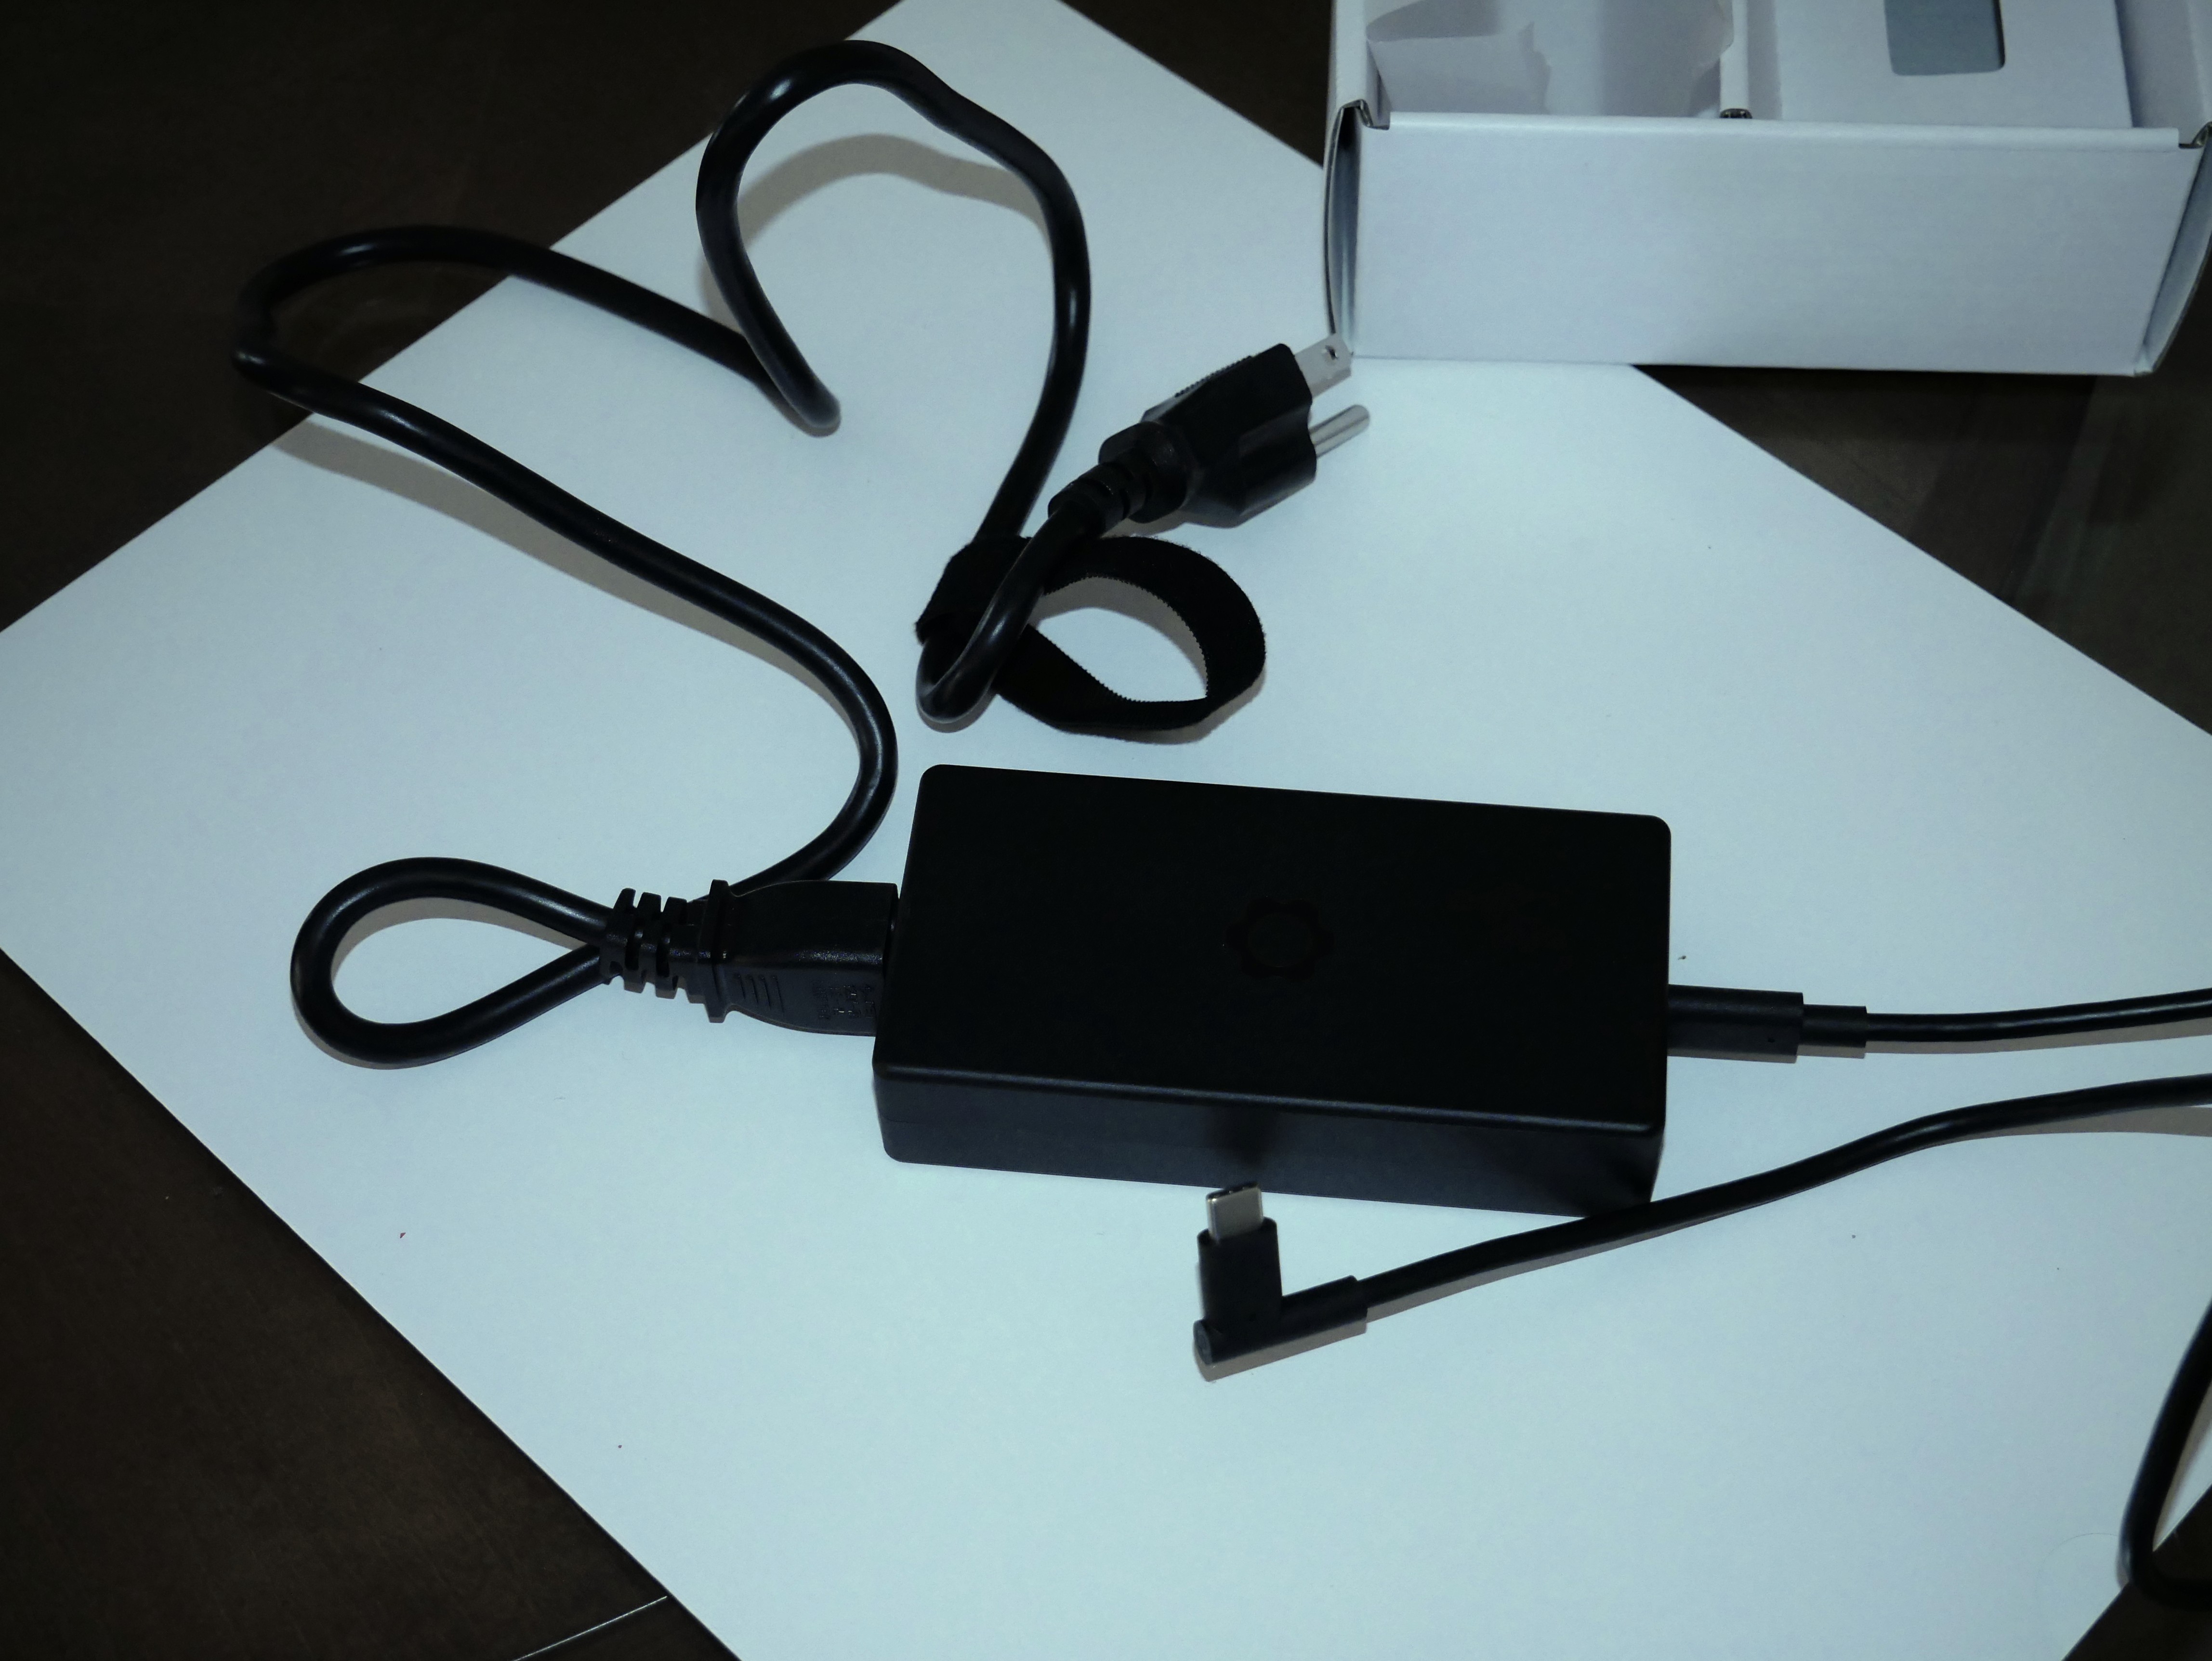
A step that I normally leave to the end, the instructions told me to plug in both sides of the power block. A nice touch, one end of the connection to the laptop, both sides USB-C, offers a right-angle plug.
03. Prep the Install
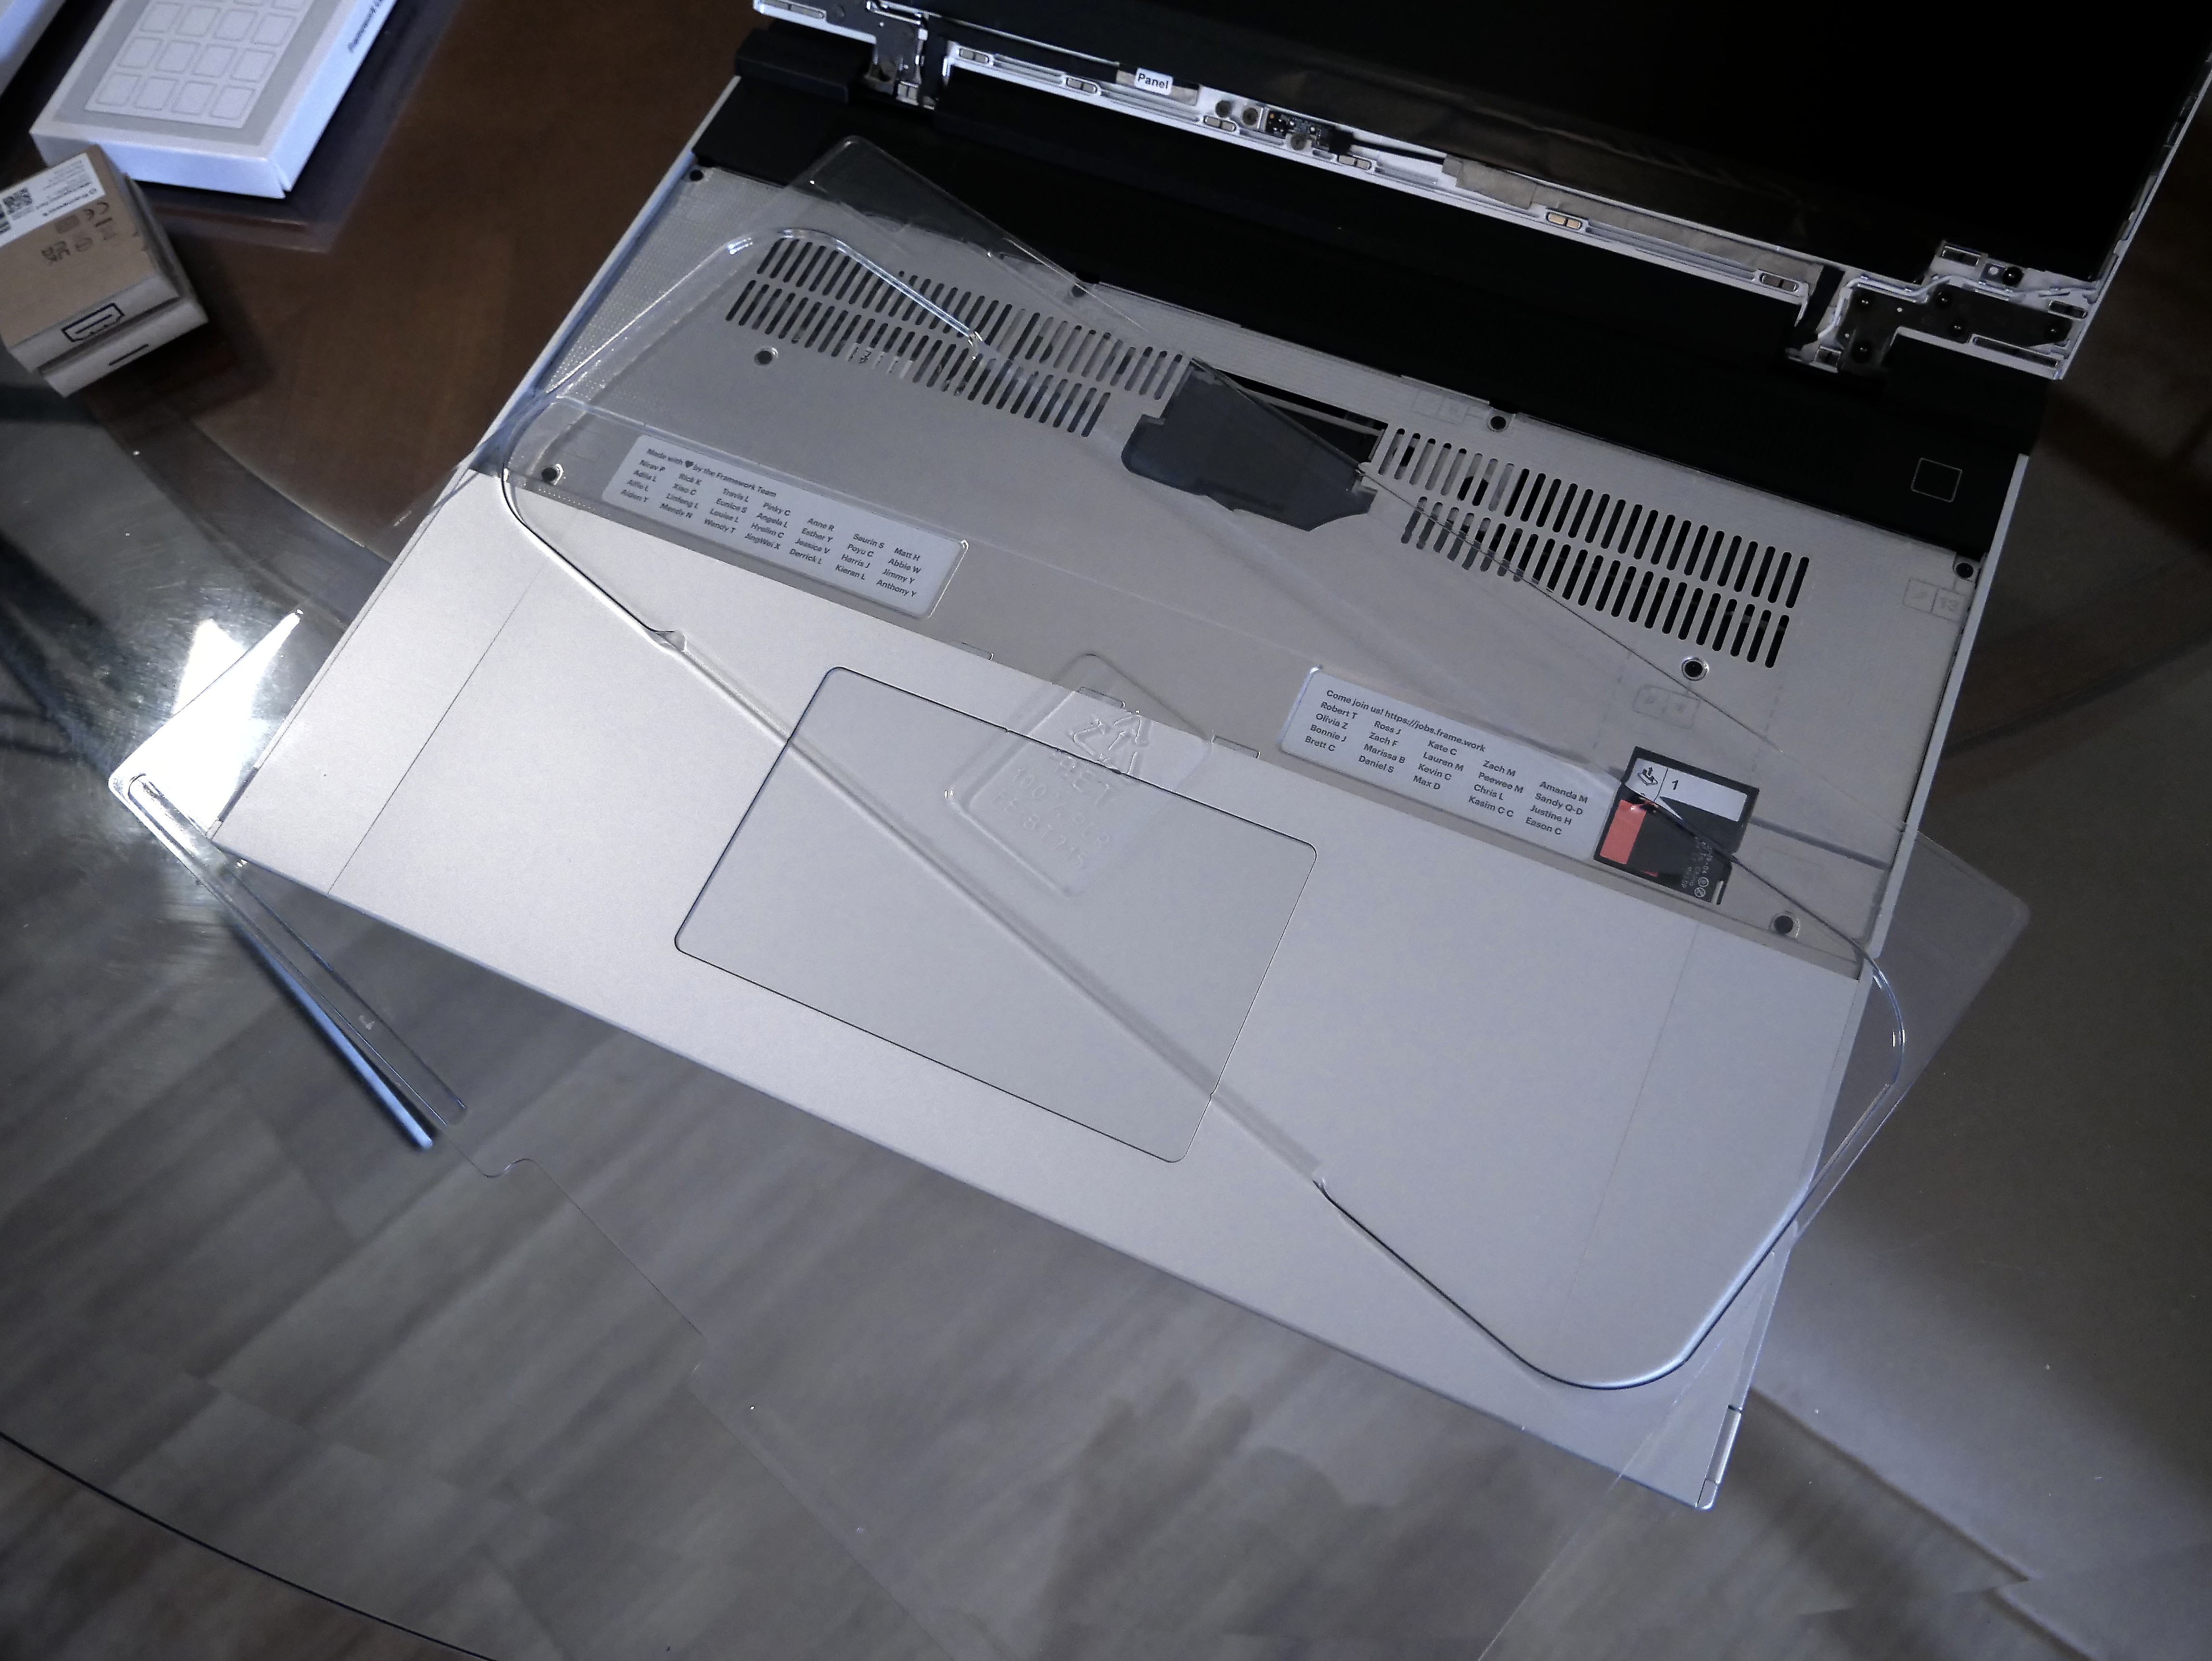
Now we take off the thick plastic cover found covering the soon-to-be keyboard area (made from post consumer waste, we are told).
04. Open the “Deck Latches”
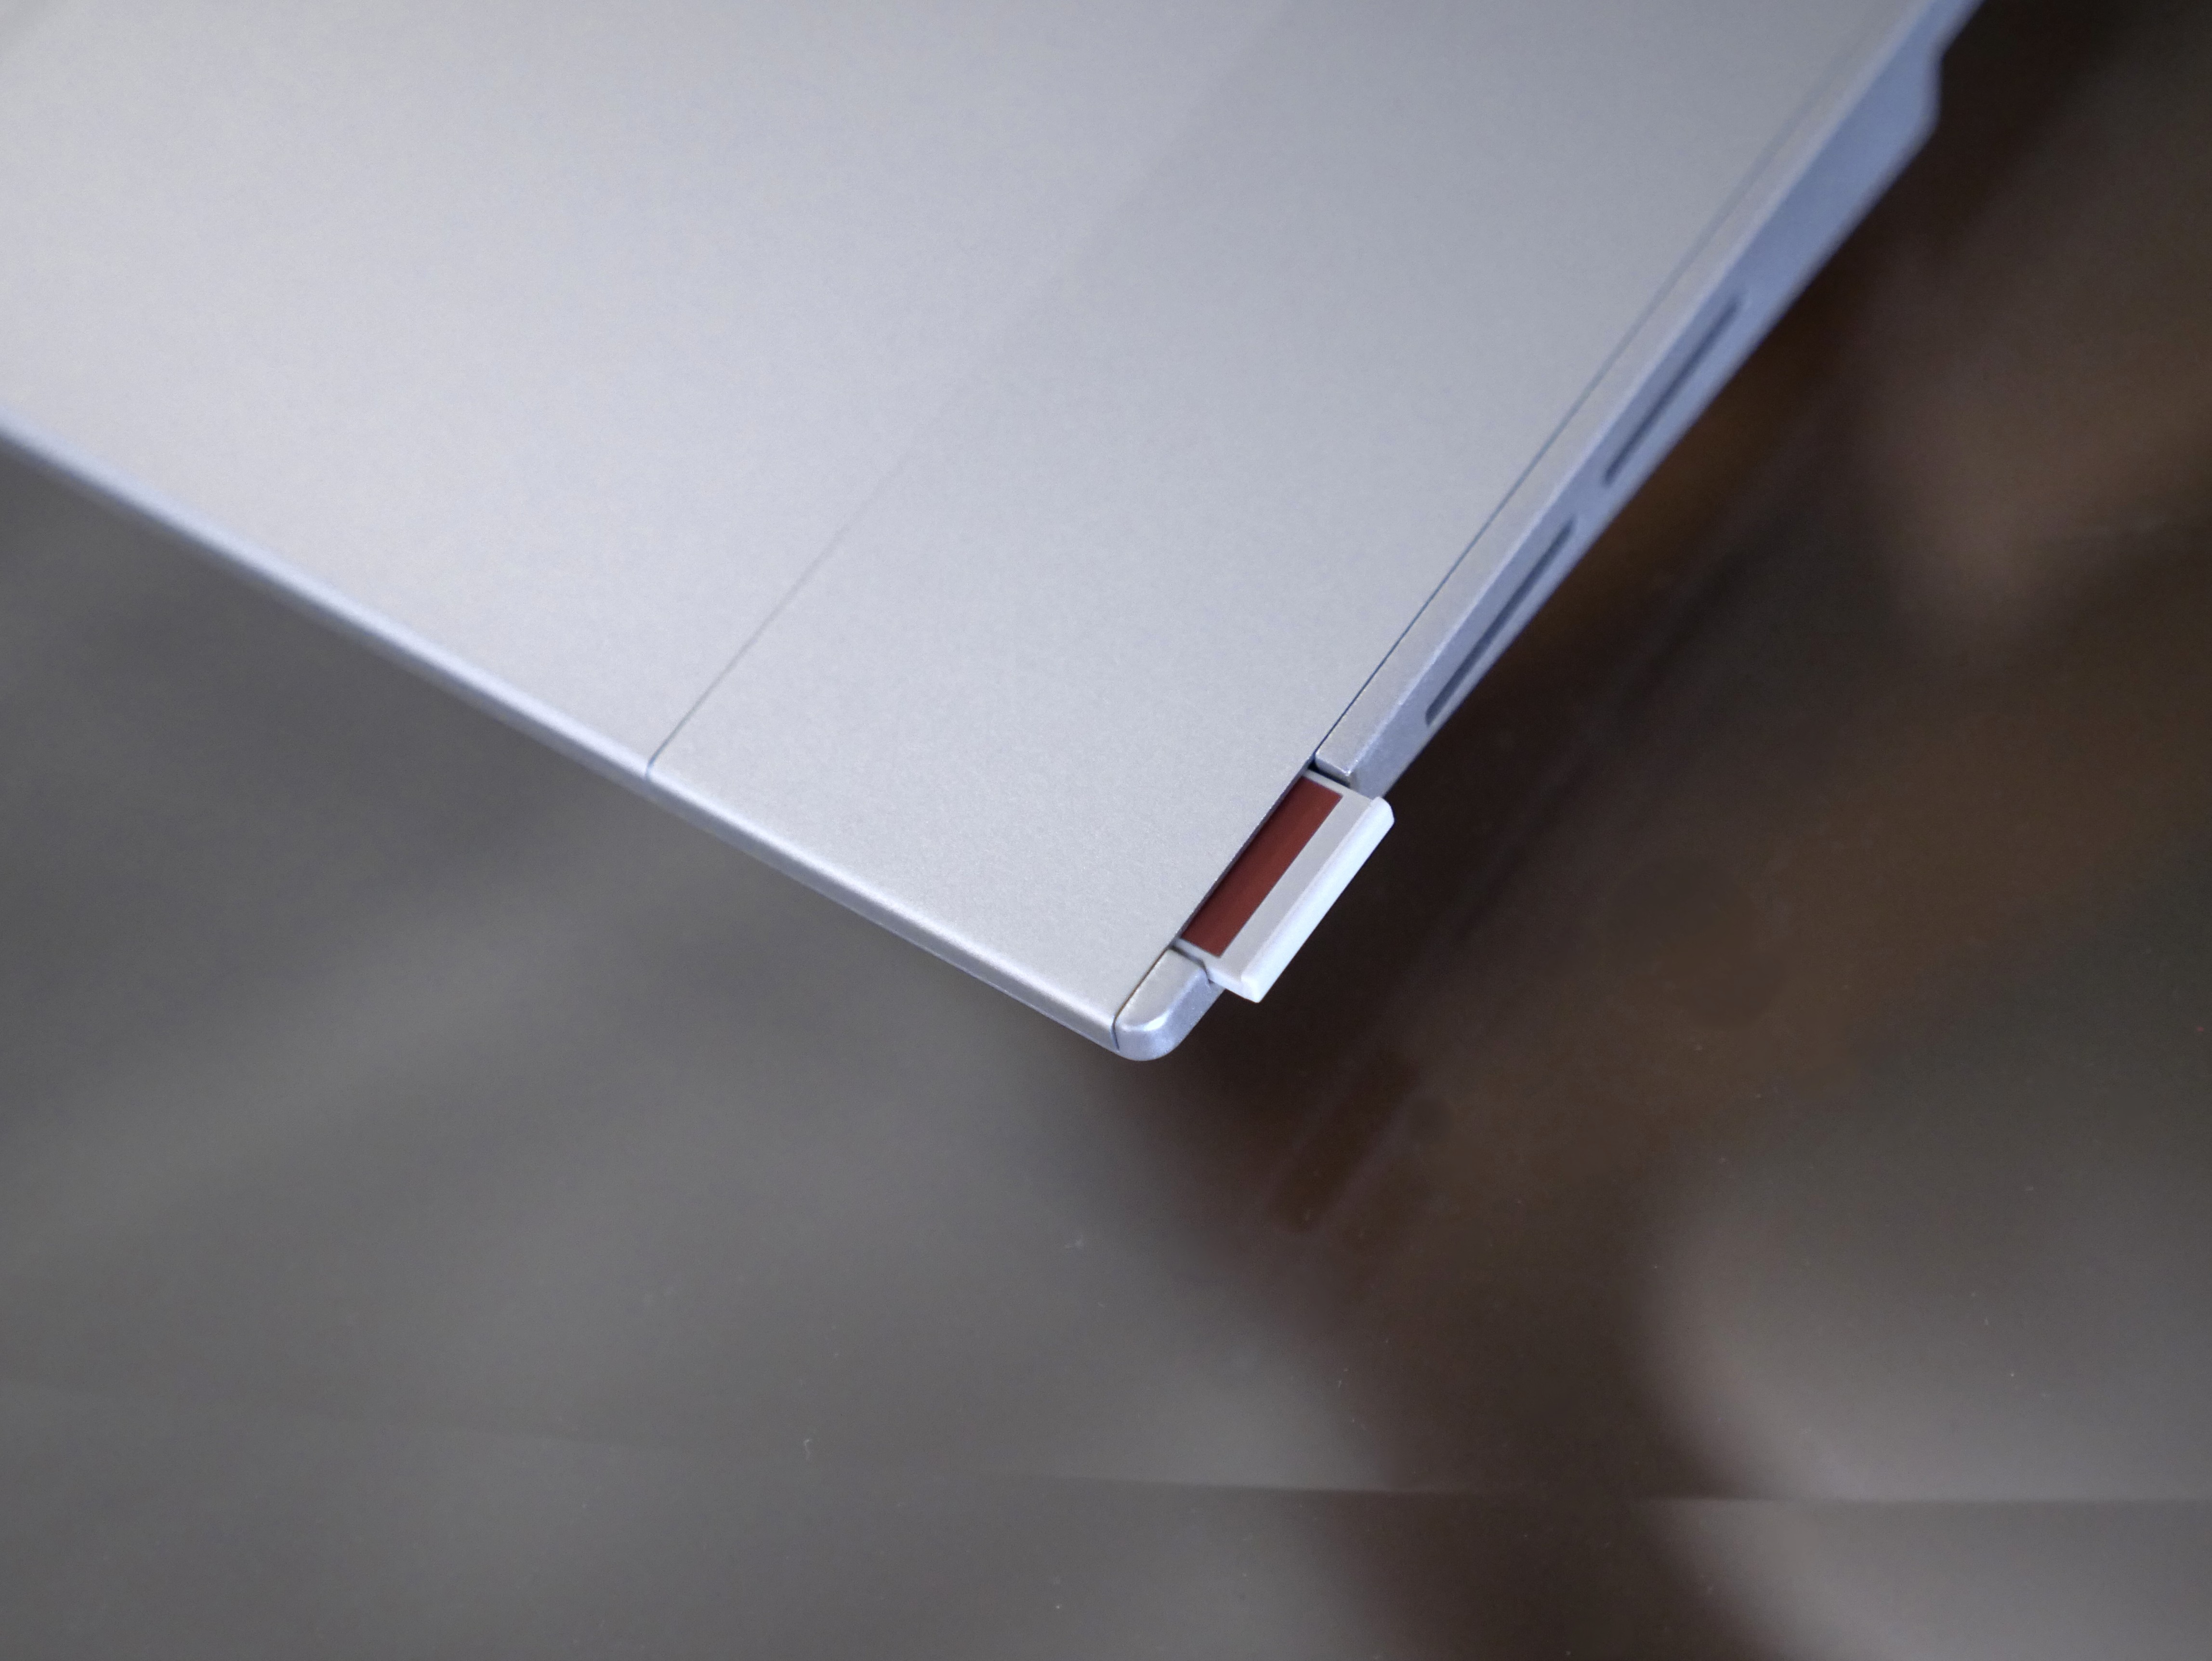
There is one at both the left and right corners of the laptop, nearest the user. They just flip open.
05. Unplug the “Mid Plate” Cable

A gentle pulling up from the pull-tab and it pops right off of the motherboard.
06. Loosen the Mid Plate Screws & Remove
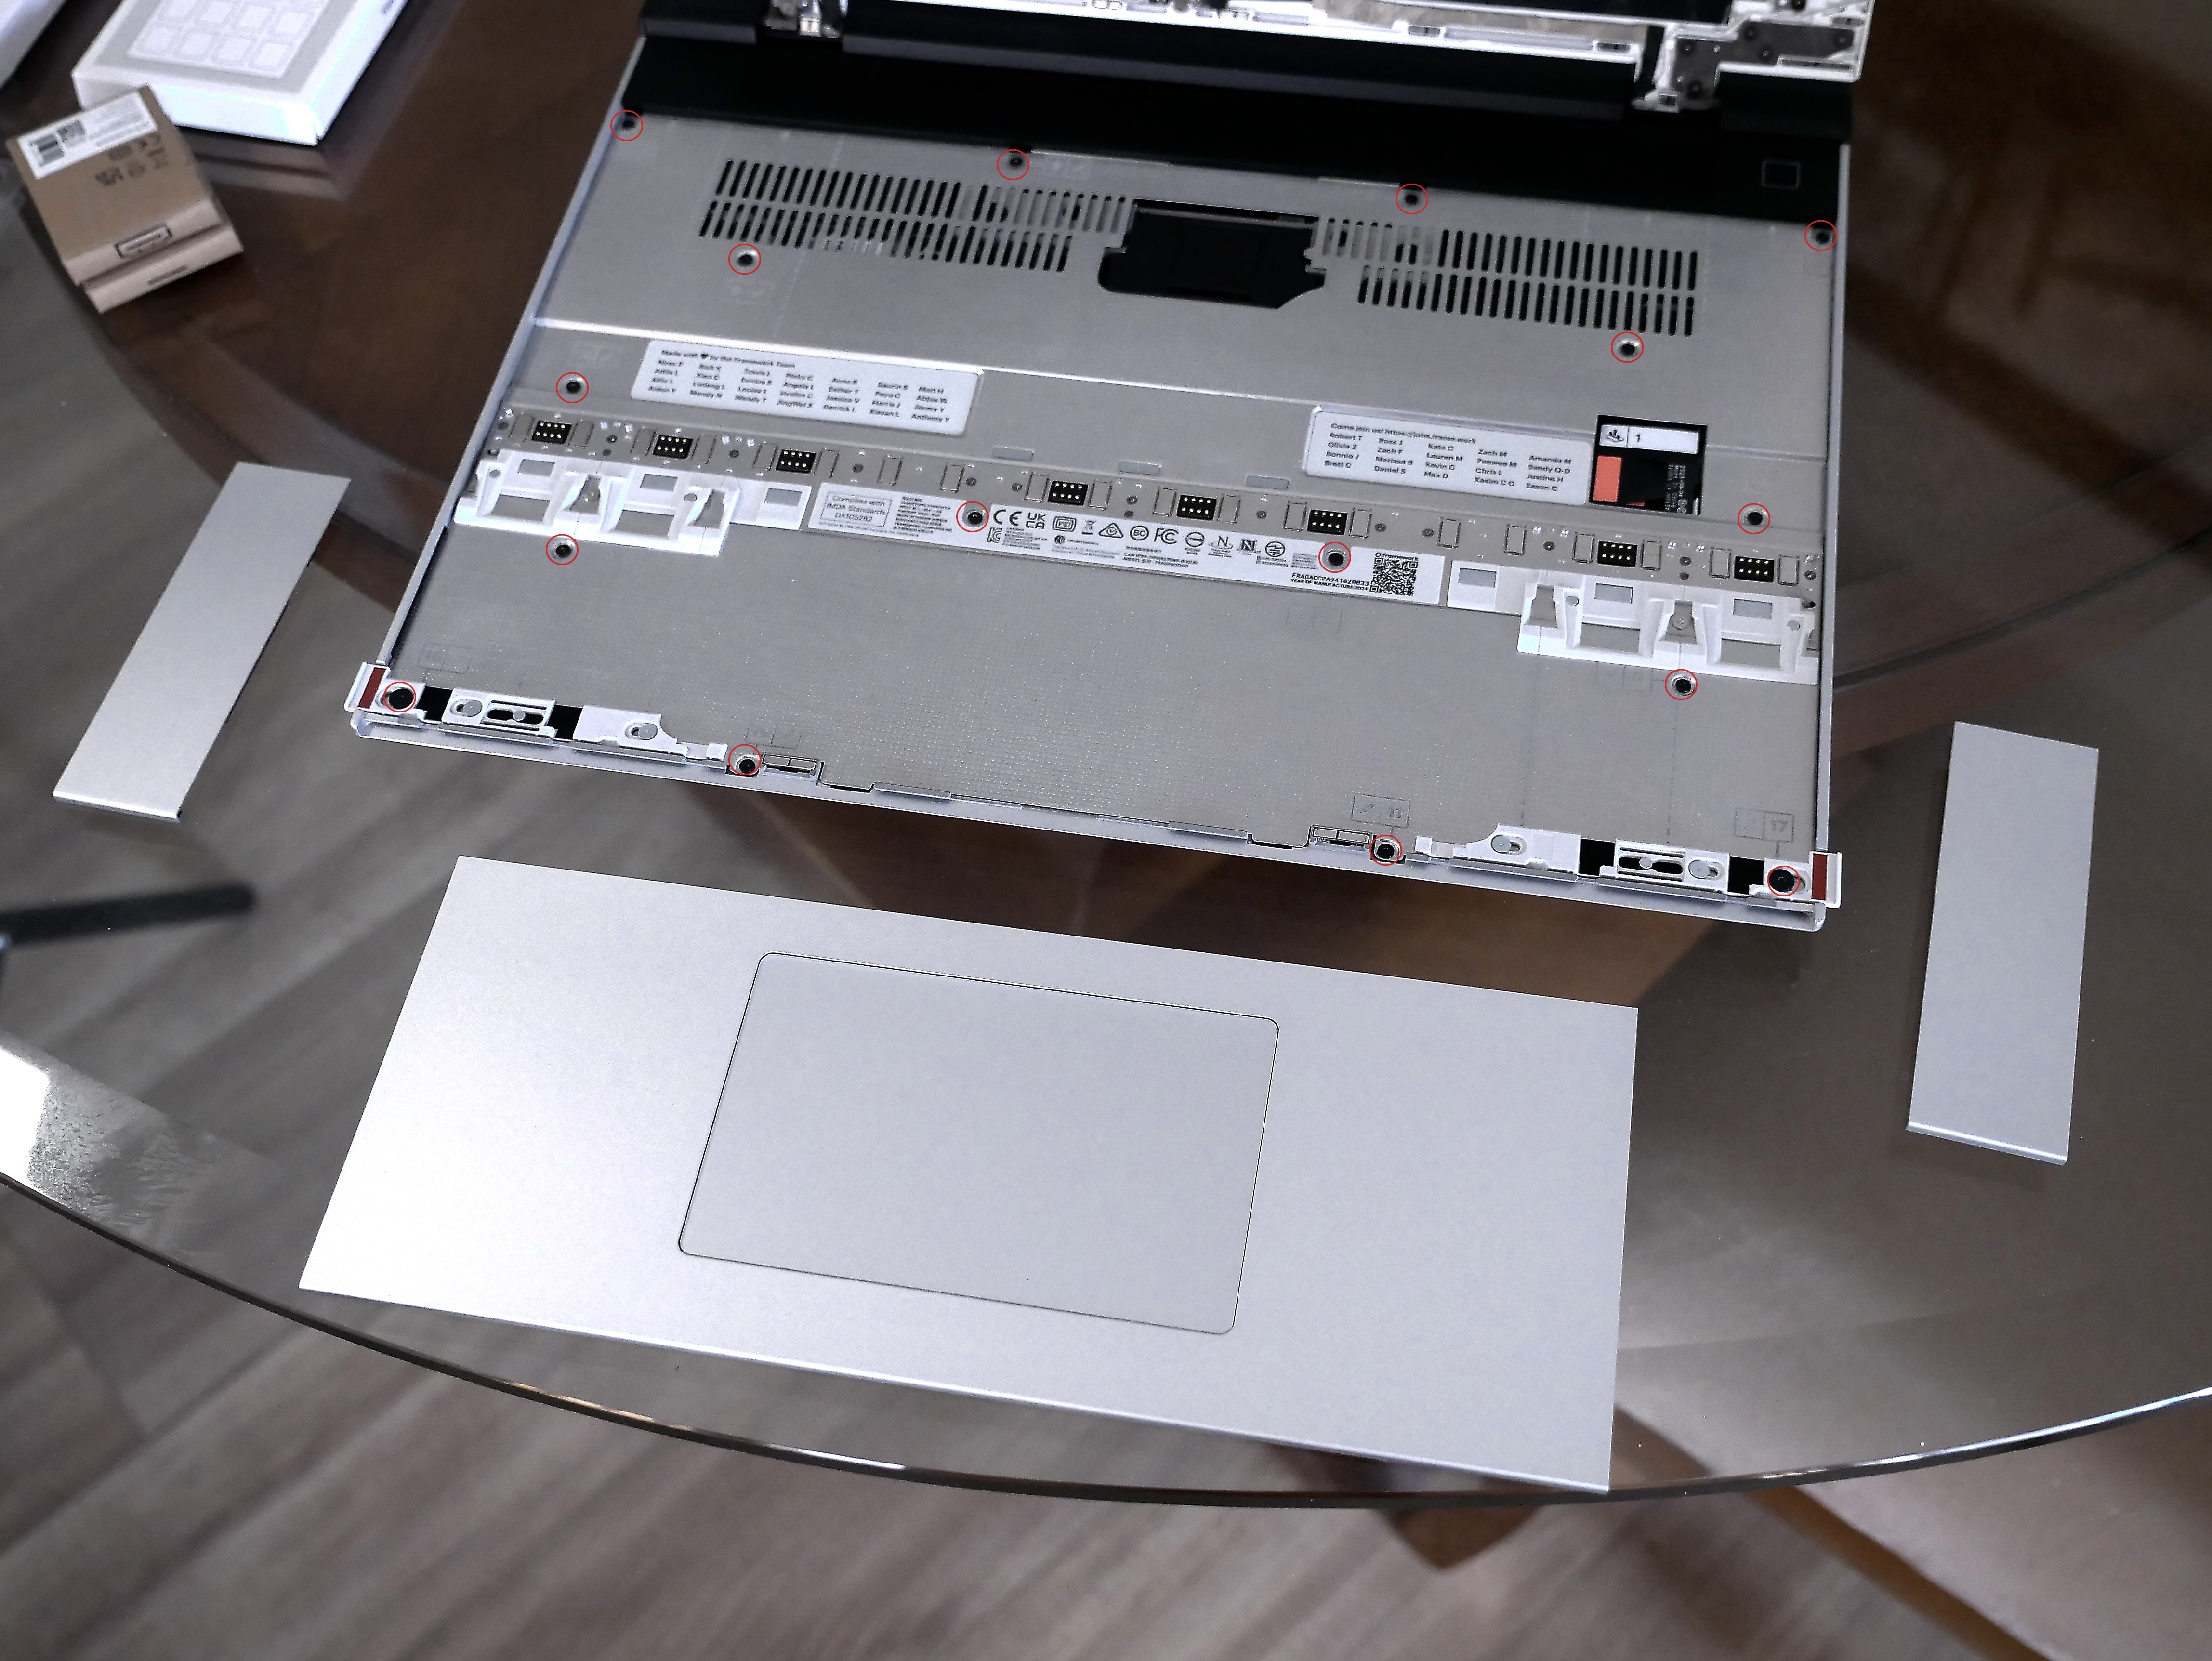
Using the Framework provided torx-screw tool, loosen all fastening screws (red circles in image). These use a micro “X” torx head, often seen in watches. The screws remain attached to the mid-plate, so they can’t be lost – a nice touch! But it also makes it hard to know if they are totally unscrewed. Removing the thin plate was a delicate operation that came close to bending it. I found that “bowing” the plate up in the middle allowed for easier removal than trying to lift is straight up.
Once that was removed, we have access to the motherboard and can get to work.
07. Adding a Hard Drive
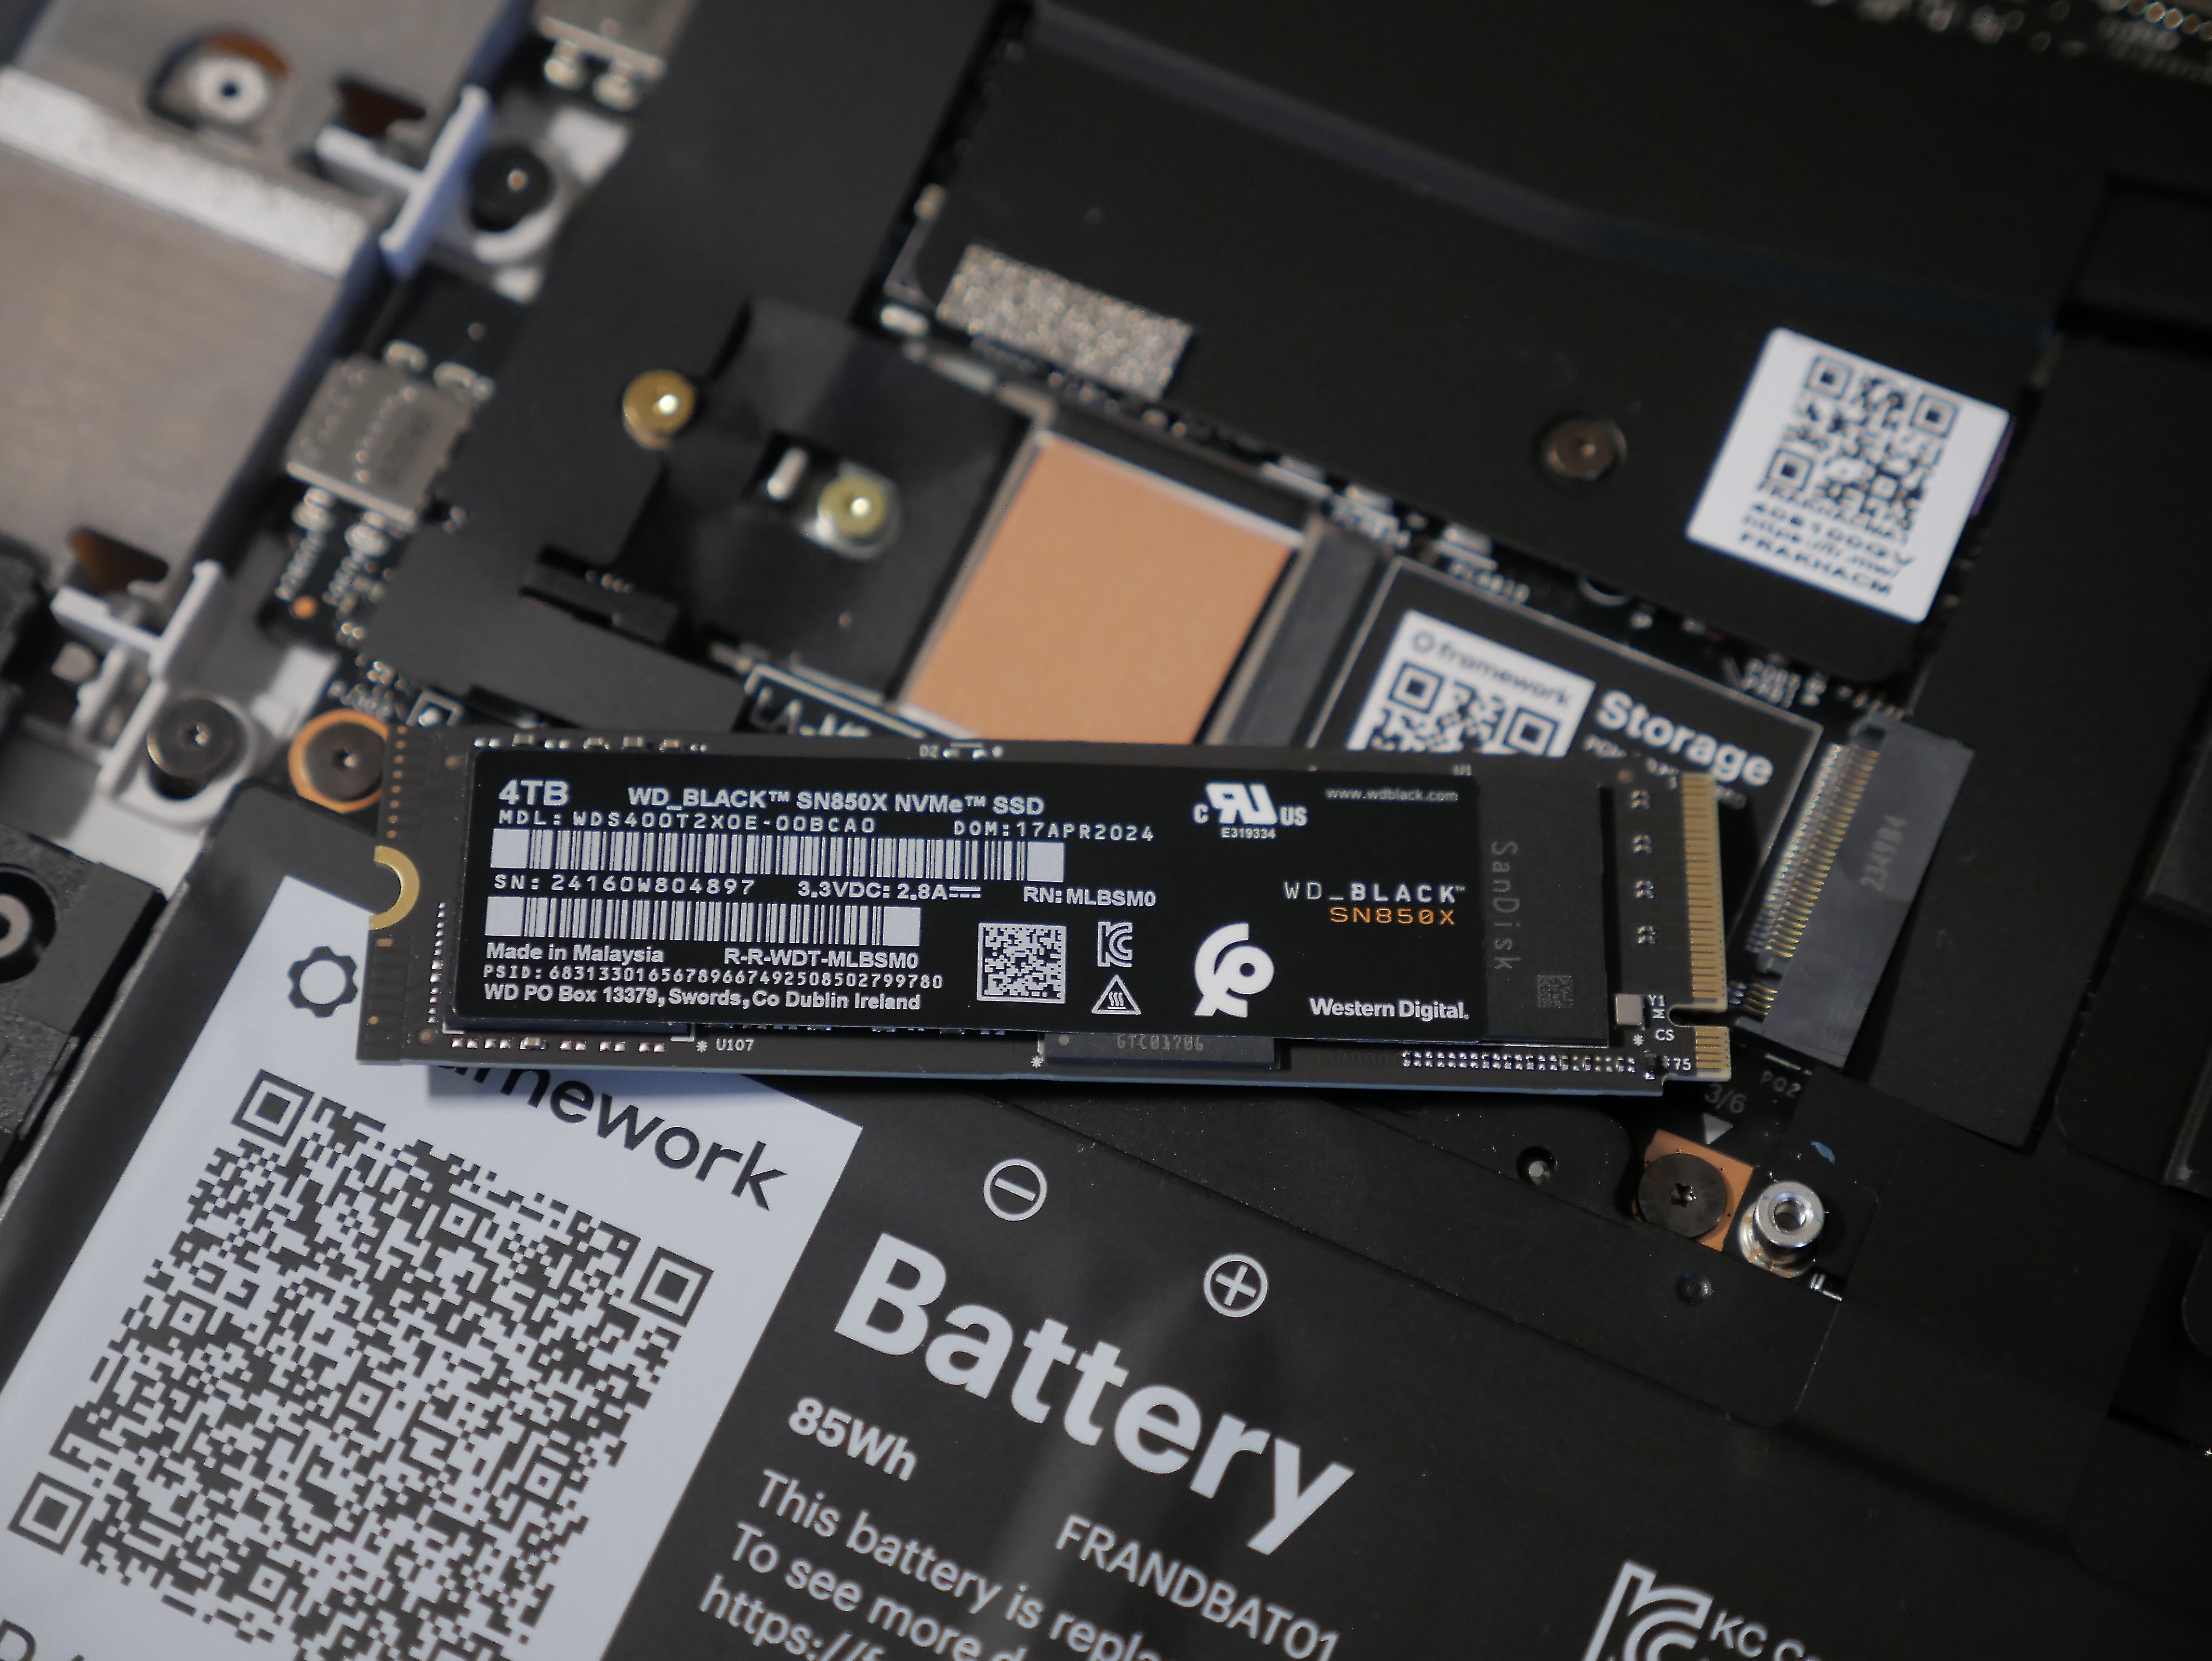
There are slots for 2 M.2 SSD drives. A primary (larger on top) and a secondary (smaller, tucked underneath). These are installed by tucking the contacts end into its slot (on the right side), and then securing the left-hand side with the screw. Best to remove that screw before beginning this step.
08. Adding the Memory
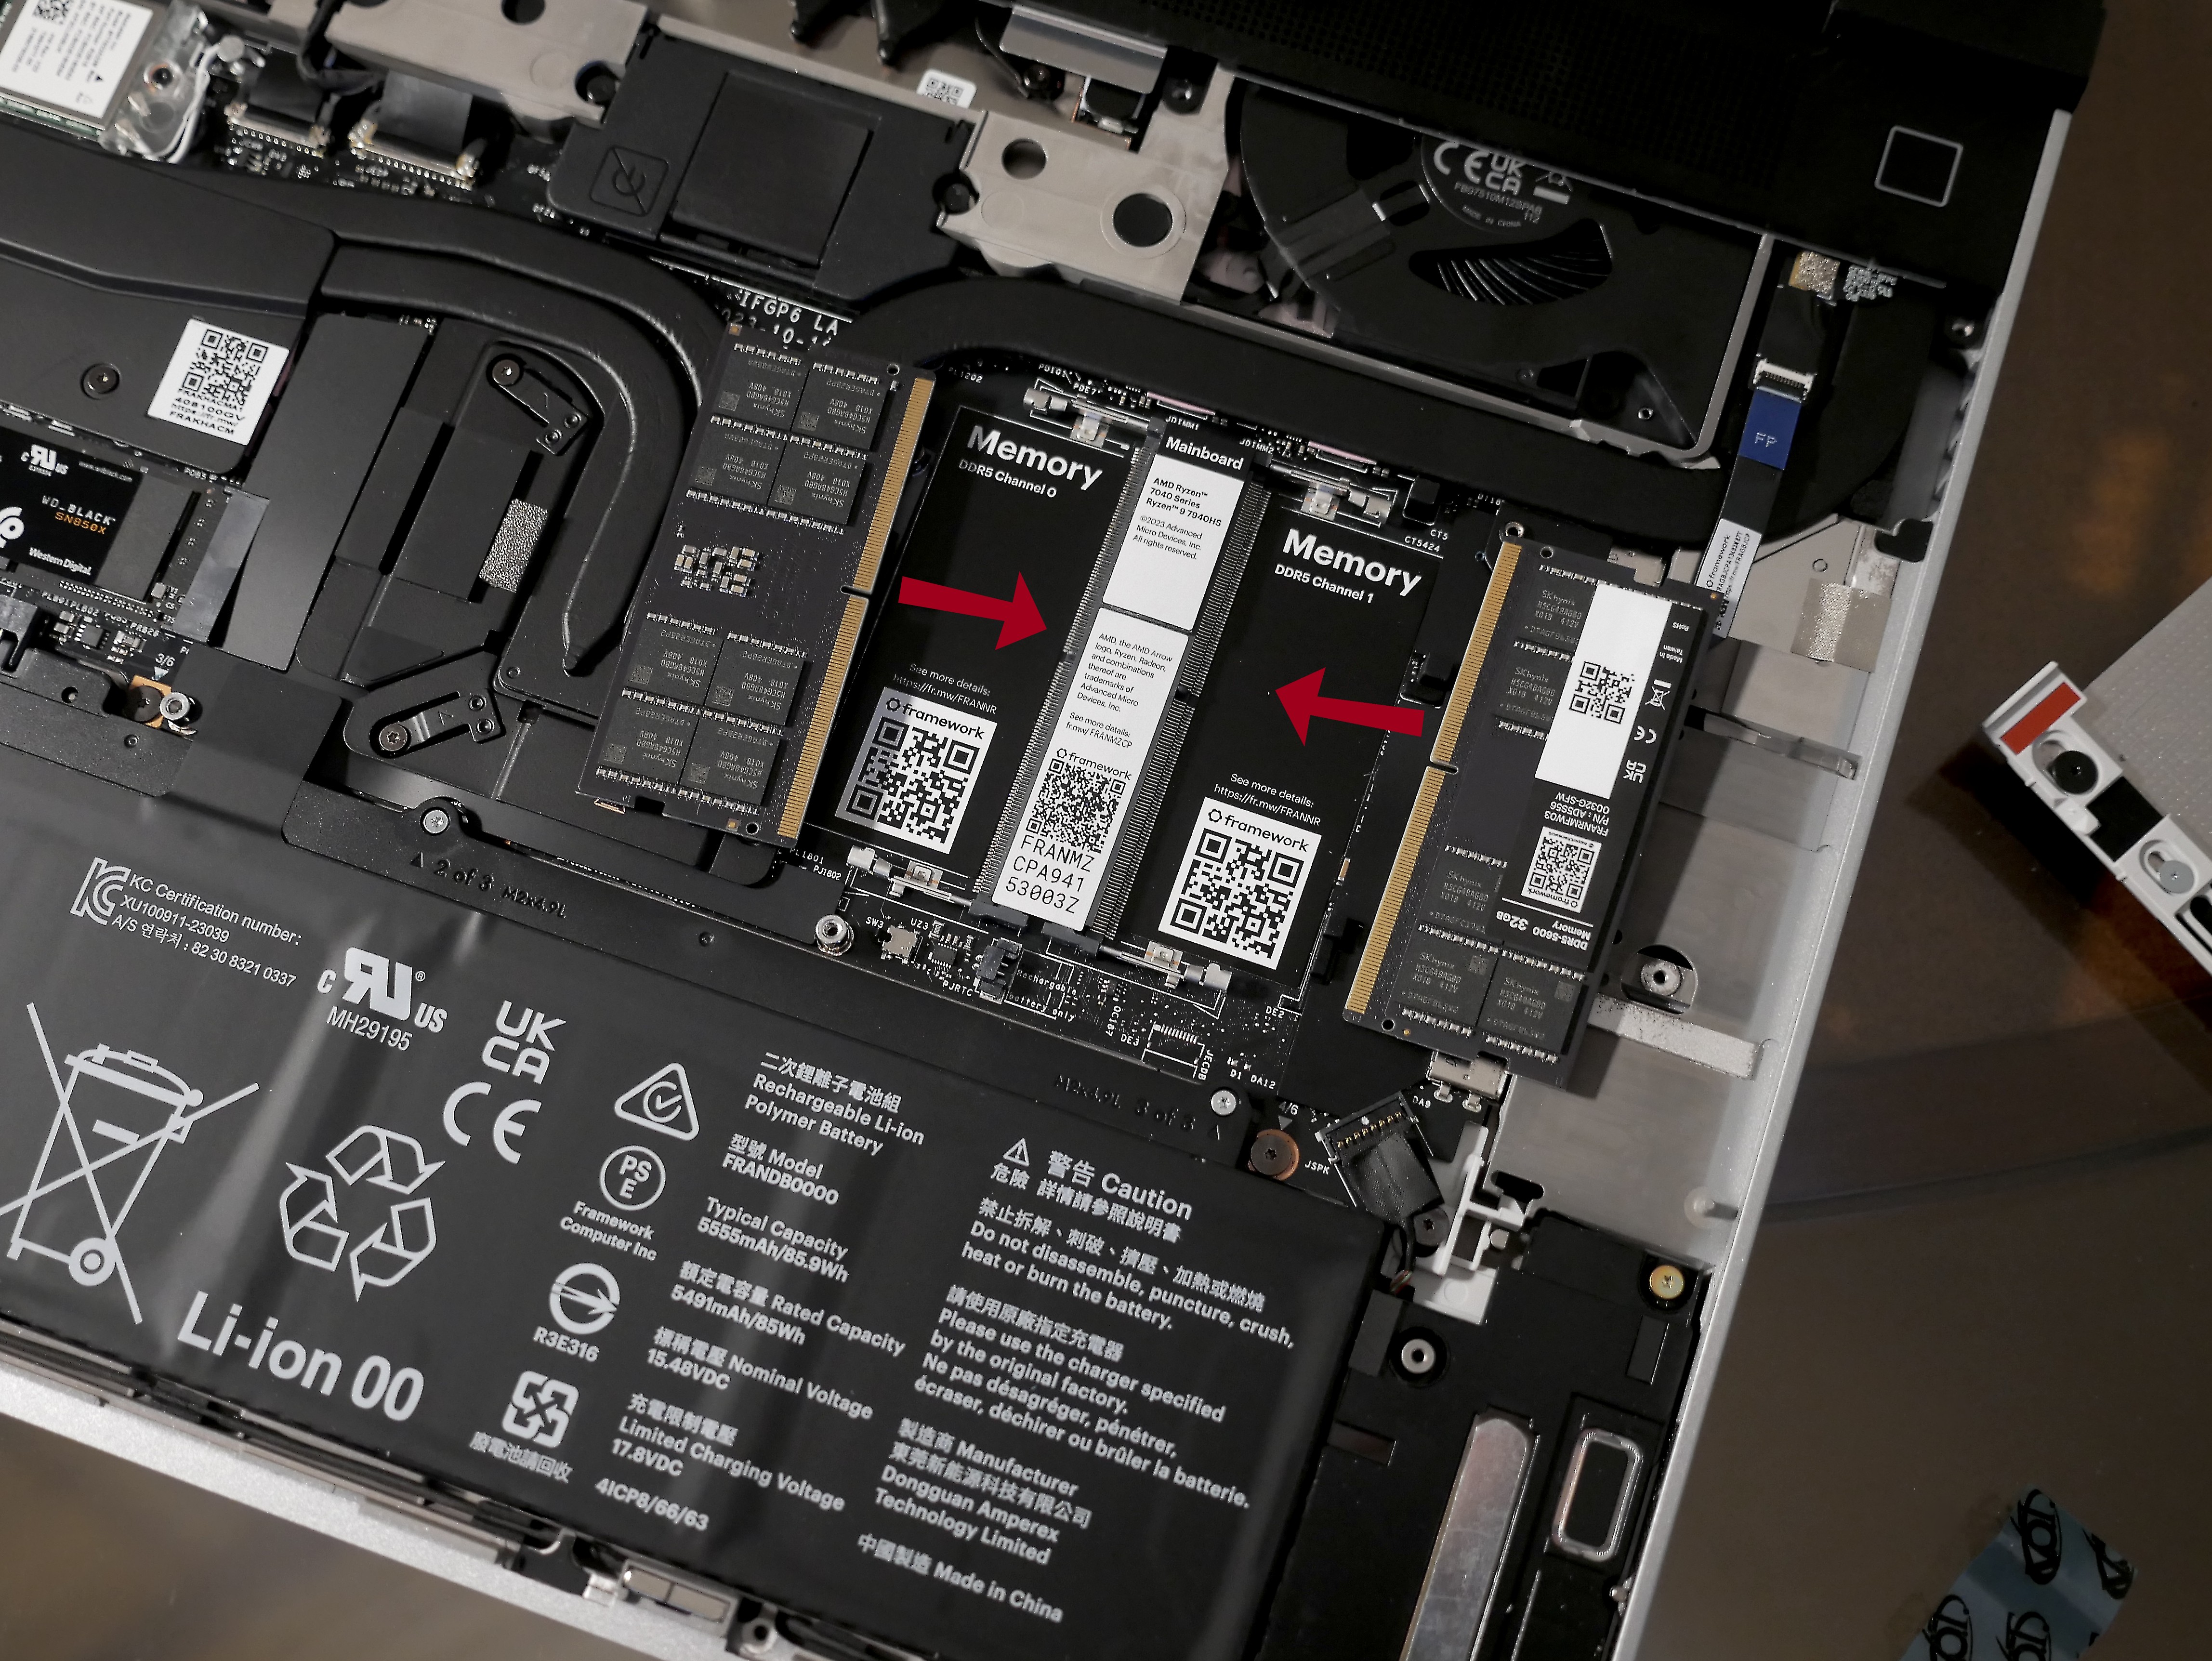
The two memory slots are further to the right on the laptop. They both connect on either side of the “spine” of contacts that go down the middle. Thus one memory stick will be facing front, and the other flipped and facing the back. You will also note that there is a notch that needs to be properly oriented to fit correctly.
HINT: While it does take a small amount of push to insert the memory sticks into their contacts, if you find it is too hard a push then you may have it incorrectly oriented. The number of metal contacts is not the same on either end of the notch, so you may need to flip it vertically.
Once inserted into the contacts, the sticks will be at an angle to the motherboard. You just need to gently push it down until is clicks into the clips that hold it in place.
09. Replace the Mid Plate and Cable
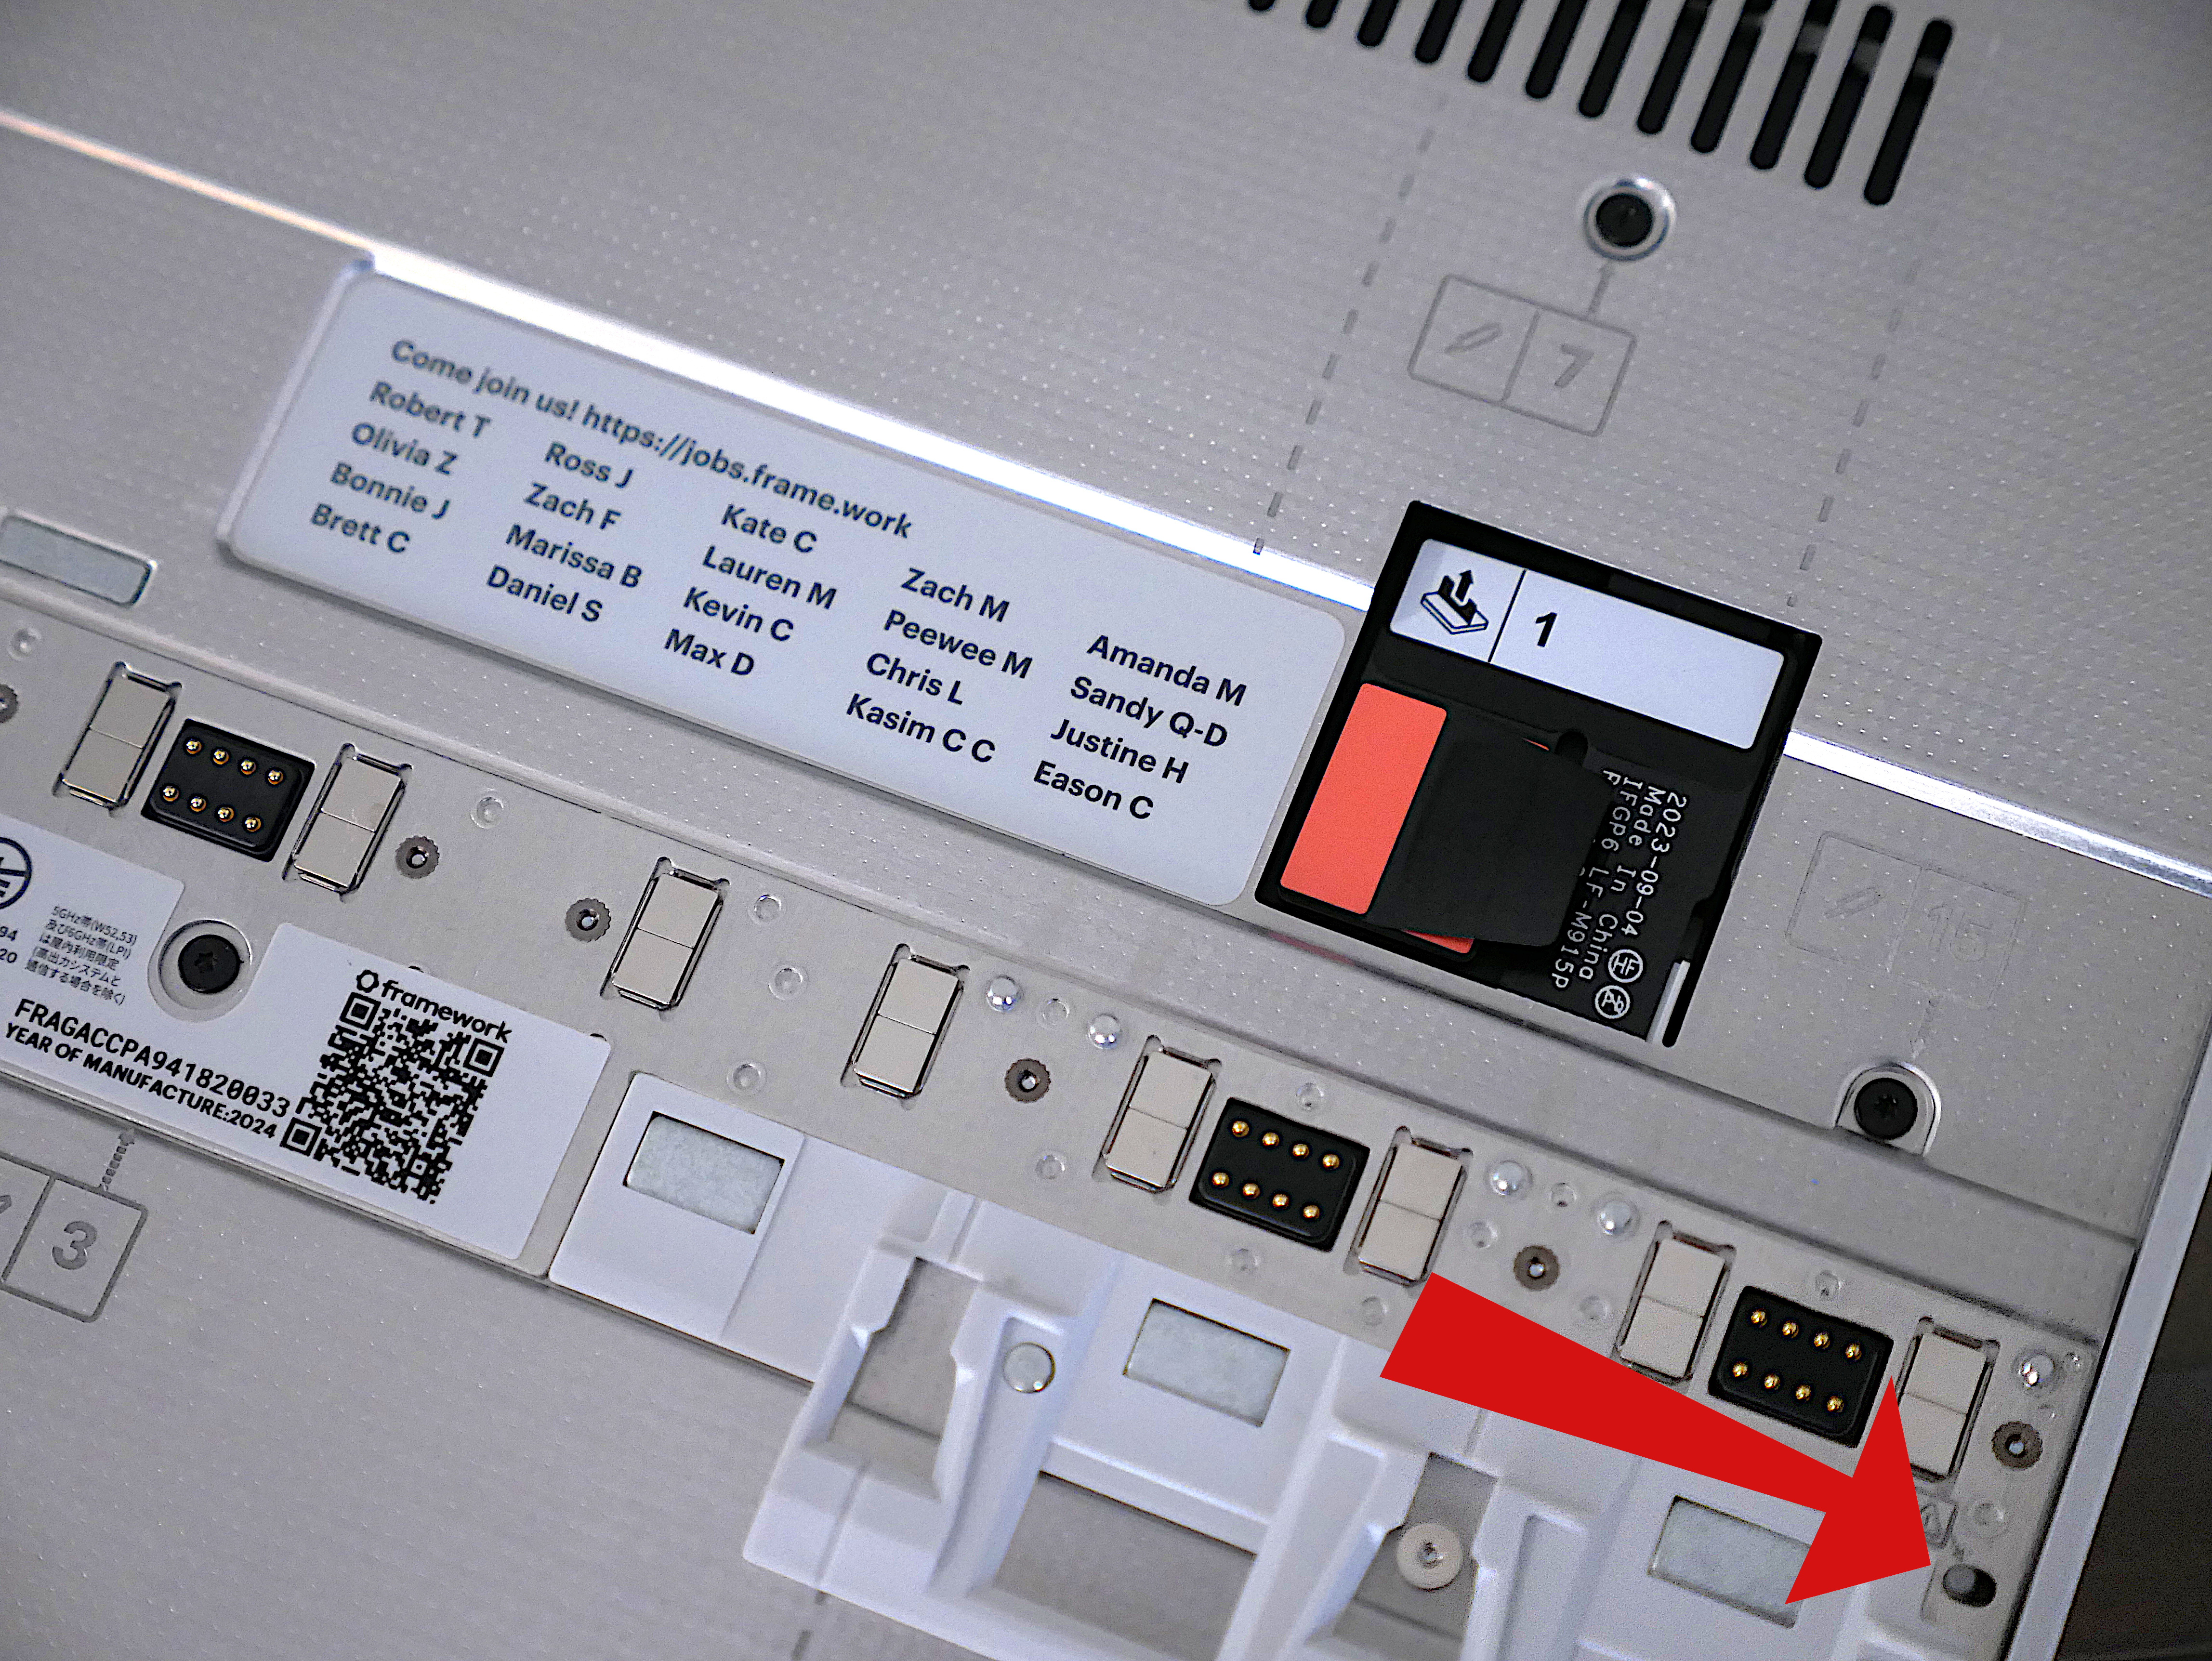
You are more than halfway done! Replace the mid plate, back over the motherboard. Note that there is an alignment pin on the left and right, which makes proper alignment easy. Again, use the Framework tool, this time to re-tighten the screws. Make sure to not over-tighten or risk stripping the delicate threads. There are so many, each just needs to be “snug”.
Now plug the mid plate cable back in. Again, a gentle touch aligning it properly, and it should go right in.
10. Configure the Keyboard & Trackpad
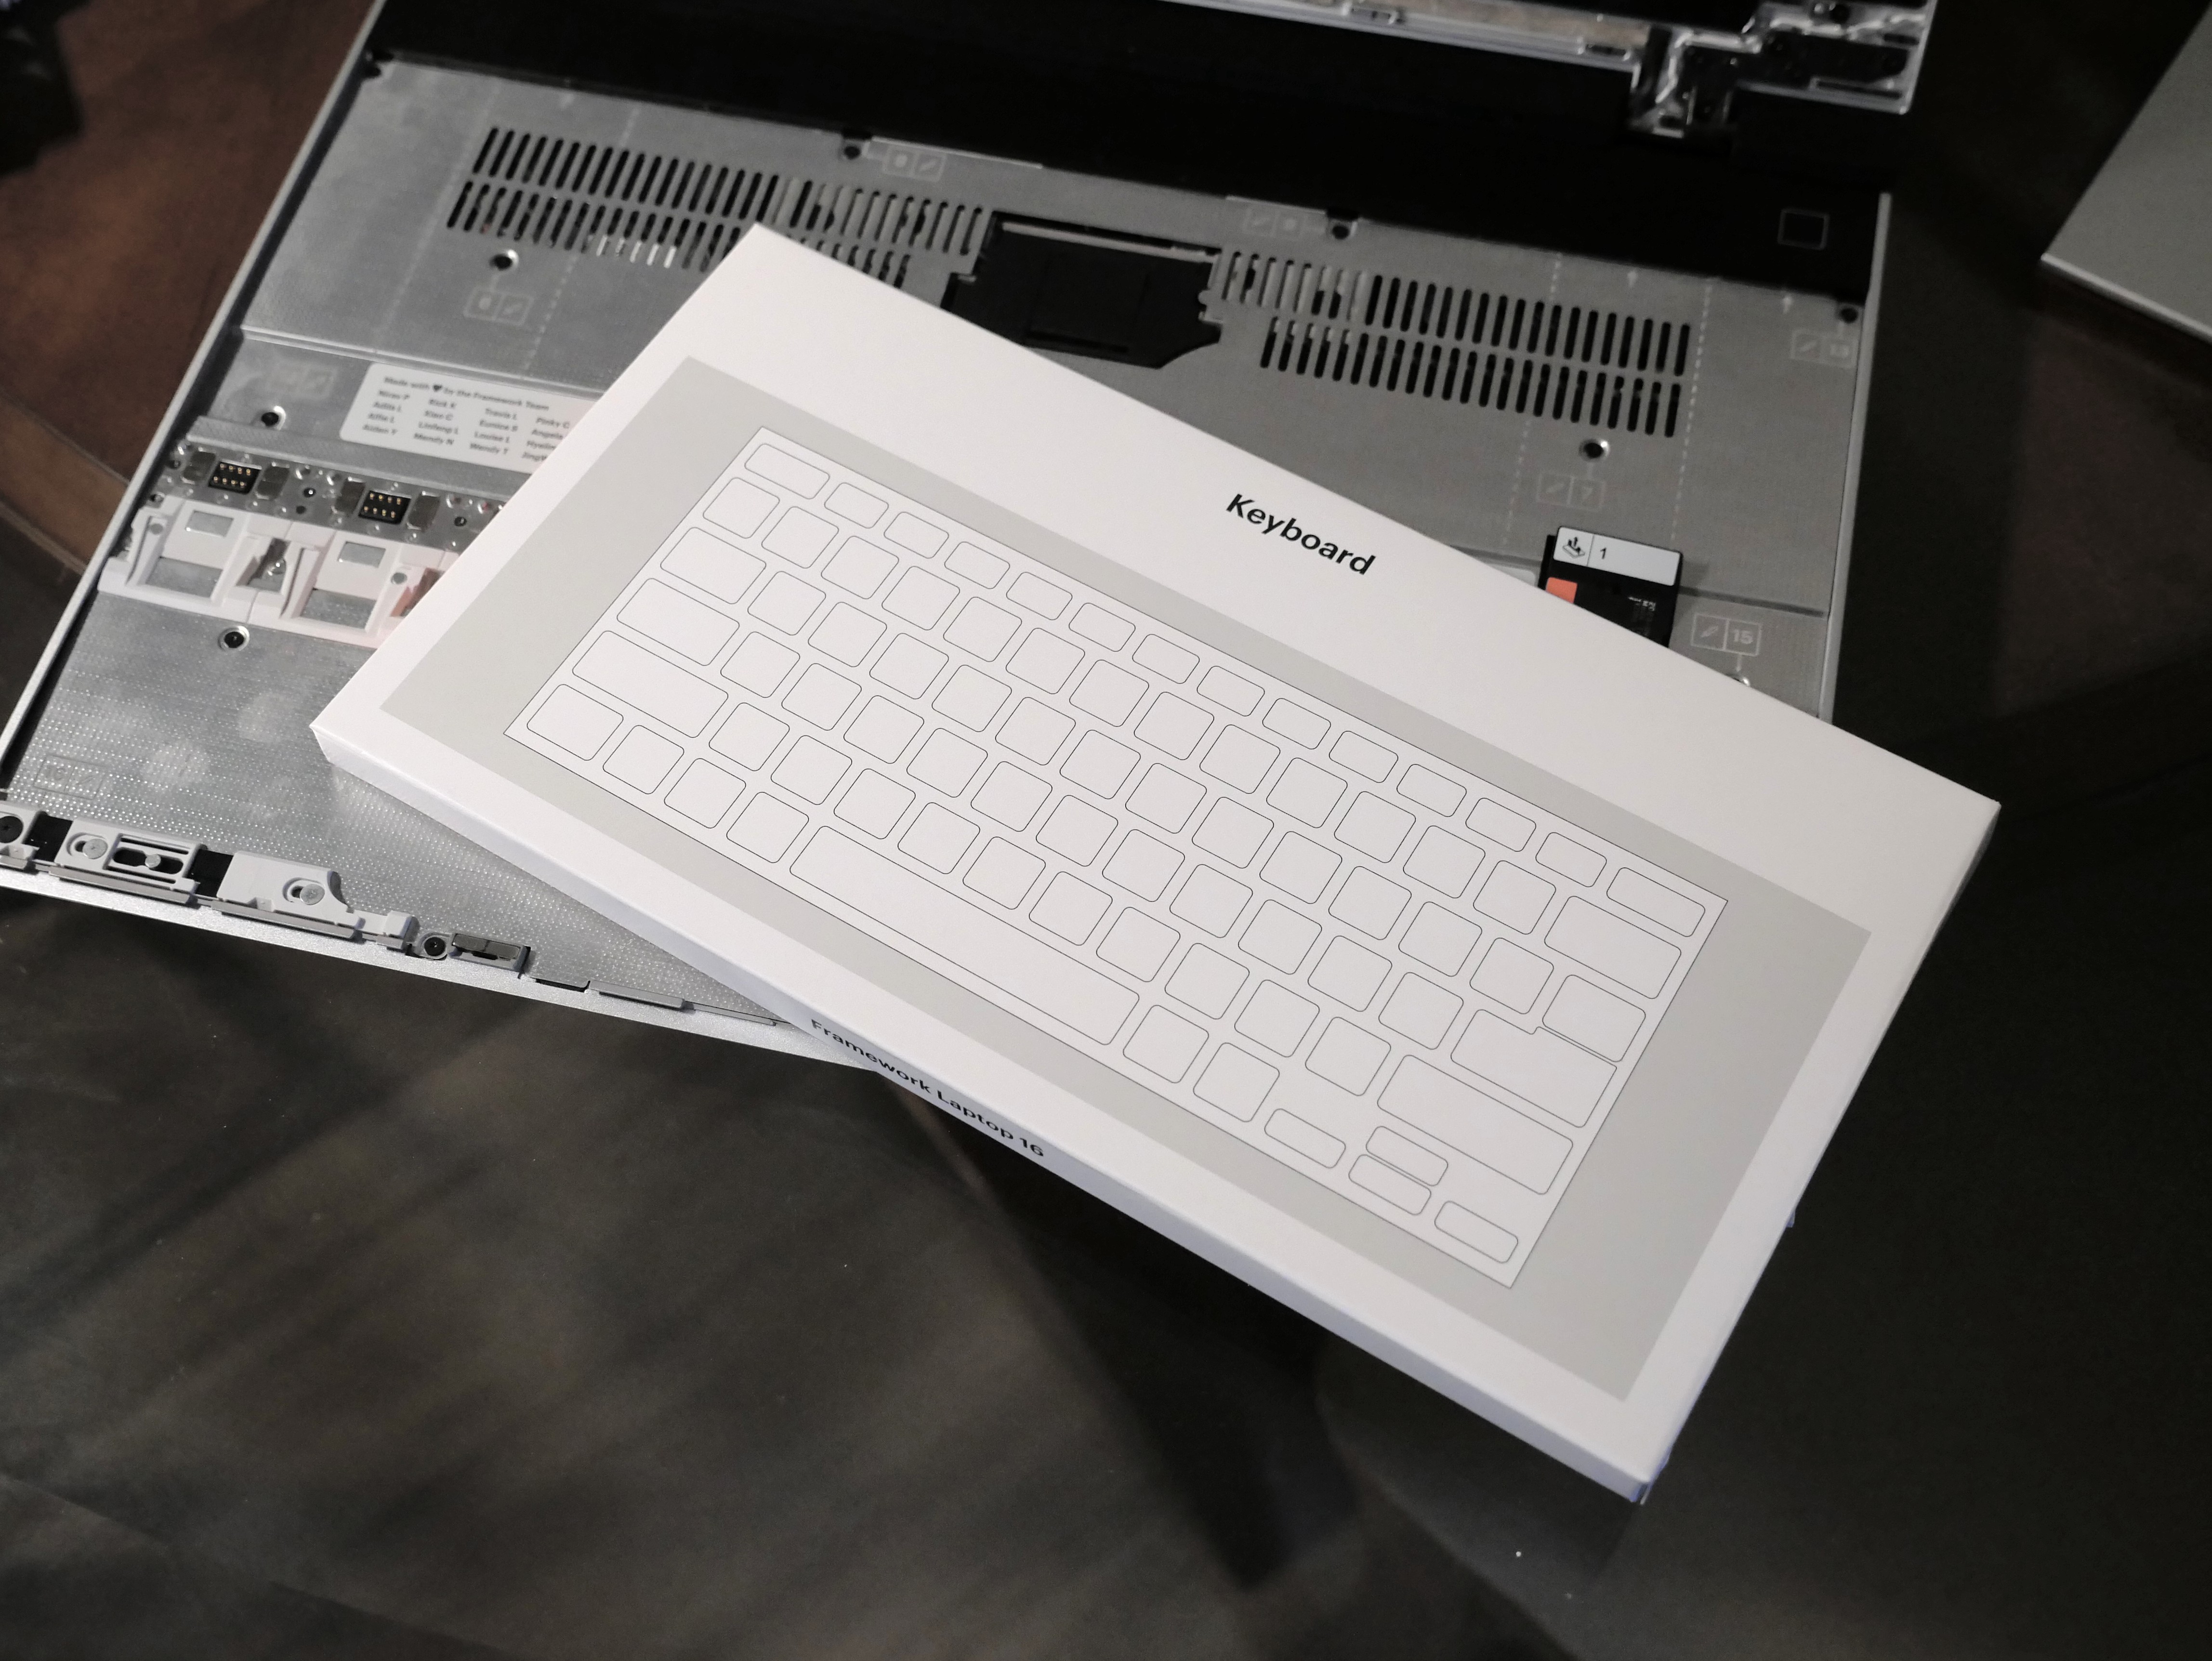
Unlike any laptop I have ever encountered, these elements on the Framework laptop are configurable. Framework offers quite a few options of elements to choose from. For example, you can configure it with a keyboard and number pad, which in my mind is the most productive. But you can forgo the number pad if you prefer your keyboard centred. Plus, they offer a range of different keyboard styles, and in different regional and language options.
11. Adding the Trackpad
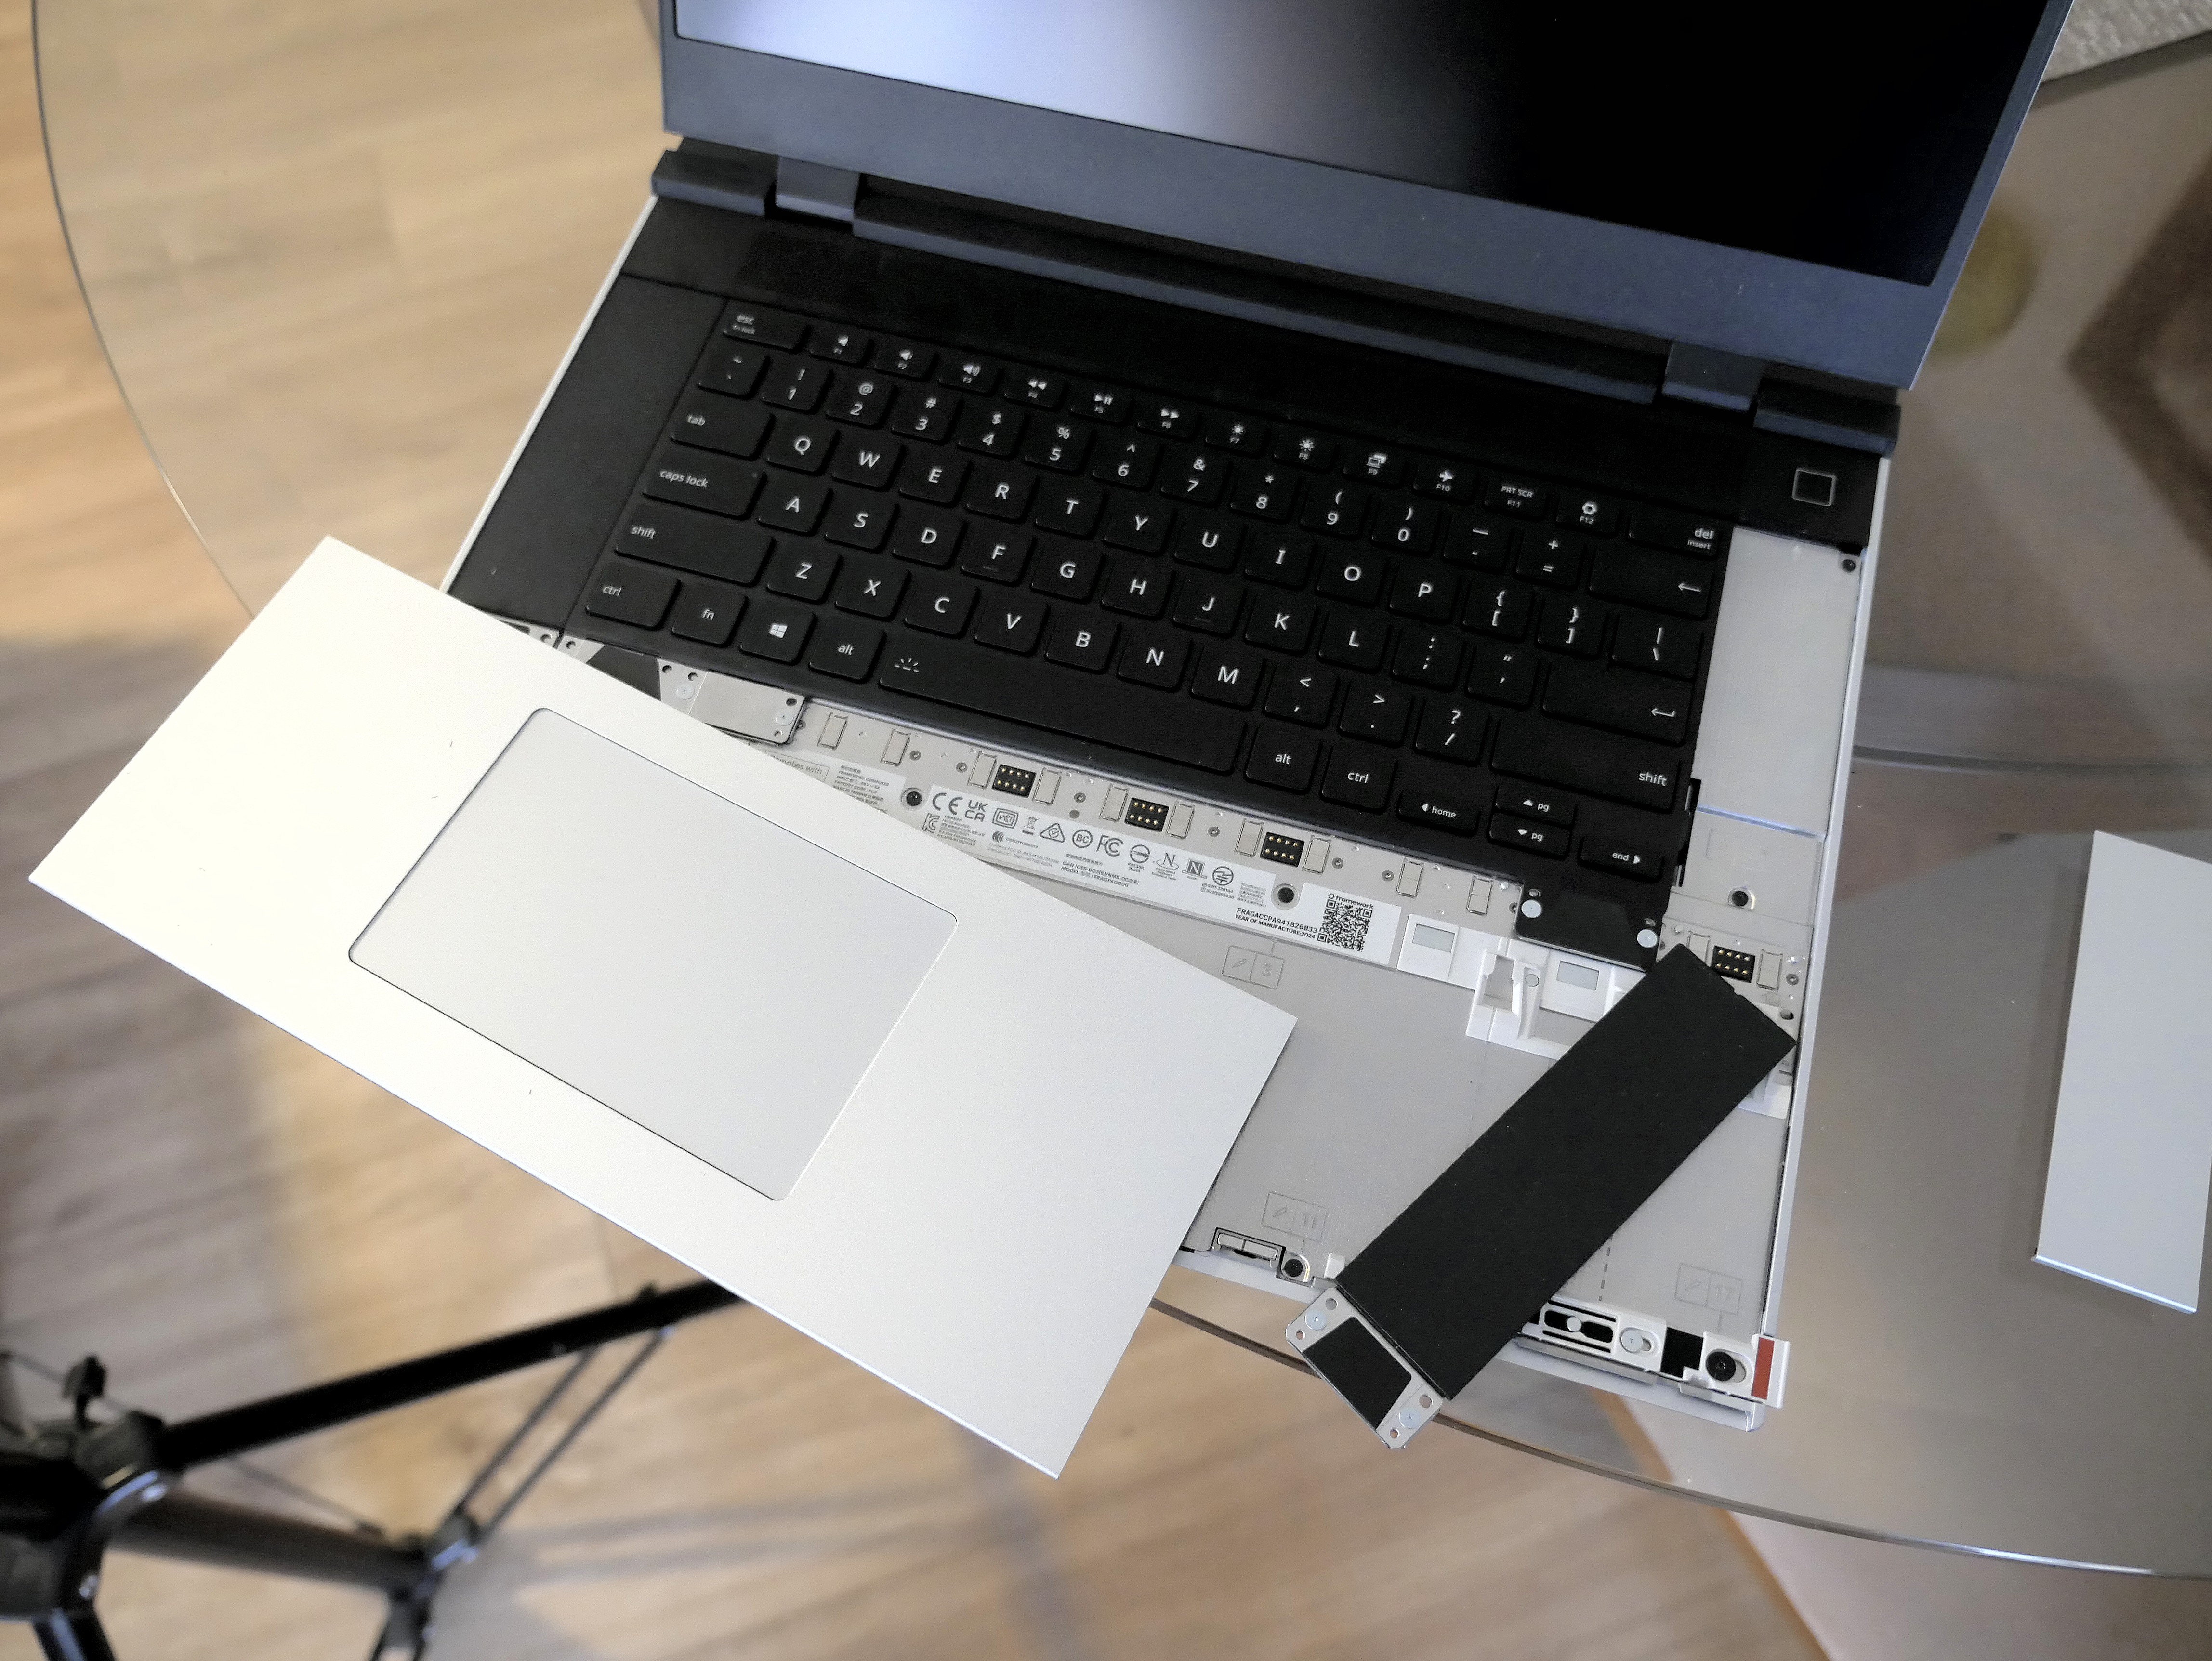
Filler panels of various sizes are also offered. These fill in the open spaces to the left and right of the KB and trackpad. So you can decide to place those items far left, center or on the right side. And fill in the rest with the flat panels. This is a truly unique option that might be very useful for those with special needs or preferences. For example, it you use your right hand for the trackpad, why keep it in the middle as many laptops do? It might be more comfortable, and even cut down on carpel tunnel stresses, to shift it to the right.
Installing all of these elements is as easy as gently sliding the parts under a small lip (one at the top for keyboard elements, and another lower down for the trackpad items). When you release the item a magnet pulls it down and holds it in place. I specifically didn’t say “locks” them in place because the whole configuration can be popped up and reconfigured whenever you wish. But once placed, I did find it hard than expected to lift up again. This is probably good, and keeps it more structurally intact.
12. Adding the Screen Faceplate
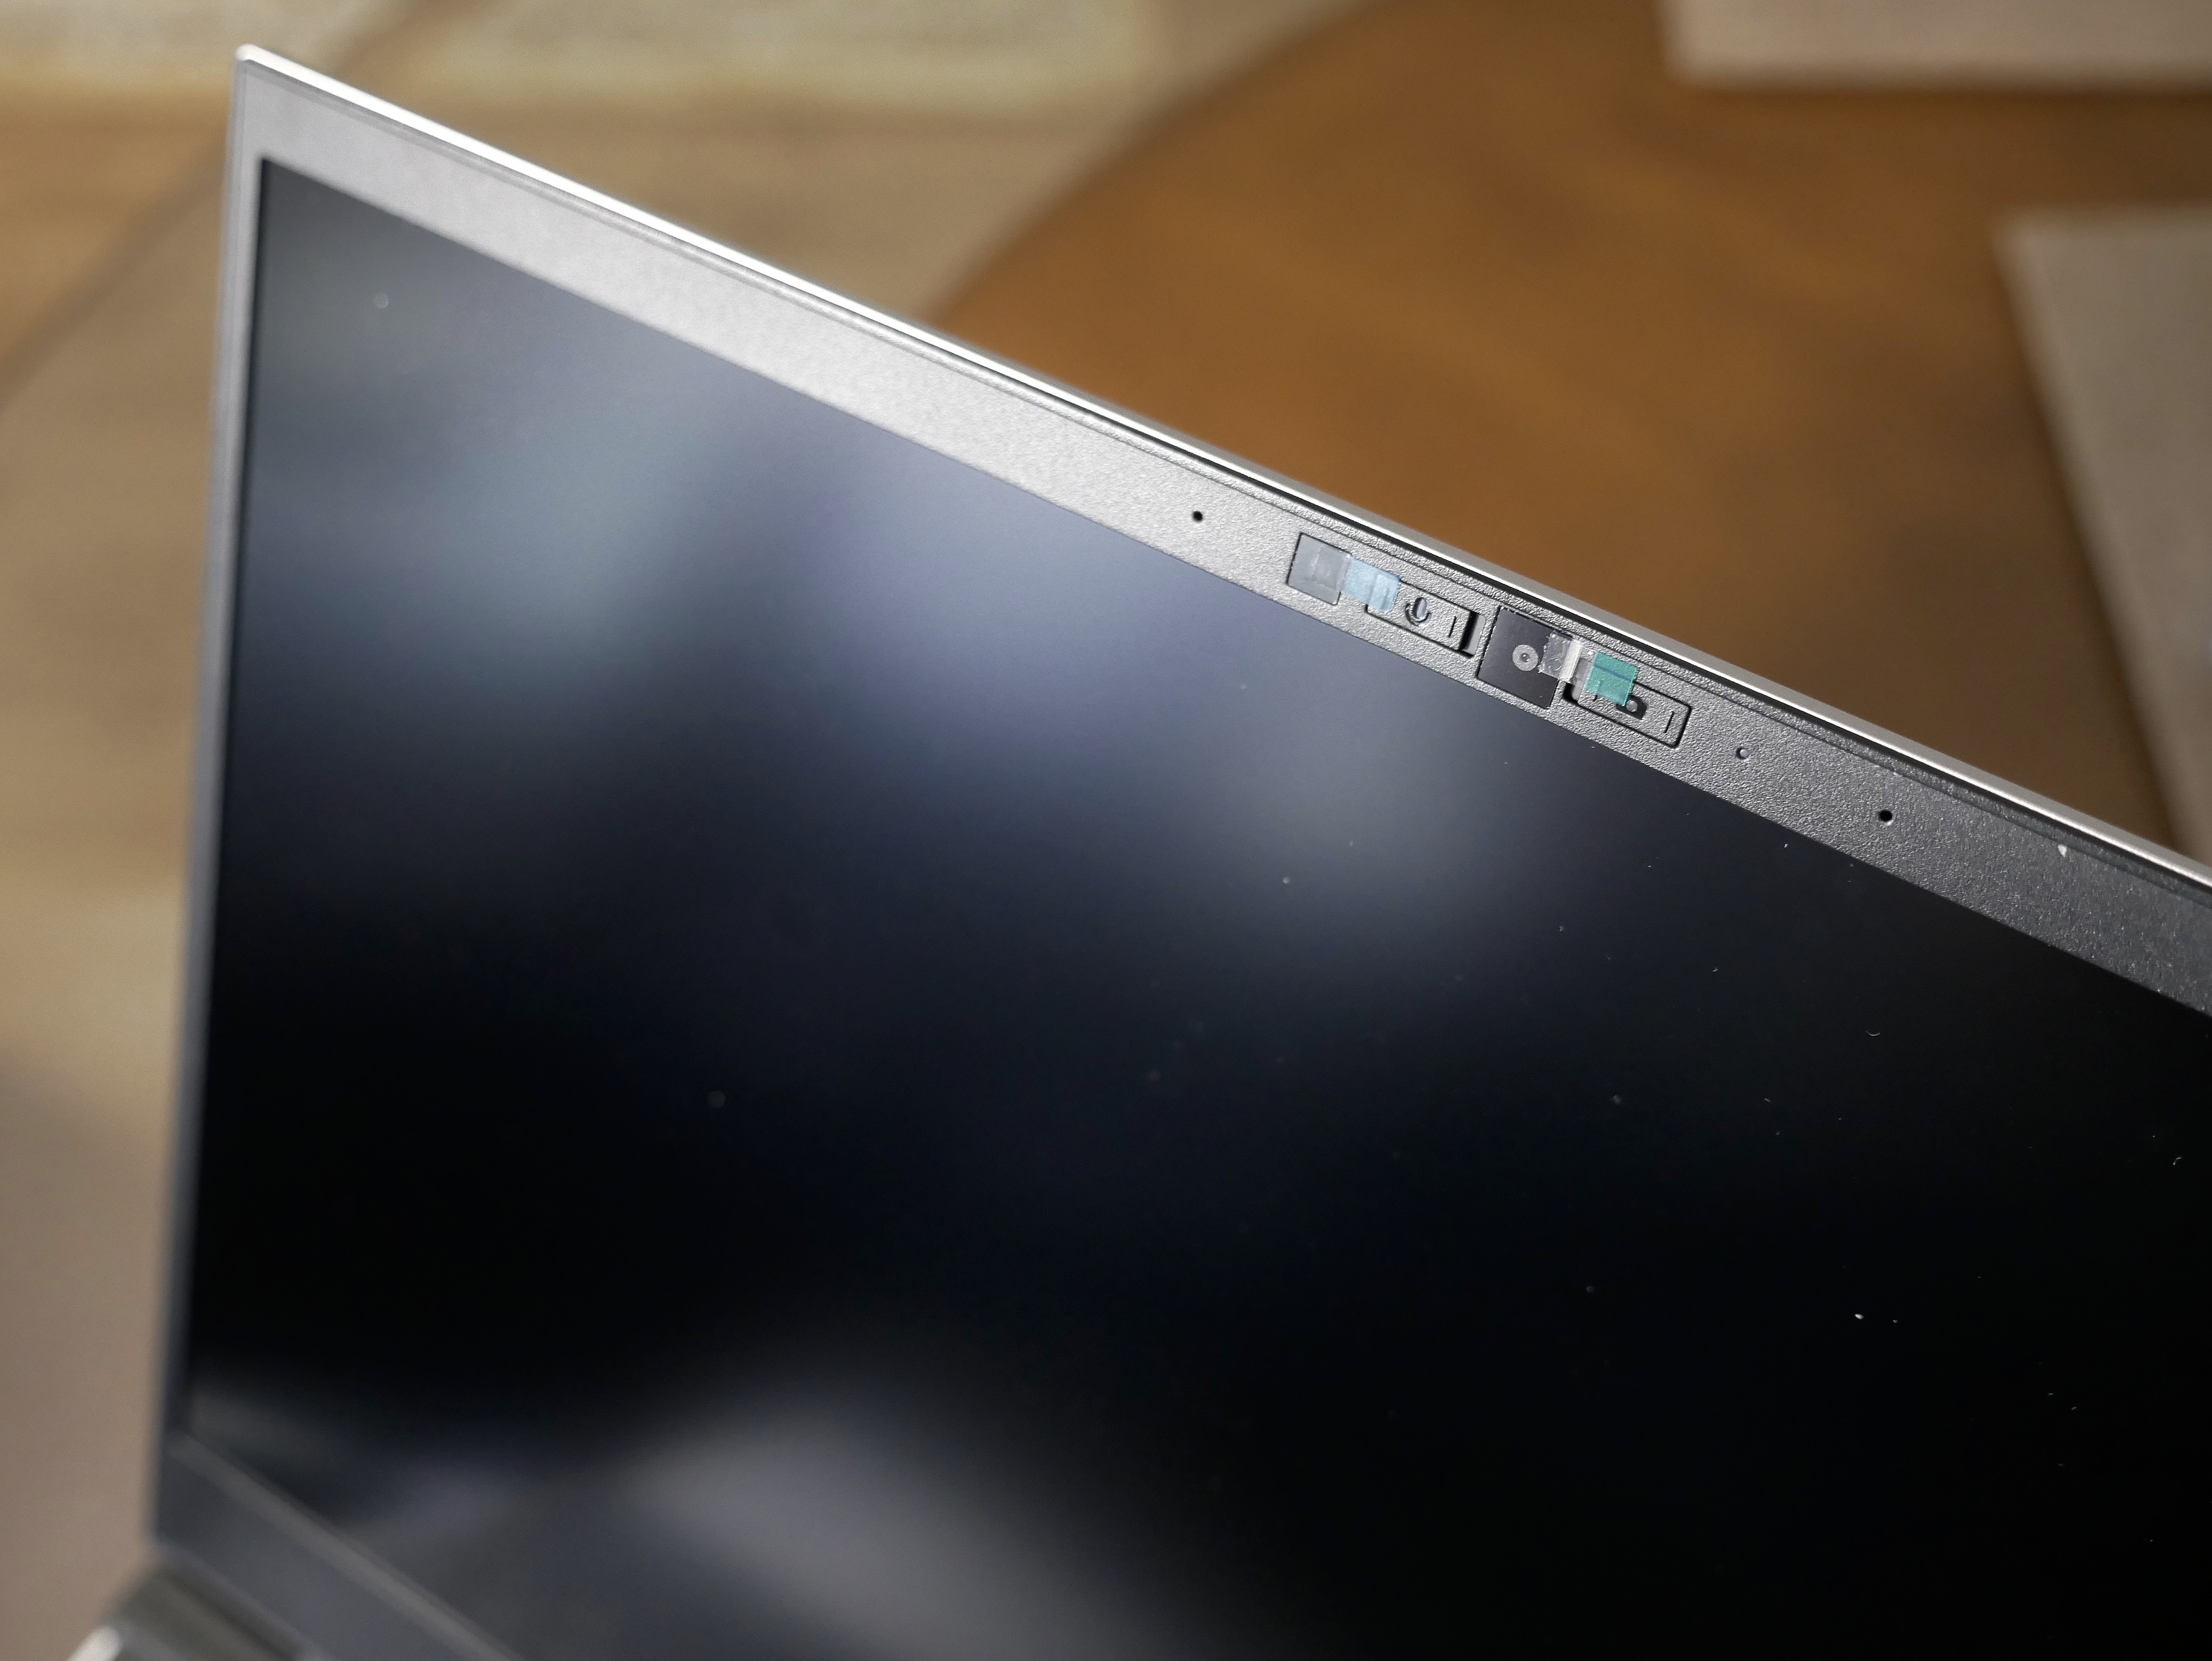
Also included is a faceplate for the bevel area, or “frame” of the screen. This is packaged in its own protective box. Carefully open the container and gently bring the frame to the screen. Magnets will snap and hold the frame in its proper place.
13. Adding Expansion Ports
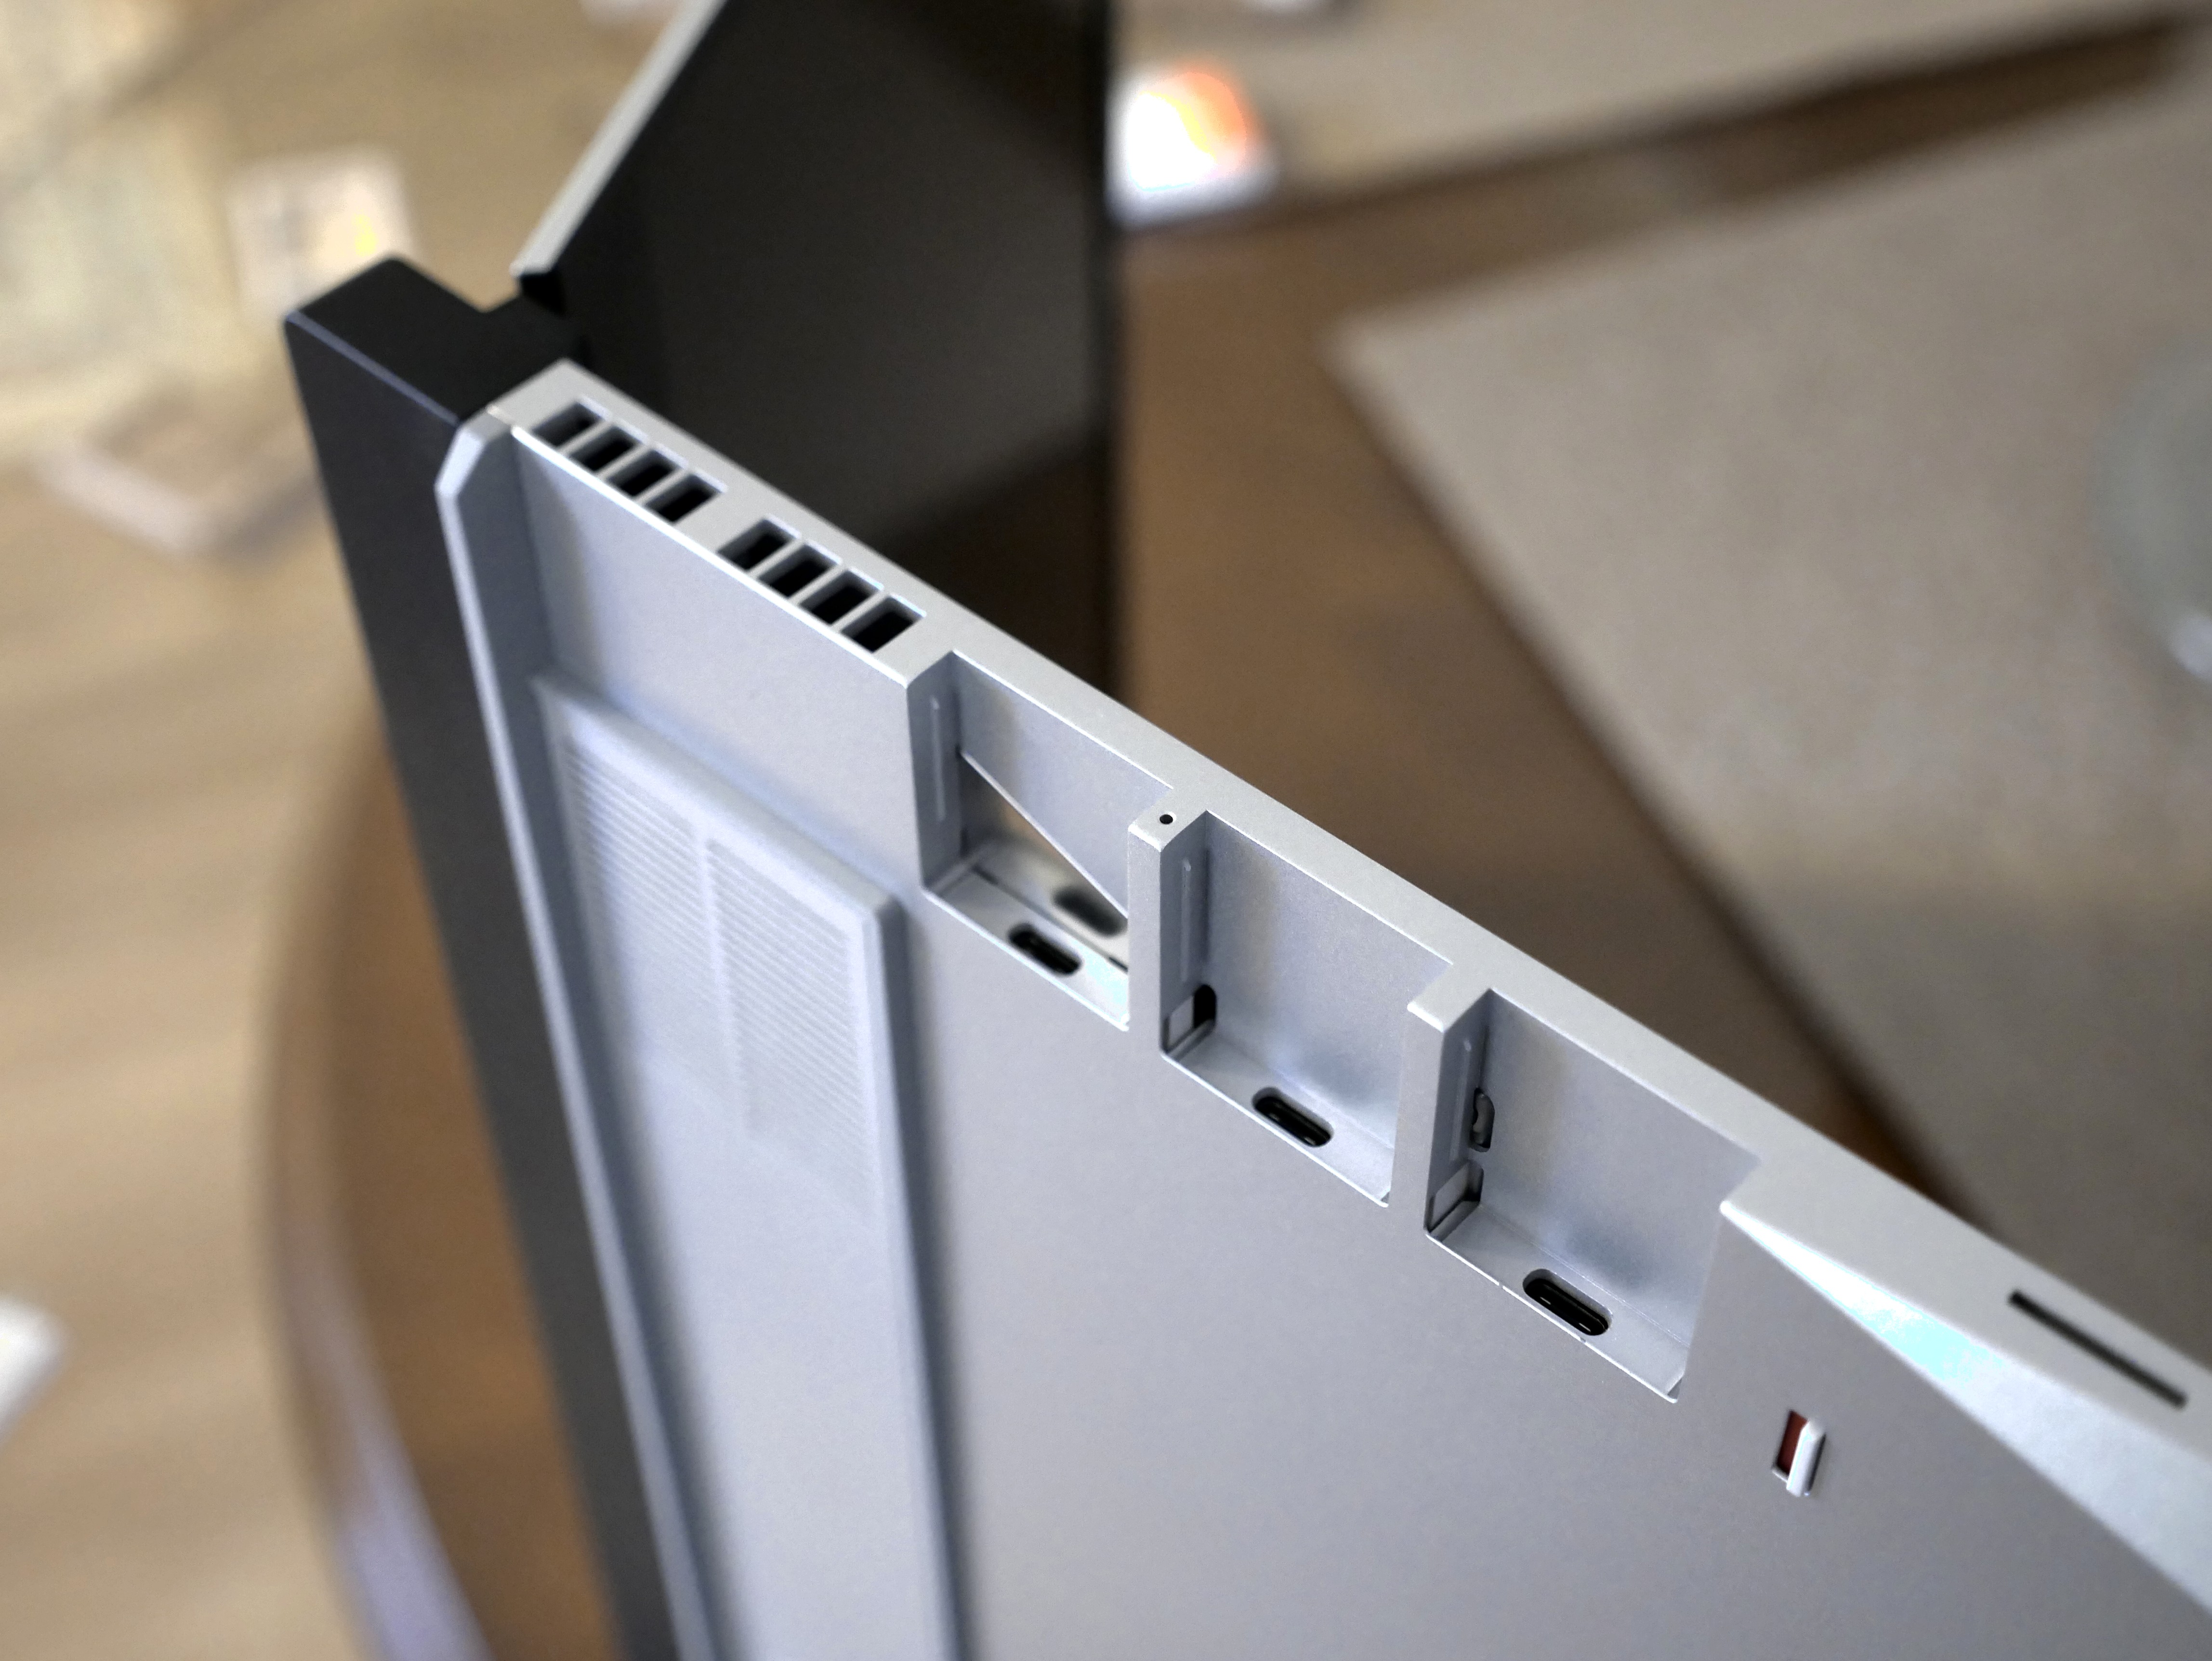
You may have noticed that there were no expansion ports along either the left or right sides of this large laptop. MacBook users are used to this and may have thought nothing of it, but the rest of us like having versatile connectivity. And the Framework laptop truly excels here.
As with the rest of its modular design, every in/out port is provided as its own module. Which gets plugged into the large empty spaces on each side of the body. You want your laptop to have a USB-C port, simply plugin one USB-C module. Or 2 or 3. The same for DisplayPort, HDMI, Micro SD reader, Ethernet plug and other connections.
This is pretty wild, and I can think of a number of times over the years this would have come in handy. For example, how many times have you needed an additional USB port? With most laptops that means buying a hub. With the Framework, it just means pulling out a module that isn’t being used and plugging in another USB. It also means we can choose which side of the laptop we wish to place any of our ports. This is another nicety that is helpful when rigging a laptop into larger audio or video workflows.
Summary:
This 16” unit is quite large, making it a wonderful mobile workstation. Our copy came pre-upgraded to have their enhanced discreet GPU (the black bar behind the hinge). This option adds a tiny bit of bulk, and an additional $400US to the price tag for an AMD Radeon™ RX 7700S graphics engine with 8GB of video ram (see our best graphics card guide if you're in the market). This truly enhances the laptop’s use for graphics, 3D and other heavier lifts. The standard configuration relies on the CPU’s built-in graphics.
The Framework online store offers an amazing range of replacement and enhancement parts. And for the most part, I was again blown away by how affordable they were (our best value laptops offer the same value). For example, many of the in/out expansion module start at just $9US. Considering how these are all Framework specific, 2-3 times that price would have still been fair. So I can’t imagine anyone questioning the company’s value proposition.
While the DIY build was my initial attraction for this article, in hindsight that really isn’t the big deal. What is a big deal is Framework’s versatility and configurability. And if you are thinking of buying it for those reasons, you may as well get the DIY version as a way to become familiar with its components that you may change yourself later. The cost savings is an added perk.
But you may want to know, how is this unit in actual use? We will be putting it through its paces over the next few weeks and have a real-world review for you shortly.

Lance Evans is creative director of Graphlink Media (graphlink.com), a boutique creative marketing agency in NYC, with clients like Olive Garden, Miller Beer and AMEX. Lance recently launched "OPEN STUDIO | NY", a YouTube channel looking at production techniques for advertising and publishing shops. Visit it at youtube.com/@OpenStudioNY
