How to make a tutorial video
Share your design skills and promote yourself online by making a professional looking tutorial screencast. Mylène Boyrie explains how in 10 easy steps.
Daily design news, reviews, how-tos and more, as picked by the editors.
You are now subscribed
Your newsletter sign-up was successful
Want to add more newsletters?

Five times a week
CreativeBloq
Your daily dose of creative inspiration: unmissable art, design and tech news, reviews, expert commentary and buying advice.

Once a week
By Design
The design newsletter from Creative Bloq, bringing you the latest news and inspiration from the worlds of graphic design, branding, typography and more.

Once a week
State of the Art
Our digital art newsletter is your go-to source for the latest news, trends, and inspiration from the worlds of art, illustration, 3D modelling, game design, animation, and beyond.

Seasonal (around events)
Brand Impact Awards
Make an impression. Sign up to learn more about this prestigious award scheme, which celebrates the best of branding.
Tutorials are a great way of building an audience on your blog. But there are so many bloggers offering this type of content nowadays that it seems difficult to stand out from the crowd… Plus, you have to be good at writing - and enjoy it. If you’re more of the visual type, you may want to try recording screencasts. Video tutorials are excellent ways of learning, because you can follow the process step by step while hearing the tutor explain it. And it’s quite easy to create, if you follow some simple rules.
In this post, I’ll share a few tips to help you create solid and valuable video tutorials.
01. Get a microphone

You may think that your computer’s built-in microphone will do the trick, but if you want to record screencasts on regular basics, it’s a good idea to pour a little money in a USB microphone. I recorded my first screencast with my MacBook’s built in microphone; as a result the sound was muffled. Since then, I record with a USB microphone, and the result is much better.
If you’re a real control freak, you can complete the microphone with a pop filter, which will reduces vocal popping and sibilance. The good news is that you don’t have to spend a lot to get top quality equipment: you can find good USB microphones, such as the Blue Microphones Yeti, for under $100.
02. Choose your screencasting software
Then, you’ll have to choose the software that will help you recording your screencasts. It’s difficult to figure which one to pick, as there are a lot of them. I recommend Screenflow if you’re using a Mac, and Camtasia if you’re running Windows. These two top-notch tools will, of course, allow you to record what’s happening on the screen and your commentaries, but they also allow to do some great editing.
This pair is the most popular screencasting software, but they require payment. If you are looking for a free one, you can look for CamStudio for PC, or QuickTime, which is included in Mac OS X.
03. Write a plan
Don’t forget the goal of your video: to help your audience. So, even if you know the procedure you’re going to explain from every conceivable angle, write down the plan of your tutorial. First, it will help you to remain focused and clear: there’s nothing worse than a confused screencast. Then, writing it down will help you to think about every possible details and tips you can add, making your screencast exhaustive and valuable.
Daily design news, reviews, how-tos and more, as picked by the editors.
04. Choose great examples

Now that you’ve gathered good equipment, it’s time to think about what you will be talking about. As an example, let’s say you plan to explain how to carve out a photo with Photoshop (as in this tutorial by French designer Serge Ramelli). Don’t choose a boring image where there is no challenge. Take a complicated and beautiful photo. Your screencast will be easier to promote if the result is beautiful: it will attract viewers and show your skills at the same time.
05. Rehearse before recording
This advice follows on from the previous one. To prevent any problem, rehearse your tutorial before actually recording it. If a window you didn’t expect pops up during the recording, it’s likely you are going to sound puzzled. The same rule applies when you show a procedure in specific software: you’ve got to be able to explain your audience every possible detail of the technique you are showing. So, study and take notes, it will prevent any mental block during the recording.
06. Prepare a neutral workspace

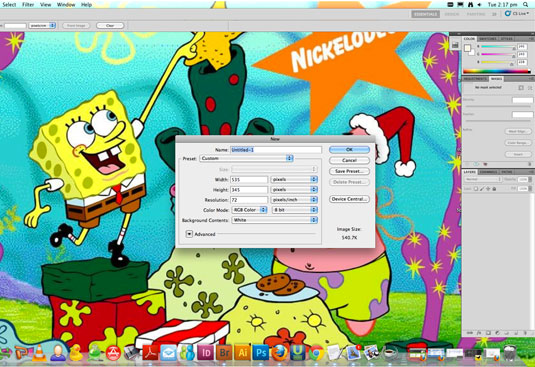
You may really like your SpongeBob SquarePants wallpaper, but let’s face it: nobody wants to see it while trying to figure out how to do something clever in Photoshop. The same rule applies for the mess that’s lying on your desktop. So, think about cleaning all this before starting your screencast.
You can even create a user session dedicated to your screencast work (and keep it clean). Don’t forget either that Screenflow can hide the mess of your desktop with a simple click. Last but not least, some focus applications, as Concentrate, can be configured to change your wallpapers, launch and quit applications when starting a new task, disconnect your Skype or Aim session…
07. Announce objectives and show results
Whether you're creating a written or video-based tutorial, it’s always a good idea to show the final result and explain the tutorial's goals straight in the introduction. This will help your audience understand what you're talking about, and keep them excited about the tutorial. It’s nice to do the same as a conclusion, too: you’ll show that you achieved everything you promised in the first place.
08. Explain possible mistakes
You made your debut at some point too, and made mistakes while learning. It’s more than likely someone in your audience will meet the same problems. Take the time to analyse them, and to explain how to overcome them. It’s always a good idea to pre-empt some questions. Once again, it will make your screencast more valuable, and you will establish your expertise in this specific domain.
09. Be yourself

Your audience won’t follow your video until the end if you talk with a monotonic voice. But they will remember you more easily if you add a little personality to your video.
You don't have to be a court jester. Personality might come in the form of adding extra info your viewers aren't expecting, creating unusual artwork for your screencasts, or just talking in a casual, natural way. Just be yourself, and you'll soon build up a loyal audience.
10. Post-production
To stand out from others screencasters, don’t hesitate to add a jingle, subtitles for extra information, zoom, shortcuts… Anything that can make the viewing easier and enjoyable.
Save your video in a good quality, too. Whether you’ll be sharing it on YouTube, Vimeo or another platform, they all offer high-resolution viewing nowadays. You might as well take advantage of this and give your audience a good learning experience.
Words: Mylène Boyrie
Mylène Boyrie is a French print and web designer. She worked for publishers and print agencies for three years and has been freelancing full-time for the last two years.
Liked this? Read these!
- How to make an app: try these great tutorials
- Illustrator tutorials: amazing ideas to try today!
- Brilliant Wordpress tutorial selection
Have you done a video design tutorial you'd like to share with the community? Let us about it in the comments!

The Creative Bloq team is made up of a group of art and design enthusiasts, and has changed and evolved since Creative Bloq began back in 2012. The current website team consists of eight full-time members of staff: Editor Georgia Coggan, Deputy Editor Rosie Hilder, Ecommerce Editor Beren Neale, Senior News Editor Daniel Piper, Editor, Digital Art and 3D Ian Dean, Tech Reviews Editor Erlingur Einarsson, Ecommerce Writer Beth Nicholls and Staff Writer Natalie Fear, as well as a roster of freelancers from around the world. The ImagineFX magazine team also pitch in, ensuring that content from leading digital art publication ImagineFX is represented on Creative Bloq.
