3 top tips for sculpting an alien torso
Weta Digital artist Madeleine Scott-Spencer shares some of her sculpting secrets.
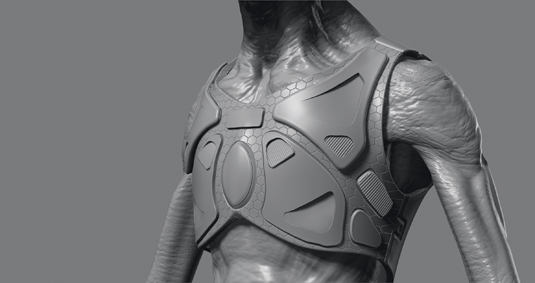
Madeleine Scott-Spencer knows what she's talking about when it comes to sculpting creatures. Recently completing five years' work on The Hobbit Trilogy, the Weta Digital artist takes us through some top tips when creating an alien torso using ZBrush 4R7.
01. Start sketching
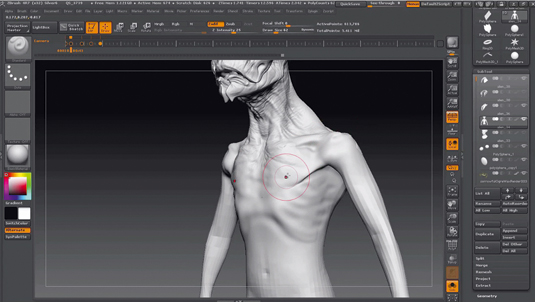
Sketch in the basic forms of the torso using the Clay Tubes brush. This is an ideal brush for establishing form and flow. If you disable the alpha you can create great soft subtle shapes. Start by blocking in the deltoids, pectorals, and ribcage.
02. Sculpting muscles
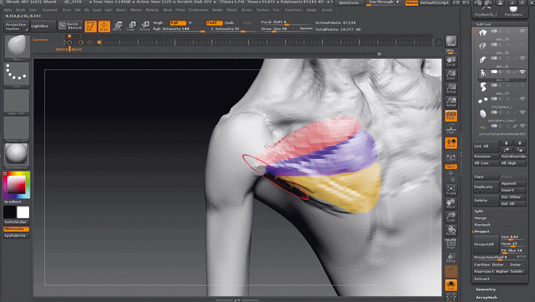
Muscles have multiple sections, often visible in more sinewy creatures. The deltoid has three sections or heads, so do the pectorals. I colour coded where I've sketched in the pectorals using three distinct strokes. Keep this structure in mind so it remains visible beneath the skin of the final creature if that degree of muscularity is appropriate.
03. Sketch landmarks
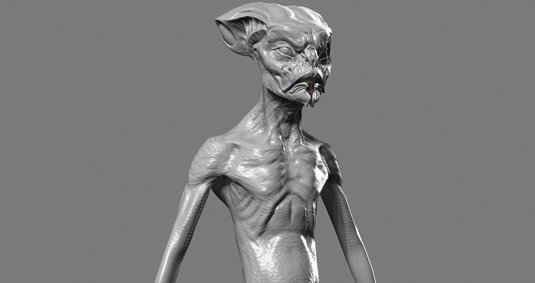
I use the Standard brush with Alpha 01 to sketch in the recesses between muscles and in bony landmarks. This is a process of catching light and shadow on the surface to accentuate landmarks. You can see how I accentuated the ribcage, especially the thoracic arch at the top of the abdomen.
I've also been careful to accentuate the sweeping arc of the collar bones, these are important bony landmarks and getting the right gesture to these lines is integral to maintaining the beauty of the structure of the neck. I've included sculpting footage of this process.
Words: Madeleine Scott-Spencer
Madeleine is an artist at Weta Digital in New Zealand where she recently completed five years’ work on The Hobbit trilogy. Madeleine uses ZBrush extensively in her work. These tips originally appeared in 3D World Magazine issue 202. Head here to purchase the magazine for her full tutorial.
Daily design news, reviews, how-tos and more, as picked by the editors.
Like this? Read these!

The Creative Bloq team is made up of a group of art and design enthusiasts, and has changed and evolved since Creative Bloq began back in 2012. The current website team consists of eight full-time members of staff: Editor Georgia Coggan, Deputy Editor Rosie Hilder, Ecommerce Editor Beren Neale, Senior News Editor Daniel Piper, Editor, Digital Art and 3D Ian Dean, Tech Reviews Editor Erlingur Einarsson, Ecommerce Writer Beth Nicholls and Staff Writer Natalie Fear, as well as a roster of freelancers from around the world. The ImagineFX magazine team also pitch in, ensuring that content from leading digital art publication ImagineFX is represented on Creative Bloq.
