How to sculpt a demon in ZBrush
Learn how to push your sculpts to the next level with this refined detailing tutorial by Titouan Olive.
Sign up to Creative Bloq's daily newsletter, which brings you the latest news and inspiration from the worlds of art, design and technology.
You are now subscribed
Your newsletter sign-up was successful
Want to add more newsletters?
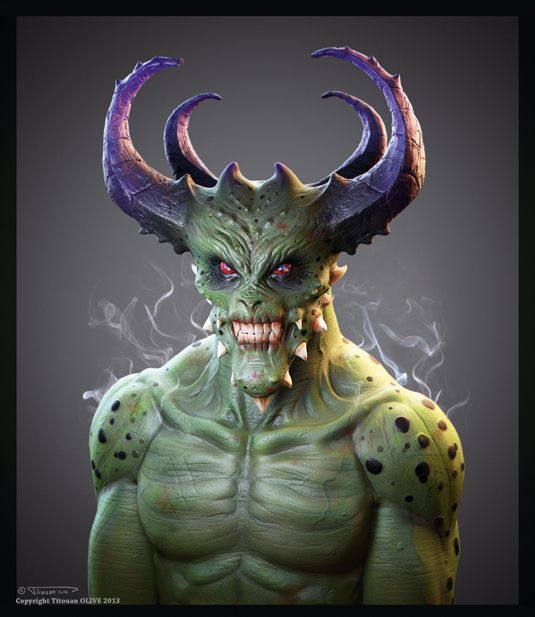
The common themes in ZBrush tutorials about character creation are the importance of getting a good base, keeping correct proportions, respecting the anatomy and so on. All this is completely true: these are the most important things to take care over when you sculpt a character.
In this tutorial I'll sculpt an imaginary creature's head, since it's the best model to add details to very freely. I'll start with a pre-made model that I've prepared especially for this tutorial. The main shapes are already roughed out to help you on focusing on details. I'll show you how to push your sculpt higher and how to add details by hand, as well as using alphas.
Adding details is a really enjoyable process, but be careful you don't overkill your model with too many. Each detail needs to be suitable and has to make sense.
Article continues below01. Load the base mesh
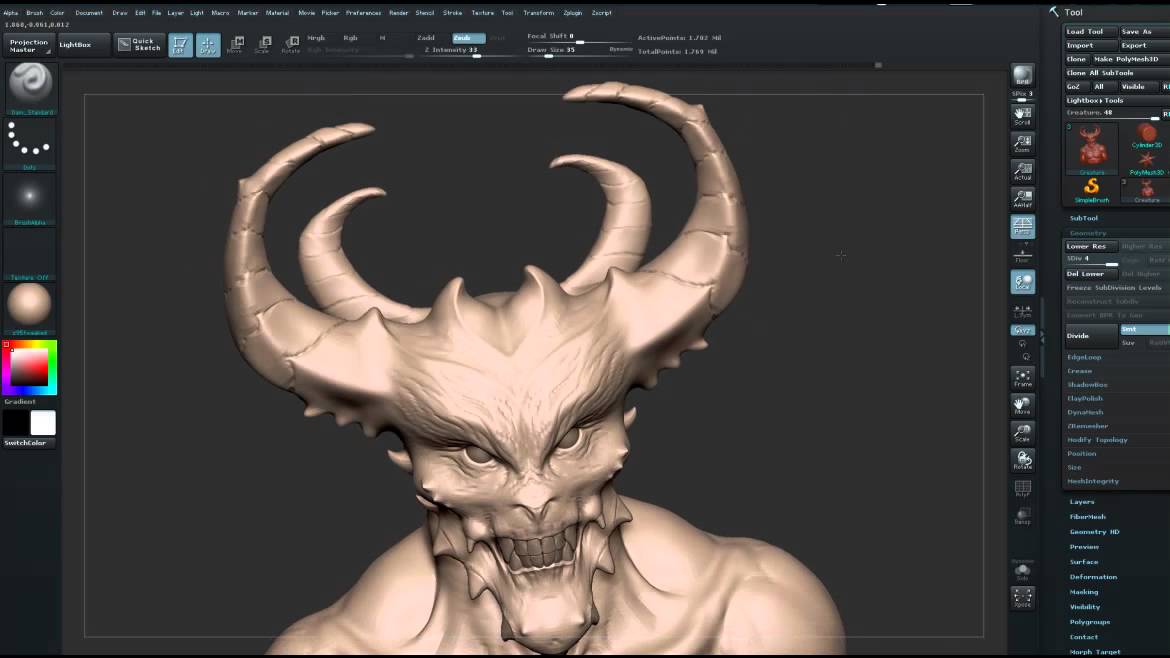
Start by dowloading the base mesh. Next enter Edit mode, and press T. As you can see, the main anatomical masses are in place and the global shapes are already blocked out correctly.
I have also prepared polygroups (press Shift+F to see them with different colours). Polygroups are, as you might guess, groups
of polygons and will be useful to isolate an area or another. It will also be much easier to work this way.
02. Subdivide the model
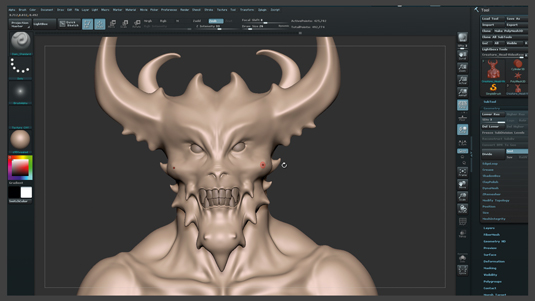
Start by clicking twice on the Divide button to subdivide your model. You will need a good amount of polygons to add detail to the character's head, so don’t shy away from working with pretty high densities.
I regularly use the DamStandard brush to add details but you can use your preferred brush. It doesn't really matter as long as you sculpt with a pretty small radius. Try to refine the nose and the nostrils at first and then work on the area around the teeth to frame them correctly.
Sign up to Creative Bloq's daily newsletter, which brings you the latest news and inspiration from the worlds of art, design and technology.
03. Work on the facial features
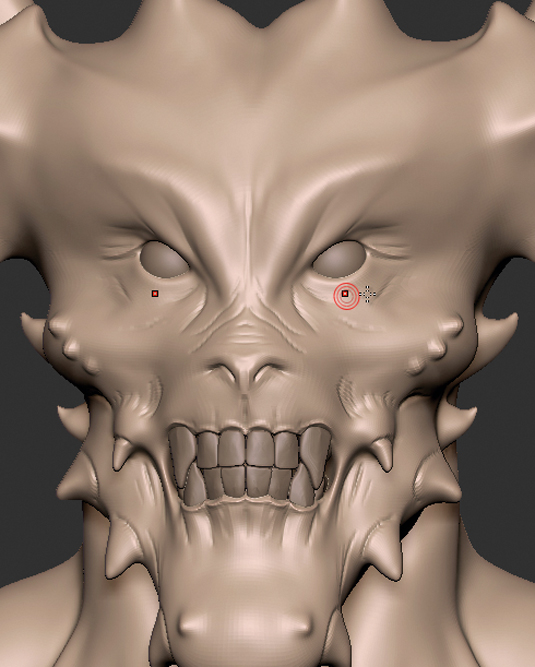
Draw lines around the eyes and continue your work on the eyebrows, on the side of the mouth and on the nose. Don't hesitate to use the Smooth brush when your work looks too sharp. Frame the small horns coming out from the face by drawing a line around them.
You can also use the Pinch brush to tighten the strokes. Now isolate the polygroup of the face - hold Ctrl+Shift and click on the face - then detail the eyelids, and refine the nose and the chin.
04. Detail the forehead
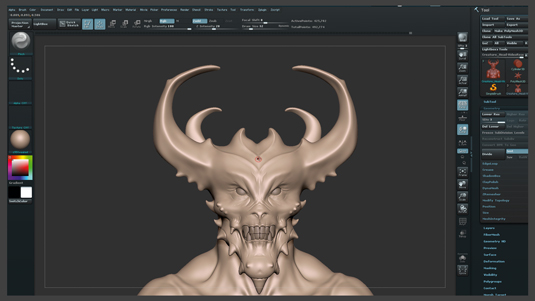
Hold Ctrl+Shift again and click on the canvas to make the whole model visible again. Next, work on the surface of the forehead drawing regular lines. When you're done, select the polygroup for the biggest horns on the top of the head (Ctrl+Shift and click on them).
Sculpt very rough lines to create several irregularities and use the Pinch brush to clean them up. This step is time-consuming since you're obliged to turn around your model to complete the lines. They are still very rough but we'll come back on this area later.
05. Create lines
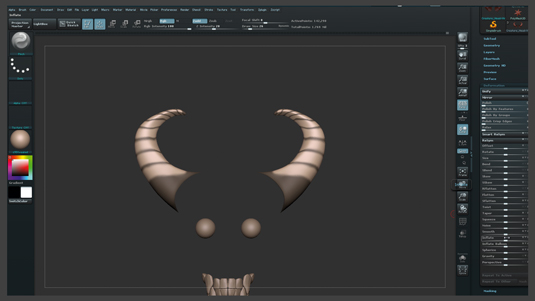
Here is another way to create lines: isolate the other horns (on the back of the head) to add details on them just as you did previously. However instead of sculpting lines, simply draw a mask (hold Ctrl and paint directly on the horns) and, when you're done, go into the Deformation menu and play with the Inflate slider to form the lines and refine them with the Pinch brush.
These two methods lead to the same result, but it's useful to know both as it's easier to use the first or the second way depending on what you’re working on.
06. Refine the demon's torso
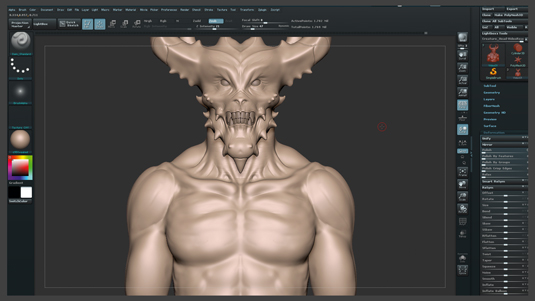
Next, work on the body and refine the muscular system as well as the prominent bones, such as the clavicles. Also sharpen the muscles of the neck and work on the face more.
Start by isolating it to be more focused on this one area, and reinforce the surface around the nose and close to the teeth. Then, use the Pinch brush on the small horns of the face and draw several strokes to frame them in a pleasant way.
07. Add wrinkles to the face
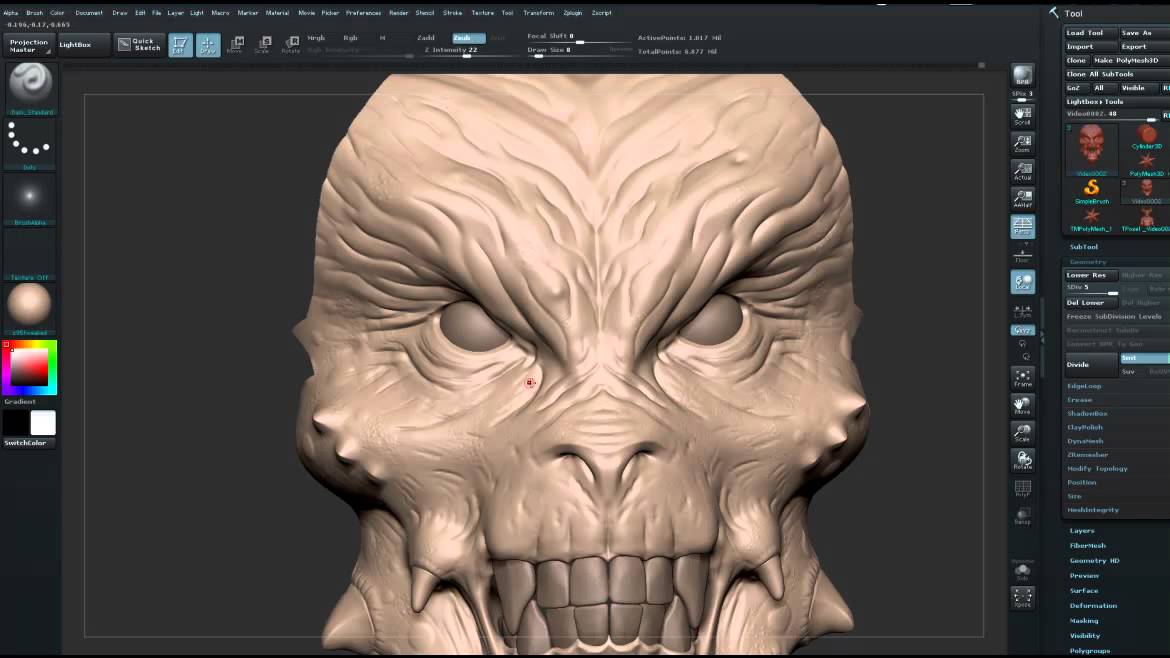
Isolate the polygroup of the face and start to add details by drawing several wrinkles on the forehead and on the eyebrows. Here, once again, I use the DamStandard brush, which is just perfect for this kind of sculpt.
Sharpen the wrinkles under the eyes and on the nose and move up the nostrils to give the face a stronger expression. Continue to work on the area around the teeth to give more and more definition.
08. Add detail to the eyes
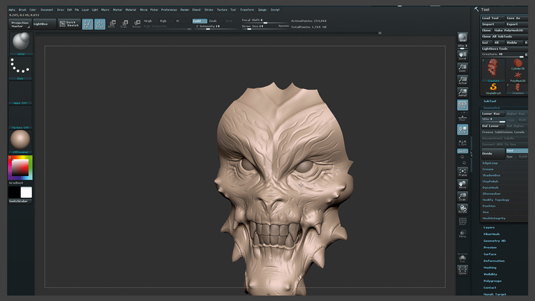
Add more volume under the eyes using the Inflate brush and do the same thing on the eyebrows and on the forehead. Try to paint between the wrinkles to accentuate them. Make the whole model visible again and add some more folds on the head.
Now focus your work on the biggest horns and sculpt a reasonably large amount of lines on them, working with a low radius and following their direction. Remember you can isolate this area to make your life easier.
09. Introduce irregularities
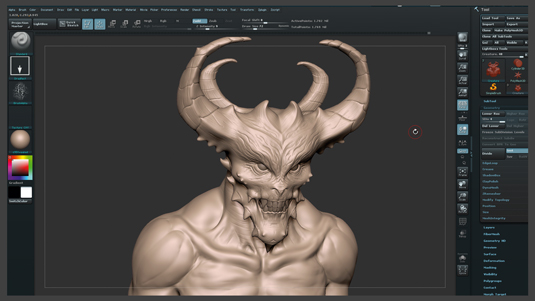
Repeat the same operation on the small horns, but use the Pinch brush on them to sharpen their sides first. Try to change the radius of your brush from time to time to add some irregularities. Next, let's investigate how we could add more details using alphas.
Start by choosing the Standard brush and select DragRect under the Strokes menu and Alpha 22 in the Alphas menu. Then turn off Symmetry and paint with this brush on the top of the head.
10.Add spots to the sculpt
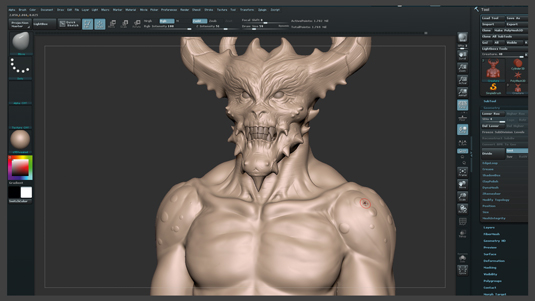
To add spots, choose alpha 06 and draw several spots on the shoulder and on the head. It's important to have Symmetry turned off at this step so you don't draw the same shapes at the same place on both sides. Break the roundness of the spots to make them more natural and less perfect.
Successful detailing is also born out of experimentation, so you should try to use different alphas to see if you can get some nice effects. But take care that you don't overload it with unnecessary details.
11. Sculpt veins on the neck
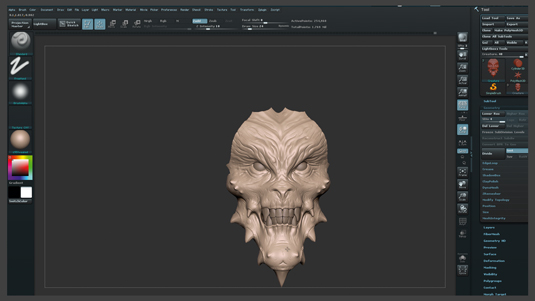
Now it's time to work on the face some more, refining the chin and so on. Use the Pinch brush when you feel you need it, and sharpen the folds on the nose. Once you're happy with the face, isolate the neck by selecting its polygroup and draw several subtle veins on each side.
Also sculpt some veins on the bust and on the arms. Try to place them correctly and use references if you have some close to hand. Draw some irregularities and some spots on the face (remember to keep Symmetry turned off at this stage).
12. Sharpen the muscular system
Next, add some more detail to the body by sharpening the muscular system. Draw several strokes on the arms to give them more relief and to increase their level of detail.
Also, focus your work on the ribcage. Subdivide your mesh one last time, if you feel you need it, then select the Standard brush and choose DragRect coupled with Alpha 07 to give a grainy aspect on some parts of the body and the face.
13. Add noise
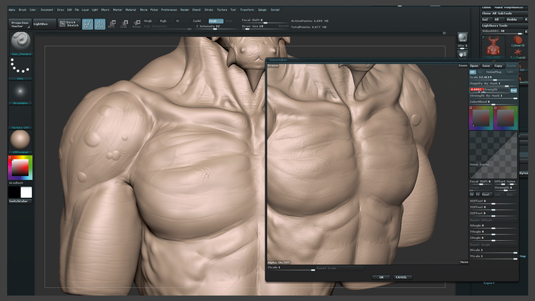
Sculpt more irregularities such as small scratches, wrinkles and scars on the face and body, and repeat the same operation on the horns in order to break up their symmetry a little more. Once you're done, open the Surface menu and click on Noise.
A new window will pop up and a slight noise will be automatically applied to your model. Play with the Scale and Strength sliders then click OK. Draw a mask on the face so that you don’t affect this area and click on Apply to Mesh.
14. Final refinements
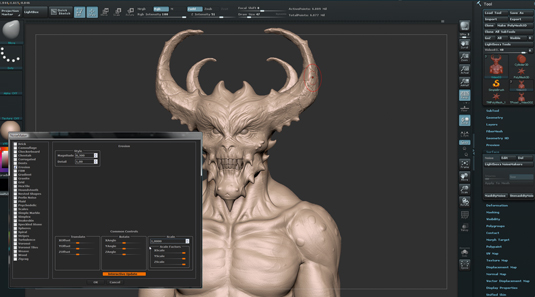
Mask everything except the biggest horns, and then click on Noise again, and on the Edit button. Now, click on NoisePlug to open the NoiseMaker window and select Erosion with a scale factor set at 1. Click OK and then adjust the Strength slider, if you need to, and click on Apply to Mesh once again.
Repeat the process for the smaller horns on the back of the head. Finish your work by adding some irregular strokes here and there, and try to break up the symmetry using the Move tool
Words: Titouan Olive
Titouan Olive is a freelance 3D artist working as lead character artist on animated films and video games. This article originally appeared in 3D World issue 178.

The Creative Bloq team is made up of a group of art and design enthusiasts, and has changed and evolved since Creative Bloq began back in 2012. The current website team consists of eight full-time members of staff: Editor Georgia Coggan, Deputy Editor Rosie Hilder, Ecommerce Editor Beren Neale, Senior News Editor Daniel Piper, Editor, Digital Art and 3D Ian Dean, Tech Reviews Editor Erlingur Einarsson, Ecommerce Writer Beth Nicholls and Staff Writer Natalie Fear, as well as a roster of freelancers from around the world. The ImagineFX magazine team also pitch in, ensuring that content from leading digital art publication ImagineFX is represented on Creative Bloq.
