Tips for turning a 2D cartoon into a 3D concept
This mini-walkthrough will help you to make the leap from a 2D cartoon to a 3D concept.
Sign up to Creative Bloq's daily newsletter, which brings you the latest news and inspiration from the worlds of art, design and technology.
You are now subscribed
Your newsletter sign-up was successful
Want to add more newsletters?

Five times a week
CreativeBloq
Sign up to Creative Bloq's daily newsletter, which brings you the latest news and inspiration from the worlds of art, design and technology.

Once a week
By Design
Sign up to Creative Bloq's daily newsletter, which brings you the latest news and inspiration from the worlds of art, design and technology.

Once a week
State of the Art
Sign up to Creative Bloq's daily newsletter, which brings you the latest news and inspiration from the worlds of art, design and technology.

Seasonal (around events)
Brand Impact Awards
Sign up to Creative Bloq's daily newsletter, which brings you the latest news and inspiration from the worlds of art, design and technology.

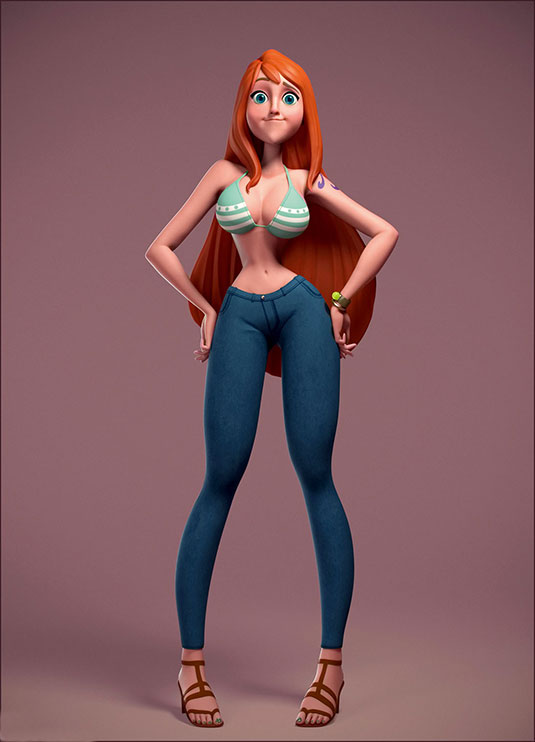
To show you how to turn a 2D concept into a piece of 3D art, I'm going to use a cartoon piece I recently finished (based on a concept by Gop Gap) as an example. It's essentially Nami from the manga One Piece, but I decided to 'Disney-fy' her a little.
When it comes to making cartoon characters in 3D from any concept, it's important to make it appealing. If it's for animation in a TV show, advert or film, the odds are that it will be seen from different angles. What looks good from the front view may not look good from the side or the three-quarter view.
It's essentially Nami from the manga One Piece, but I decided to 'Disney-fy' her a little
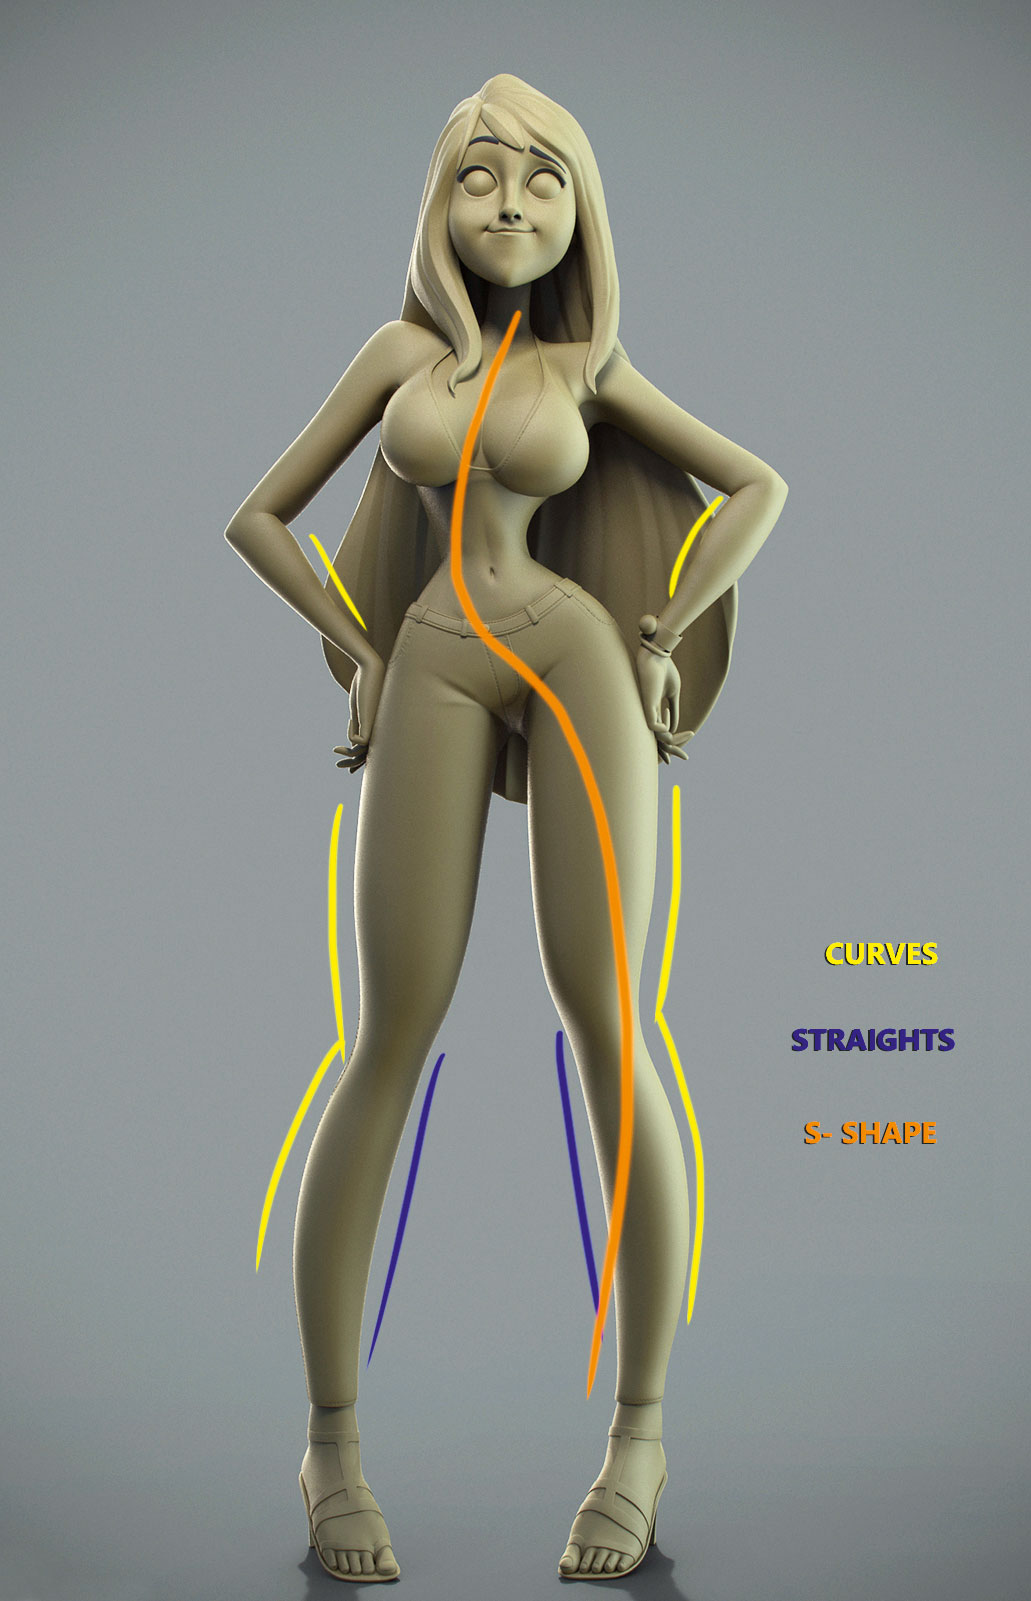
I followed the principles of curves versus straights quite a bit in this piece, especially on the limbs. One side is usually curved and the other is straighter. This technique is utilised in a lot of films by Pixar: it works really well and gives their characters dynamism on the screen.
I push the pose to try to get a nice S-shape. This accentuates the curves and makes the character look more appealing.

Using ZBrush, it's easy to play with proportions. I used the Move tools to make sure it looked similar to the concept, but was unique enough in 3D so as not to be a complete copy of it.
I started out in the T-pose and then used the Transpose tools with some masking to bend the limbs and fingers.
For the expression, I wanted to capture the quirky smile of the original, so it was a case of using the Move tool in ZBrush until I got it. Once the major forms and gesture were done, I went in smaller; tweaking the finer details. I wanted to get the clothes, colours and lights right.
Sign up to Creative Bloq's daily newsletter, which brings you the latest news and inspiration from the worlds of art, design and technology.
This all depends on the concept you're working with, however, the principles apply to most 3D cartoon pieces: Getting the form, curves and straights; capturing the gesture; and making sure the figure works in the round or from all angles.
The most important skill needed here is a knowledge of human anatomy. While is it a cartoon piece, the character is still grounded in reality, and if you intend to bend the rules, you should know about them in the first place!
Expert tip - make sure everything looks good 'in the round'
When sculpting or creating any character, cartoon or otherwise, it's important to not just check it looks good from the front and side view, but also from above and below.
Sometimes we forget this and wonder why our models look slightly off. Once all the views are locked down, the form will be ready for detailing.
This article was originally published in 3D World magazine issue 207. Buy it here.
