How to model a character for animation
Jean-Michel Bihorel shares his process for modelling a detailed character in ZBrush.
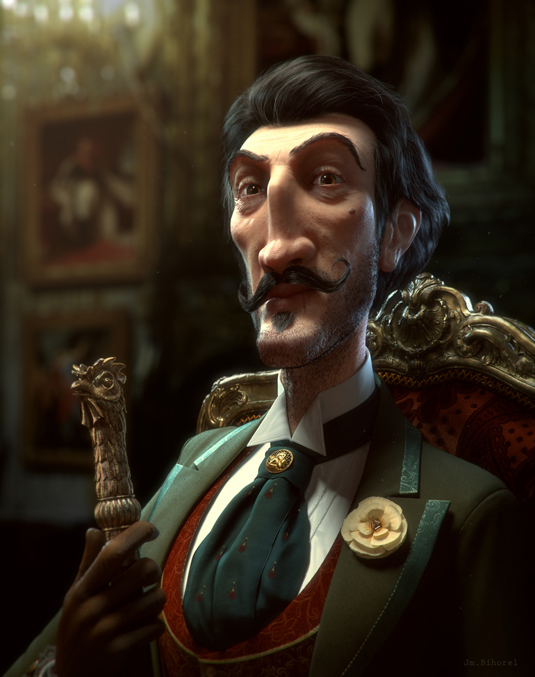
Artist Jean-Michel Bihorel shared the character design of Georges Henri de la Poudrière with fellow artist Camille Campion. The concept was devised on paper by Camille and then Jean-Michel realised it in 3D, from modelling to compositing. The project took a year to create as Jean-Michel modelled the entire figure for animation as well as paying attention to the finer details.
"I used photogrammetry to reconstruct the carved wood part of the chair," explains Jean-Michel, who visited the Louvre museum in Paris, where he took photos of an historical Napoleon chair from different angles and fed the images into 123D Catch. "It provided me with a base to start modelling in ZBrush while staying very close from the original. 3D scanning with photogrammetry helps quite a lot but doesn't provide a complete solution. [The result] still requires quite a lot of cleaning and detailing to be usable for rendering."

01. Start with concept sketches
As my character is designed to be animated later, the process is very classic. I start from drawing research. After many iterations I or the team settle on one drawing in particular and I start to model. Here is the drawing from Camille Campion we finally settled on after many versions.
Article continues below 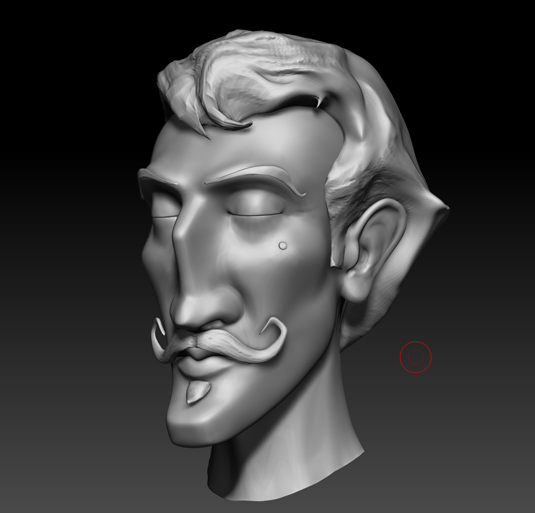
02. ZBrush concept
I started the model in ZBrush in order to move freely without the need for a topology. It is great as I can make iterations very fast in order to find the best match for the drawing in 3d. The eye tends to get used to what it sees very fast so working in maya can be dangerous as every step is very slow, it becomes less flexible and you are less likely to notice the flaws in the style. Whereas in Zbrush it move fast and it is easier to stay objective on your own work.
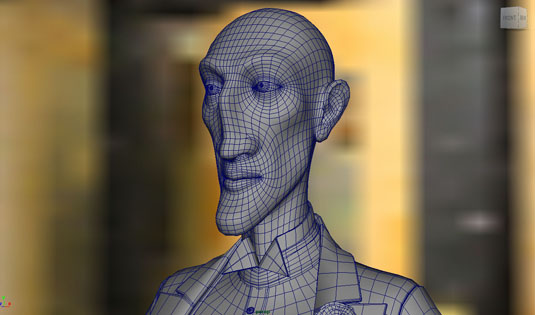
03. Retopology
Once the model is approved you just need to do a good topology for the character. It is a litle puzzle game in order to have a good flow of edge loops. You can do it in zbrush or benefit from the new modeling tools in maya. You could use 3dCoat or topogun as well.
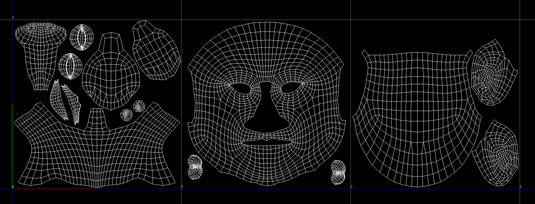
04. The UV stage
After the retopology has been finished, you have to open proper uvs. Here again it is a puzzle game in order to find a good balance between stretching and cutting the uv shells. In the case of my character I had to separate the nose from the rest of the face in a disgraceful uv cut around it otherwise the amount of stretch would have decrease a lot the effective resolution I would have been able to use for it.
First I wanted to have a lot of details so I used 3 UV patches for the head with each 8k maps. I soon realised it was too much and that it was slowing me down, not much for the rendering but more for the iterations I was able to do while painting, exporting both my textures and displacement maps in three steps was taking far too much time. So I switched back to one uv patch at the end.
Sign up to Creative Bloq's daily newsletter, which brings you the latest news and inspiration from the worlds of art, design and technology.
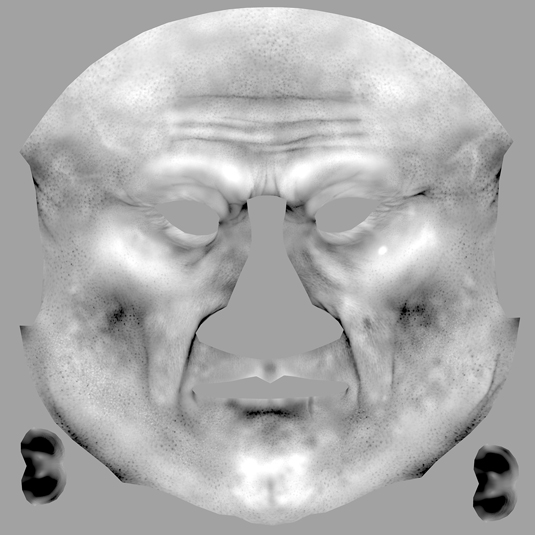
05. Displacement maps
Once your uvs are done, you can start to export all your displacement maps once you details have been re-projected. Personally I use some exr 32 bit float maps in order to keep consistent settings across the scenes and have the same result than in Zbrush without having to play with numbers.
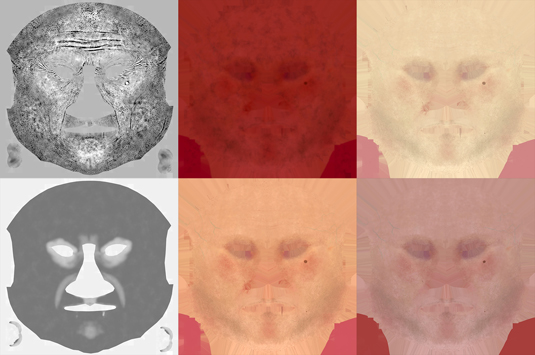
06. Painting textures
I usually start to paint my textures once all these steps are achieved. I paint different layers of details in ZBrush and combine them in Photoshop or nuke based on the projects. Then I use the same layer in a different way to output my specular maps and other utility maps. I often us cavity maps from ZBrush to add a bit of extra detail in my hand painted textures.
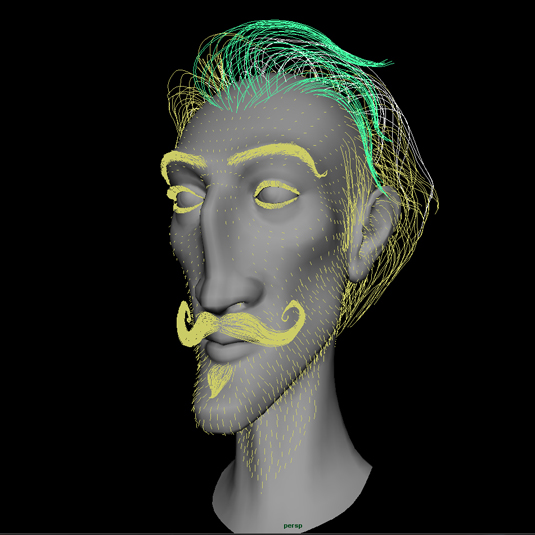
07. Combing hair
Combing the hair was a quite time consuming process. I comb one patch at the time in order to have more control. I define a small area, comb it precisely then jump to the next one utils I have the full hair-style. Yeti is very good for that kind of process as you can combine all the patches in the same node tree at the end.
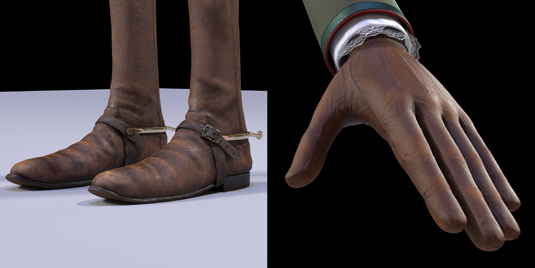
08. Using shaders
For the shaders, I tweak all the assets in a neutral environment with the same HDR for all the props in order to be able to combine them at the end and having them react all the same way to the light.
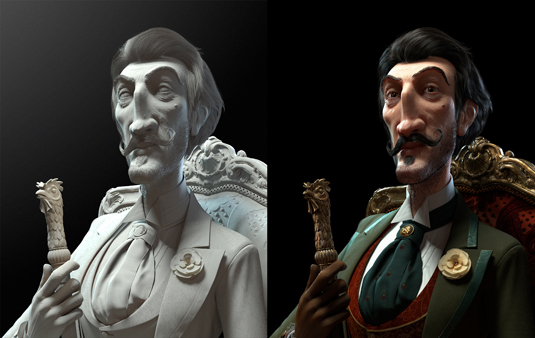
09. Comp and rendering
Once all the steps are done, I do a proxy rig. I use Advance Skeleton for that. It is a great free plugin for maya in order to speed up tremendously the time required to do a rig. I pose the character, touch up the pose for some of the elements in ZBrush then the scene is ready for the final lighting and rendering!
Lighting process in Arnold is very straight forward as everything reacts in a very physic way to the lights. Even the hair is having the same light setup which didn't always used to be the case with other rendering engines.
After that, a little bit of touch up in compositing and the picture is finished!
See Jean-Michel Bihorel's art and other artist's projects in 3D World 190, on sale now.

The Creative Bloq team is made up of a group of art and design enthusiasts, and has changed and evolved since Creative Bloq began back in 2012. The current website team consists of eight full-time members of staff: Editor Georgia Coggan, Deputy Editor Rosie Hilder, Ecommerce Editor Beren Neale, Senior News Editor Daniel Piper, Editor, Digital Art and 3D Ian Dean, Tech Reviews Editor Erlingur Einarsson, Ecommerce Writer Beth Nicholls and Staff Writer Natalie Fear, as well as a roster of freelancers from around the world. The ImagineFX magazine team also pitch in, ensuring that content from leading digital art publication ImagineFX is represented on Creative Bloq.
