Create generative art with Hype
Anton Mills makes it easy to produce stunning generative Flash art with the Hype framework
Sign up to Creative Bloq's daily newsletter, which brings you the latest news and inspiration from the worlds of art, design and technology.
You are now subscribed
Your newsletter sign-up was successful
Want to add more newsletters?

Five times a week
CreativeBloq
Sign up to Creative Bloq's daily newsletter, which brings you the latest news and inspiration from the worlds of art, design and technology.

Once a week
By Design
Sign up to Creative Bloq's daily newsletter, which brings you the latest news and inspiration from the worlds of art, design and technology.

Once a week
State of the Art
Sign up to Creative Bloq's daily newsletter, which brings you the latest news and inspiration from the worlds of art, design and technology.

Seasonal (around events)
Brand Impact Awards
Sign up to Creative Bloq's daily newsletter, which brings you the latest news and inspiration from the worlds of art, design and technology.
It was the Z4 project by Joshua Davis for BMW that first sparked my interest in the standard math functions in Flash. The Math tool enables you to rotate shapes, mix different colours and create dynamic, ever-changing designs that are as fun to make as they are to watch in action.
This type of design is called 'generative art'. Recently two giants of the Flash world, Branden Hall and Joshua Davis, joined forces to create a coding framework named 'Hype', which eliminates the overhead of working with Math, enabling creatives to experiment more, and create some pretty cool designs.
As we progress through this tutorial, you'll be introduced to some core principals of Hype. We'll create a basic design and develop it - from there, feel free to adjust some of the numbers and experiment for yourself. You'll end up with some awesome effects.
Click here to download the support files (4.36MB)
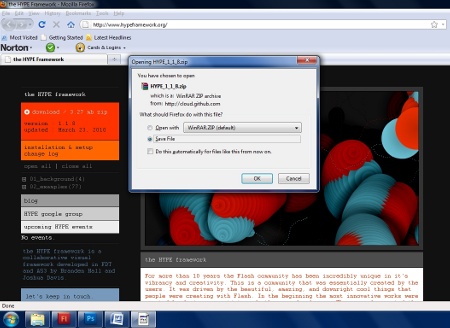
01 One of the most important resources for learning about the Hype framework is www.hypeframework.org. It contains a wealth of source code and examples to learn from. Go to the website and click the download link on the left-hand-side of the page to download the Hype framework zip file.

02 Inside the Step2 tutorial folder in the support files you will find a template project. Copy this to your computer to work with, then open the hype-framework zip file from the first step, and copy the two .swc files from the zip into the 'lib' folder in this template.
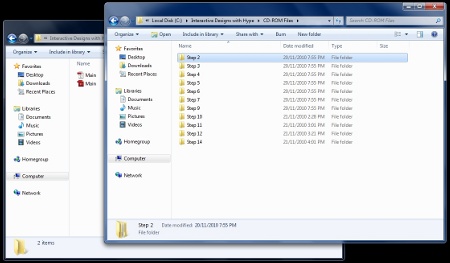
03 You're now ready to begin creating your new Hype project. You will be making changes to the code in Main.as and testing Main.flin Flash. Remember that the files for each step are included in the support files, where there are in-depth explanations.
Sign up to Creative Bloq's daily newsletter, which brings you the latest news and inspiration from the worlds of art, design and technology.
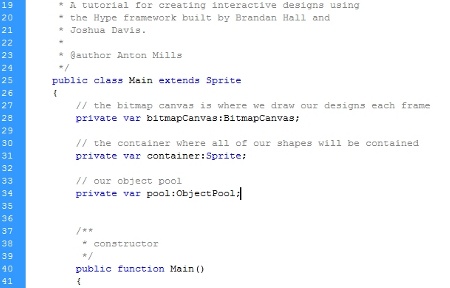
04 First, you need to create three references to objects: an ObjectPool, which will house all of your shapes; a container MovieClip, which you will move your shapes around inside; and a BitmapCanvas, which will take a snapshot of the container.
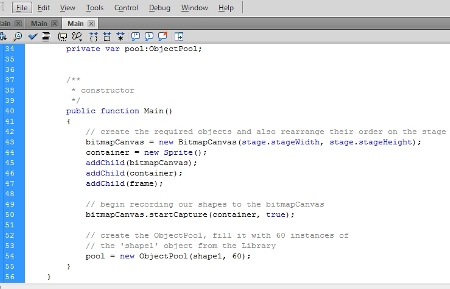
05 After adding the references, start to create these objects as shown. Lines 40-55 create a regular MovieClip called container, an ObjectPool with 60 instances of the MovieClip in the library named 'shape1', and then tells the BitmapCanvas to capture the container each frame.
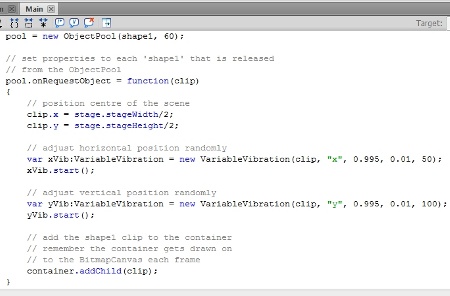
06 Each time you 'request' one of the ObjectPool's clips, use its RequestObject method to set any values you wish for the new clip. For this project, set each clip to be positioned in the centre, with its horizontal and vertical position adjusted randomly each frame using a VariableVibration.
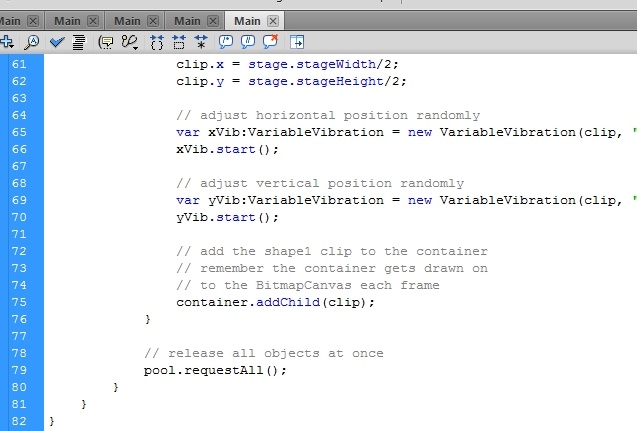
07 The ObjectPool has two options for using its clips. You could use the request() method to get a single instance, or, as opted for here, you could tell the ObjectPool to requestAll() just beneath where you added the code for the last step, which will release all 60 objects at once.
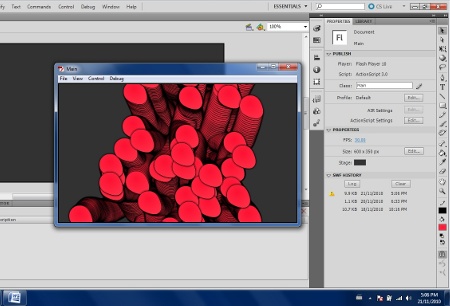
08 At this point it should be starting to look pretty cool. Remember that you used VariableVibration to adjust each clip's X and Y positions so that each time you run this you should get different results, which is perfect for this type of project.
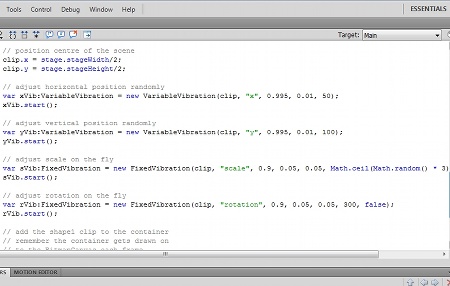
09 You can also use the ObjectPools onRequestObject to adjust the scale and rotation for each clip. This time use a FixedVibration to give you a smooth sliding value between the minimum and maximum parameters. Scale, for example, has a minimum vibration value of 0.05, and the maximum is a random number.
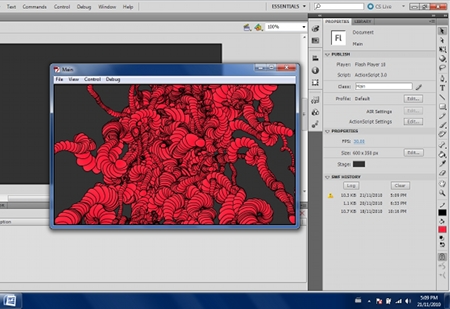
10 It's all starting to take shape at this stage, but we can still make some improvements. Add a blurring effect to the BitmapCanvas: use a FilterCanvasRhythm, pass it a BlurFilter to use, and tell it to start applying it every 50 frames, slowly blurring the BitmapCanvas.
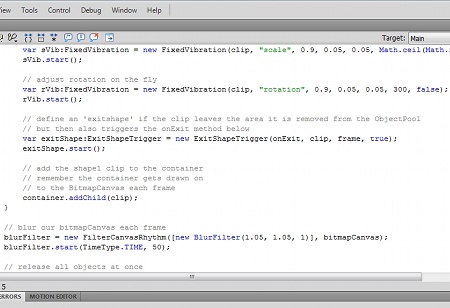
11 The shapes you create are lost once they move out of the screen. You can easily fix this using an ExitShapeTrigger. Define this trigger inside the ObjectPools onRequestObject method so that each clip has a defined area to move around inside.

12 Next, pass ExitShapeTrigger the MovieClip on the stage called 'frame' to use for the shape to move around inside, and define a method that is triggered when the object leaves the frame. The onExit method then removes the clip from the ObjectPool and requests a new one.
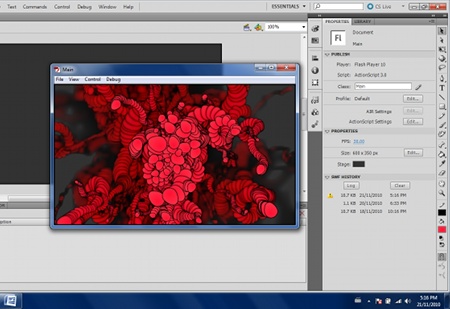
13 Your composition is really starting to come together now. The blur effect works well with the BitmapCanvas, and the spiralling movement of the shapes mixed with the scaling and random movement makes for an interesting effect. All you need to do now is add one more effect, and that's a ColorPool.
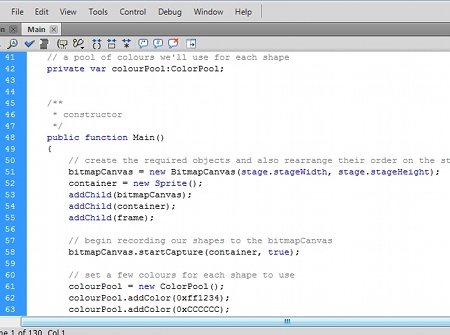
14 A ColorPool is very similar to the ObjectPool, but it stores a range of colours instead. Create it as shown in the files on your cover disc, and add two different colours to it: 0xFF1234 (pink), and 0xCCCCCC (light grey). Now test the movie.
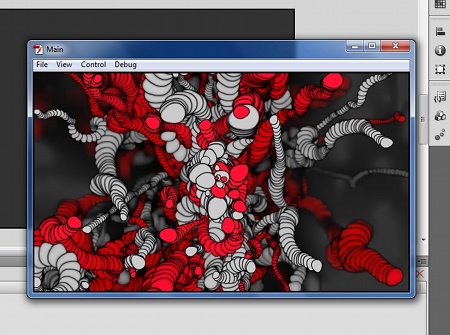
15 It's time to begin experimenting with your creation. Try adding different colours to the ColorPool, adjusting the minimum and maximum numbers in the Fixed/VariableRhythms, or redrawing shape1 in the Flash Library to create your own designs. Have some fun with it!
Anton Mills
A rich media developer, lecturer and writer living in Sydney, Anton primarily deals with Flash development and has a new love for mobile platforms. Find out more at www.antonmills.com

The Creative Bloq team is made up of a group of art and design enthusiasts, and has changed and evolved since Creative Bloq began back in 2012. The current website team consists of eight full-time members of staff: Editor Georgia Coggan, Deputy Editor Rosie Hilder, Ecommerce Editor Beren Neale, Senior News Editor Daniel Piper, Editor, Digital Art and 3D Ian Dean, Tech Reviews Editor Erlingur Einarsson, Ecommerce Writer Beth Nicholls and Staff Writer Natalie Fear, as well as a roster of freelancers from around the world. The ImagineFX magazine team also pitch in, ensuring that content from leading digital art publication ImagineFX is represented on Creative Bloq.
