Painting a character with a pained expression
See what you need to take into account when painting a pained expression with these quick tips.
Sign up to Creative Bloq's daily newsletter, which brings you the latest news and inspiration from the worlds of art, design and technology.
You are now subscribed
Your newsletter sign-up was successful
Want to add more newsletters?

Five times a week
CreativeBloq
Sign up to Creative Bloq's daily newsletter, which brings you the latest news and inspiration from the worlds of art, design and technology.

Once a week
By Design
Sign up to Creative Bloq's daily newsletter, which brings you the latest news and inspiration from the worlds of art, design and technology.

Once a week
State of the Art
Sign up to Creative Bloq's daily newsletter, which brings you the latest news and inspiration from the worlds of art, design and technology.

Seasonal (around events)
Brand Impact Awards
Sign up to Creative Bloq's daily newsletter, which brings you the latest news and inspiration from the worlds of art, design and technology.
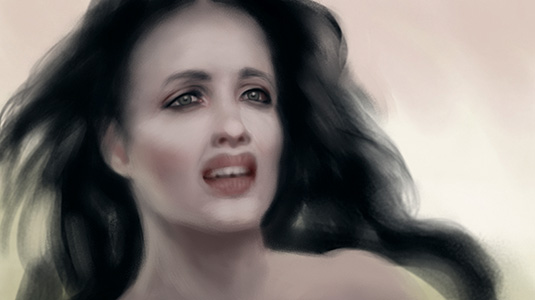
I start this task by conducting some research, because however much I think I can visualise how to paint a painful expression with a sense of photorealism, seeing one in front of me will be much more useful. I also have the options of either using myself as a reference, or asking a friend to recreate the desired expression.
For convenience's sake I usually go for the self-reference: I have a small mirror placed next to my screen, which comes in pretty useful during the painting process.
Expressions are mainly conveyed by the eyes and mouth. As well as the size and shape of a person's eyes, the inclination of their eyebrows and mouth are effective yet simple way to express emotion.
To work the expression's intensity – in this case, pain – I simply accentuate the facial movements, such as the mouth, which can be more or less open to simulate a cry of pain. The eyes could either be wide open or tightly closed with frown lines.
And if the pain is intense, consider adding details such as tears, or extra pale skin, indicating the onset of shock. Here I've chosen not to show what's causing the pain, so that the viewer can focus on the facial features.
01. Laying the foundations
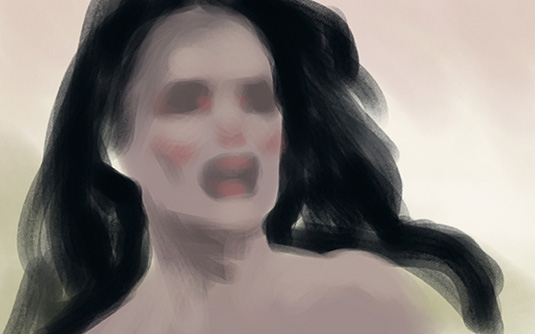
My first step is to determine the base of the face. My character is suffering, so I want to give the impression that she's crying. Her mouth will be open, with lips inclined downwards to indicate pain. The base of the face is crucial when trying to create a strong expression: this sketch helps to visualise the final expression.
02. Facial features
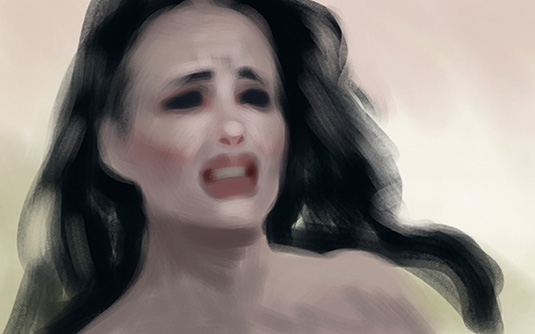
Now I start working the details. I refine the eyes and accentuate the position of the eyebrows. I want them to give the sensation of surprise but also of pain, so I depict them raised. I add a few more eyelid wrinkles to indicate slightly closed eyes, which will increase the overall intensity of the character's expression.
Sign up to Creative Bloq's daily newsletter, which brings you the latest news and inspiration from the worlds of art, design and technology.
03. Adjusting the shape
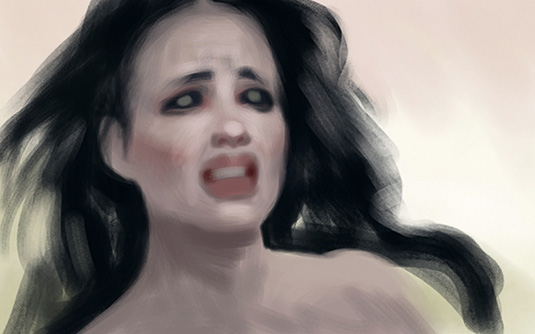
I move on to the less-important parts of the face, such as the cheeks. This area reacts to the rest of the face, in particular the mouth. The shape varies little: I just need to make them more round than when the face is at rest, and add large wrinkles at the corners of the mouth to link the mouth and cheeks together.
This magazine was originally published in ImagineFX magazine issue 133, page 30.

Mélanie is a freelance illustrator who specialises in fantasy. She is a digital painting instructor at CGMA.
