Add depth with spot colours and channels
João Oliveira explains how you can add dimension to your illustrations with special finishes
Sign up to Creative Bloq's daily newsletter, which brings you the latest news and inspiration from the worlds of art, design and technology.
You are now subscribed
Your newsletter sign-up was successful
Want to add more newsletters?
08 Now that we have a nice looking illustration, we can start working on the spot colours. First we must decide where we want them and how many colours we’re after. For this illustration I’m going to create two extra spot channels – one for the spot colour, and another one to apply a spot UV coating to achieve a glossy effect. This is where they’ll be applied.
09 Select the smoke shape with the Path Selection tool, Ctrl/right-click on it and choose Make Selection. Do the same on the lettering shape but in the Make Selection box choose Subtract from Selection. Select the big circle we made in step 02, choose Make Selection and select Intersect with Selection. Do the same with the black circle from step 04 and select Subtract from Selection.
10 We also want the pink circle on the top to be printed with the spot colour so select it, right-click and select Make Selection, followed by Add to Selection. Now select the cloud shape that’s on top of it and go to Make Selection>Subtract from Selection. Repeat this process for any shape that’s on the top of the spot colour. In this case I still have two spheres blocking it, so Ctrl/right-click on those layers and select Subtract Transparency Mask (Cmd/Ctrl+Alt).
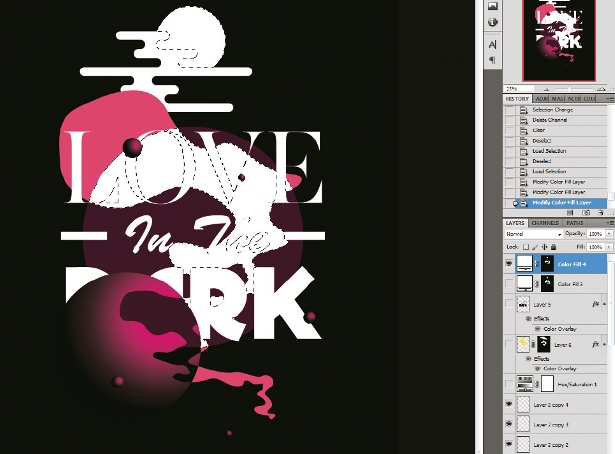
11 Printing inks are translucent, so we don’t want to lay any colours over each other. Select white as your foreground Colour and go to Layer>New Fill Layer>Solid Color. You should have an image that looks similar to the one above by now. Don’t worry about it being white: it will be printed with your spot colour.
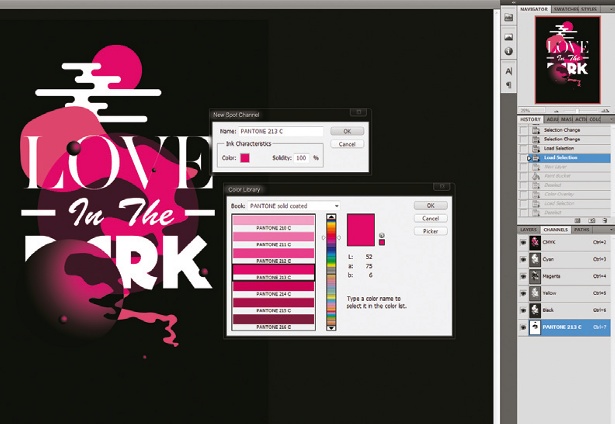
12 To create a new spot colour with the same selection, go to Channels, click on the drop-down menu and select New Spot Channel. In the dialog box, click on Color and select the Pantone you want to be printed. I opted for Pantone 213 C. You can change the solidity to 100% to see the spot colour.
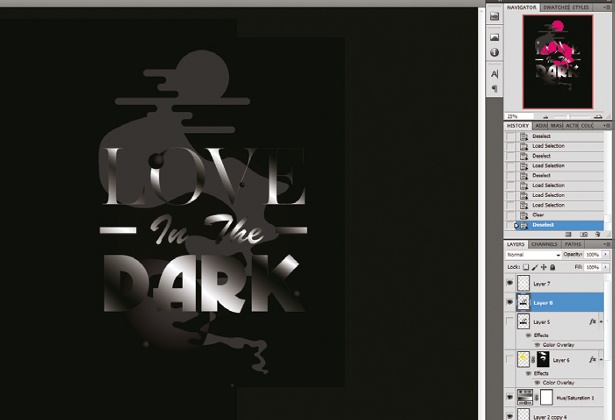
13 Now that we have the spot colour applied to our illustration, we can start preparing the spot UV coating. This applies a nice glossy coat to your illustration and works just like the spot colour.
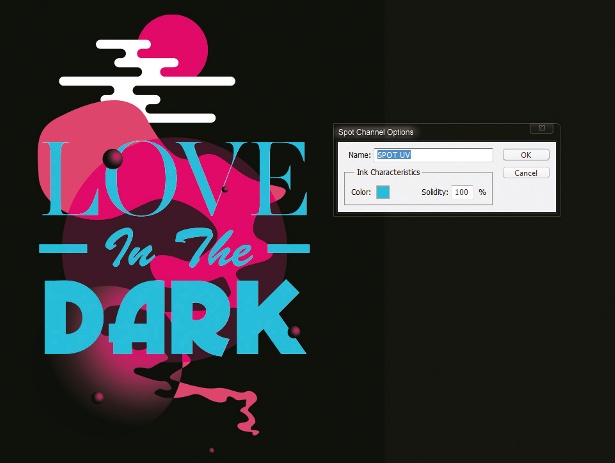
14 Select the lettering and choose Make Selection. Don’t forget to subtract any shape that’s on top of it from the selection. Now go to Channels, click on the drop-down arrow and select New Spot Channel. Pick any colour – it’s not important since the colour won’t be used – and change the channel name to ‘Spot UV’.
Sign up to Creative Bloq's daily newsletter, which brings you the latest news and inspiration from the worlds of art, design and technology.
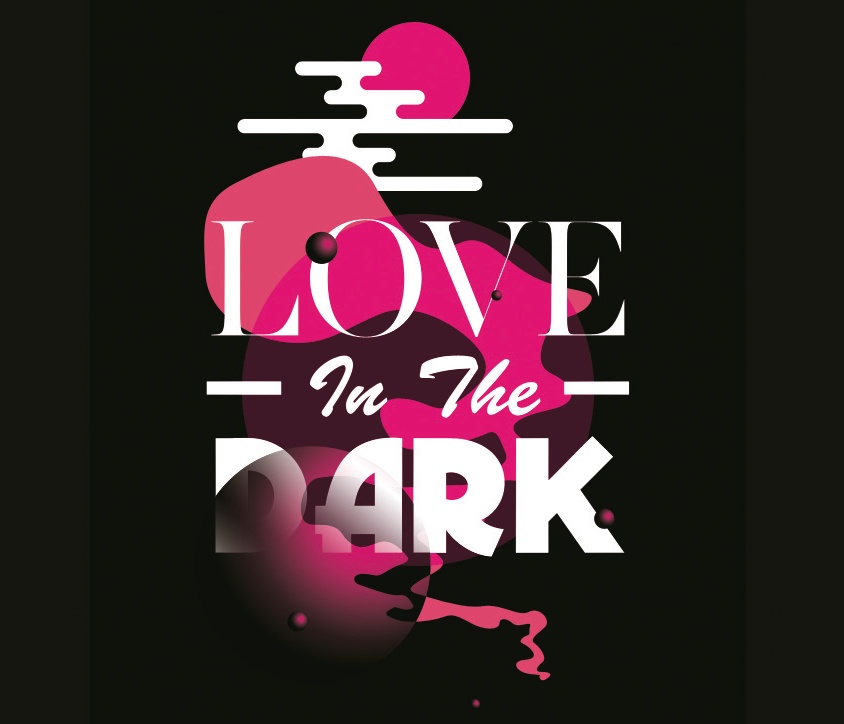
15 You can add even more glossy detail, such as varnish on the black shapes just on top of the black background. And that’s it, we’re done.

The Creative Bloq team is made up of a group of art and design enthusiasts, and has changed and evolved since Creative Bloq began back in 2012. The current website team consists of eight full-time members of staff: Editor Georgia Coggan, Deputy Editor Rosie Hilder, Ecommerce Editor Beren Neale, Senior News Editor Daniel Piper, Editor, Digital Art and 3D Ian Dean, Tech Reviews Editor Erlingur Einarsson, Ecommerce Writer Beth Nicholls and Staff Writer Natalie Fear, as well as a roster of freelancers from around the world. The ImagineFX magazine team also pitch in, ensuring that content from leading digital art publication ImagineFX is represented on Creative Bloq.
