Create an abstract world with textures
Simon Cook reveals how to use bespoke textures and brushes to add depth to your work
Sign up to Creative Bloq's daily newsletter, which brings you the latest news and inspiration from the worlds of art, design and technology.
You are now subscribed
Your newsletter sign-up was successful
Want to add more newsletters?
In this tutorial I'll show you how to create cool, bespoke brushes and texture fills that can be applied to all different types of images to add depth and character. Using a cityscape, we're going to implement a combination of techniques, cutting out shapes and images, and compiling them digitally to create a unique collage-style illustration. Simplicity is key, but don't be afraid to combine different elements for increased visual interest - often the least expected ones are those that work best.
There is a sense of magic and wonder within my work, and I love the idea of taking the viewer into a fantasy land where anything is possible. As well as using Photoshop and Illustrator, you'll need to get your hands dirty, so make sure your art box is stocked full of bits and bobs, such as paints, crayons and coloured paper.
Click here to download the support files (10.8MB)
Article continues below 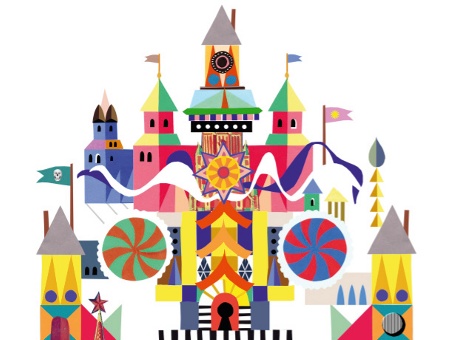
01 First open a project file that you've started work on but haven't fully completed (or you can create your own from scratch). I'm using a cityscape that doesn't yet contain any of the patterns and textures that will bring it to life - there are lots of little bits to fill.
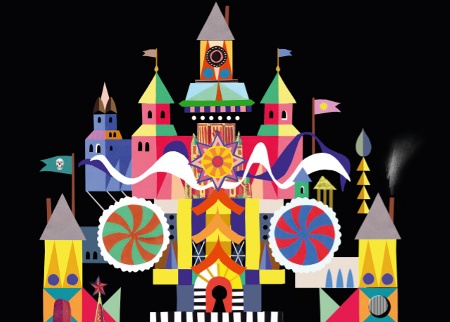
02 Choosing your colour palette is an essential part of the creative process: it sets the tone and adds a real sense of narrative. Select your background layer, go to Edit>Fill, and select your colour of choice, ensuring Opacity is set to 100%. I experimented with a mixture of pastel and bold colours, for maximum impact.
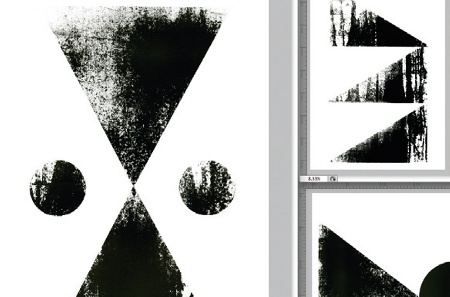
03 Textures are a really good way to add depth to your illustrations, so go wild and make your own. I've included a basic set on your disc to use if you prefer, which were created using a variety of techniques, such as screen-printing.
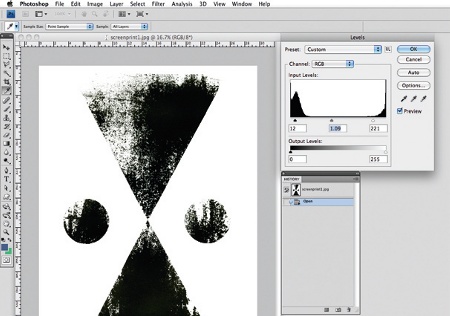
04 When you're done, scan your textures in at 300dpi, Greyscale. I like to give them sense of heaviness, so open Photoshop, go to Image>Adjustments> Levels, and play around. This is a great method for creating a harsh contrast and eliminating the white and any greyness in the background.
Sign up to Creative Bloq's daily newsletter, which brings you the latest news and inspiration from the worlds of art, design and technology.
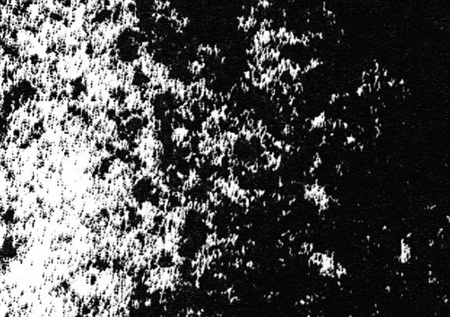
05 Now select the parts of the textures that you want to use by cutting into them using the Polygonal Lasso tool. Once you've cut out the shape, select the Crop tool, highlight the area you want and hit Return. Highlight it again and hit Ctrl/Cmd+C - this will copy the cropped shape, ready to make a bespoke brush.
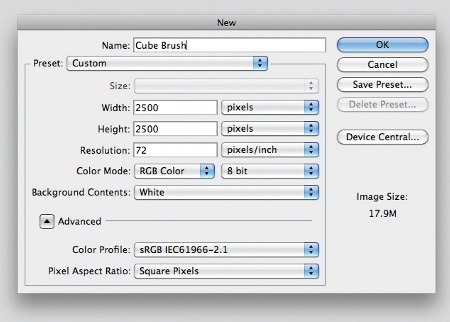
06 To create your bespoke brush, go to File>New, create a Custom document and name it as your brush layer. In CS3 the maximum size allowed for Photoshop brushes is 2,500mm, so let's go with that. Set the Width to 2,500 pixels and Height to 2,500 pixels - the bigger the better.
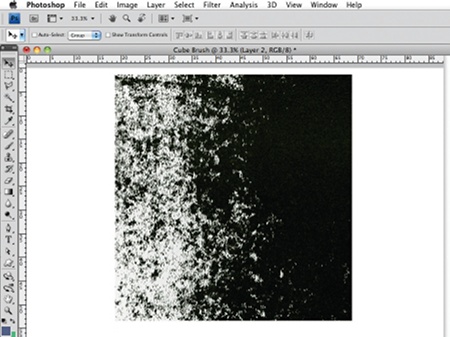
07 Paste the cropped shape into your custom document and go to Image>Adjustments>Black and White. The white area behind the shapes will eventually become transparent, so it's always a good idea to create brushes in black and white.
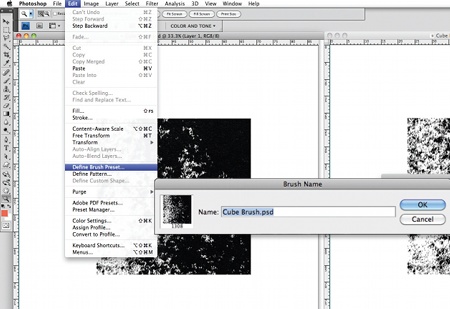
08 Now go to Edit>Define Brush Preset, and name your brush so that it's easy to find. You now have a cool little bespoke brush that will add depth to your illustration.
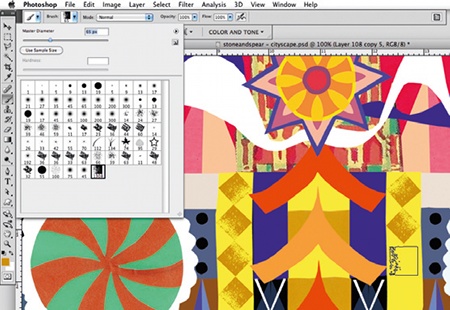
09 It's time to add some brush work to your illustration. Create a new layer, then click on the Brush tool and use the drop-down arrow to select your brush. Be creative and make sure you mix in your brush effects with care. To help you do this, think of the overall composition as a whole.
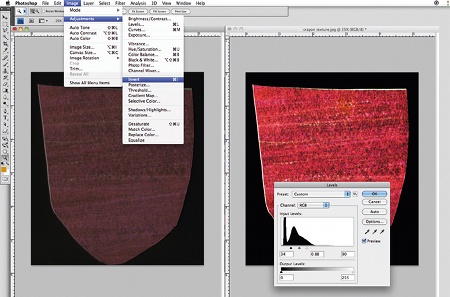
10 Now let's add a textured overlay onto some areas of your image. I opted to enhance the buildings in mine, and used wax crayons to create the texture. Scan your texture in and open the file in a new window in Photoshop. Click Image>Adjustments>Invert and then go to Image>Adjustments>Levels, setting the Input Levels to 34, 0.88 and 90. This will give you a fuzzy effect.
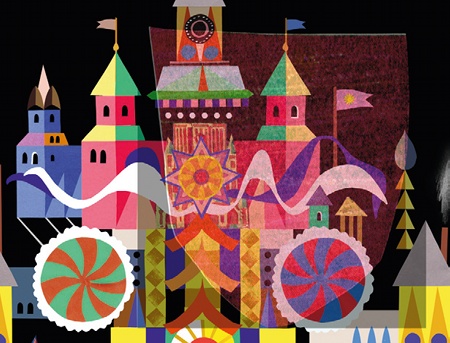
11 Now bring this texture into your main image and set it as the top layer. Adjust the Opacity of the layer to 40% and hover it over the section that you want to add texture to. This is a very simple technique, but one that really adds to the collaged feel.
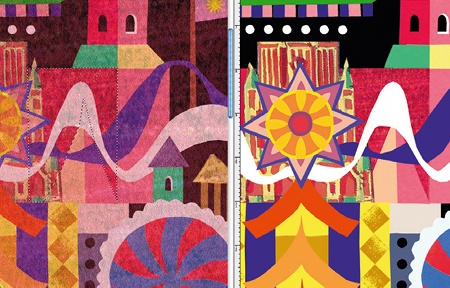
12 Using your background image as a guide, start to cut shapes into the texture with the Polygonal Lasso tool, tracing the sections that are visible underneath the layer. I didn't add the texture to every building as I didn't want the image to look too busy. Once you've selected your shapes, copy your selection. Hide the original layer and then paste. Your texture will now appear cut to size. Adjust the Opacity to 60% and order the layer in the Layers panel to sit on top of the targeted areas.
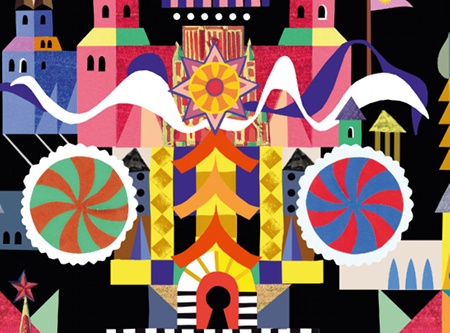
13 Repeat steps 10-12 to add more texture. I decided to use the same technique on the rooftops and different parts of the buildings in my image to give a balance to the overall composition.
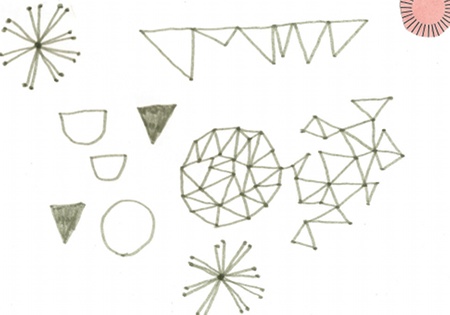
14 Now for extra details. I really like doodling shapes, using different types of pen and pencil to give a lovely smooth or crunchy texture. Depending on your preferences, either create your own or use the doodles supplied on your disc. Repeat steps 4-8 to create further brushes and work in some extra details.
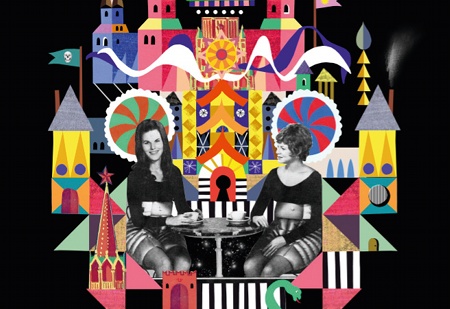
15 To finish off, I added some more elements to bring the image to life, including my signature black-and-white photographic imagery. Keep an eye out for different materials, and remember to use the shapes like building blocks to add to that handmade feel.

The Creative Bloq team is made up of a group of art and design enthusiasts, and has changed and evolved since Creative Bloq began back in 2012. The current website team consists of eight full-time members of staff: Editor Georgia Coggan, Deputy Editor Rosie Hilder, Ecommerce Editor Beren Neale, Senior News Editor Daniel Piper, Editor, Digital Art and 3D Ian Dean, Tech Reviews Editor Erlingur Einarsson, Ecommerce Writer Beth Nicholls and Staff Writer Natalie Fear, as well as a roster of freelancers from around the world. The ImagineFX magazine team also pitch in, ensuring that content from leading digital art publication ImagineFX is represented on Creative Bloq.
