Design a mixed media portrait in Photoshop and Illustrator
Anthony Neil Dart reveals how to produce creative portraiture with a mixed-media approach
Sign up to Creative Bloq's daily newsletter, which brings you the latest news and inspiration from the worlds of art, design and technology.
You are now subscribed
Your newsletter sign-up was successful
Want to add more newsletters?
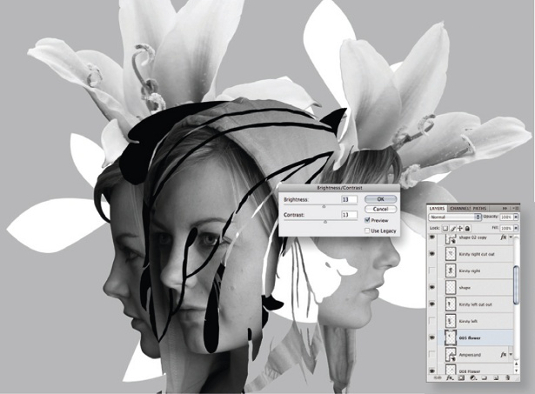
06 Select your flower images and experiment with different angles using the Transform and Rotate tools. (Tip: in Transform mode you can Ctrl/right-click to flip vertically or horizontally.) I also used the Filter menu to play with the brightness and contrast to match the lighting. For the flower and faces, I made use of Filter>Sharpen as well as the Unsharp Mask function to get some crispness back into the images.
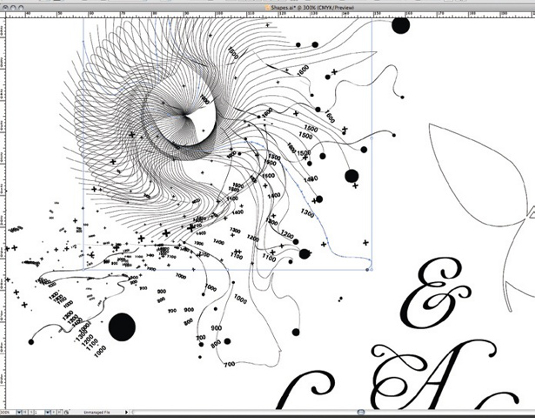
07 In Illustrator, take another abstract organic object created in step two. Using the Warp tool, break the symmetry of the blend shape to give it a non-uniform feel. Then add numerical values and plus signs to add complexity, finishing by placing different-sized circles on the ends of the curves to create a sense of depth. I also introduced characters from a feminine, organic typeface called Affair.
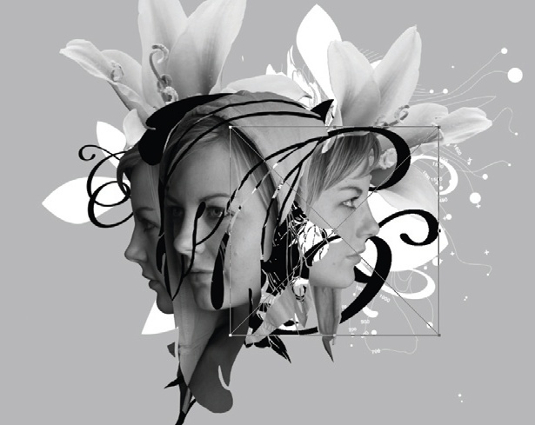
08 Back in Photoshop, paste the abstract vector shape as a Smart Object at the bottom of your image and transform it into the desired position. Bring up the Colour Overlay Smart Filter and change the fill swatch to white. Repeat this with the typographic characters. I scaled the ampersand to almost encapsulate the profile of the face in complementary negative space, adding to the cohesion between the different elements.
Article continues below 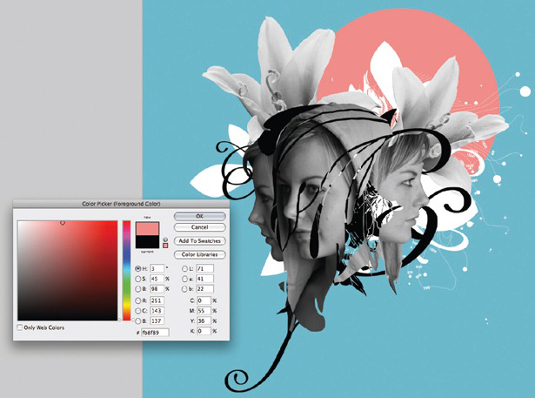
09 Next I created two new layers: a background colour and a spherical flat-colour shape. Both are soft pastels, but the pink circle is just a focal area towards the top of the composition to help lead the eye in. Experiment until you’re happy: it’s all about applying the techniques covered here to your own elements. You could use harder-edged angular vector forms as opposed to the organic forms here, for example, for a different effect.
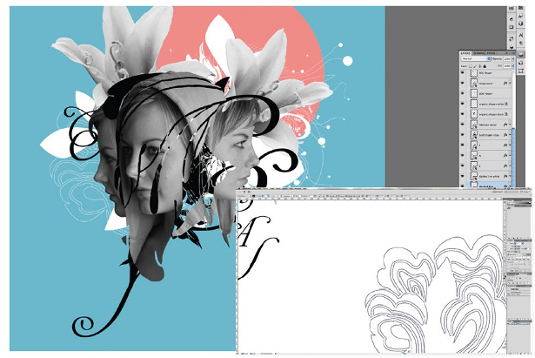
10 Finally, head back into Illustrator and create some more shapes. You want to achieve a balance between the design elements and your subject, so the trick is knowing when to stop. I’ve gone with a dashed outline around the object instead of a solid one to add a level of feminine intricacy. For this, in Illustrator check the Dashed Line option in the Stroke panel and experiment with the Dash and Gap values until you’re satisfied.

Anthony Neil Dart
A self-taught designer working in motion design and direction, Dart takes a multidisciplinary approach to his work. His clients include Ericsson, Audi, Ford, Nokia, Toyota, MTV and Peugeot.
www.anthonyneildart.tv
Sign up to Creative Bloq's daily newsletter, which brings you the latest news and inspiration from the worlds of art, design and technology.

The Creative Bloq team is made up of a group of art and design enthusiasts, and has changed and evolved since Creative Bloq began back in 2012. The current website team consists of eight full-time members of staff: Editor Georgia Coggan, Deputy Editor Rosie Hilder, Ecommerce Editor Beren Neale, Senior News Editor Daniel Piper, Editor, Digital Art and 3D Ian Dean, Tech Reviews Editor Erlingur Einarsson, Ecommerce Writer Beth Nicholls and Staff Writer Natalie Fear, as well as a roster of freelancers from around the world. The ImagineFX magazine team also pitch in, ensuring that content from leading digital art publication ImagineFX is represented on Creative Bloq.
