How to paint a figure underwater
French artist Melanie Delon takes your through four steps to create the effect of underwater lighting.
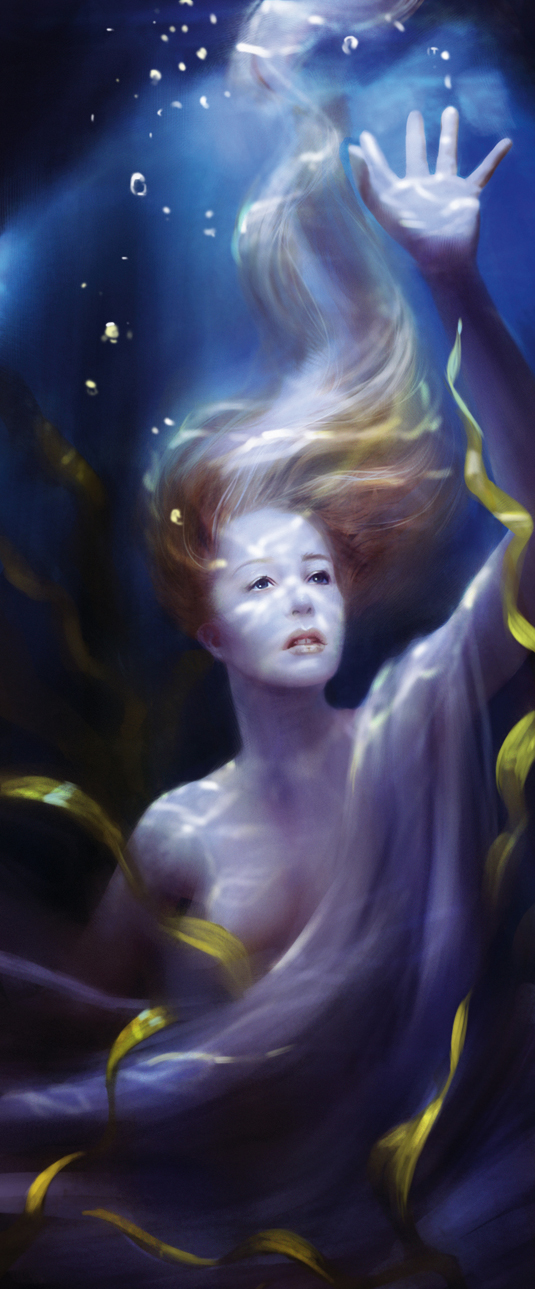
Underwater light isn't the same as that seen on the surface. It's more diffuse and variable, mainly because of the constant water movement. I have to keep in mind that water works like a filter for light, so my illumination must be affected accordingly. The colours are also different: they're less vibrant and are closer to their real tones.
The colour scheme is the most difficult part to get right, and the correct choice is the key to success for an underwater scene. First, I decide on the body of water; a sea isn't the same hue as a lake.
Another factor is the depth of the scene. If it takes place near the surface then the lighting scheme will be brighter and more dynamic. If it's at depth, it will be diffuse and dark.
As I've said, the colour choice is crucial, but to help you generate the right effect and atmosphere, there are some little tricks you can use. For example, the Photo Filter Adjustment layer in Photoshop is useful for adding more colour unity to the scene.
You could try using the default filter – for a typical underwater scene, the cooling or blue/green ones are perfect – or pick your own shades. You can also use the Color Balance Adjustment layer, which is great for correcting little mistakes, adding more blue in the mid-tones, for example.
01. Lights, camera, action!
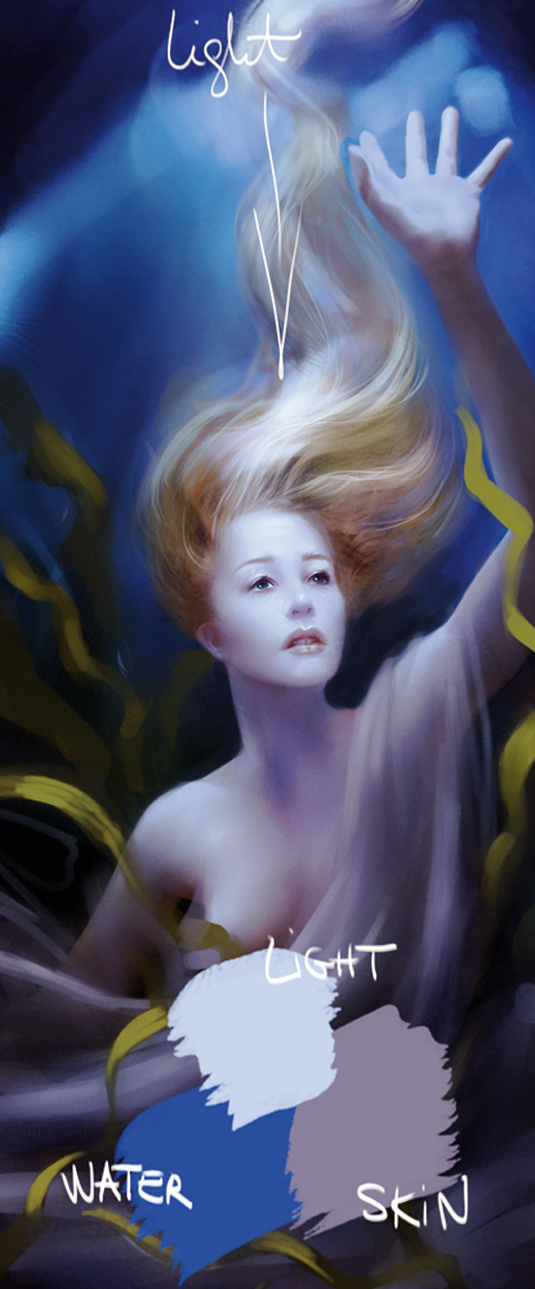
I choose to place this underwater scene in the sea rather than a lake or river, so the main colour coming through should be blue. The woman's skin will be slightly pink, with some touches of orange-red thrown in to add more variation and life. The main light source, which comes from the sun above the surface, will be a pale blue.
02. Like the layers of an onion
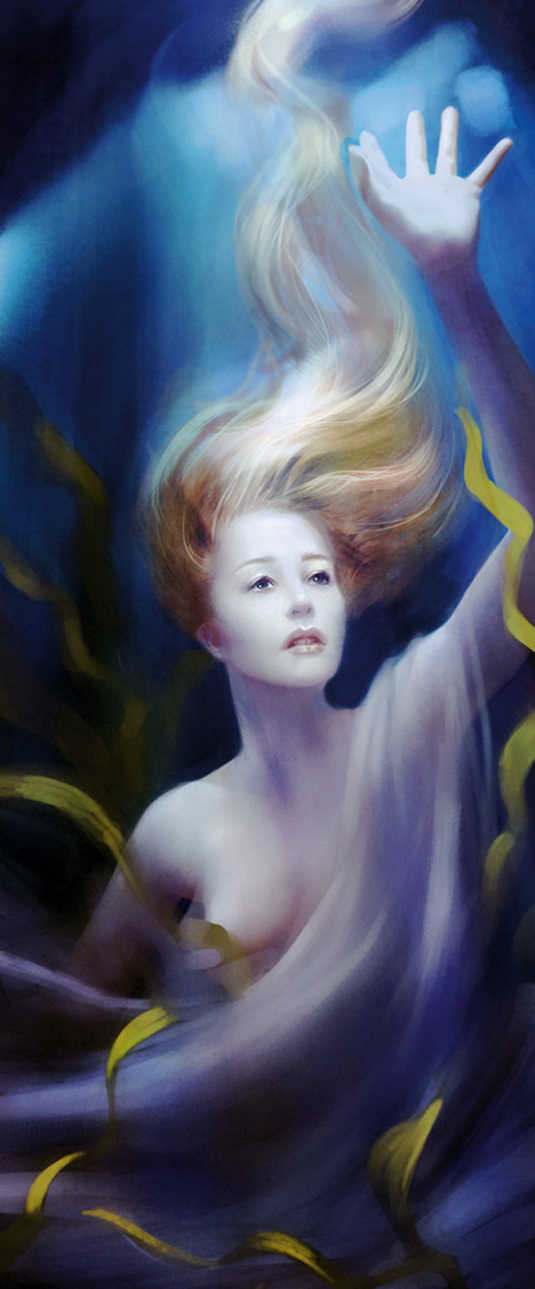
Now I'm adding in some more underwater effects, such as the ray of light coming down from above. I decide to paint these on another layer and set it to Color Dodge with a low opacity.
Sign up to Creative Bloq's daily newsletter, which brings you the latest news and inspiration from the worlds of art, design and technology.
Even a little step like this will add more dynamism to the picture, so don't hesitate to play around with the Layers mode.
03. Devil in the detail
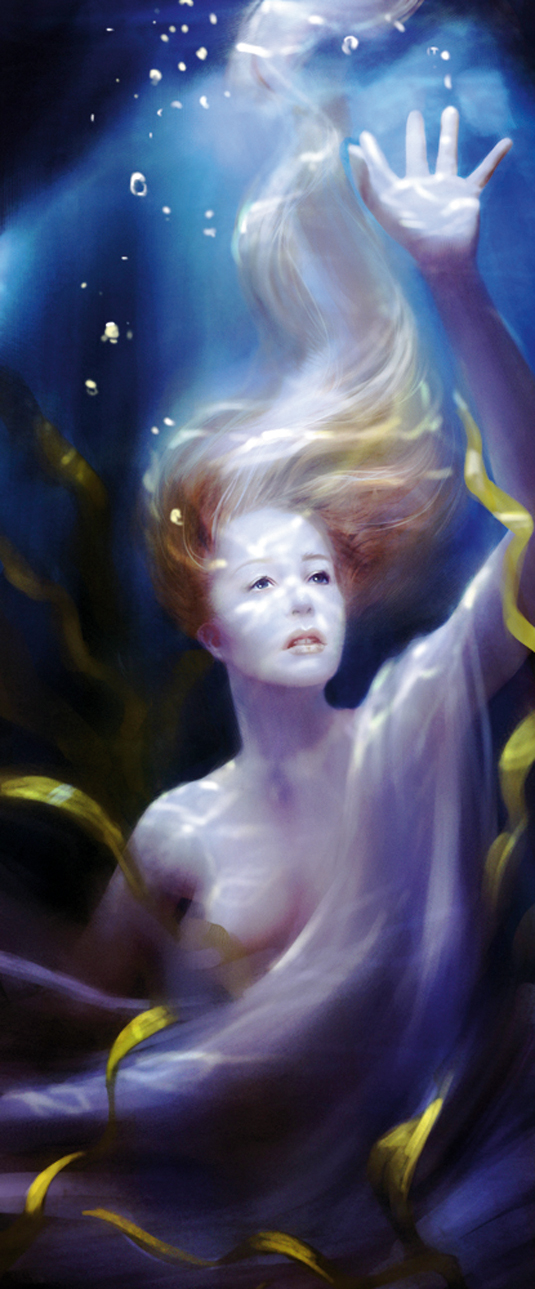
Now I add watery light reflections on the character. They're mainly wild brush strokes on a layer set to Color Dodge. For this, I use a Basic Round brush with hardness set at about 30 to 50 per cent. I also add some air bubbles around the woman, just to bring more detail and movement to the composition.
04. Underwater ray of light

This type of brush comes in pretty handy when you have to paint numerous underwater light rays. The best thing to do is create a few different-shaped brushes to avoid repetition in the painting, thus injecting an interesting illumination effect into your image.
This article originally appeared in ImagineFX.
Like this? Read these...
- Combine fantasy and realism for striking creature art
- Free Photoshop brushes every creative must have
- Great examples of doodle art

Mélanie is a freelance illustrator who specialises in fantasy. She is a digital painting instructor at CGMA.
