How to wrap textures around an object in Photoshop
Use Photoshop tools to wrap textures around your character.
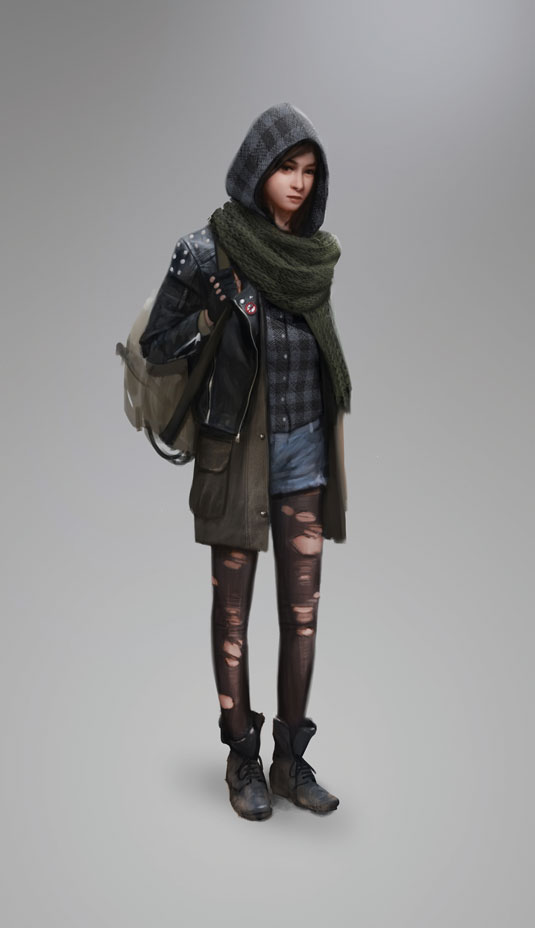
Painting textures on three-dimensional objects can be tricky, because you can easily become confused by the details of the texture that wraps around the shape you're trying to paint. Clothes are a good example of this. Not only do you need to focus on the creases and folds of the cloth you're painting, but you also have to keep in mind how the pattern or texture wraps around it. I always try to keep the two separated, by painting plain clothing first and then adding the texture I want on top.
Warp and Liquify in Photoshop are incredibly powerful tools to help you do this and will speed up your workflow a lot. While Warp can help you to position the texture just right, Liquify enables you to go in and literally push the pixels of your texture around so they follow the shape underneath better.
This technique can be used with almost every material you can imagine, and will help you implement textures in a much more realistic and believable way. Let's have a look at how to do it.
01. Block it out
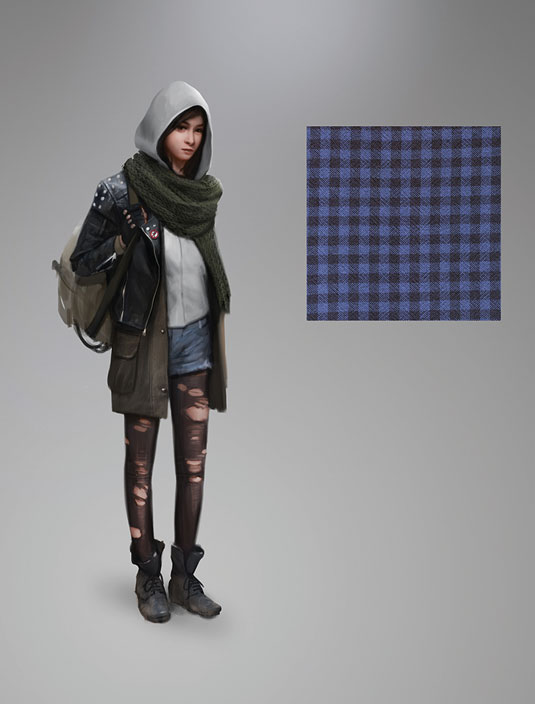
I block out the character and her outfit without textures. As you'd imagine, this is the most time-consuming part of the process. I paint the textureless pieces of clothing on just one layer, but plan ahead on the other pieces and keep them light in value and on a separate layer. This helps me cut out the textures later on.
02. Use warp tool
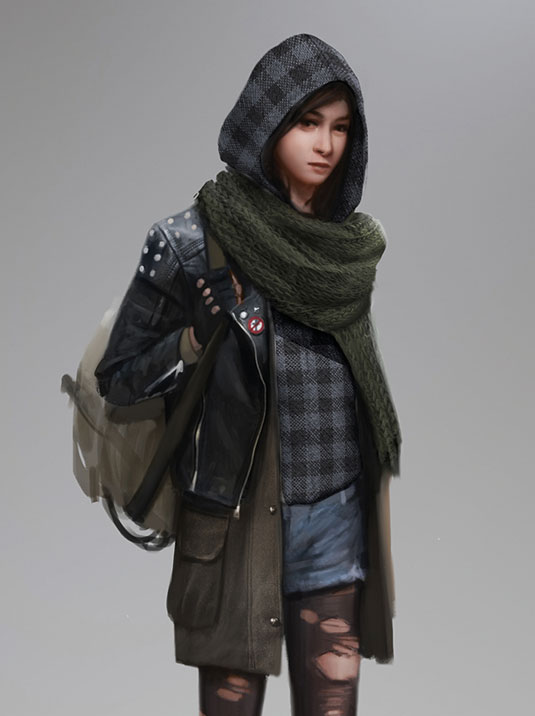
Now that I have the basic shape , I paste in a plaid texture, move it over the hoodie layer and hit Edit>Transform>Warp. I skew the texture so that it follows the hoodie's shape, then set its Blend mode to Multiply. I Ctrl-click the hoodie layer's Layer icon, invert the selection and erase the overflow of the pattern.
03. Liquify
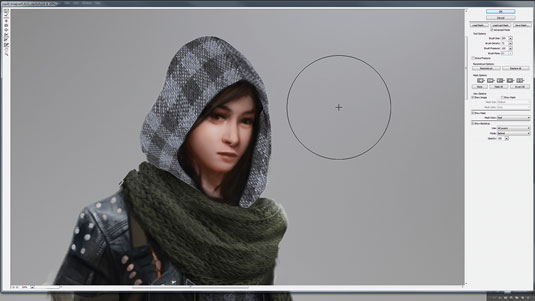
With the texture layer selected I go to Filter>Liquify. I enter Advanced Mode and tick the Show Image box. With the Forward Warp Tool I push parts of the texture around to follow the creases and folds of the underlying clothes. I hit OK and as if by magic the texture smoothly follows the shape of the forms underneath.
Artist's secret: Textures and blend modes
Flat textures go really well with Multiply, Overlay or Soft Light Blend modes. The trick is to paint a three dimensional object without grain or texture, and then paste over a texture in Multiply, Overlay or Soft Light.
Daily design news, reviews, how-tos and more, as picked by the editors.
This article originally appeared in ImagineFX magazine issue 123.
Like this? Read these!
- How to paint realistic armour for your character
- 10 tips for Photoshop Elements beginners
- Free Photoshop brushes every creative must have

The Creative Bloq team is made up of a group of art and design enthusiasts, and has changed and evolved since Creative Bloq began back in 2012. The current website team consists of eight full-time members of staff: Editor Georgia Coggan, Deputy Editor Rosie Hilder, Ecommerce Editor Beren Neale, Senior News Editor Daniel Piper, Editor, Digital Art and 3D Ian Dean, Tech Reviews Editor Erlingur Einarsson, Ecommerce Writer Beth Nicholls and Staff Writer Natalie Fear, as well as a roster of freelancers from around the world. The ImagineFX magazine team also pitch in, ensuring that content from leading digital art publication ImagineFX is represented on Creative Bloq.
