Add multi-language support to Angular
Provide more languages to expand your audience.
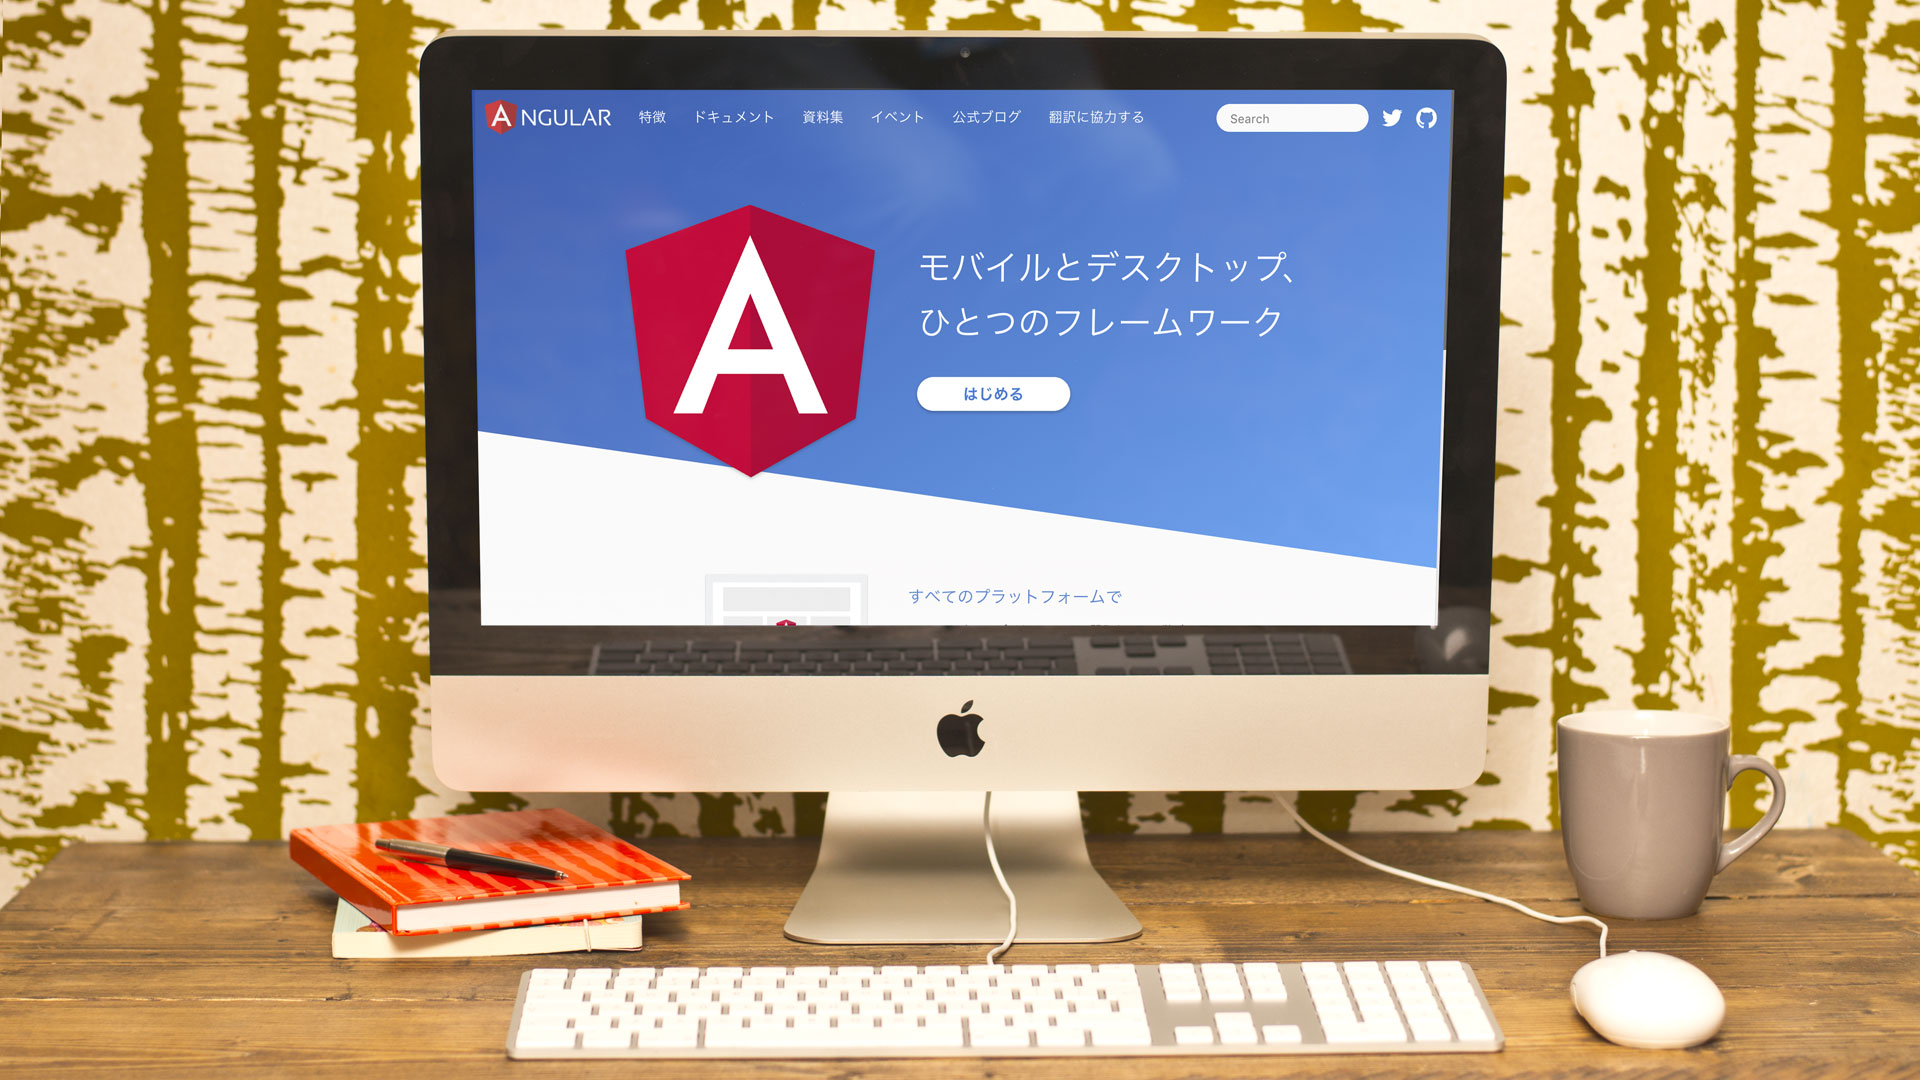
In this tutorial we're going to take you through the process of making your app accessible and user friendly for people around the world. Only about 20 per cent of the world speaks English, so providing other language options can improve your user experience and greatly increase your app's reach. We're going to take a look at Angular's built-in internationalisation tools and show you how to correctly use them.
If you're building a site rather than an app, be sure you've got your toolset right. See our guides to the best website builder and top web hosting to find out more.
We've created a very simple demo app to demonstrate the process. Clone it from here and then follow the installation instructions.
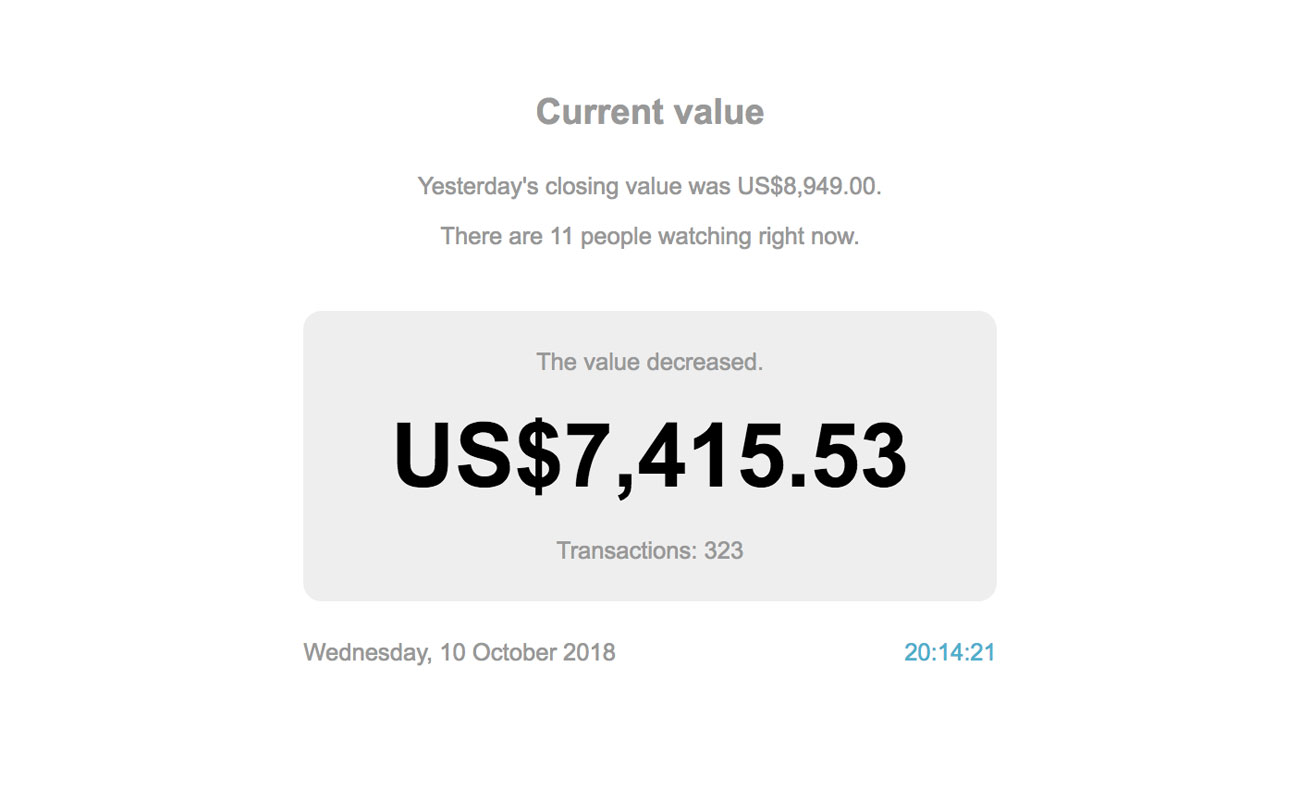
Start the app to familiarise yourself with it. It just displays and updates random numbers and values with different contexts, e.g. currencies, dates etc. We'll cover some of the pipes and features used during the tutorial.
01. Key terms for supporting languages
There are two words that are often used interchangeably when talking about translating an app – internationalisation and localisation – however, they actually mean slightly different things. Internationalisation refers to the process of preparing your app for supporting different languages. In contrast, localisation refers to the process of actually translating your app into your required languages. Essentially internationalisation is something you do once per app, and localisation happens once per locale – at least that's the plan.
These terms might also be familiar in their shortened versions: i18n (where 18 is the number of letters between the first 'i' and the last 'n' of internationalisation) and l10n (where 10 is the number of letters between the 'i' and the 'n' of localisation).
02. What's localisation?
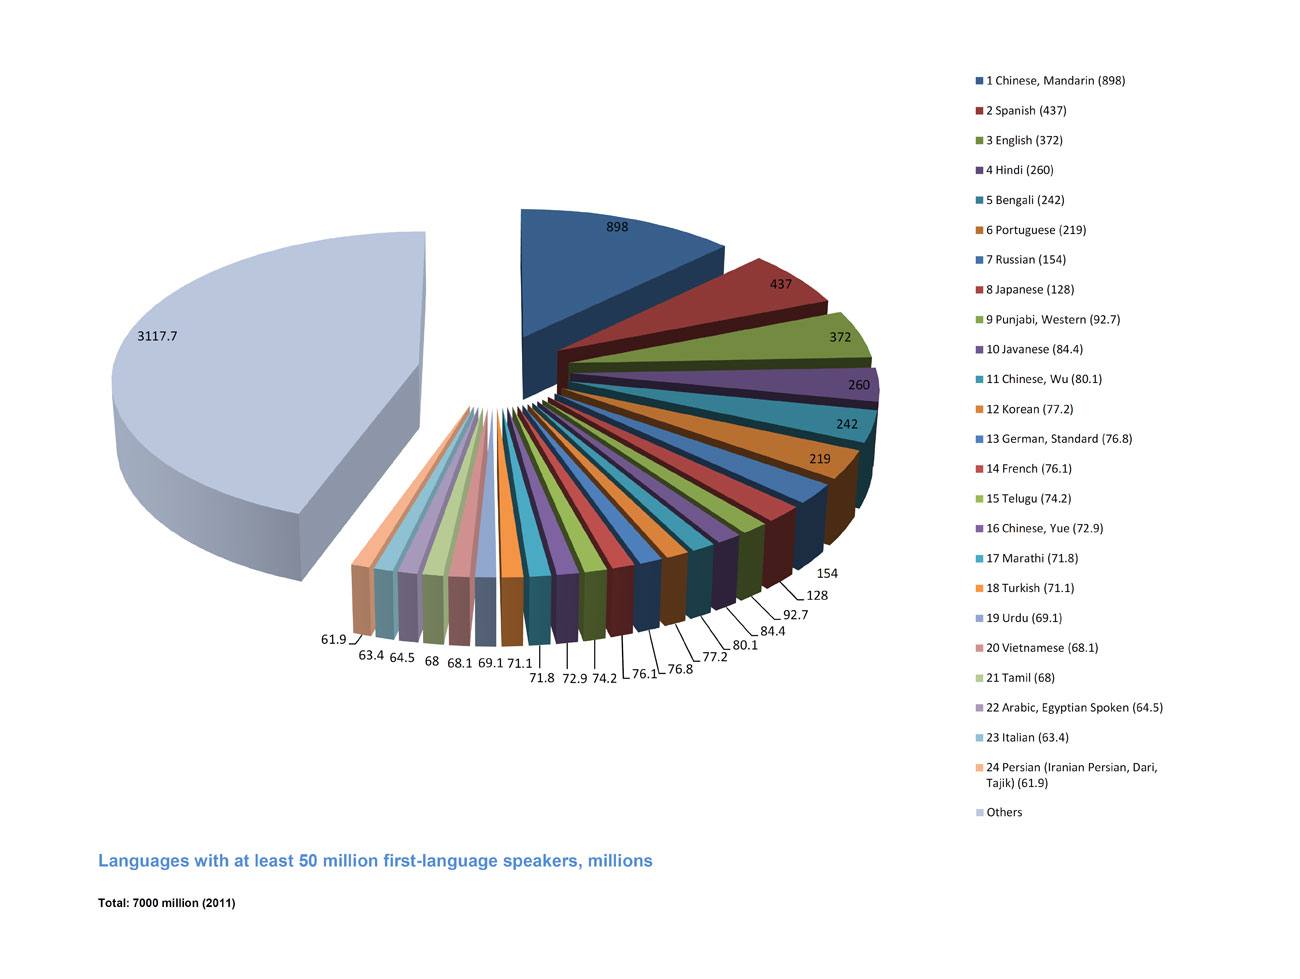
There are over 6,000 languages used around the world today, most of which are only used by very small groups of people. Yet even if we only focus on the top three languages – Mandarin, Spanish and English – there will be significant differences in date formatting, grammatical structure, pluralisation and number formatting.
Daily design news, reviews, how-tos and more, as picked by the editors.
If we include the fifth most widely used language – Arabic – we encounter another difference; Arabic is a right-to-left (RTL) script which means the UI will also have to be mirrored.
So during localisation we have to consider grammar, layout and formatting differences, and of course, we also have to change the text itself. Angular can help with much of this but you'll still need to manually translate the text (and save the translation in cloud storage, so it's secure and shareable with your team).
03. Locales in Angular
We will need to localise for each locale we need to support. A locale refers to the general set of preferences for the considerations mentioned above that tend to be shared within a region of the world, typically a country. Each locale is represented by a Unicode locale identifier, which specifies the language code and the locale extension.
Angular's default locale is 'en-US', which is the language code 'en' (English) as spoken in the region 'US' (United States of America). An app localised for 'en-US' will be subtly different from an app localised for 'en-GB' which is English as spoken in Great Britain. For example, in the US dates are (bafflingly) formatted mm/dd/yyyy, whereas here in the UK we use the more sensible dd/mm/yyyy approach. This minor difference can result in a major error in comprehension.
To make things interesting let's localise our demo app for Arabic as spoken in Iraq, aka 'ar-IQ' and English as spoken in the UK, aka 'en-GB'. We'll use English as the default this time.
04. Build configuration
Our demo project was created using Angular CLI, which includes some useful tooling. We're going to use the Ahead-of-Time (AOT) compiler for this project so we need to make some changes to the CLI's configuration file: 'angular.json'. If you want to use Just-in-Time (JIT) you need to configure things slightly differently.
With an AOT build you get a small, faster rendering ready-to-go application which loads without the need for asynchronous requests to fetch things like templates and stylesheets. As a result you must create a build for each locale and serve the appropriate build using the URL or some kind of server-side language detection logic. The simplest approach is to create a directory for each locale, e.g. www.example.com/en-GB and www.example.com/ar-IQ. The trade off is that you can't switch language on-the-fly, but in reality that is unlikely to be something required by real users.
First of all we need to add a build configuration for our Arabic locale. In the JSON file look for the 'architect.build.configurations' object. Add the following block to define a configuration for the locale:
  "ar-IQ": {
    "baseHref": "/ar-IQ/",
    "deployUrl": "/ar-IQ/",
    "outputPath": "dist/angular-i18n-demo/
ar-IQ",
    "i18nFile": "src/locale/messages.ar-IQ.
xlf",
    "i18nFormat": "xlf",
    "i18nLocale": "ar-IQ"
This configuration tells Angular where to output the compiled build and which translations file and format to use. It also sets the locale and tells Angular which directory the app will be deployed to.
We also need to modify the default options in 'architect.build.options' to use the 'en-GB' locale. Set the following properties as shown. Note we're enabling AOT here across the board so it will be used for production and development builds:
  "outputPath": "dist/angular-i18n-demo/
en-GB",
  "i18nLocale": "en-GB",
  "deployUrl": "/en-GB/",
  "baseHref": "/en-GB/",
  "aot": true
Angular supports a number of locales. Make sure you use the correct value for the 'i18nLocale' property. You can see the complete list here.
Behind the scenes the above configurations simply load and read from one of these locale preference files.
05. Serve configuration
In addition to configuring the build output we also need to set up the configuration for the 'ng serve' command for development. This is more straightforward as we can simply reference the build configuration we just added. In 'angular.json' add the following block to 'architect.serve.configurations':
  "ar-IQ": {
    "browserTarget": "angular-i18n-
demo:build:ar-IQ",
    "servePath": "/ar-IQ/"
  }
Here we are referring the build configuration options using the 'browserTarget' property, and we're also setting the 'servePath'. Before we can either serve or build the Arabic app we need to create the translations file referenced in the 'i18nFile' property above. Angular CLI includes a tool for extracting flagged text into an industry-standard translation source file.
We'll cover these files in more detail later on in the tutorial but for now we just need to export the basic, empty file to allow us to compile.
We'll use the 'ng xi18n' command with the following options. This is the only time we'll include the locale ID in the '--out-file' filename:
  $ ng xi18n --output-path locale --out-file
messages.ar-IQ.xlf --i18n-locale ar-IQ
This should create a file in a src/locale directory. From now on we'll always output the file named 'messages.xlf' and manually copy it over the version with the locale ID in the name. The reason for this is to prevent the extraction tool from overwriting any existing translations we've added to the file.
06. Switch configuration
At this point we can now compile the project and see what happens, but we need to tell the 'ng serve' command which configuration to use. First let's take a look at the English version. No changes here because English is the default:
$ ng serveAs you can see it looks much like the original version, which uses Angular's default locale of 'en-US'. The notable difference is the currency now specifies US$ instead of just $. Okay, now let's try the Arabic version. Stop the English version and run:
$ ng serve --configuration=ar-IQAs you'd expect there are more obvious differences in this version, in particular the date is now written in Arabic. Angular can do this because the names of some things, such as months and days, are from a set list and ultimately they relate to a known number. Everything else, however, is still in English.
07. Locale-aware pipes
Take a closer look at the source code of 'app.component.html' and you'll see that we use a number of different pipes. The following Angular pipes are locale-aware, meaning that they adapt their output based on the current locale: 'DatePipe', 'CurrencyPipe', 'DecimalPipe' and 'PercentPipe'.
If you use these pipes carefully Angular will handle a lot of the localisation legwork for you. By carefully we mean use the available predefined options wherever you can. A good example is the US vs UK date formatting we mentioned earlier. If you're in the UK and you want to display a date using the (sensible) day-month-year format, you might be frustrated to find that the predefined ''shortDate'' option renders as m/d/yy (eg. 10/9/18) and be tempted to hardcode your desired format like this:
{{ myDate | date:'dd/MM/y' }}But we now know that we get the m/d/yy format because Angular uses the 'en-US' locale by default. So instead of hardcoding the format we should use the ''shortDate'' option and localise our app to use 'en-GB'.
{{ myDate | date:'shortDate' }}It takes a tiny bit more effort but then we can add locales to our heart's content and always have a user-friendly date format.
08. Overriding the predefined options
Unfortunately it doesn't seem that there is an easy, built-in way to override a predefined format. For example you can't just decide that you'd prefer the ''shortDate'' format to be dd/mm/yyyy instead of dd/mm/y as there is no way to modify the format at runtime. Also you can't add your own predefined options.
For these edge cases you could create a custom date pipe which wraps the Angular 'DatePipe' and handles any custom formats per-locale. Anything it doesn't recognise would be passed on to the built-in 'DatePipe'.
09. CurrencyPipe
Off the shelf the 'CurrencyPipe' will format a number as US Dollars, trim to two decimal places and add groupings as defined in the locale's preferences.
You'll notice that in both our locales the currency is always in US Dollars. It doesn't magically switch to Sterling (GBP) when you use the 'en-GB' locale. The reason for this is that £10 is not the same as $10, so you must explicitly specify the currency your number refers to.
Let's update 'app.component.html' to use GBP throughout. When specifying the currency code you must use the correct value from the ISO 4217 standard (list available online).
Modify the two currency pipes by adding ':'GBP'' like so:
{{ value$ | async | currency:'GBP' }}And you'll start seeing the £ symbol instead of US$.
Remember, it doesn't do anything clever like automatically convert USD to the equivalent value in GBP if you change the currency – it just changes the symbol it uses.
10. Translation workflow
Okay, so we've got our two locales configured and Angular is helpfully doing some of the work for us out of the box, but the text is all still in English. Angular can't translate this automatically, sadly, but it can help us with parts of the workflow. This is what has to happen:
- Flag static text in all components for translation
- Export translation file containing this static text
- Modify the translation file and add the relevant translations
- Merge translated translation file back into app
Angular helps us with steps 2 and 4, but as developers we need do step 1 manually. Step 3 would typically be completed by a translation professional or agency, using special software to read and update the translation file.
11. Axis details
To achieve this we have to add a special attribute to every element that contains fixed text to be translated. To be clear if the content arrives from an API then that isn't fixed text and you'd need to localise that in the API. You only need to add the attribute when the text is written directly in the HTML template in your source code. A key point here is that you should try to keep your TypeScript files locale-agnostic – in other words, avoid putting any text that needs to be translated in the component logic and keep it all in the templates. Otherwise the extraction tool won't be able to extract it. It's good practice anyway to separate your concerns – in life and in code.
Let's open up 'app.component.html' and start with the 'Current value' title. Simply add the 'i18n' attribute to the element that directly contains the text.
   <div class="meta__title" i18n>
     Current value
   </div>
It's important to understand that this is just a 'dumb' custom attribute. It isn't an Angular directive that triggers anything at runtime, in fact ,the compiler removes it after translation.
Anyway, let's see what happens when we run the extraction tool again to regenerate the translation file. Remember '--out-file' is just 'messages.xlf' now:
    $ ng xi18n --output-path locale --out-file
messages.xlf --i18n-locale ar-IQ
Open up the output XLF file and you should see a new translation unit block that looks something like this with some additional context information:
  <trans-unit id="face3d45c0f0cd38b726e7798da15
3e2f8d55551" datatype="html">
    <source>
      Current value
    </source>
Great, that means the tool picked up the 'i18n' attribute. That long ID is generated by the tool and will stay the same unless the text changes. If you have multiple instances of exactly the same text they will all get the same ID. Don't edit this ID!
If you prefer, you can specify a custom ID within the 'i18n' attribute. If you do this the ID will remain the same even if the text changes, so you need to be sure you don't have any ID collisions throughout your app. Use the '@@' prefix to set a custom ID. Here the ID will become 'title':
   <div class="meta__title" i18n="@@title">
     Current value
   </div>
12. Add some context
To ensure the translator is able to provide an accurate translation they will often need to know the context that the text is being used in. The 'i18n' attribute allows us to define a description and a meaning to help the translator. The format is as follows:
<div i18n="meaning|description@@
customId">Text</div>
Let's update our title with a meaning and description:
   <div class="meta__title" i18n="Card
title|Value at this moment in time@@title">
     Current value
   </div>
That should give the translator enough context to provide an accurate translation. Regenerate the translation file and you should see these values have been output. It's worth noting that if you don't use a custom ID the generated ID takes the meaning and the text into account. So the same text, but with a different meaning, will get a different ID. The description, however, has no impact on the ID.
13. Text with variables
Let's move on to the intro section. The first paragraph contains text and a variable which will be interpolated at runtime. How do we handle this?
Well happily it is quite straightforward. Again we need to add a meaningful 'i18n' attribute to the containing element. Add it directly to the paragraph element:
<p i18n="Closing value|Value when the market
closed yesterday@@closingValue">
Run the extraction tool again and you'll see this new translation unit:
<trans-unit id="closingValue"
datatype="html">
<source>Yesterday's closing value was
<x id="INTERPOLATION" equiv-text="{{
closingValue | currency:'GBP'
}}"/>.</source>See how the variable interpolation has been detailed in the output. The nice thing about this is it allows the translator to modify the grammatical structure of the sentence if necessary, without breaking the binding. For example, there may be a language where the sentence would be best written: X value was yesterday's closing, ie with the variable at the start.
14. Pluralisation
Moving on to the next paragraph you'll see some intimidating syntax. This is called ICU Message Format and it allows you to specify different chunks of text based on the value of a variable.
You can use this to add the 's' to words in English when the value is zero or not one. For example, if 'seconds' is a variable containing the number of seconds we can use this ICU pluralisation expression:
    {{ seconds }} {seconds, plural, one
{second}, other {seconds}}
Which will output:
- 0 seconds
- 1 second
- 2 seconds
It doesn't appear to be documented but you can also use the 'AsyncPipe' inside the pluralisation syntax to work with Observables.
In that example 'one' and 'other' are pluralisation categories. There are a number of categories to choose from, but beware! Not all locales support all the categories, and Angular doesn't tell you if you try to use a category that isn't supported by the current locale. It is easy to end up thinking that you've done something wrong because the 'two' category isn't working in your 'en-GB' locale and instead you are seeing the 'other' text. Inexplicably 'en' (and many other common languages) only support 'one' and 'other', even though 'zero' and 'two' are explicit values.
Check out this file to see what's actually supported.
15. The multiple radial bar charts
We can work around this limitation by using numbers instead of categories. Just prefix the value with an '=':
    There {watchers, plural, =0 {is nobody} =1
{is one person} =2 {are two people}
    other {are {{ watchers }} people}}
watching right now.
This is already set up in the demo app, we just need to add the 'i18n' attribute to the containing paragraph:
    <p i18n="Watchers|Number of people
watching the value@@watchers">
Run the extraction tool again to see how this looks. You'll see that this is output slightly differently. It will create two translation units; one for the ICU expression itself and one which interpolates that expression into the original string.
16. Select expression
If you want to display different text depending on the value of a variable you can use a 'select' ICU expression which is very similar to the 'plural' syntax demonstrated above. In our demo app we monitor the change applied to the value and create an Observable stream called 'trend$' which outputs 'up', 'down' or 'stable' depending on whether the change is positive, negative or zero.
We then hook up our 'select' ICU expression to output a different string depending on the stream value. Here you can see the 'AsyncPipe' in use:
    The value {trend$ | async, select, up
{increased} down {decreased} stable
    {didn't change}}
This is a somewhat cleaner syntax than using 'ngIf' or 'ngSwitch' to manipulate the DOM, plus it also plays nicely with the extraction tool. Add the 'i18n' attribute to the containing element:
    <div class="card__info" i18n="Value
trend|Describes the value change trend@@trend">
Regenerate the translations file and you'll see the approach is similar to the plural output, with two translation units created. ICU expressions are pretty handy once you get used to them, plus you can nest them to create more complex outputs.
17. Add translations
One more 'i18n' attribute to add:
   <div class="card__info" i18n="Transactions
count|Number of transactions today@@
transactions">
     Transactions: {{ transactions$ | async |
number }}
   </div>
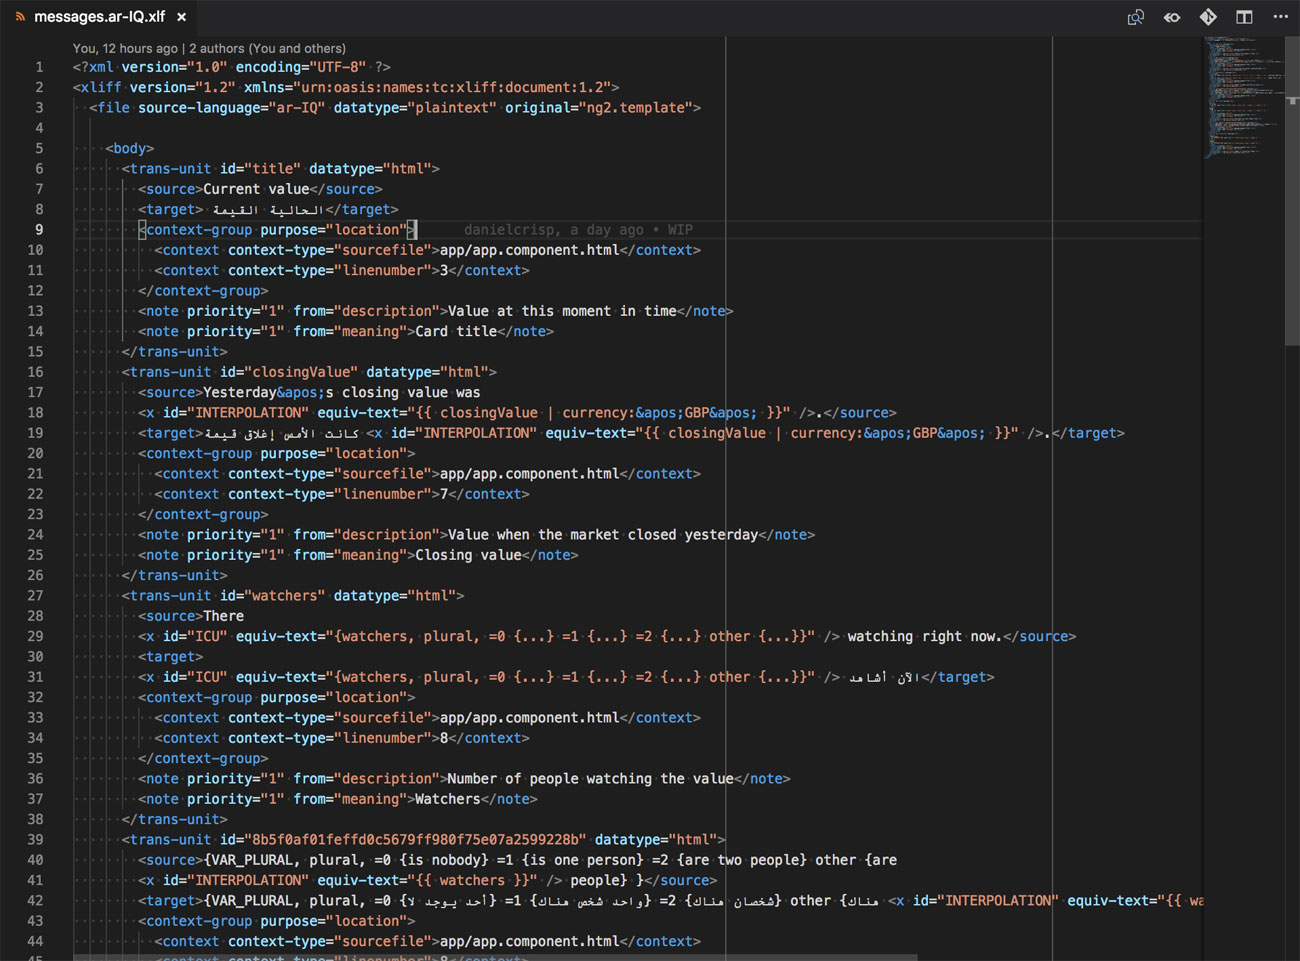
Now we've marked up all the text that needs translating we can generate the translation file one last time. Once it is created rename it to 'messages.ar-IQ.xlf' and replace the previous incarnation. This is the file we'd be sending to the translation professional, but for the purposes of this tutorial, Google Translate will be standing in!
Open up the XLF file and duplicate every '<source>' element, renaming it '<target>'. Unfortunately it can be quite untidy so it might help to beautify the contents.
To check we've got them all, save the file and start the app with the Arabic locale:
$ ng serve --configuration=ar-IQIf you see any messages in the terminal like this that means you've missed one:
ERROR in xliff parse errors: Message *id*
misses a translation ("
Hopefully you won't have any errors and you'll be able to see the app in the browser. We've not added any actual Arabic yet so it won't look much different.
18. Google Translate
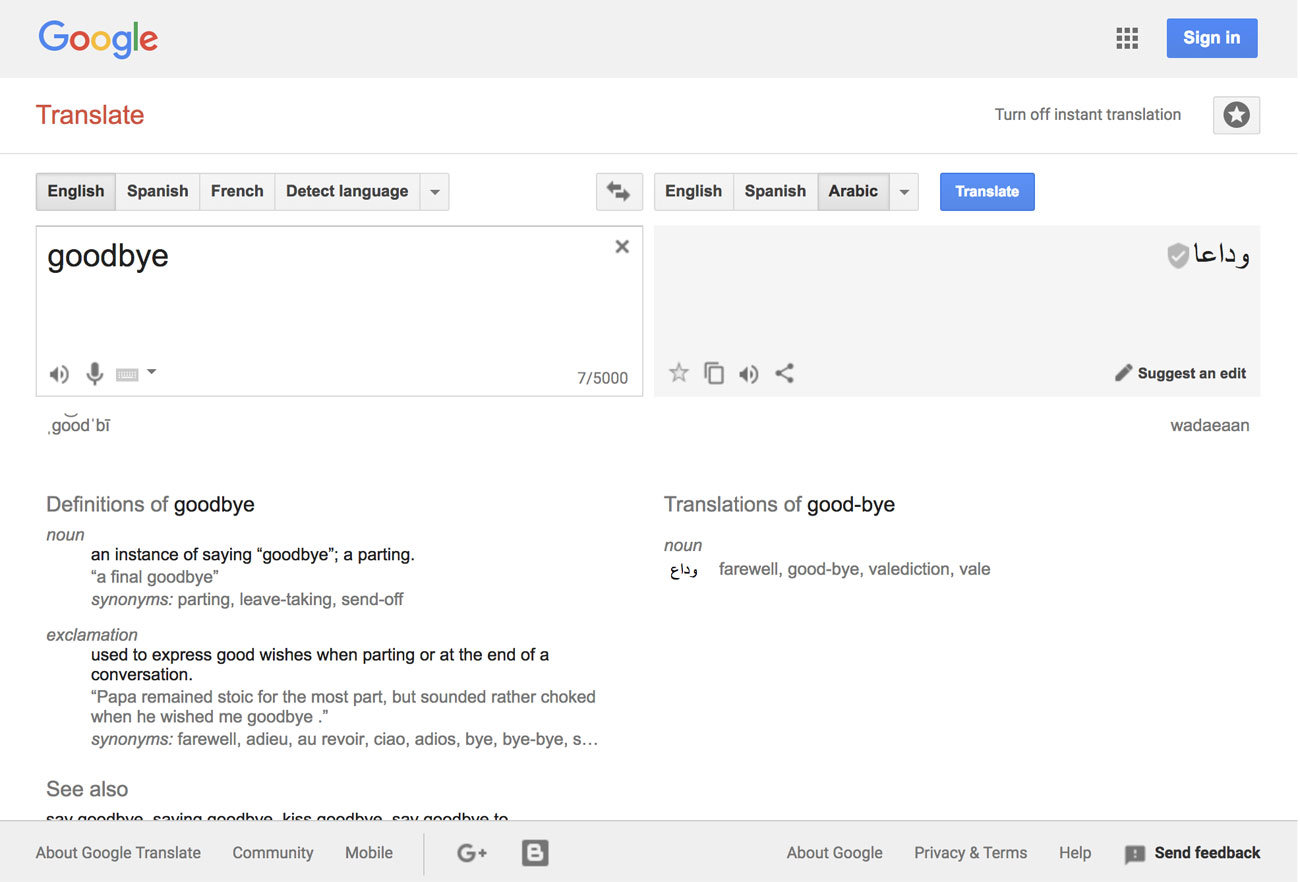
Let's start with something easy – the 'Current value' title. Google Translate tells me it should be (Arabic text here) so update the value in the '<target>' element:
       <source>Current value</source>
       <target>Arabic text here</target>
So far, so good. Now let's do one with interpolation. Here is "Yesterday's closing value was…" (hopefully!):
<target>Arabic text here<x
id="INTERPOLATION" equiv-text="{{ closingValue
| currency:'GBP' }}" />.</target>Use a number when you translate so you can see where the interpolation should be. Notice that when you see the translated result in Google Translate it will appear reversed – ie the number at the start – but when you copy and paste it into the translation file it will return to the original order. This is happening because Arabic is an RTL language so the script is (almost) entirely mirrored. Google Translate does this by adding a 'dir="rtl"' attribute to the containing element. We'll learn how to do this in the next step. The rest of the translations are available in the demo repo, 'tutorial' branch.
19. Script direction
We need to manage the script direction in our app because Angular won't do this automatically for us. There also doesn't appear to be any way to detect if the current locale is an LTR or RTL language, so we'll need to hardcode this. It'd be great if Angular offered a built-in directive for this.
Open up 'app.component.ts'. Import 'Inject', 'LOCALE_ID' and 'HostBinding' from ''@angular/core''. Then set up the 'HostBinding' as follows. This will add a 'dir' attribute to the AppComponent and set the default language direction to 'ltr':
@HostBinding('attr.dir') dir = 'ltr';Next add a constructor and inject the 'LOCALE_ID'. Remember this is set by our configuration because we're using AOT.
constructor (@Inject(LOCALE_ID) private locale: string) {}And finally add the following snippet to the existing 'ngOnInit' method. Here we are checking if the 'LOCALE_ID', ie 'ar-IQ', starts with 'ar' and if it does change the direction to 'rtl' instead.
   if (this.locale.startsWith('ar')) {
     this.dir = 'rtl';
}
If you plan to support more locales then you'll probably need to refactor this to make it more scalable, however, as there are only about ten RTL languages in use today this approach shouldn't be too unwieldy. Start the Arabic app and you should now see that the UI is mirrored – the £ sign should be on the right.
20. Production
The final step is to generate and check our production builds. First, though, we need to make another quick modification to the 'angular.json' configuration.
In 'architect.build.configurations' duplicate the existing production object and rename it '"production-ar-IQ"'. Then copy and paste the properties from the existing '"ar-IQ"' configuration into the object, so you have both the production options and the 'i18n' options.
You also need to update 'architect.serve.configurations' too. This time duplicate the existing '"ar-IQ"' object and rename it '"production-ar-IQ"' and change the 'browserTarget' value to point to your new 'production-ar-IQ' configuration.
Now you can build and serve your production Arabic locale with this command:
$ ng serve --configuration=production-ar-IQOkay, we're done! We've successfully internationalised our app, and localised it for 'en-GB' and 'ar-IQ' audiences. Angular makes the process remarkably straightforward for the developer, in fact, the hardest bit is figuring out what the translations should be – apologies to any Arabic speakers if anything is wrong!
This article was originally published in issue 281 of creative web design magazine Web Designer. Buy issue 281 here or subscribe to Web Designer here.
Related articles:

Daniel Crisp is a contract/freelance senior frontend developer. Daniel's areas of expertise lie in JavaScript (Angular), HTML and CSS.
