How to simplify blend shape creation in Maya
Use Maya to create blend shapes with greater speed and efficiency.
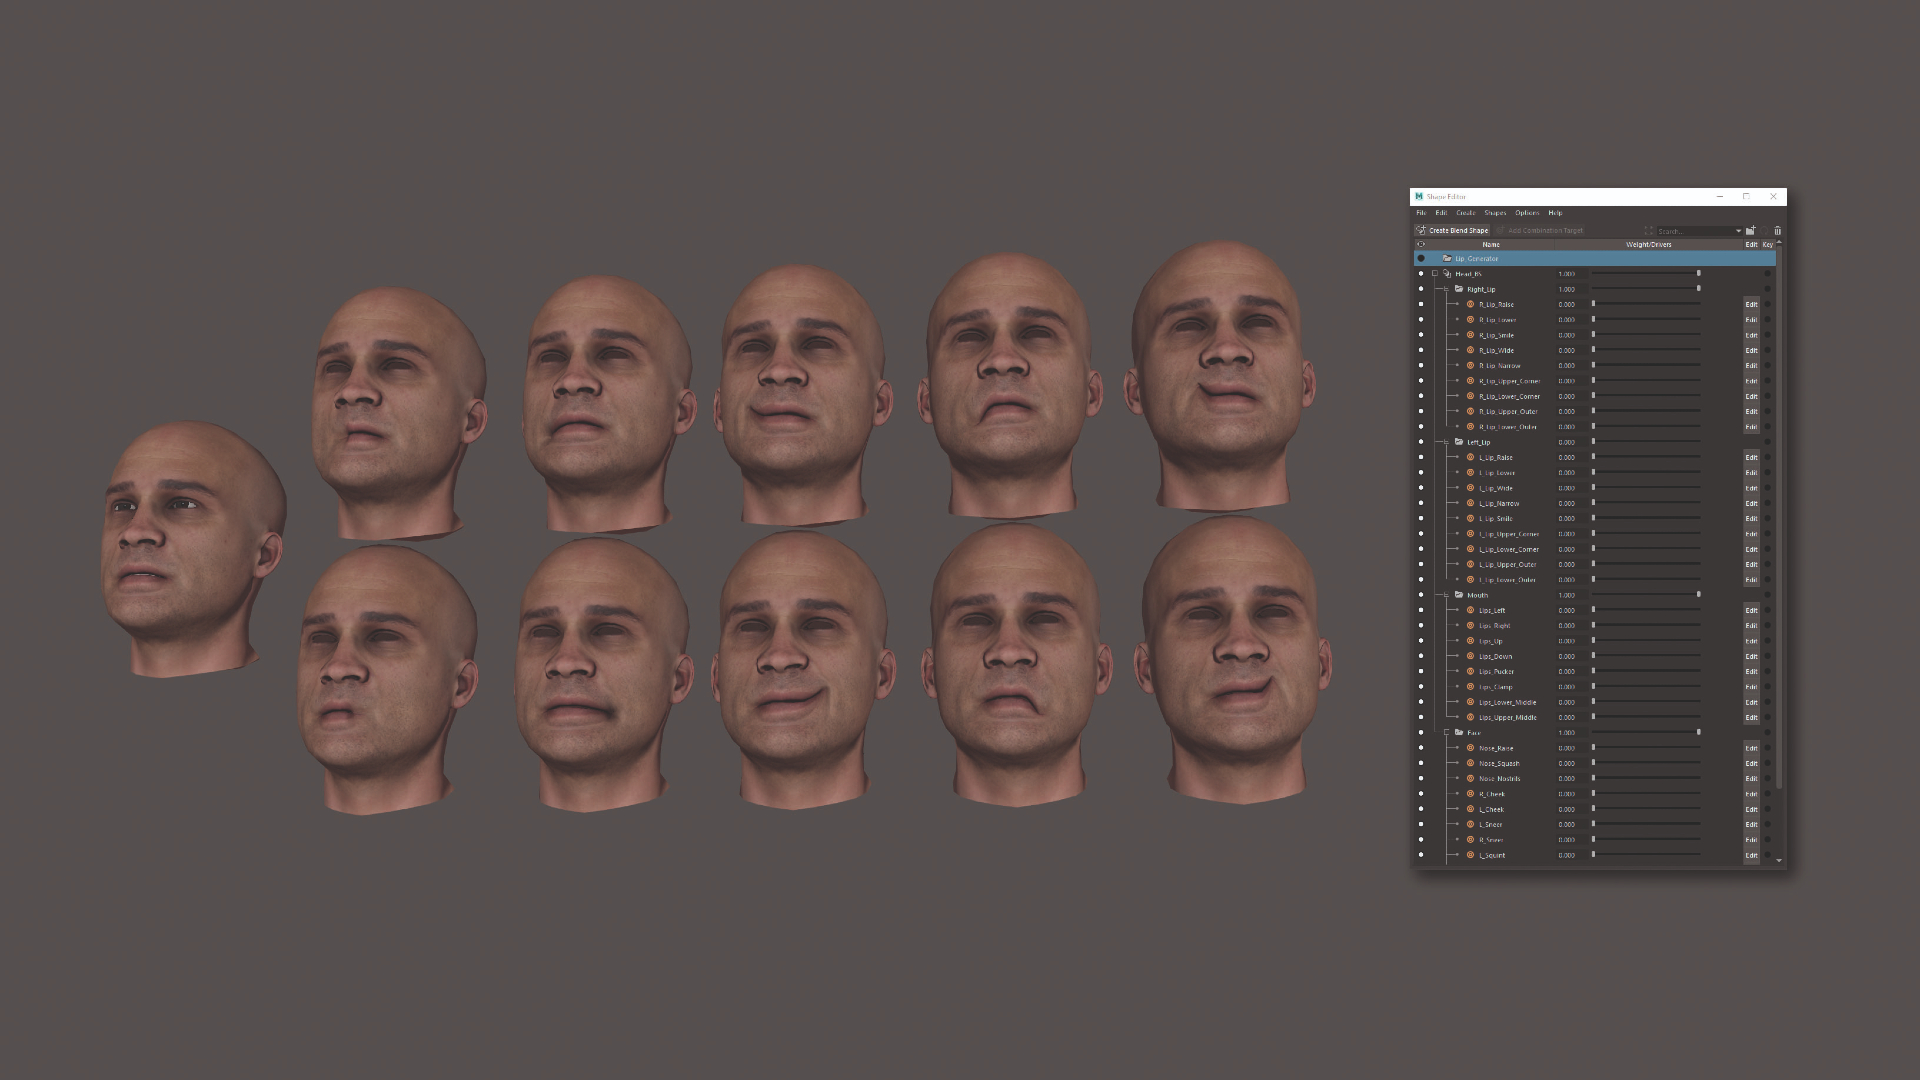
In Maya, blend shapes, or morph targets as they are also known, are a powerful way to bring life to a static model. You create a target shape and then your model can blend into and out of this using a slider, so it’s a nice organic motion, even if it is a linear movement.
Traditionally, creating blend shapes could be a long and tedious job, but there have been lots of improvements in blend shape creation over the years and some shortcuts have been developed to help speed up generation and prevent the need for any work to be repeated. Let's explore how you can use a mixture of Maya's new tools and methods to quickly and efficiently create blend shapes.
Improve your skills even further with our roundup of high-quality Maya tutorials that you can try today.
01. Create your first target shape
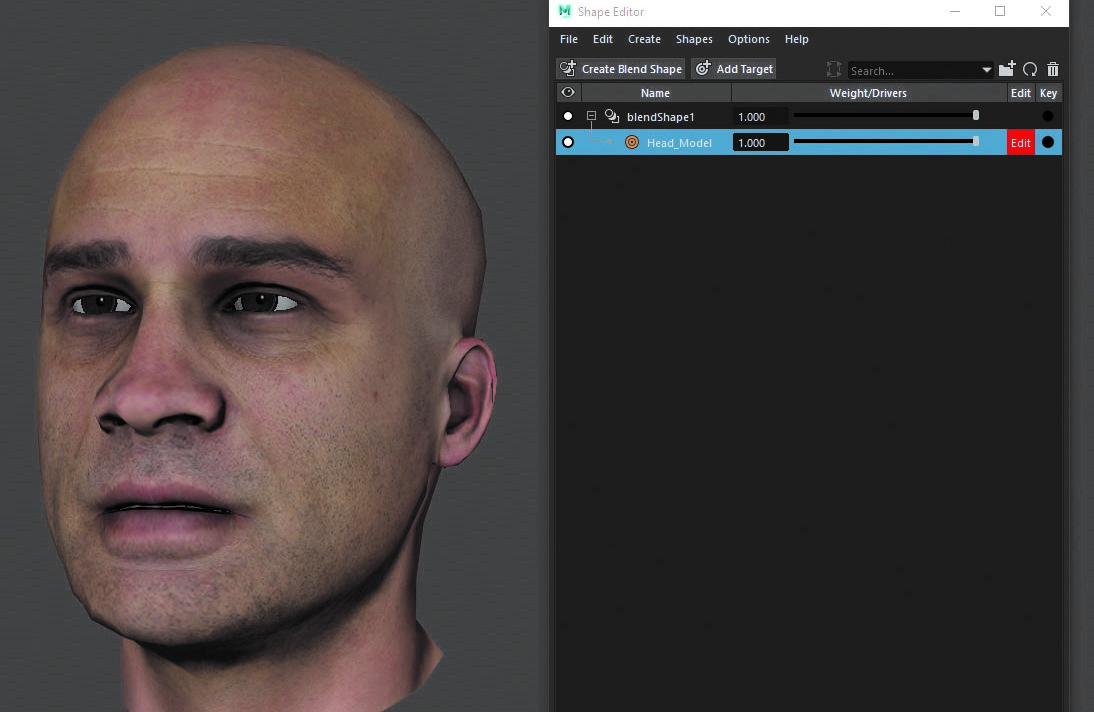
The Shape Editor can be found on the sculpting shelf. When you first open it, Maya will automatically scan the scene for any existing blend shape nodes and fill the window for you. If none exist all you need to do is select the head model and then click Create Blend Shape. This creates the main container node called blendShape1, but you then need to define your first target shape which the head will blend into. To do this, just select the blend shape node and then click Add Target.
02. Use the edit button
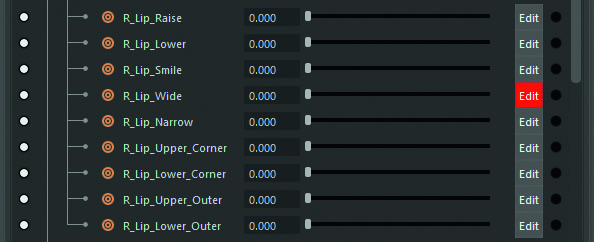
What I like about the Shape Editor is there are no separate models to play with, everything is held within the blend shape node. This not only makes for a cleaner scene but also a smaller file. What you must remember is to hit the edit button next to the target you’re working on, so Maya knows which shape to manipulate. Maya will helpfully give you a warning if you try to work on a target that isn’t editable, but if you aren’t careful you will end up changing a shape you’re not working on, and if it’s not currently visible you may not see the edits until it’s too late.
03. Master the sculpting tools
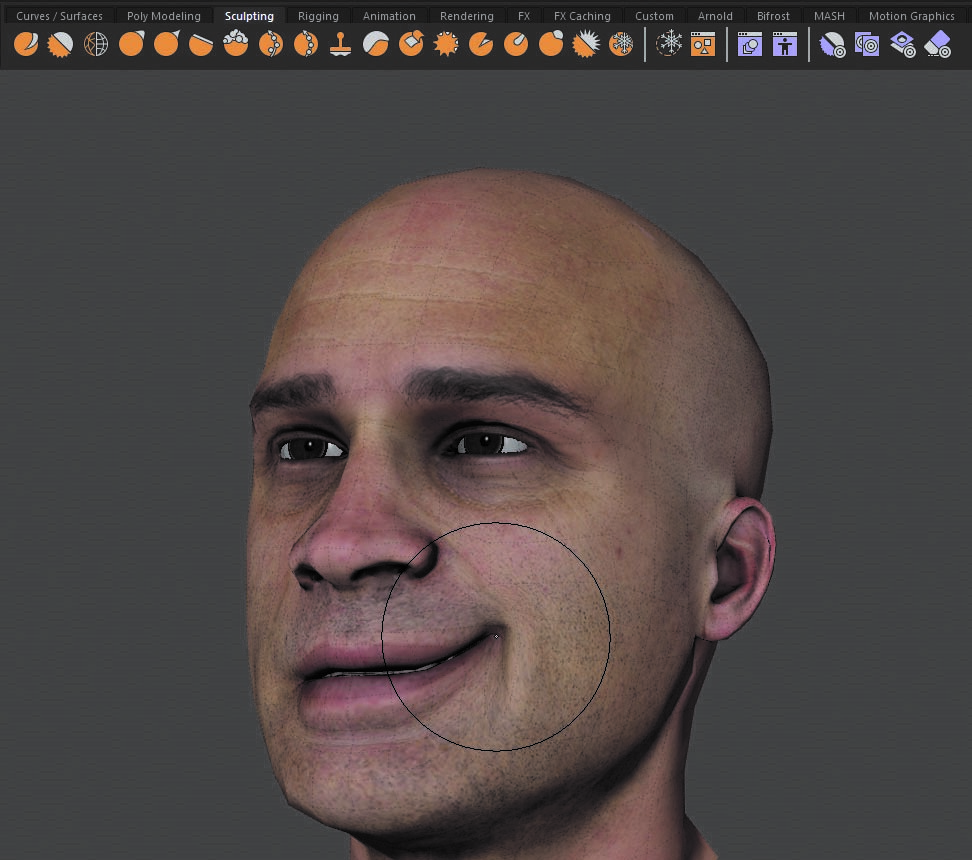
Defining your target shape is made even easier with the help of the sculpting tools. The Grab tool is essential for pulling the face around, meaning you can quickly achieve organic-looking expressions with just a few strokes. Other key tools are the Smooth tool, which you can also access by holding Shift, and the Relax tool. What this will do is spread the distribution of the vertices across the model’s surface, while retaining its shape. This is good for fixing areas where there is texture stretching and is also handy for fixing the topology.
04. Learn shape editing
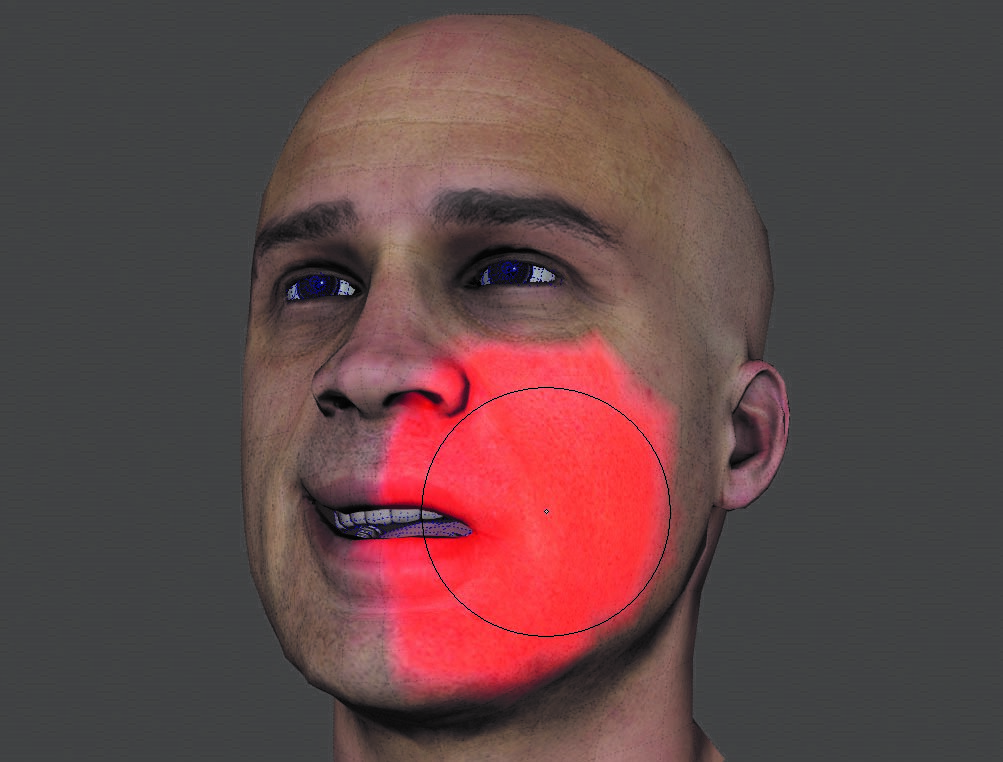
In addition to the main sculpting options, there are also a series of tools geared more towards blend shape creation, and these are found at the end of the sculpting shelf. These are the Smooth Target tool, Clone Target tool, Mask Target tool and the Erase Target tool. What’s useful about these is they focus more on the targets you’re working on, so it reduces the risk of inadvertently editing the other shapes.
05. Don't forget the traditional tools
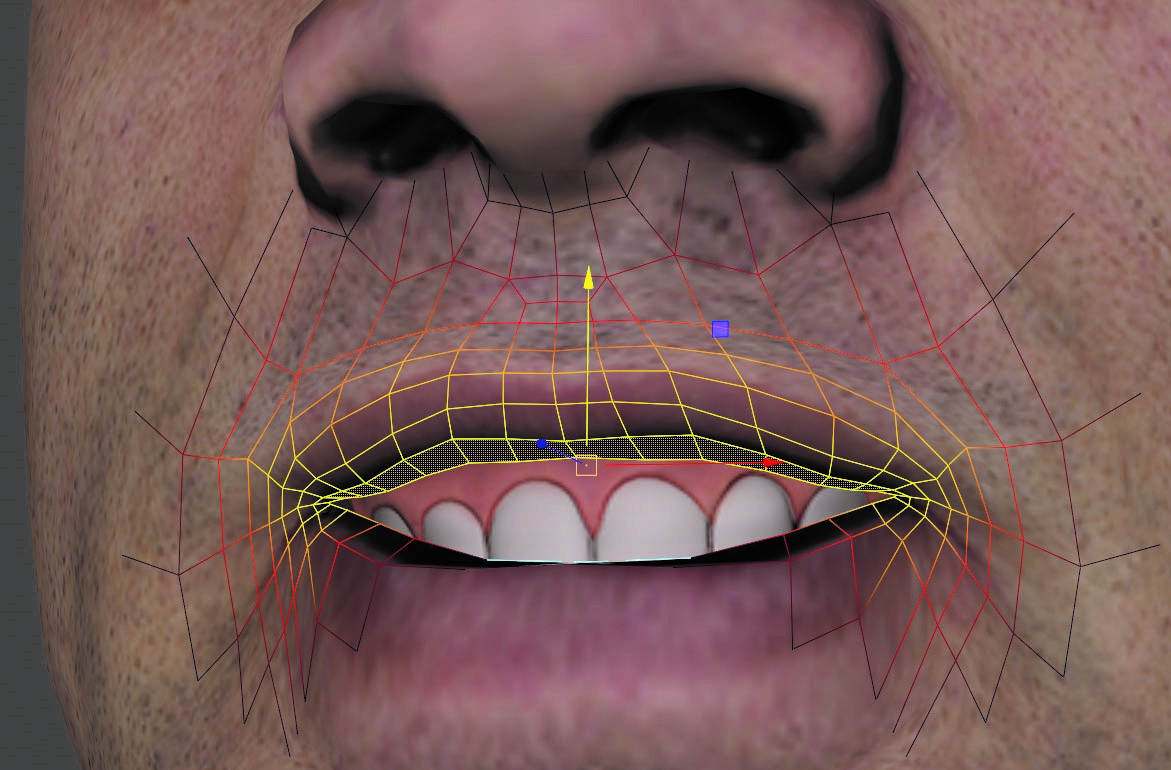
As good and as intuitive as the sculpting tools are, there are times when you need more precision, but luckily, targets don’t just have to be edited by sculpting them. You can still work on them at a component level, meaning you can fine-tune the shape vertex by vertex should you need to. What also helps is the Soft Selection tool, which gives a gradual falloff from your selection, meaning the surrounding geometry is influenced too, which can give a more organic feel.
06. Embrace symmetrical modelling
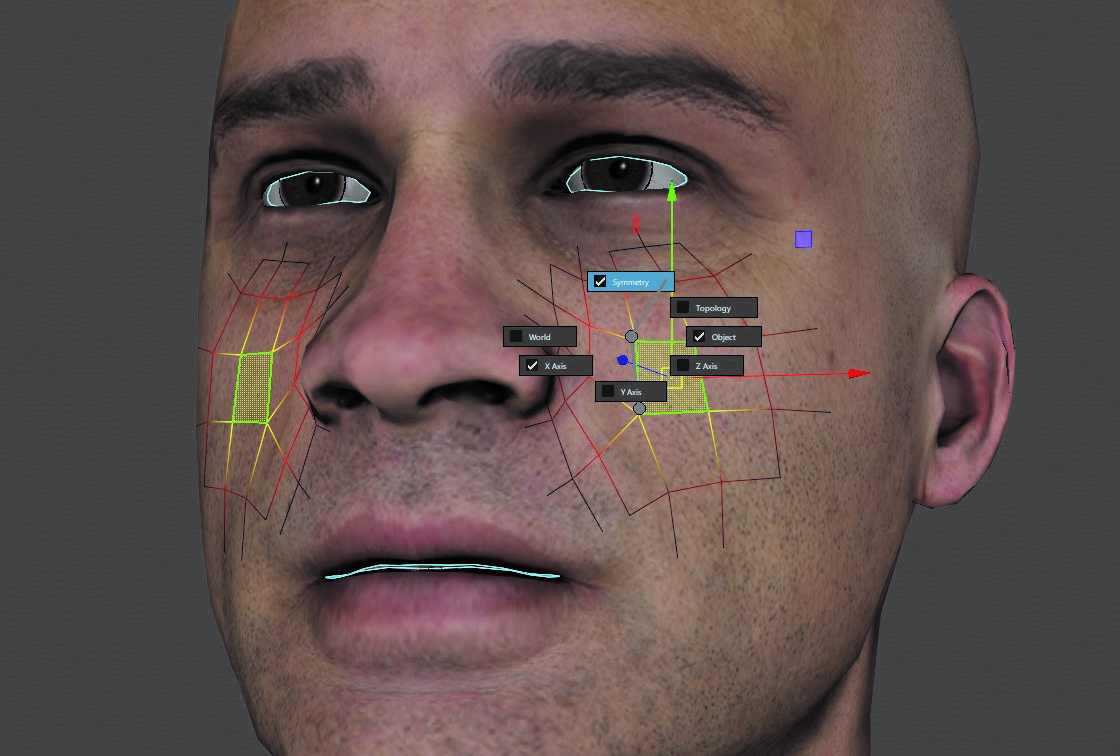
There are times when you need to influence both sides of the model at the same time, especially if you’re working on the mouth area. This is where symmetrical modelling comes in handy. If you’re working in component mode, all you need to do is hold down Control, Shift and right-click to bring up the marking menu. Go up to Symmetry, and then again go to Symmetry to enable it. The components affected will then be highlighted in blue. If you’re sculpting, you can use exactly the same key combination to get to the symmetry options.
07. Save time with independent sides
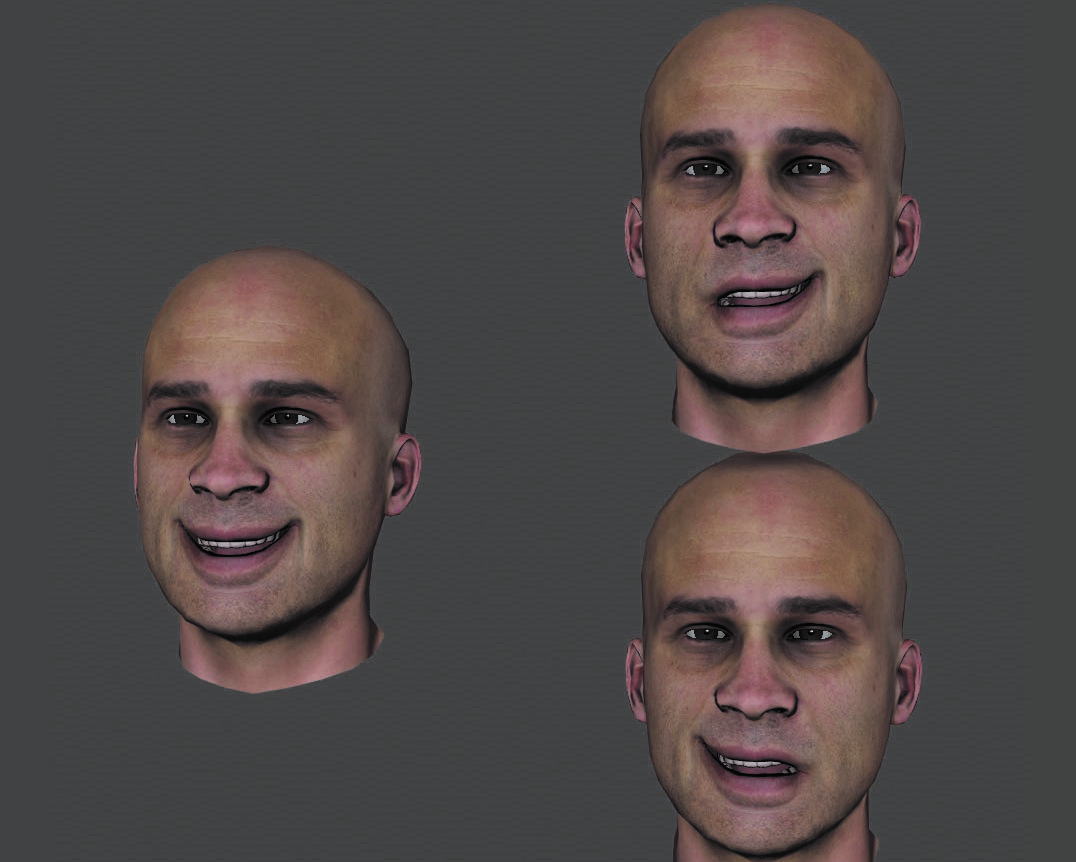
Another time-consuming task when creating blend shape targets is having to divide them. For example, if you have a mouth shape where the character is smiling, you want that to be editable on both sides of the face, so the animator can raise the mouth on either side, independently. One method of achieving this is to use more heads and blend shapes, editing the weight values directly so the input from the main head is only affecting one side at a time. This will not only divide that shape but any others you then feed into the main head shape, saving you time in the long run.
08. Take a simpler approach
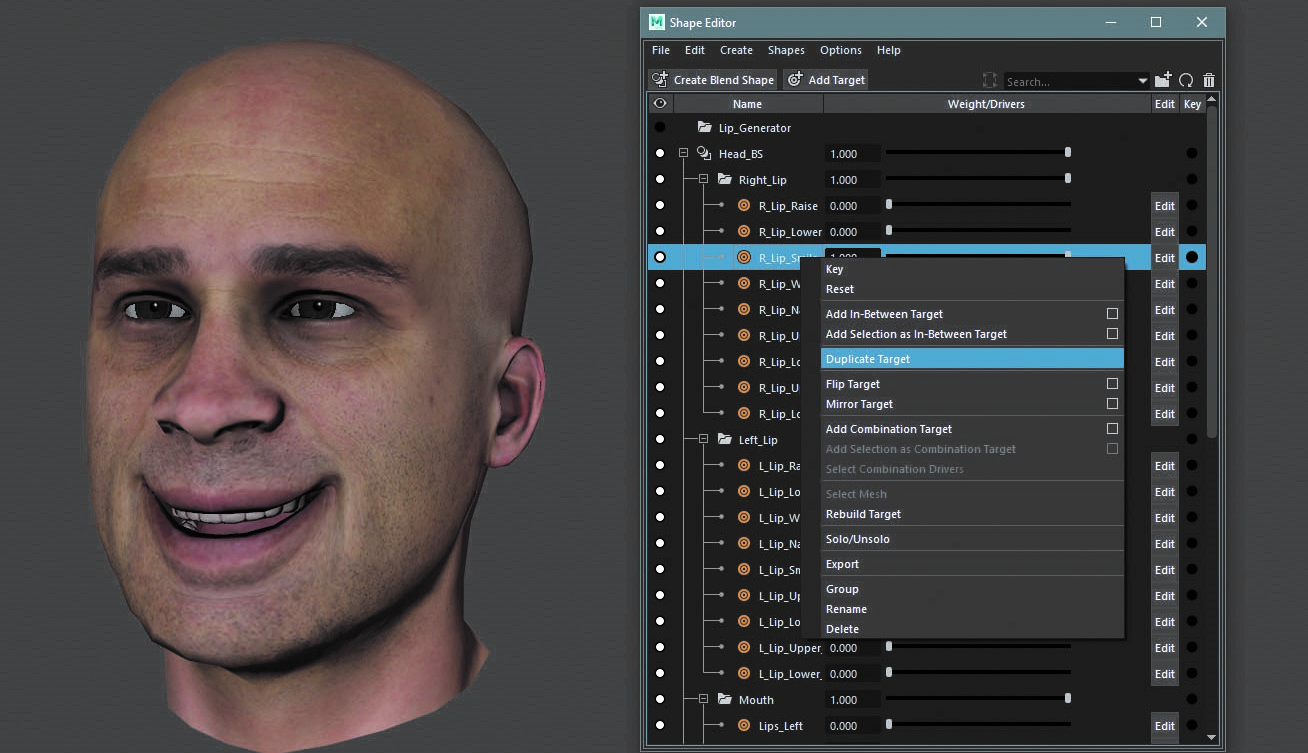
With the Shape Editor, this can also be simplified. You have two options. Create the full grin target shape, using symmetry to work on both sides at the same time, and then right-click it in the Shape Editor to bring up the menu. You can then duplicate the grin shape and use the Erase Target tool to remove the sides you no longer need. Alternatively, you can create just one side of the grin and then duplicate it, but this time simply use the Flip tool to move those edits across, giving you both sides but on different targets.
09. Beware of target combinations
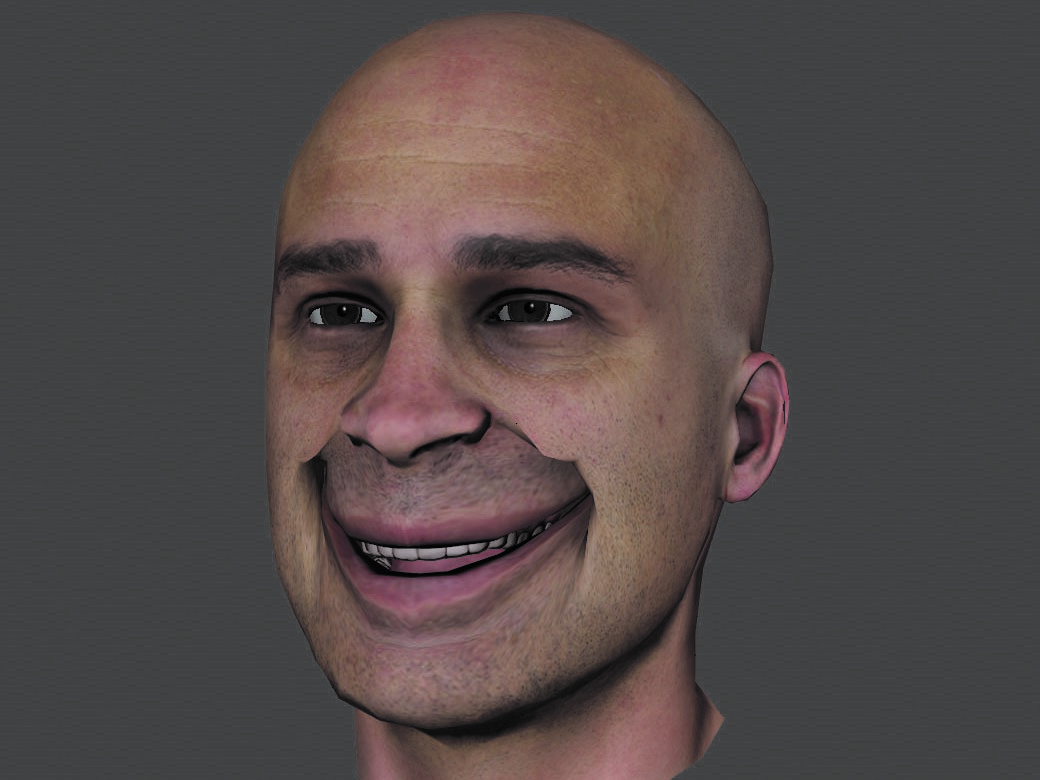
One thing to always be aware of when creating your target shapes is how they will work when combined. Blend shapes are additive, meaning the vertex movement from each is simply added on to each other.
If you’re working on the mouth area, for example, you need each target shape to work in harmony with all the others affecting the same area. So, if you have a target that raises the corners of the mouth and another which pulls them out to the side. If you’re not careful these, when combined, it may result in a badly deformed model.
This article was originally published in 3D World, the world's best-selling magazine for CG artists. Subscribe to 3D World.
Read more:
Sign up to Creative Bloq's daily newsletter, which brings you the latest news and inspiration from the worlds of art, design and technology.

Since the early 90s, Antony has worked for many of today’s top game and VFX studios. He has written three technical manuals on Game Character Development in Maya, Game Character Development and 3D Modeling in Silo, all of which have been translated into multiple languages. He is the owner of antcgi.com, and regularly produces both written and video tutorials on technical aspects of game development and VFX.

