How to perfect hair in your portraits
Learn how to perfect your portraits using ZBrush, 3ds Max and the Hair Farm plug-in.
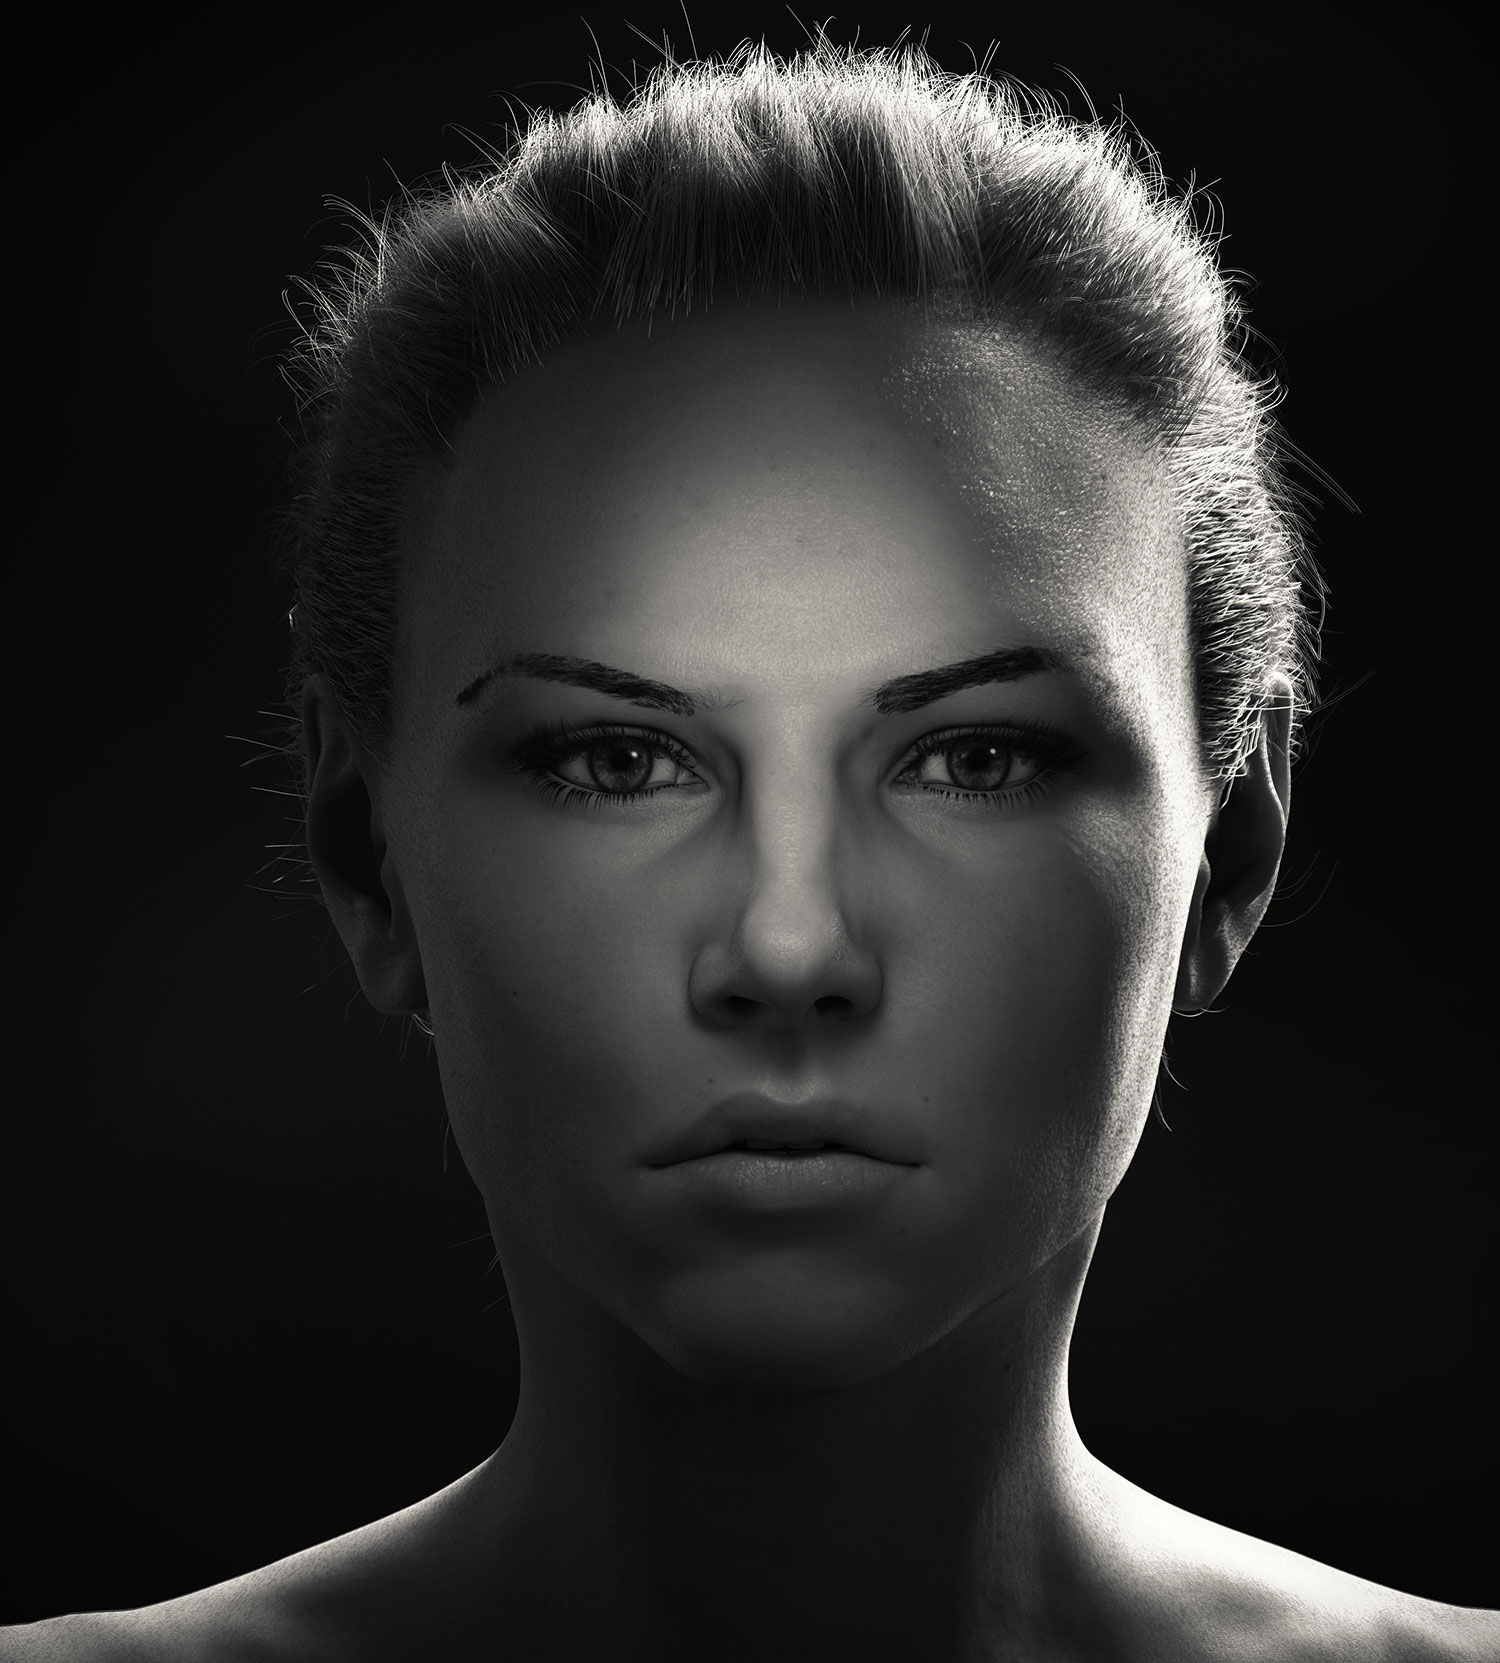
Today we will be creating eyebrows to ensure your portraits look more realistic. Just like hair and eyelashes, eyebrows are often neglected in tutorials about creating the human body in 3D art, but unrealistic-looking eyebrows can really make the difference between a believable and an unbelievable 3D model.
First, we will take our model into ZBrush and mask the areas we need to use as our scalp or hair emitter. ZBrush is great for doing this since we can basically paint in 3D on our high resolution model in order to make it look exactly the way we want it. Then, we will perform quick actions such as generating UVs and retopologising automatically to get clean and fast results.
This technique – which uses ZBrush, 3ds Max, the Hair Farm plug-in and Photoshop to make eyebrows – can also be used to create other types of hair.
Article continues belowDownload the files you'll need and an accompanying video.
01. Loading the model

Load your ZBrush model. If you didn't make it in ZBrush, insert a PolyMesh3d object and then use the import function. Export your model from your 3D package to .obj or another format that ZBrush supports. Once your model is loaded, make a duplicate of it. We'll use this as a backup.
02. Testing the mesh
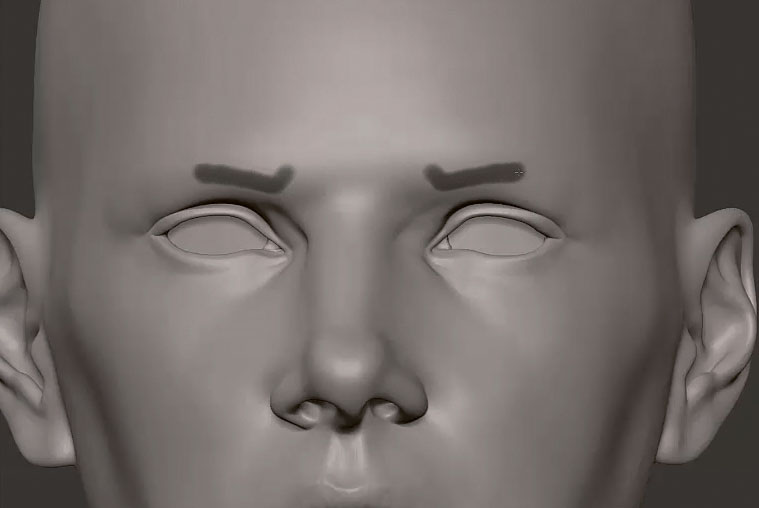
Paint a test mask onto the surface to check if it has enough subdivisions to ensure a clean and detailed mask. If your mask is low resolution or jagged, increase the subdivision until you get a clean result. It doesn't really matter if you go a bit overboard (as long as it doesn't slow down your machine) as we are only interested in getting masks to generate objects and we won't overwrite the original object.
03. Activating symmetry
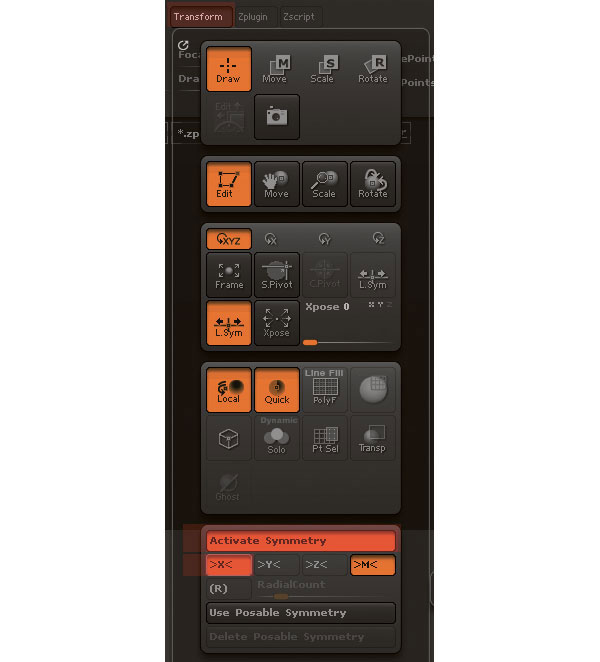
Go to the Transform menu, enable Activate Symmetry and make sure X is enabled.
Sign up to Creative Bloq's daily newsletter, which brings you the latest news and inspiration from the worlds of art, design and technology.
04. Painting the brows mask
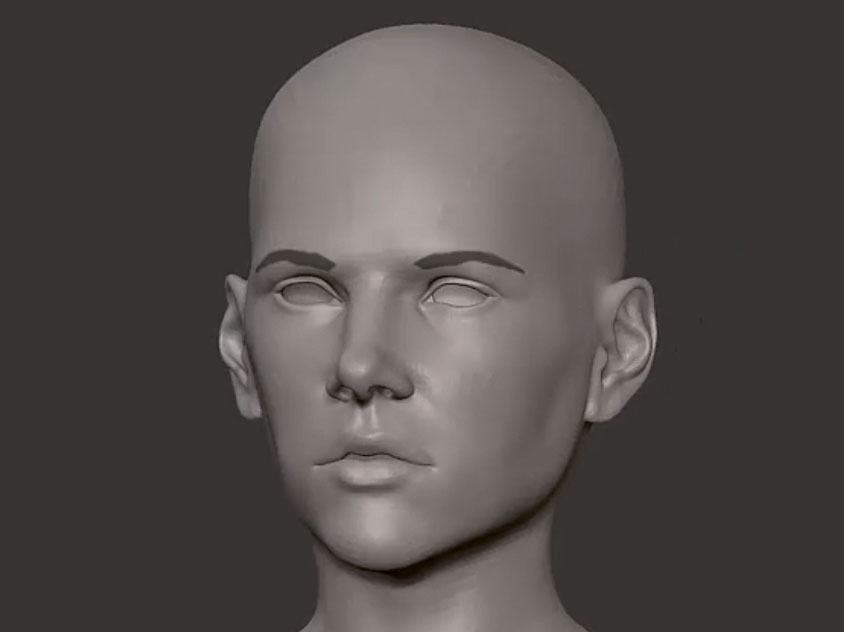
Start painting the mask for the eyebrows. Use reference to ensure you get a proper shape. Use Ctrl+Alt to erase any unwanted areas and Ctrl to add more surface to the eyebrow. Review the brows from all angles until you're satisfied.
05. Turning the mask into a polygroup

Go to the Tool menu. Open the polygroup tab, and click Group Masked. This will turn our selection into a polygroup for easier access, and also means it can be isolated from the rest of the geometry.
06. Isolating the selection
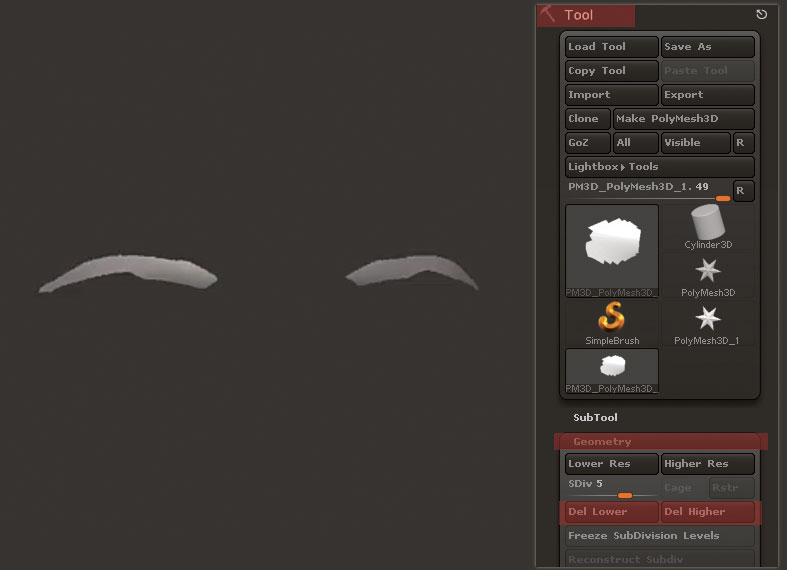
Hold Ctrl+Shift, then click in the masked area of the eyebrows to isolate the selection. Go to the Tool menu, open the Geometry tab, and under subdivision levels, delete both Lower and Higher subdivisions if you have either of them.
07. Deleting the hidden mesh
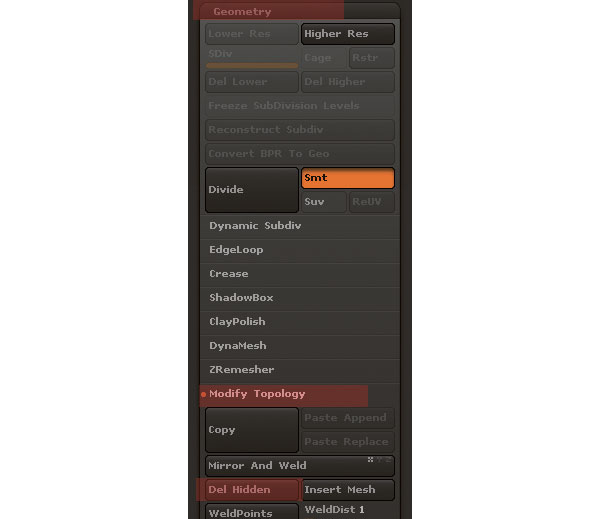
Go to Tool>Geometry, select Modify topology, then press the Delete Hidden button. This will delete all the polygons that are not visible at the moment.
08. Auto-retopologizing the brows

Go to Tool>Geometry, and open the ZRemesher tab. Click the ZRemesh button. This tool is amazing, as it usually creates great topology instantly. A few years back, you would need to remodel all these polygons by hand, something which, depending on the complexity of the object, could take hours. Now, with a simple click and a few seconds… voila! It does a really good job most of the time.
Tweak the values of the polycount slider and feel free to press Half to turn it on. Click ZRemesher a few more times until you get a good-looking brow mesh that is not too high res (but not too low res either). Make sure you have enough polys not to sacrifice the overall outline we had with the brows.
09. Setting up the UVs using UV Master

Go to the Zplugin menu. Open the UV Master rollout and press Unwrap. This will lay out the UVs nicely for your mesh, enabling us to paint a mask for the brows in Photoshop later on. You can double check how they look by pressing Flatten. While in this mode, you can modify the UV's position and scale. Press Unflatten to return to the geometry.
10. Exporting the Brows mesh as .obj
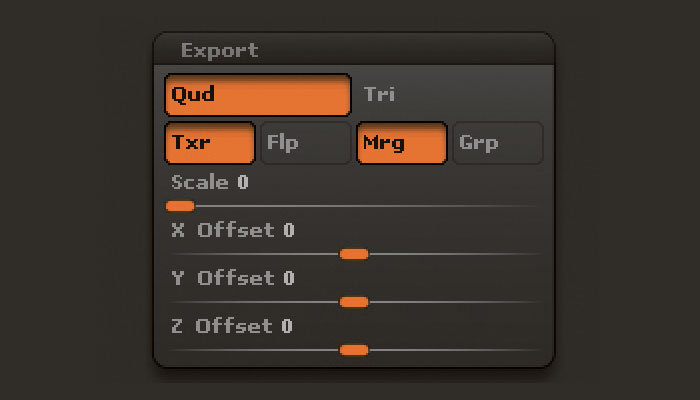
In the Tool menu, scroll down to the Export section. Disable the Grp button and leave everything else at default. Scroll back up, and press Export. Save as a .obj file. Alternatively, you can use GoZ to transfer your work into a compatible application.
11. Start 3ds Max

Open 3ds Max, go to the Import menu, and import the .obj (if you used GoZ it should appear in the scene automatically). Make sure you also import the original head so we can have an idea of how the brows will look on the model.
Select the brows mesh we imported, go to the modifier menu, and select Hairmesh edit. Choose Polygon Selection mode and make sure the brows are selected completely. Click on Extrude and extrude slightly to represent our hair volume (in this case, the eyebrow hairs' length). Once you've done this, adjust the verts until you have something that looks more like an eyebrow from the top.
12. Adjust geometry

Adjust geometry at the vert level from all views. Make sure you look at real life references, if possible, and your own photos. Don't forget male and female eyebrows are very different.
Next page: discover the last steps to perfecting hair in your portraits...
