Make realistic 3D hair and fur in 3ds Max and V-Ray
Create hirsute characters with these tips for top tresses.
Don't miss Vertex 2018, our debut event for the CG community. Packed with inspiring talks from industry pros working in games, VFX and more, plus career advice, workshops, an expo and more, if you work – or play – in CG, it’s unmissable. Book your ticket now.
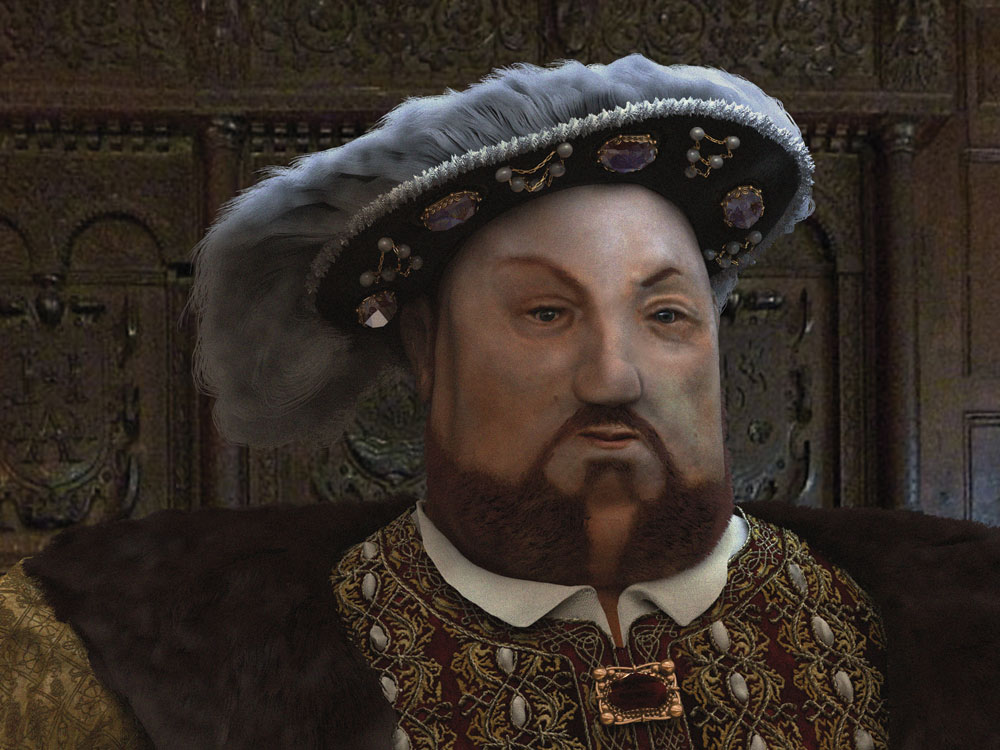
Creating realistic 3D portraiture will more than likely include simulated hair, but there may also be many other situations when a hair modifier is useful in a scene. Not only for dressing a human head, but also for clothing items, fabrics, animal hair, carpets and grassy surfaces to name but a few.
3ds Max comes with a very intuitive tool for creating realistic and styled hair and fur. This modifier is found under the World Space Modifiers drop-down list.
Article continues belowV-Ray also has a (less flexible) hair creation tool found under Geometry and VRay: VRayFur.
The 3ds Max Hair and Fur modifier enables you to comb, style and trim hair strands on screen and interactively, as if using a comb and scissors. This is fantastic for creating detailed, brushed hair styles and it can be additionally deformed by adding external simulated forces like wind.
Styling with VRayFur is tricky and less intuitive however, as it requires tweaking the variables in linked procedural maps in the material editor. For this reason VRayFur is best used as a tool for creating random furry objects such as deep pile carpet or even grassy areas, as it doesn't lend itself easily to such close control.
V-Ray also supplies a very nice material specifically for use with hair and fur objects. I find this to be a superior material to the default option offered in the 3ds Max Hair and Fur modifier.
Sign up to Creative Bloq's daily newsletter, which brings you the latest news and inspiration from the worlds of art, design and technology.
To get the best out of both worlds and by selecting one or two additional parameters, it is of course possible to use the V-Ray material together with the 3ds Max Hair and Fur modifier. Also see our review of 3ds Max 2017.
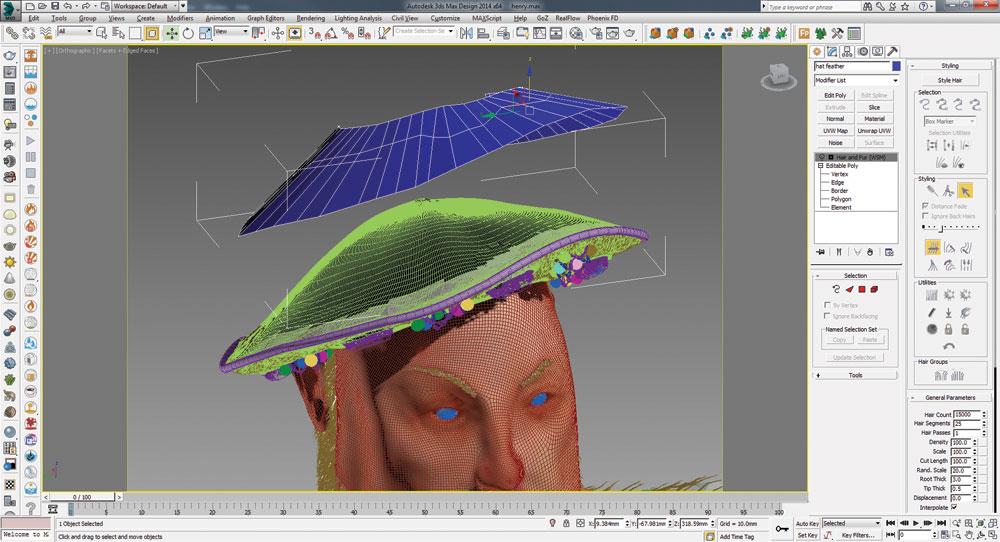
01. Create a base for the new hair plume
To begin, create a simplified surface in 3ds Max with the line tool whilst snapping to vertices on the top of the cap. The surface does not need to cover the entire cap, but only a reduced area where the plume will appear.
Next, create the form with shapes bounded by three or four vertices at most (rectangles or triangles) and then weld all the vertexes. Apply the Surface modifier and ensure the normals are pointing upwards. Make the surface non-renderable in its properties dialogue.
02. Hair and fur assignment
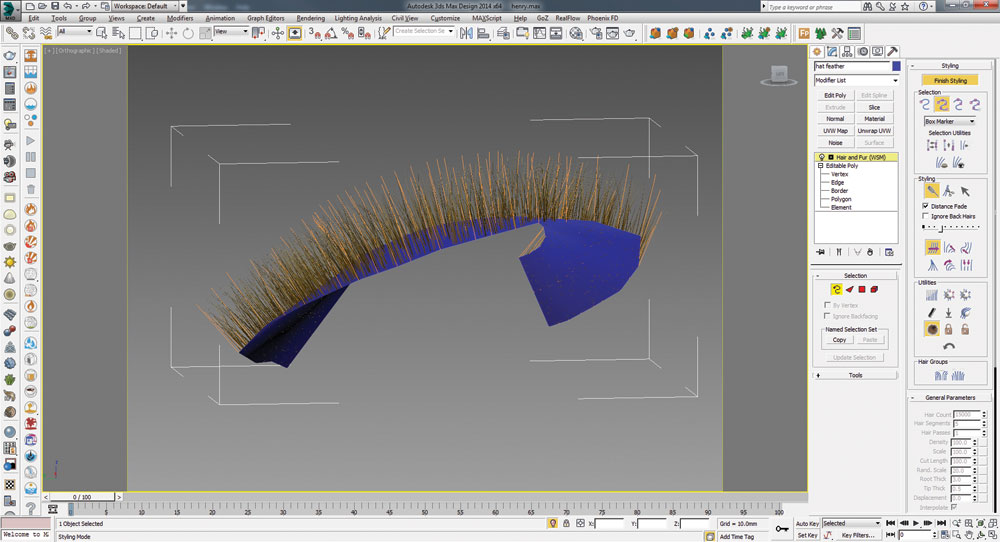
With the new surface selected, we now need to open up the drop-down Modifier list in the top right, and select the Hair and Fur option.
Start by adjusting the general parameters in order to achieve the approximate length required for the plume. Tweak the hair strand thickness and the hair density to your liking with the Hair Count option. Adjust the amount of hairs on display to help with GPU memory under the Display tab, and then switch on the guides icon.
03. Comb and cut
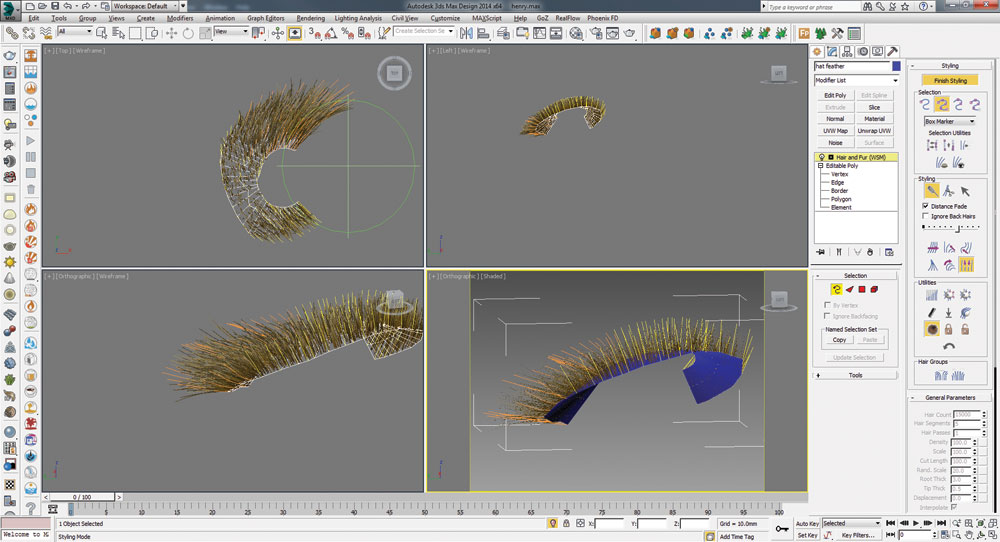
Under the Styling tab choose the Select button and select an area of hair guides that you might want to work on. Then click the Hairbrush button and the Scale button underneath. Work in the top and side viewports and stretch the hair with the green comb icon on screen.
Switching from the Scale button to the Translate button will enable you to easily comb the hair into a style of your choosing, and switching from the comb to the cut icon will allow you to snip off ends in order to neaten and tidy the plume.
04. Render settings
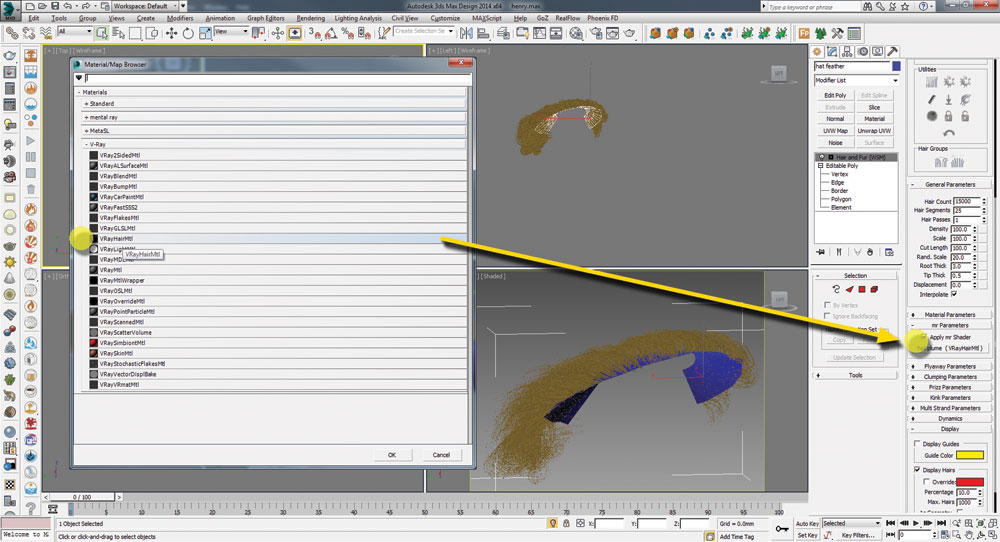
Once the hair has been combed and cut into the required style open the mr Parameters tab, select Apply mr Shader and click into the box under. Choose VRayHairMtl. Drag and instance the material into an empty slot in the material editor and adjust the colour and glossiness parameters, or choose a preset.
Next open the Environment dialogue from the Rendering tab in the main top menu and select the Effects tab. Add Hair and Fur and under Hair Rendering Options select 'mr prim' for the Hairs options.
This article was originally published in issue 231 of 3D World, the world's best-selling magazine for CG artists. Buy issue 231 here or subscribe to 3D World here.
Book your Vertex 2018 ticket now
On 13 March we’re launching Vertex 2018: a one-day event in London for the CG community. Featuring a jam-packed schedule of inspiring talks from the industry’s most exciting practitioners, there will also be workshops, networking opportunities, a busy expo and lots more. Get your ticket to Vertex 2018 now.
Related articles:
