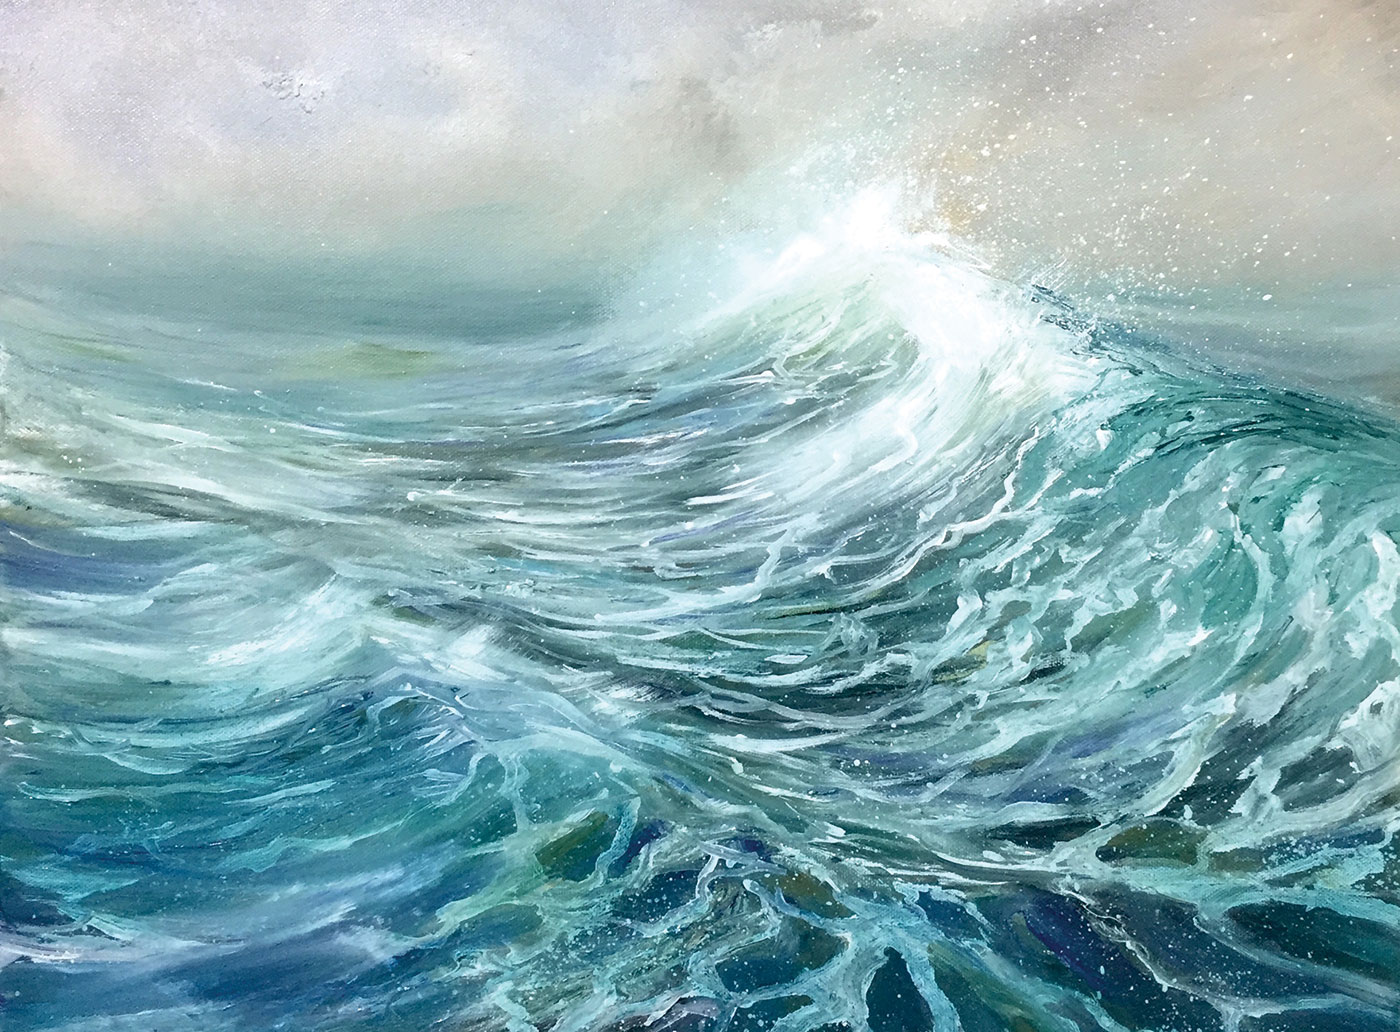
Paint an energetic seascape in oils
Discover how Sarah Jane Brown uses memories of the sea to create atmosphere and energy.
Sign up to Creative Bloq's daily newsletter, which brings you the latest news and inspiration from the worlds of art, design and technology.
You are now subscribed
Your newsletter sign-up was successful
Want to add more newsletters?

Five times a week
CreativeBloq
Sign up to Creative Bloq's daily newsletter, which brings you the latest news and inspiration from the worlds of art, design and technology.

Once a week
By Design
Sign up to Creative Bloq's daily newsletter, which brings you the latest news and inspiration from the worlds of art, design and technology.

Once a week
State of the Art
Sign up to Creative Bloq's daily newsletter, which brings you the latest news and inspiration from the worlds of art, design and technology.

Seasonal (around events)
Brand Impact Awards
Sign up to Creative Bloq's daily newsletter, which brings you the latest news and inspiration from the worlds of art, design and technology.
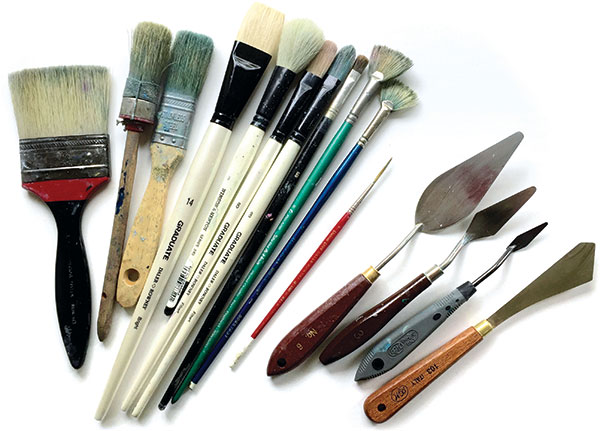
Sarah paints in oils on a 50x50cm cotton primed canvas and uses a variety of brushes and palette knives.
2 1/2 inch 'skyflow' brush
1 inch natural hair brush, round
1 inch natural hair brush, flat
Bright, size 14, 5
Goat hair mop, size 3
Filberts, size 8
Fan brushes
Rigger
Selection of palette/painting knives
She uses various makes of oil colour including some alkyd white, which speeds up the drying time considerably.
If you've ever been on a boat or ship at sea, you might recall the smell of the sea air, the salty spray on your lips and the physical effort required to compensate for the rolling and pitching motion.
For this workshop, I decided to recreate these sensations in the studio using a combination of sketches and photo references, but mostly drawing upon my own vivid memories of what it feels like to be at sea.
For me, capturing feeling and energy is more important than 'photographic' visual accuracy. I'm interested in recreating the emotions that the original experience unleashed.
I never sit down to paint, this enables me to use my whole upper body to inject more energy. I also step back frequently to get a more objective view. So for this exercise, I hope you will also enjoy getting a bit more physical. Not quite right? See our other tutorial explaining how to paint a seascape.
01. Break the ice
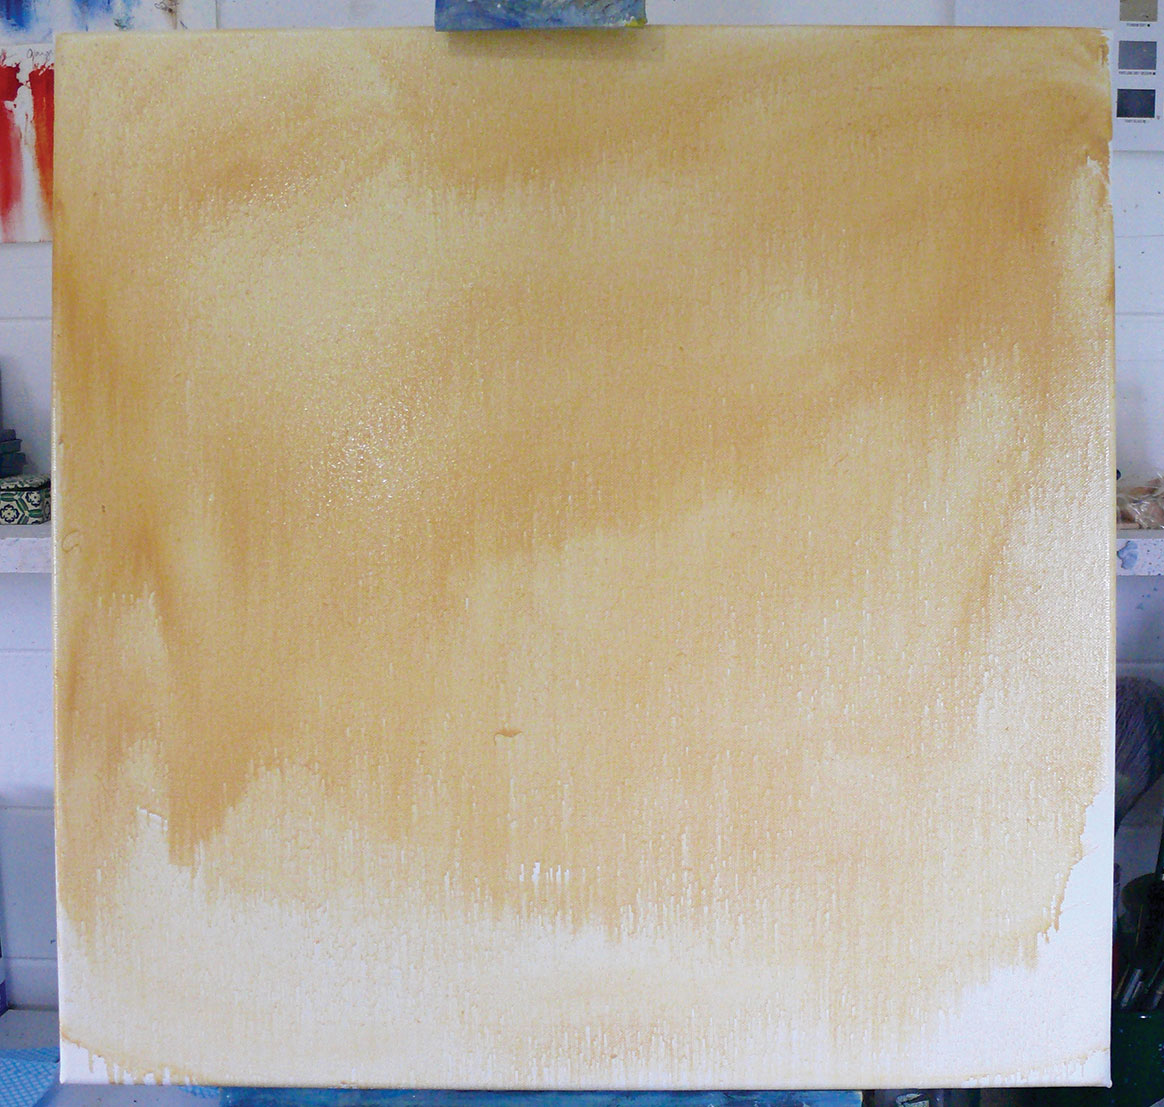
Quickly cover the canvas with a thinned wash of colour. This will also create a sense of unity to the finished piece. I've used a warm yellow ochre to help prevent the later layers of blues and greens from looking too cold. Work fast and loose!
02. Lightly sketch in the composition
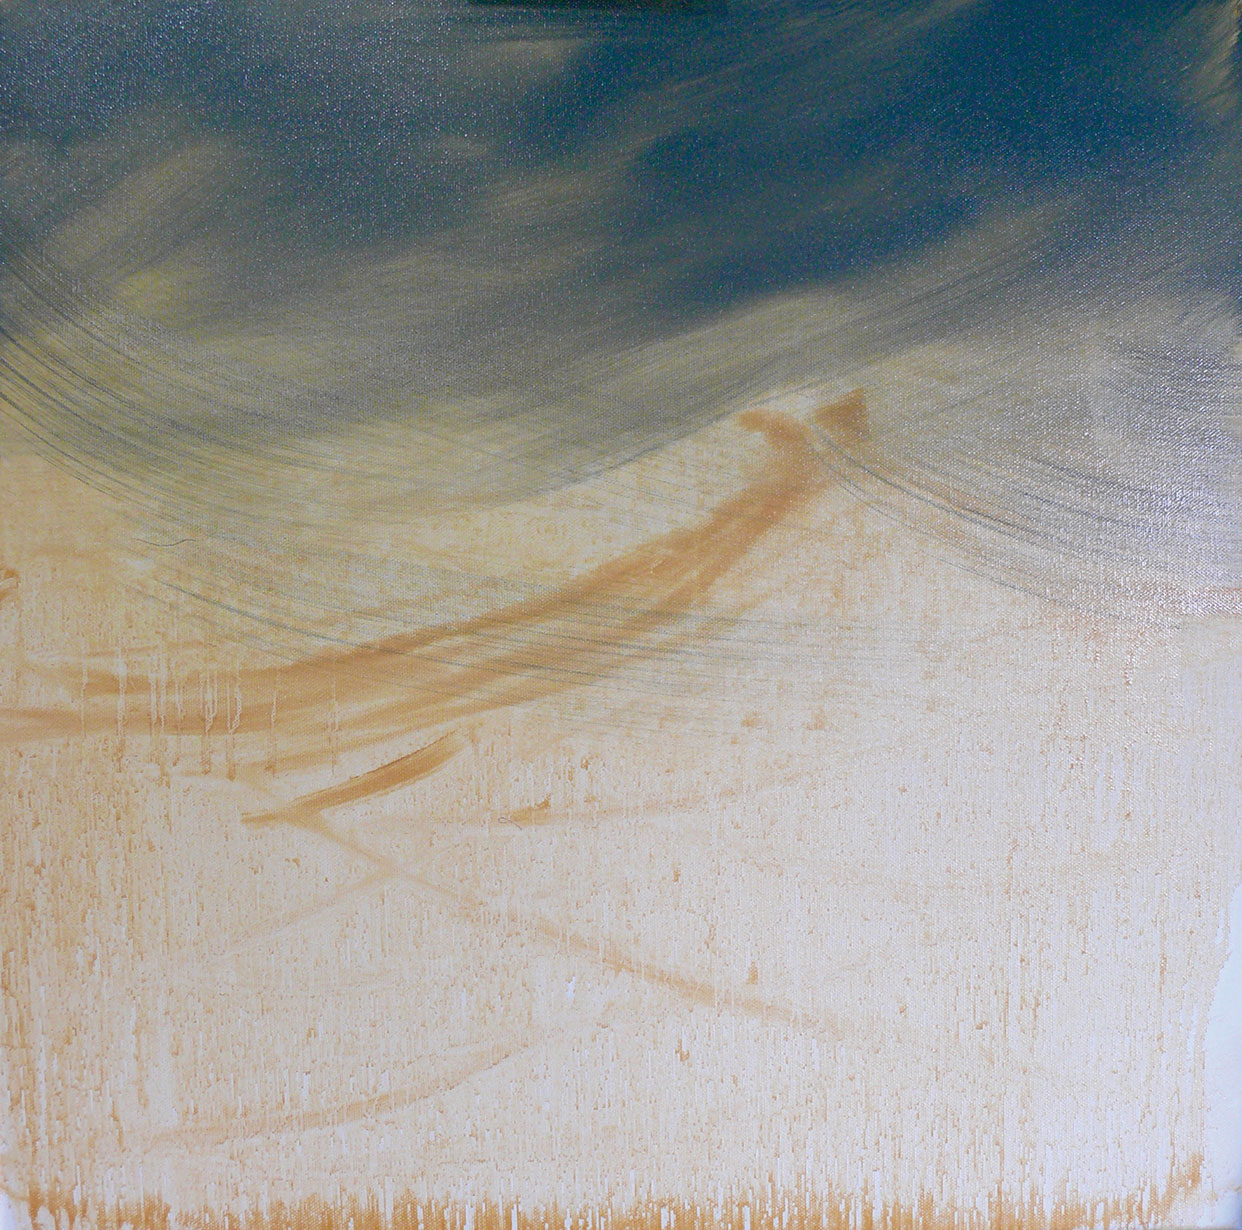
Decide early on where your focal points will be and aim to place them with a strong diagonal arrangement. Using a large brush, quickly sweep some blue/grey colour into the sky area. Diagonal sweeps are dynamic to the eye, which is exactly what you want when representing movement.
03. Blend in sky colours
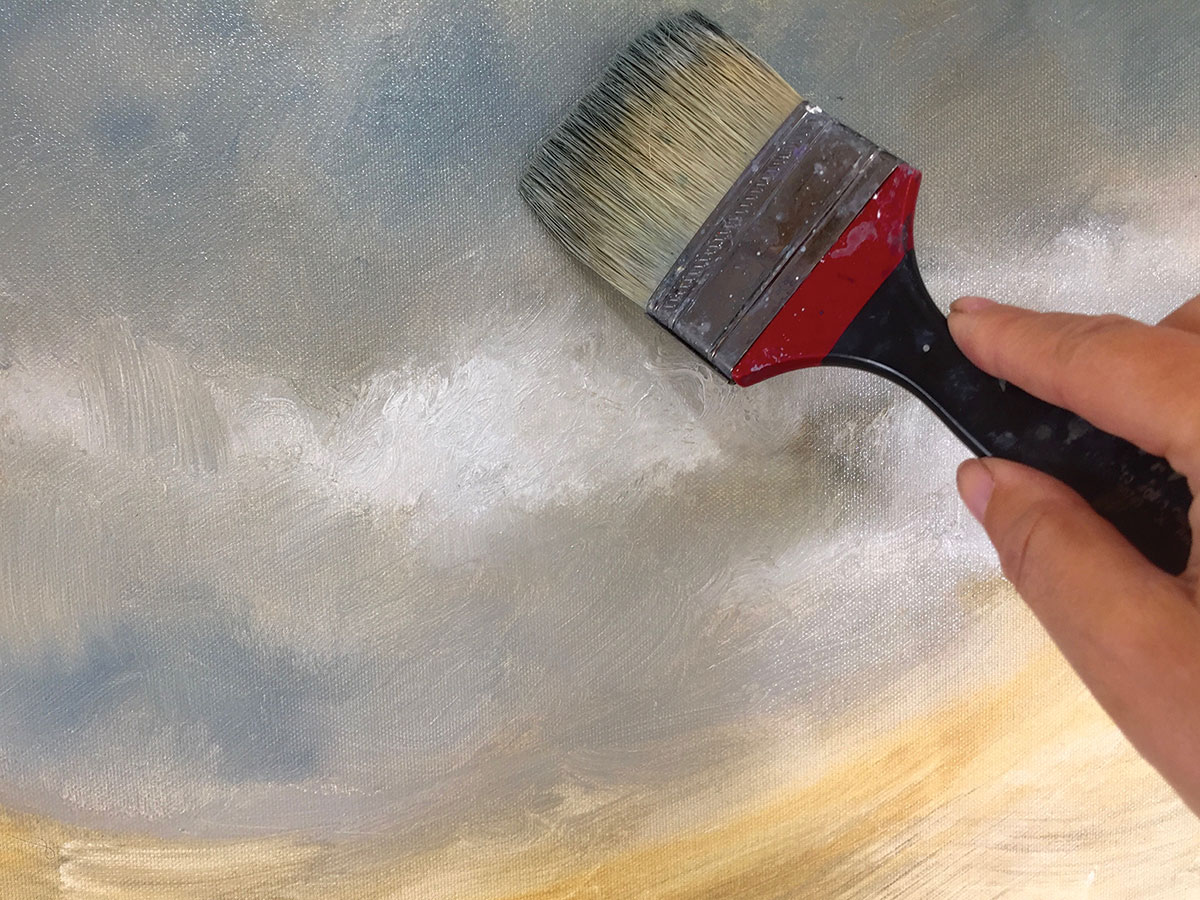
Using the same large brush, pick up some white and stipple it into the blue/grey while it's still wet, blending the edges softly. This white will also blend nicely with the ochre background colour to give a range of natural cloud colours.
Sign up to Creative Bloq's daily newsletter, which brings you the latest news and inspiration from the worlds of art, design and technology.
04. Sweep in the waves
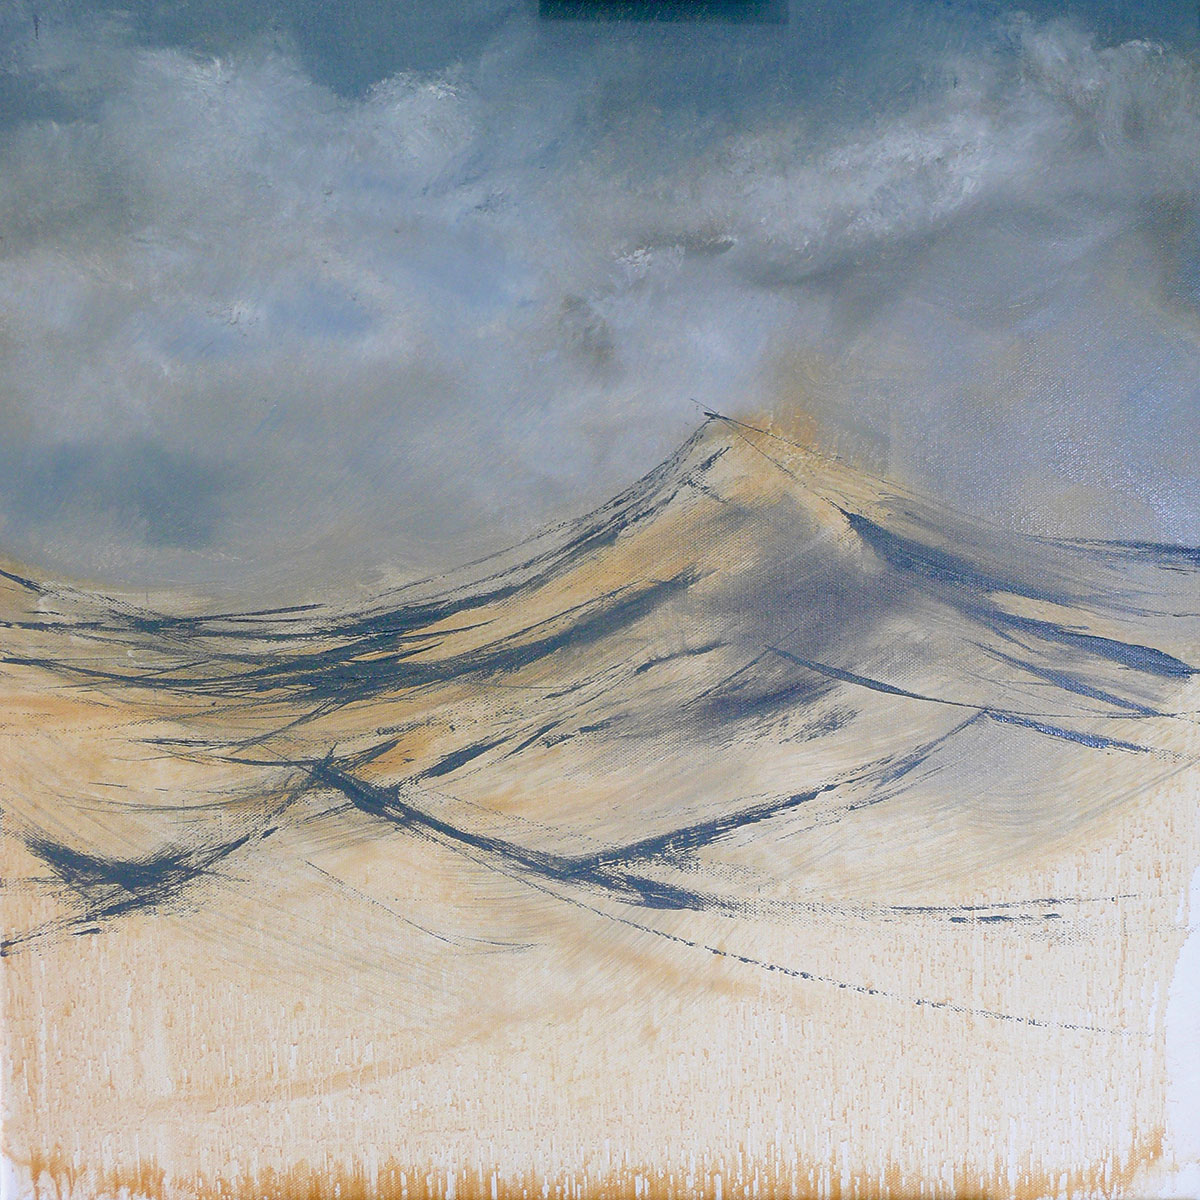
Pick up a roll of the dark sky colour on the edge of a palette knife and, using the knife on its side, sweep in the rough shapes of the waves. Stand back from your canvas and use your whole arm to do this with an energetic rocking motion.
05. Rock your body
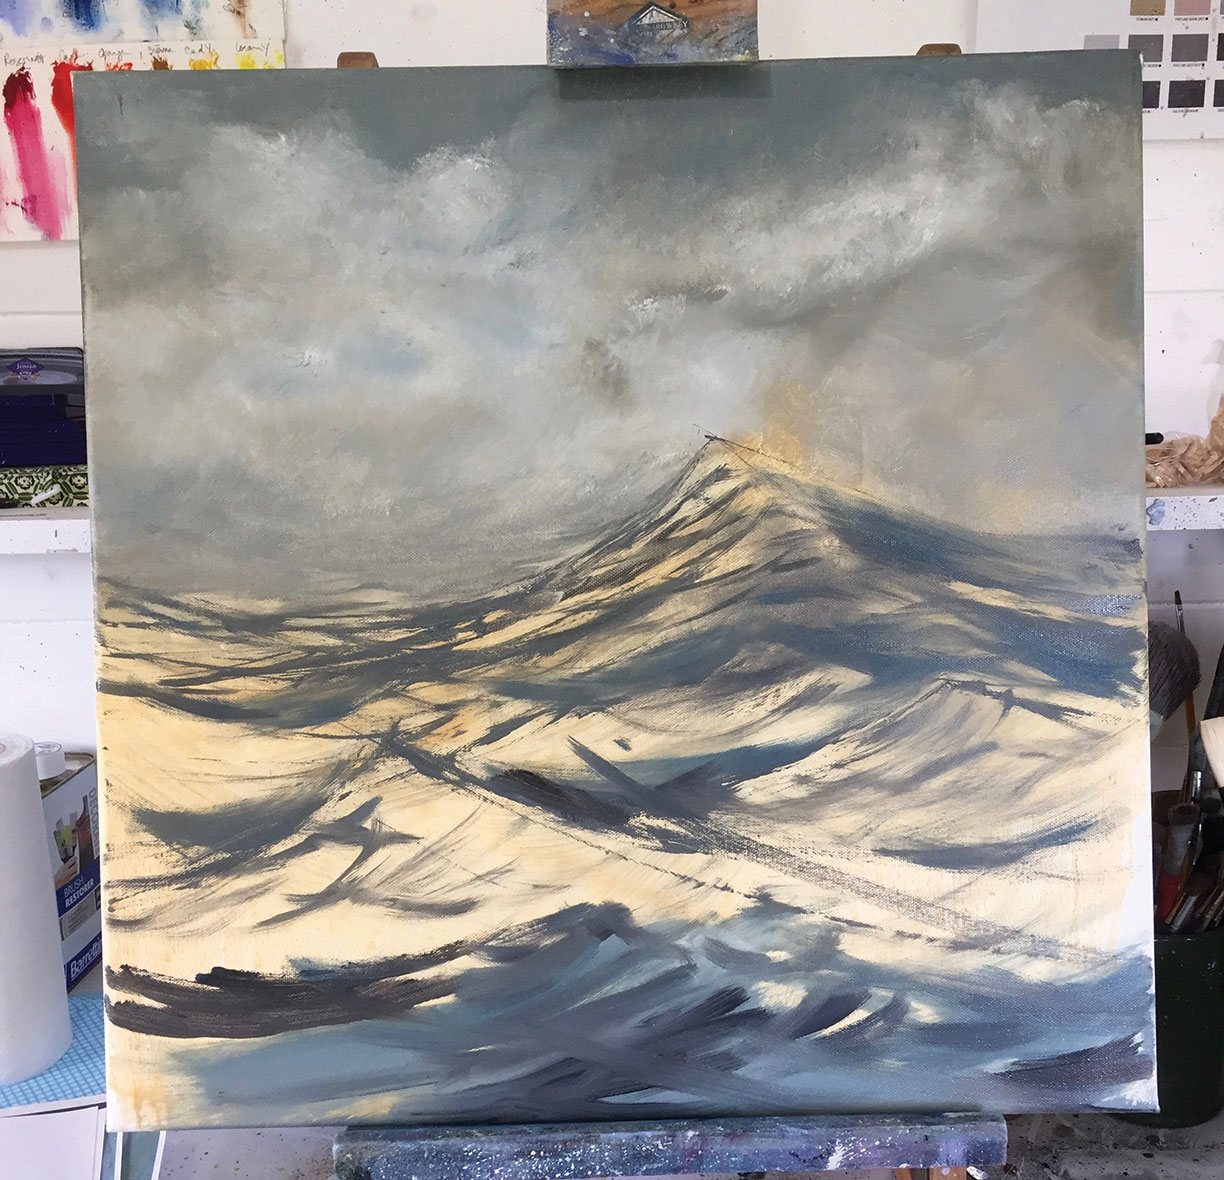
Switch to a small brush and continue using an overlapping zigzag rocking motion to build up the pattern of small 'wavelets' that make up the bigger wave shapes. As you work down the canvas, change to larger brushes so that the brush marks indicate that the waves are closer to the viewer.
06. Have patience

Begin introducing some thinned turquoise to your zigzag pattern, remembering that colours appear less intense towards the horizon. Don't use too much paint at this stage or it will obliterate the ochre that is peeping through and make the water look too solid. Now leave your piece to dry. This keeps the structure intact and prevents the colours becoming muddy.
07. Let it flow
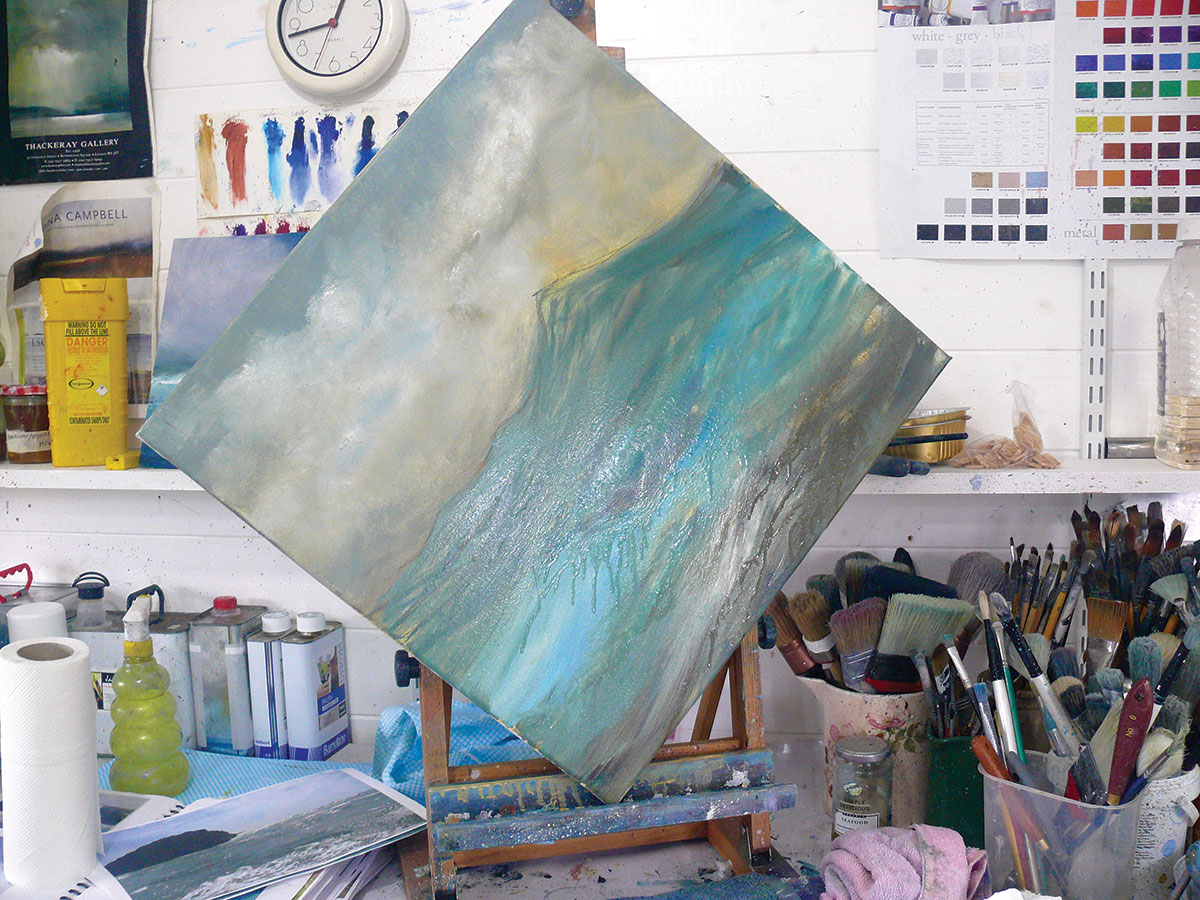
When the underpainting is completely dry, you can be more creative with the next layer. Add colour thinned with painting medium to make it more transparent. I often tilt the canvas so that the paint runs and bleeds together, creating fluid effects that are appropriate when painting the sea. It can be messy, but it's fun! Don't be tempted to move your piece until it's dry, or your 'runs' will change direction.
08. Sculpt the wave crests
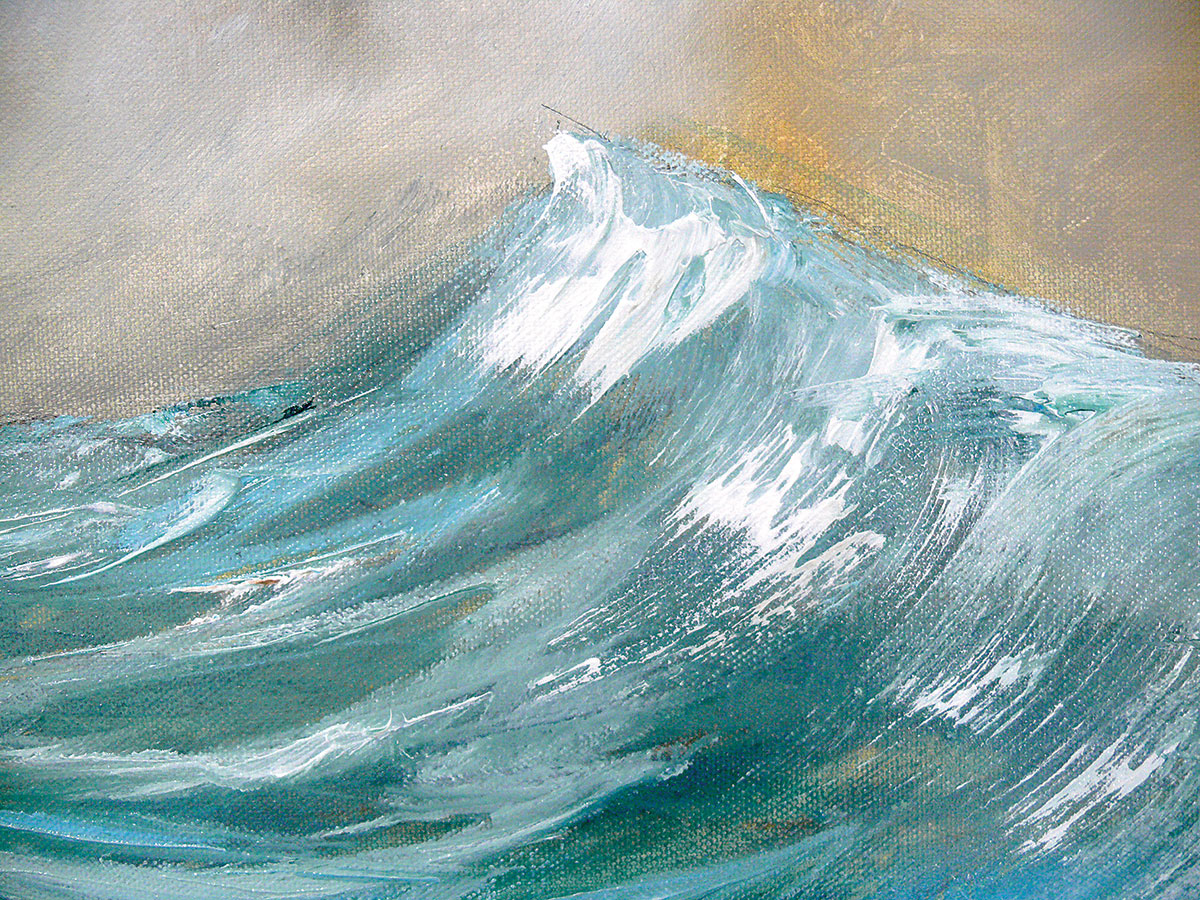
I use a palette knife loaded with thick white to sculpt the crests of the waves. I gently touch the knife onto the canvas at the highest point and then quickly sweep it down the face of the waves in just one pass so that the effect stays clean and fresh.
09. Make an atmospheric horizon
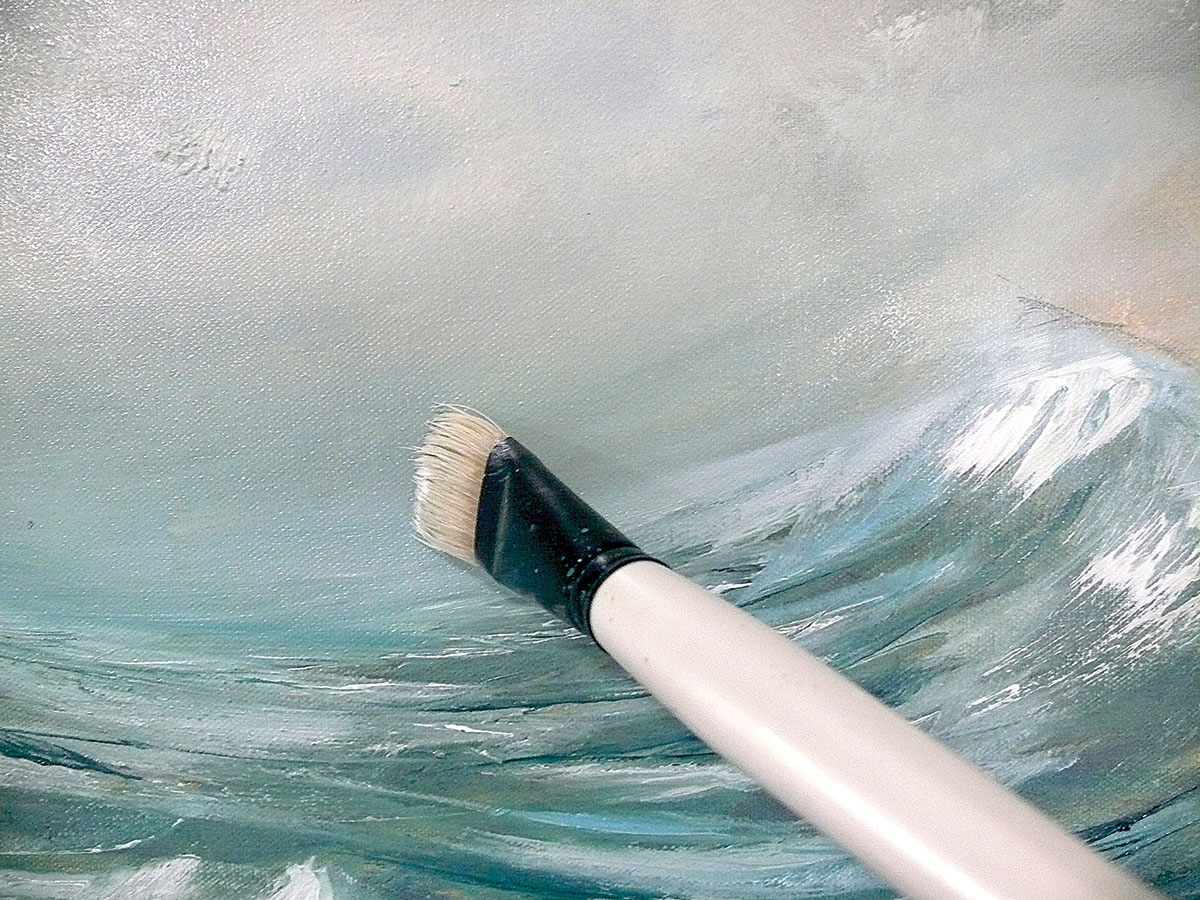
Take a clean dry brush and softly 'stroke' the horizon, blending some of the sea colour upwards into the sky to create distance and a nice misty effect where sea and sky blur into one.
10. Define with contrast
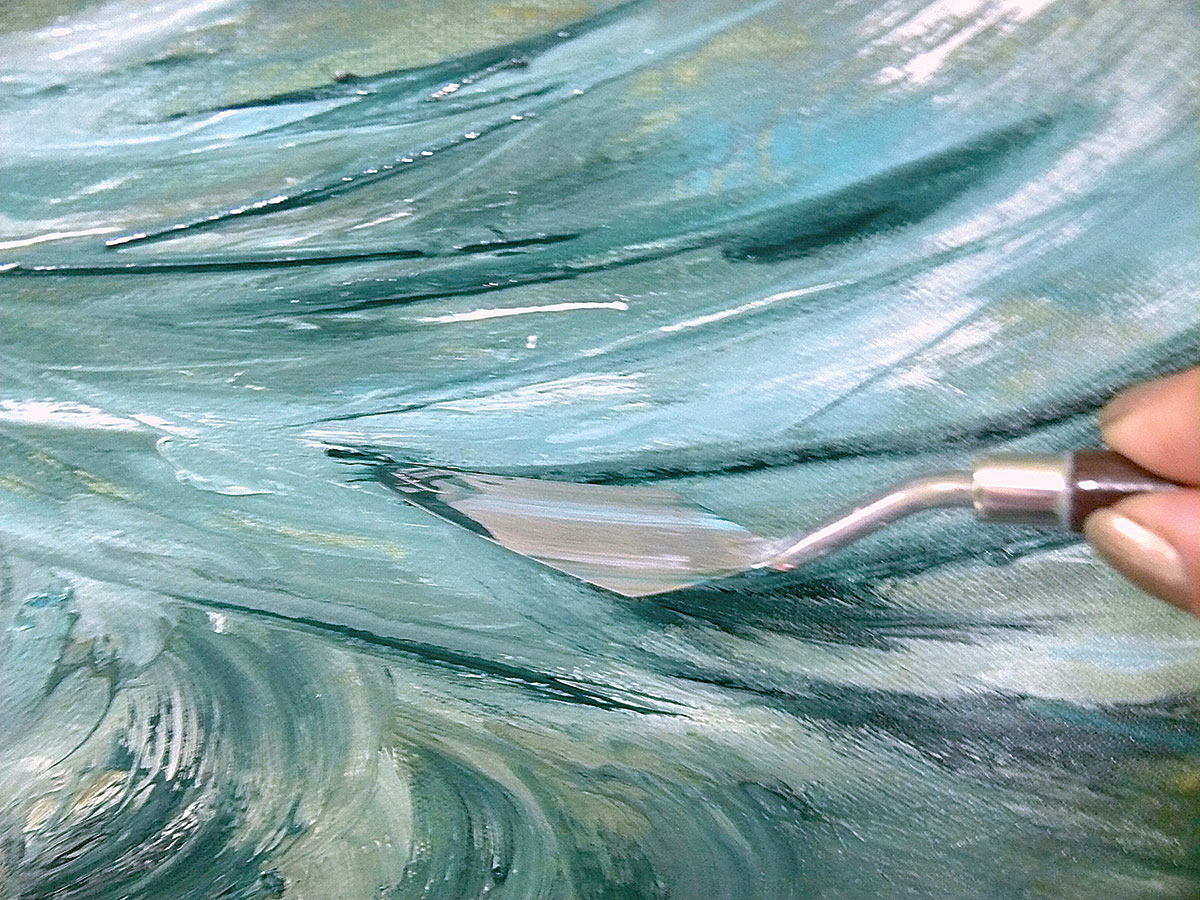
Adding back in darker areas helps lift and define the whole image again, making it more dynamic and interesting. The more different tones there are in the waves, the more movement they will seem to have.
11. Create an action point
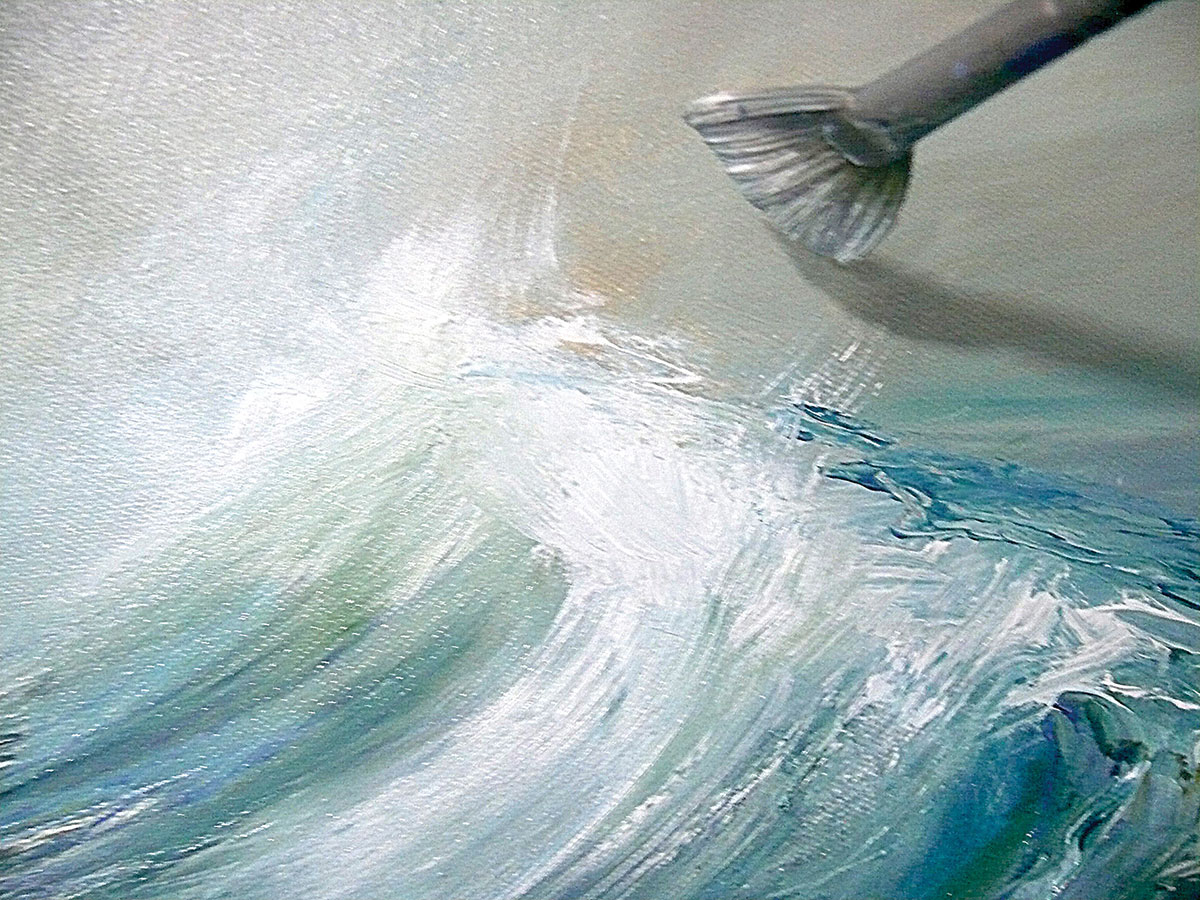
The very top of the main wave is the focal point of this painting, so this is where I want to imply the most energy and create a point of action – the moment that the wave is starting to break. Sweeping some of the white upwards and slightly backwards implies it's being carried on the wind.
12. Add foamy details
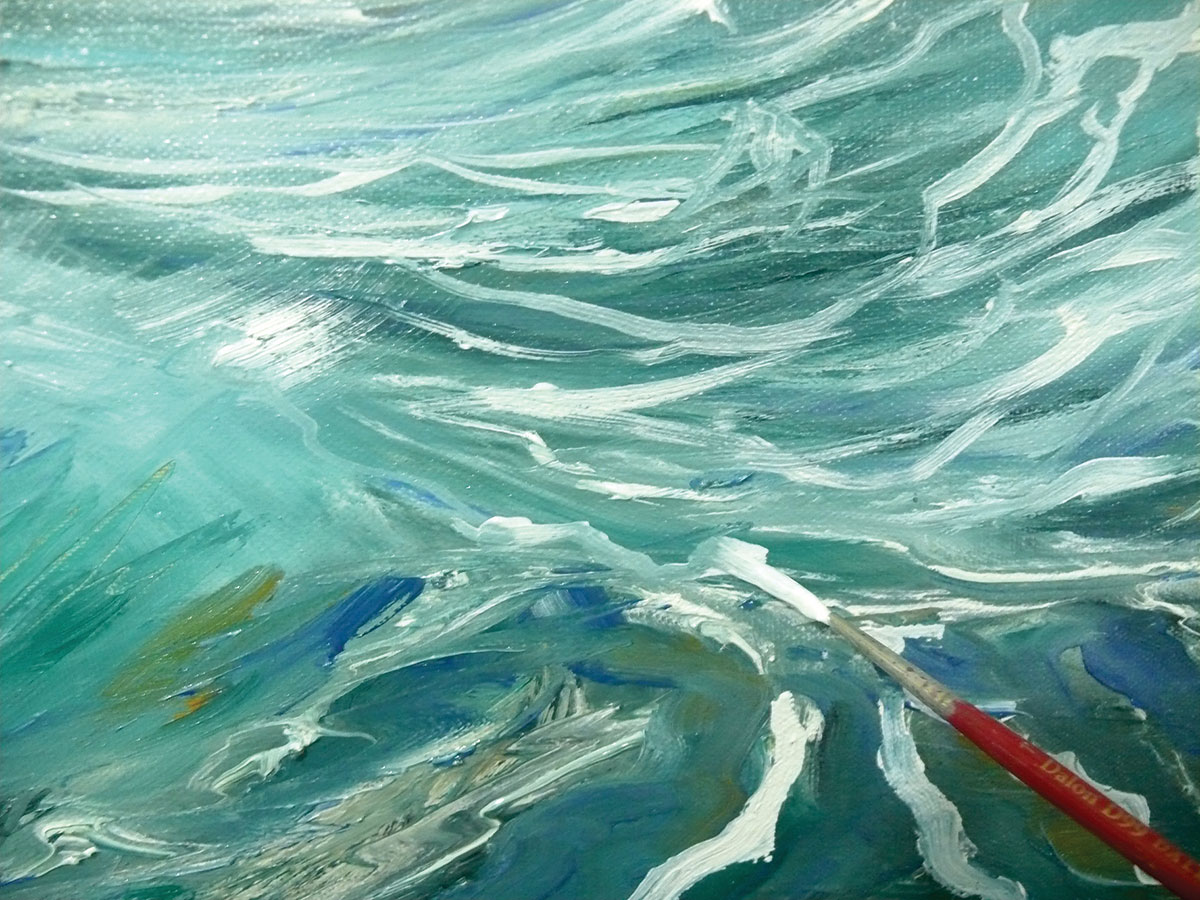
Using a rigger brush loaded with a highlight colour (a pale sea green), I lay in the foam patterns, following the structure of the underpainting. The holes in the pattern are more open on the vertical of each wave and then flatten out back to the zigzag shape on the horizontal.
13. Make bubbles
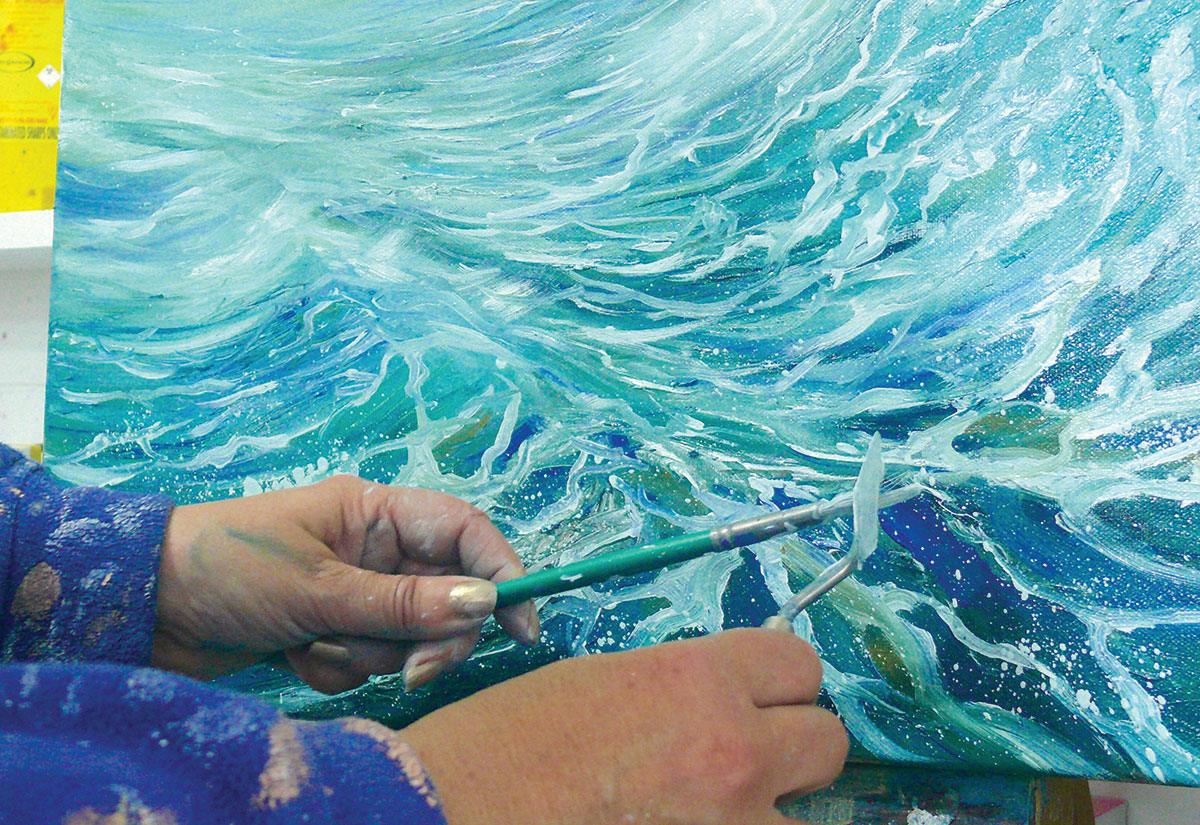
Use a fan brush loaded with some of the foam pattern colour mixed to the consistency of single cream. Hold the brush a couple of inches from the canvas and draw a palette knife across the top of the bristles to make a spattering of air bubbles. This can take a bit of practice so try it on a sacrificial canvas or board first and don't overdo it.
14. Sea spray
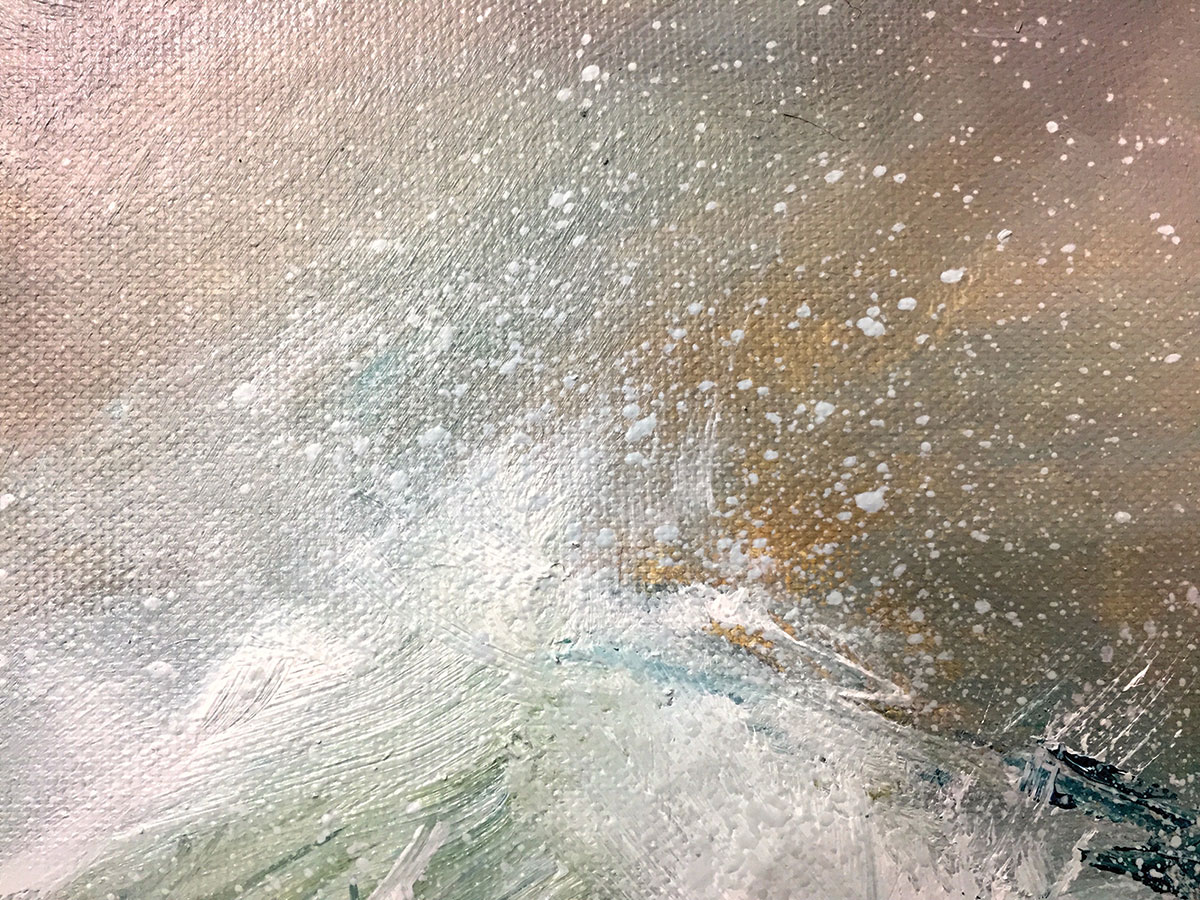
Using the same technique, spatter the crest of the wave. This time I've used pure white as it's the focal point. It also appears brighter here, being backlit against the sky. Mix the paint slightly thinner here to create finer, misty speckles. Again, practise before you add to your piece!
15. Add the final transparent glaze
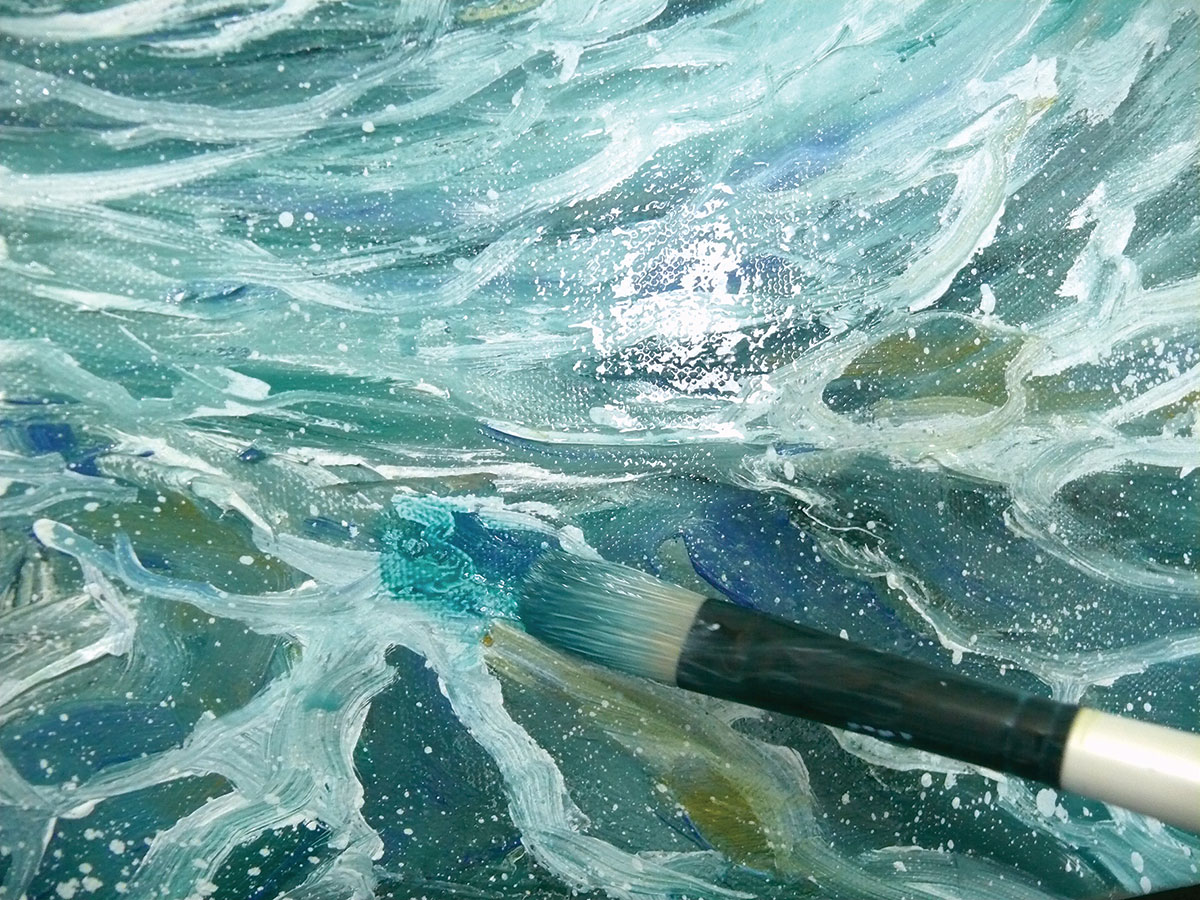
Let the painting dry fully before you do this last stage. Mix up a glaze of transparent turquoise using plenty of painting medium. Be aware you will need hardly any paint to tint the glaze – it's better to add more pigment gradually if you need it. Applying this glaze over the dry sea areas will create a translucent effect. This creates optical depth in your piece by deepening the dark areas and enriching and unifying the lighter foam colours.
This article was originally published in issue 12 of Paint & Draw, the magazine offering tips and inspiration for artists everywhere. Buy it here.
Related articles:
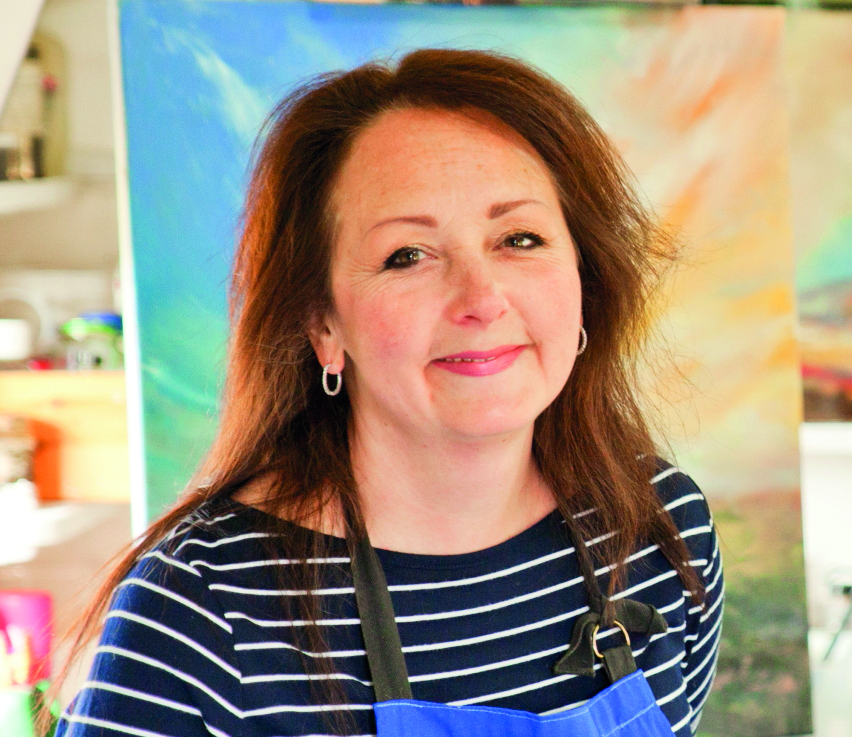
Sarah Jane Brown is a landscape painter based in Pembrokeshire, UK, and is inspired by the clear coastal light and the rugged beauty of her surroundings. A member of the Guild Society of Artists, she exhibits widely and her work is collected internationally.
