Create textures with the Pattern Stamp tool
Enrich your creative process with this trusty Photoshop staple.
If you're stuck staring at a blank canvas, or faced with a brief that has a lot of room for interpretation, having the right tool to hand can help you get your creative mojo on. And if you need to generate a variety of ideas and concepts as quickly as possible, Photoshop CC's Pattern Stamp tool can be a godsend.
Creating variety is where the Pattern Stamp tool excels. It generates interesting textures and colour variations from texture sheets, and also creates enough room for happy accidents to occur which can be beneficial to the early stages of the creative process.
Here we'll take you through the process of creating your own custom patterns and how to apply them to a value sketch. Based on the outcome of placing the patterns, we'll refine the sketch to a working idea, before bringing that idea to a more refined finish.
Article continues belowDownload the custom brushes for this tutorial.
01. Gather pictures
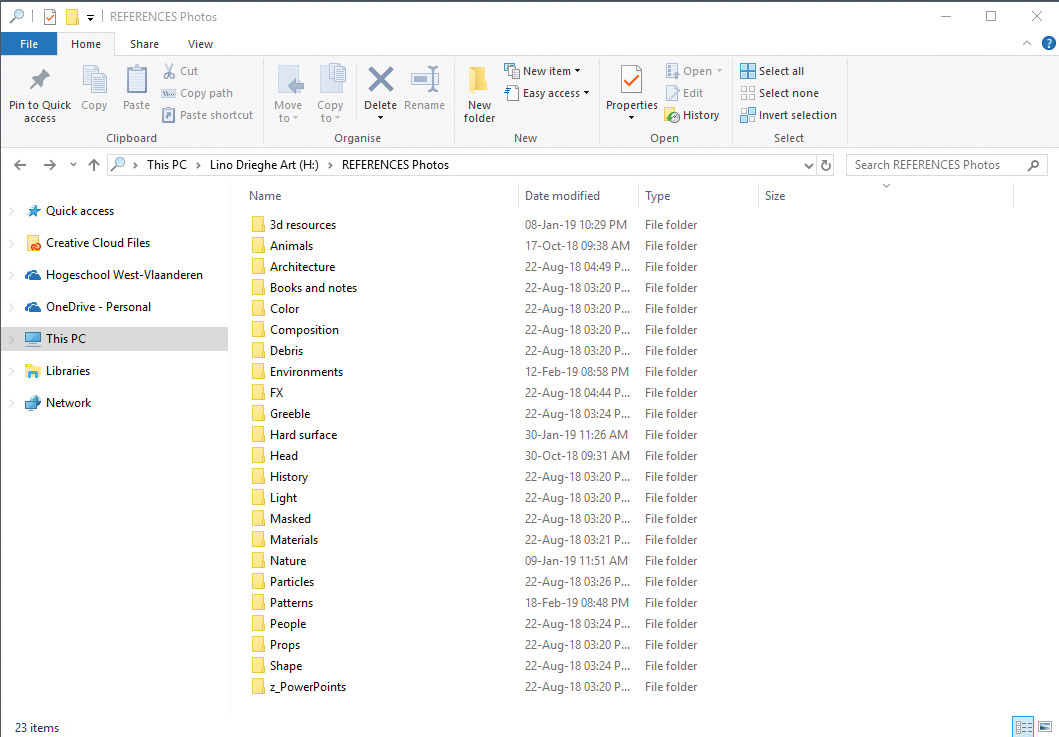
Before I start, I gather pictures to build my library of patterns. I'm using photos that I take myself or collected from friends and family. I'm building up my own reference library by storing photos on a cloud server. That way I can use my own photos, knowing there are no copyright restrictions on them.
02. Use the Pattern Stamp tool
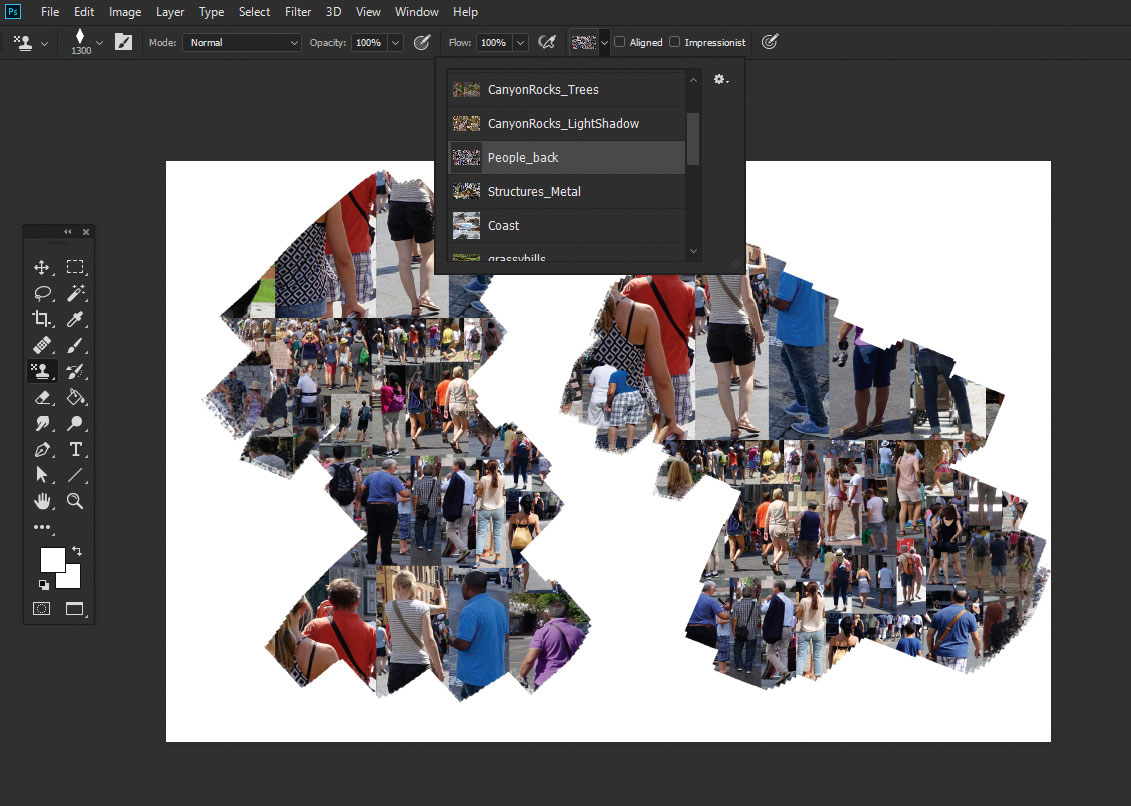
The Pattern Stamp tool enables me to paint or fill my canvas with a pattern that I choose from a pattern library. Similarly to the Brush tool, I can select a brush tip to paint the pattern with. There are pre-made patterns available but for this workshop I'll make my own. I've created several patterns that can be downloaded from my website under the Resources tab.
03. Create patterns to use with the tool
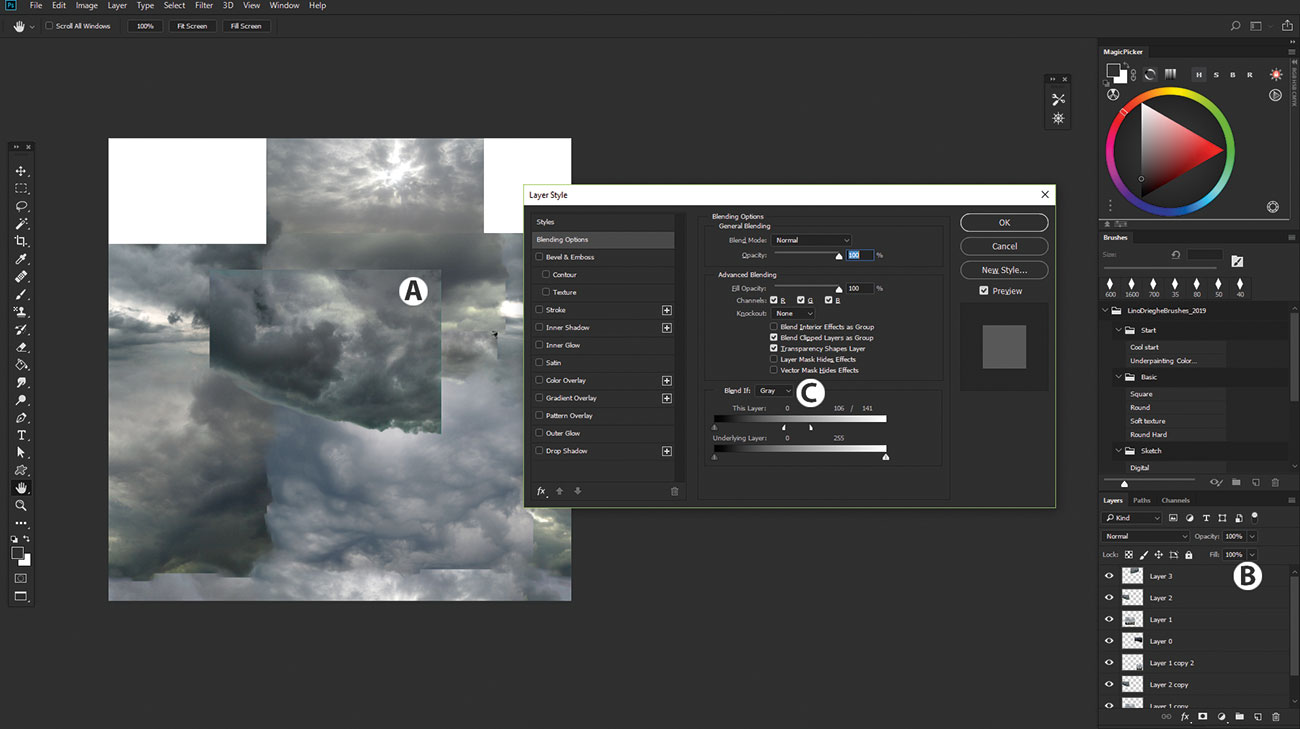
I make a new document and copy-paste photos from my reference library (A). By double-clicking my layer (B) and using the Blend if… option under Layer Style (C), I can blend layers together by excluding colours. Holding Alt while dragging will split the slider in two, resulting in a smoother transition. I make sure that I arrange the photos in such a way that the lighting and shadows correspond with each other.
Sign up to Creative Bloq's daily newsletter, which brings you the latest news and inspiration from the worlds of art, design and technology.
04. Refine and edit the chosen patterns
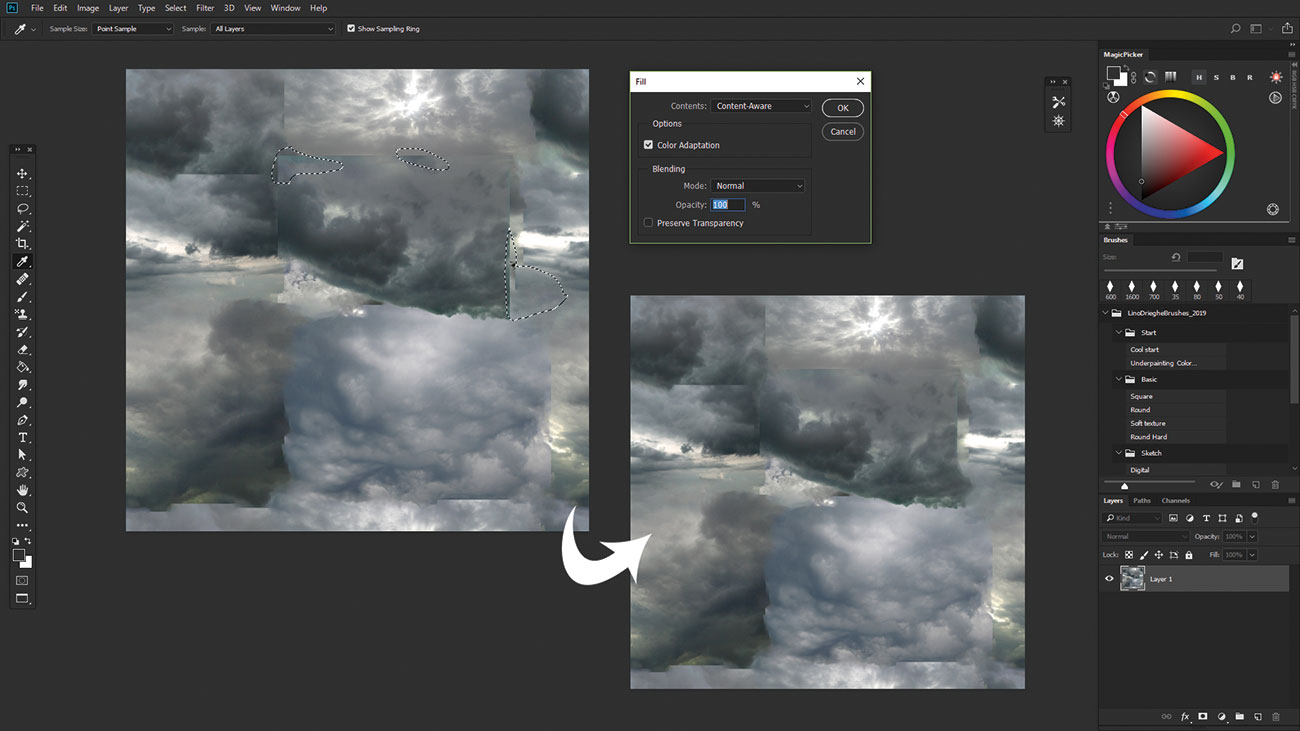
To retouch the edges of the photos, I use the Content Aware tool under Edit > Fill. In the dialog I choose Contents > Content Aware. By clicking OK, this tool fills the selection with the surrounding pixels and blends them together. I click Filter > Other > Offset to make the pattern tileable.
05. Warm up and create a series of sketches
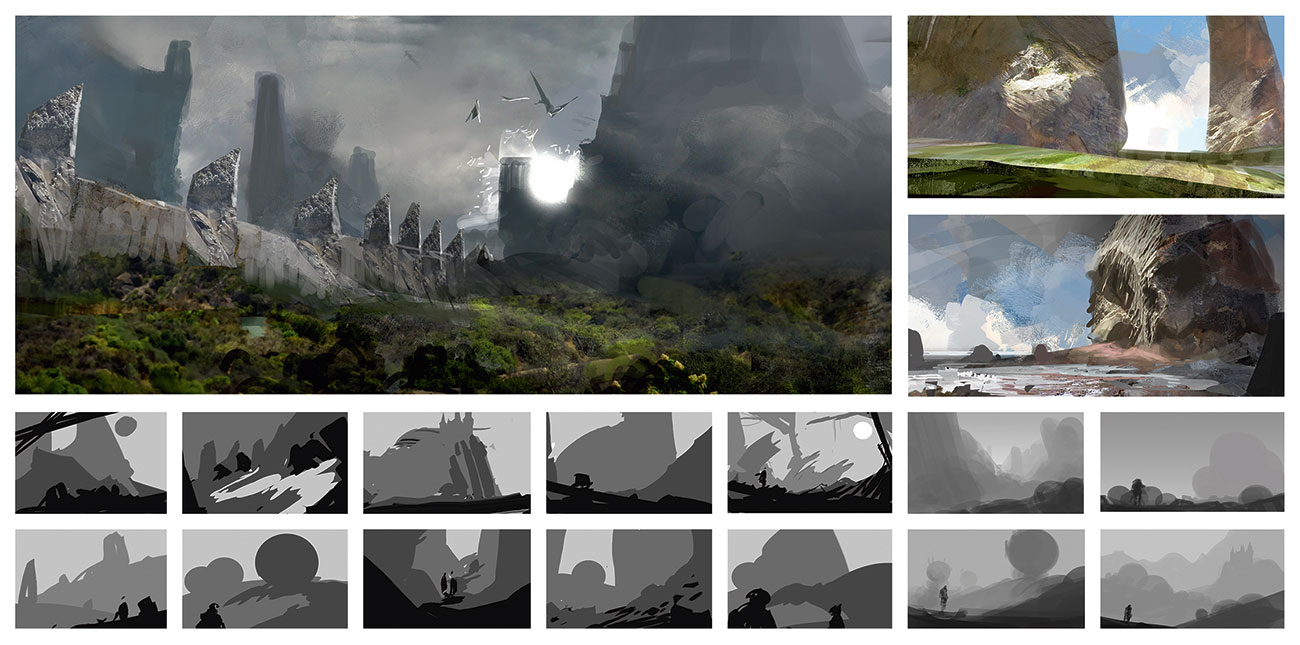
At this point I have no idea in mind so I use the Pattern Stamp tool to warm up, and to show how effective it is in the early phases of a painting. I start my sketches with limited values and use the standard Round brush to keep the shapes simple. After producing multiple sketches, I decide to develop one of them so I can show my whole process from start to finish in this workshop.
06. Refine the value sketch
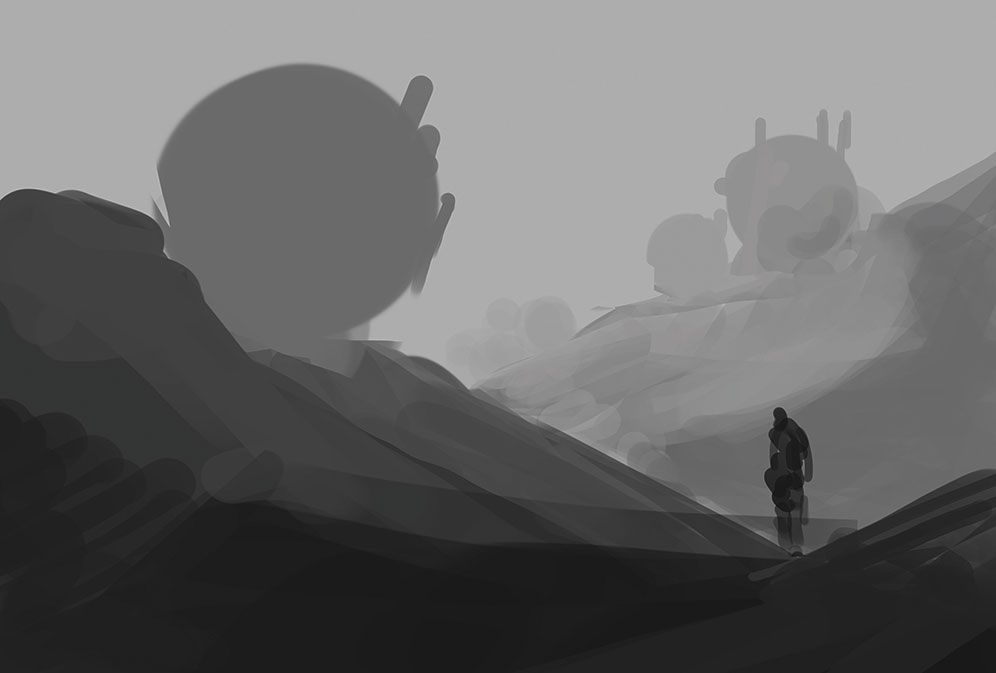
I create the feeling of atmospheric perspective by making the foreground values darker, and those in the background lighter. I deliberately avoid adding any light or shadows because I want the Pattern Stamp tool to do that for me. At the same time, I rearrange different layers to come up with a pleasing composition. I want the round shapes to contrast with the straight lines.
07. Block in the colours
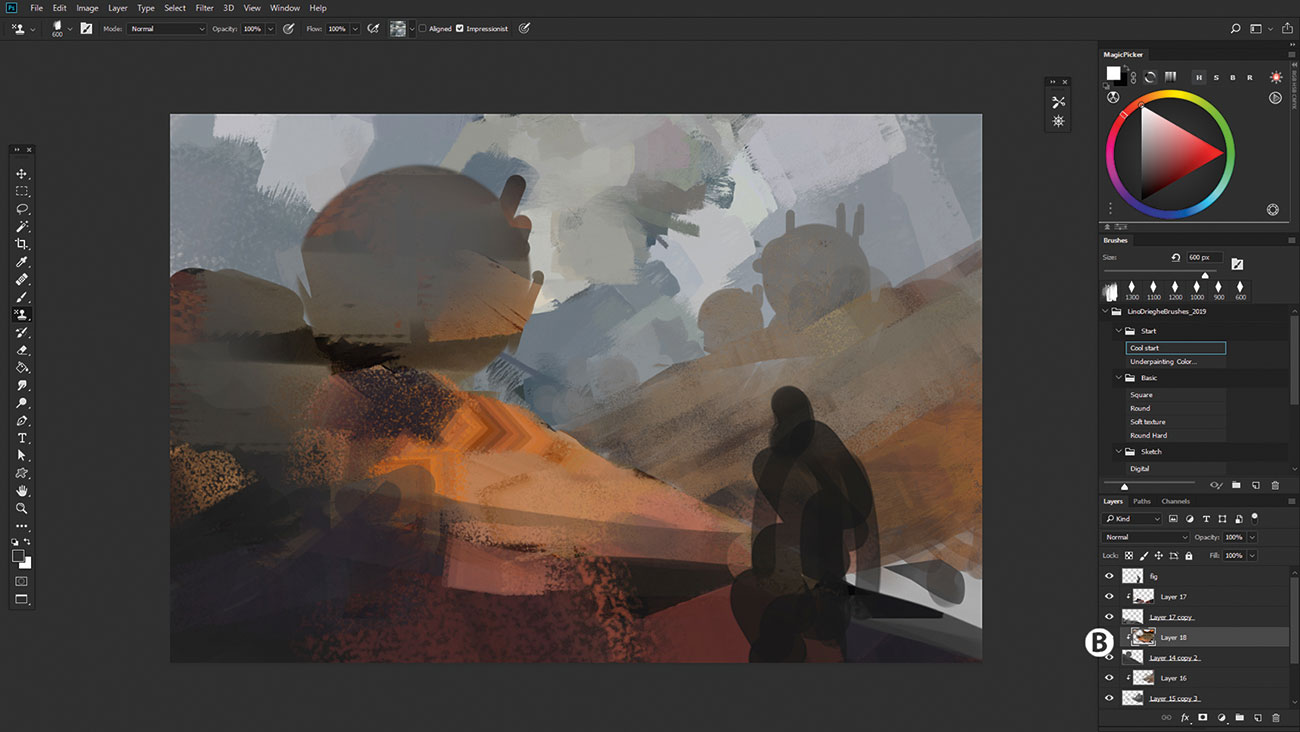
I use the Impressionist mode of the Pattern Stamp tool to block in the colours. The Impressionist mode will generate colour variations based on the colours Photoshop identifies in the active pattern. I block in the colours of each layer on a separate layer so I can add them as a clipping mask (B) and adjust them later on.
08. Make the most of those happy accidents
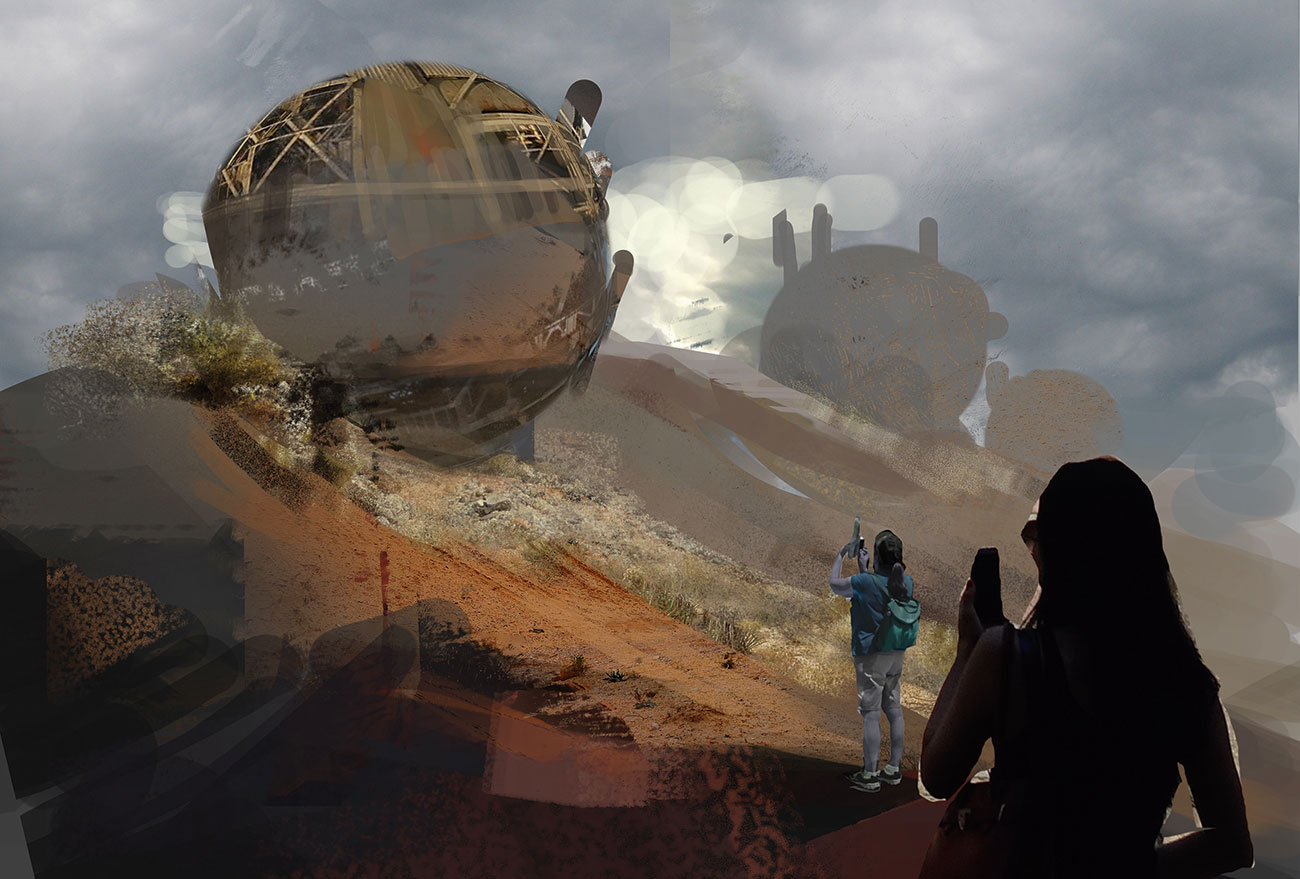
I create a new layer to paint with the Pattern Stamp tool with the Impressionist mode turned off. This is the moment where a happy accident should help take an idea to the next level. For those not aware of the phrase, a happy accident in painting is when something unique and unexpected happens. It turns out to be beneficial to your work and guides you on to a new path that you might not have considered.
09. Rethink the story
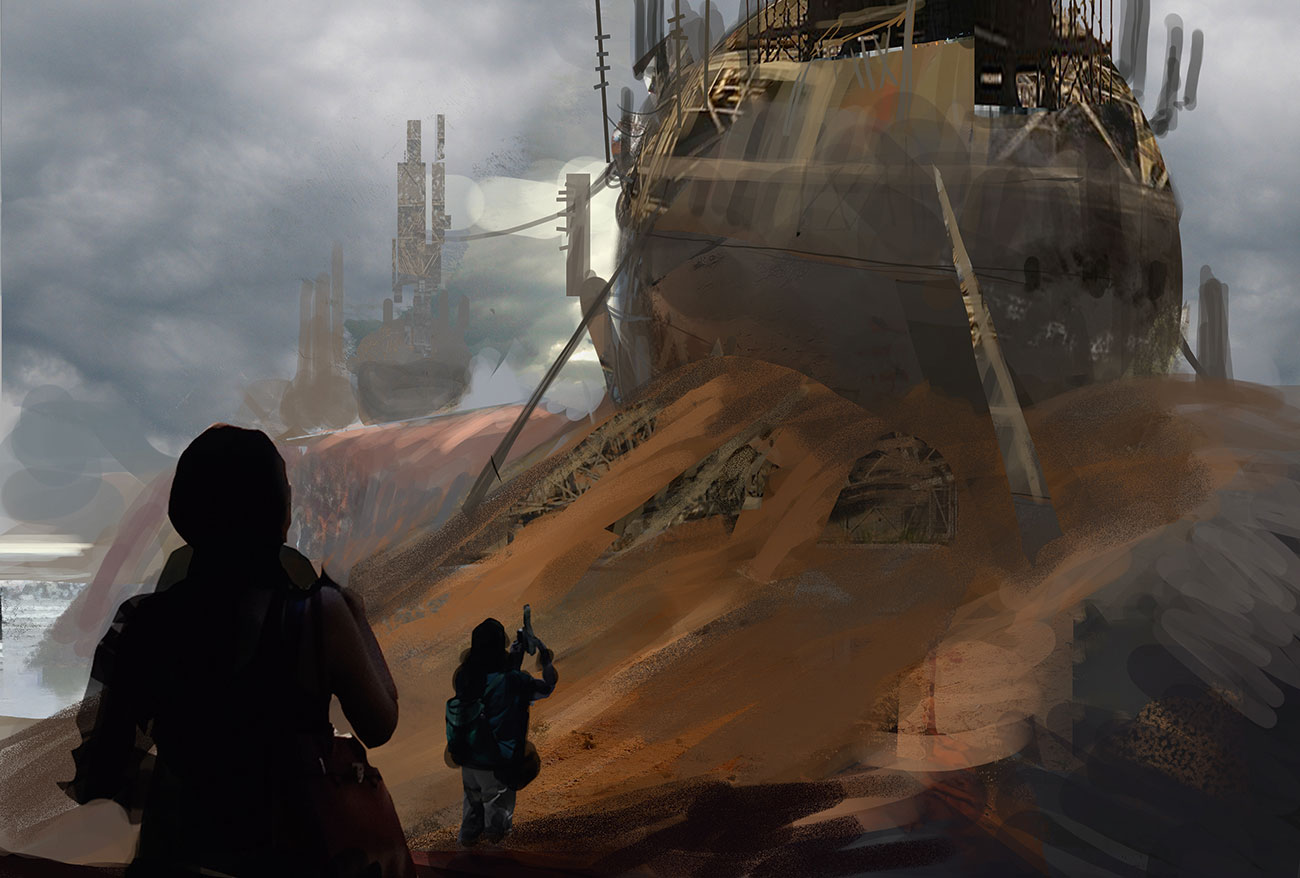
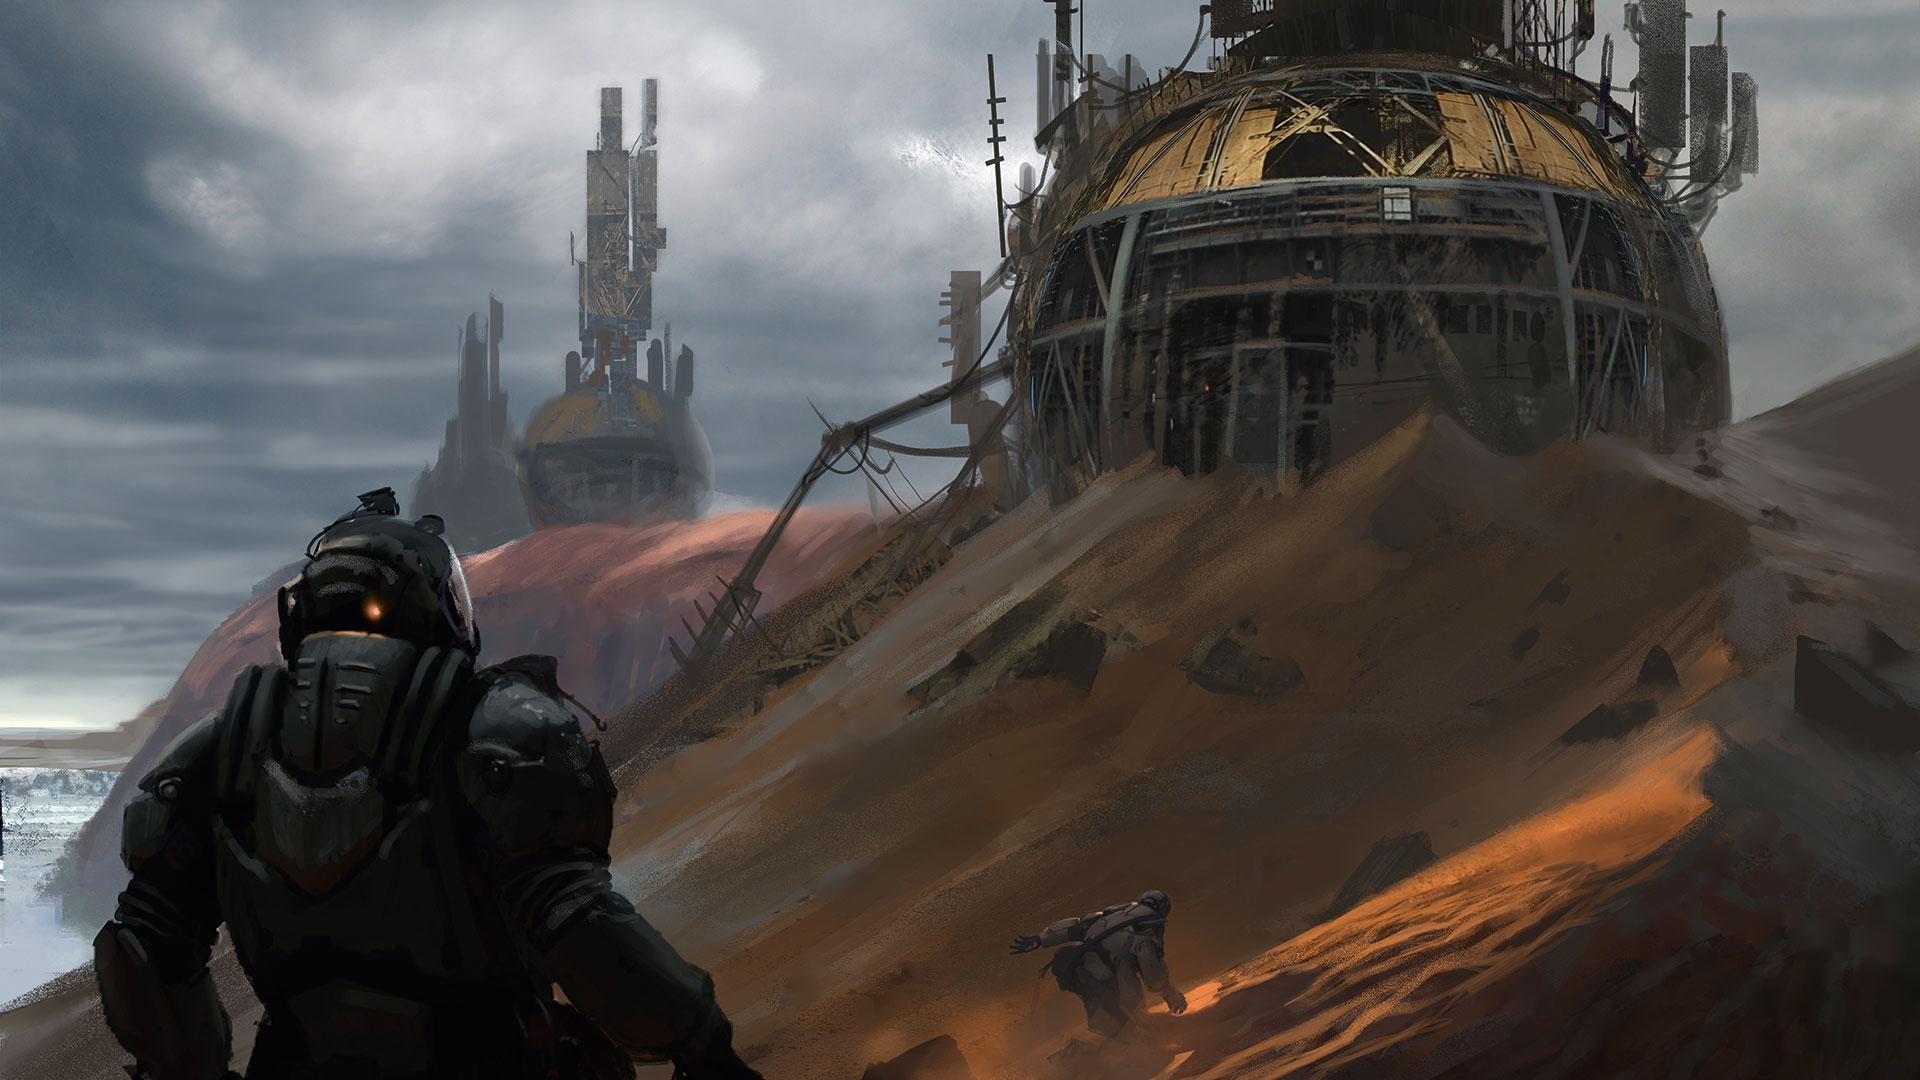
By placing the Pattern Stamp tool I come up with the idea of having derelict communication spheres that are partially buried under the desert hills. I use the Pattern Stamp to create the sea and clouds in the background. Because I use clipping masks for all the coloured layers, I can easily adjust the values to the underlying greyscale layer.
10. Clean up the focal points
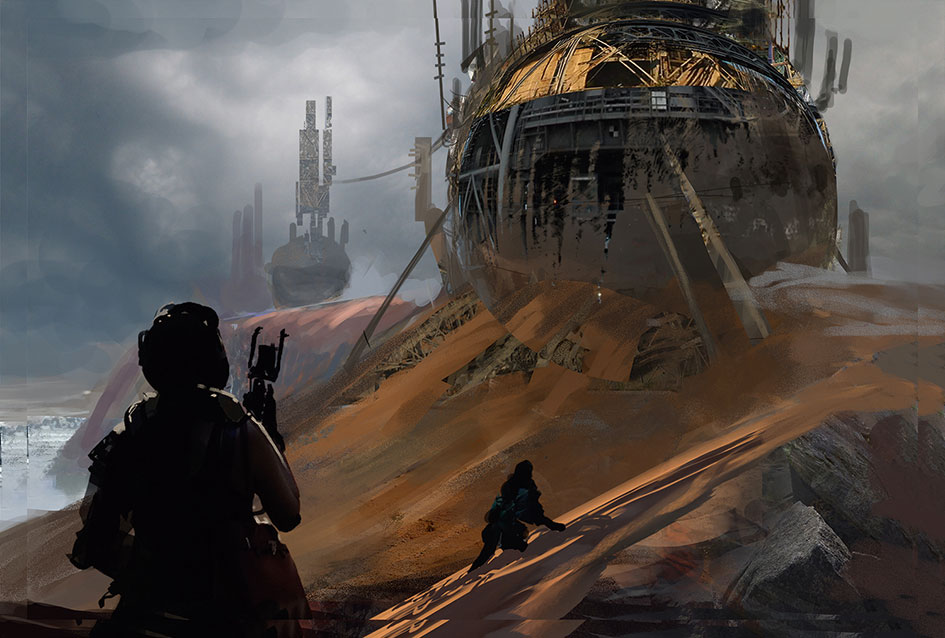
Once I'm happy with the overall positioning of elements, I upscale the image to a bigger resolution. This enables me to add more details on the focus points. By adding more layers with the Pattern Stamp tool and applying a Distort > Spherize Filter on them, I generate more details on the foreground communication hub.
11. Refine the figures
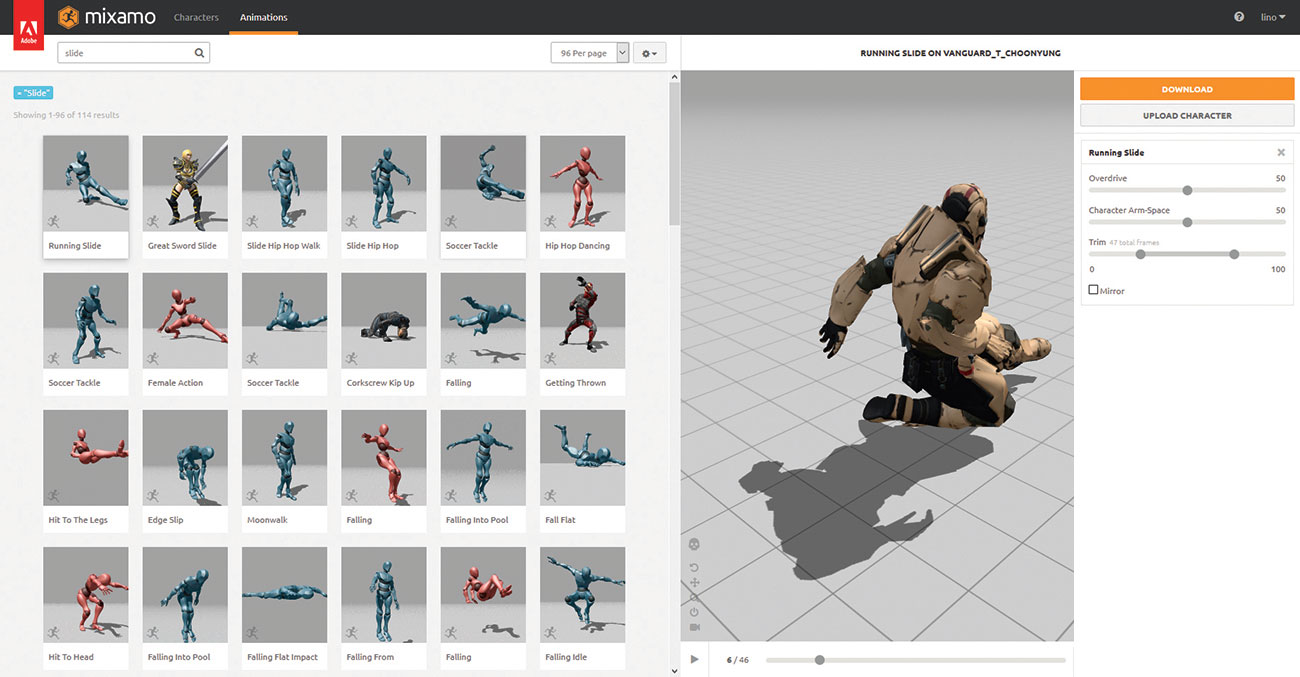
Mixamo is my favourite tool to add figures to my paintings. It's an online service designed to rig and animate your custom 3D characters. It also holds a library of pre-made models and animations that are free for use. I pick a model and animation and screengrab the pose to add it to my painting. This model will help me to achieve the correct pose and proportions.
12. Check the readability of the composition
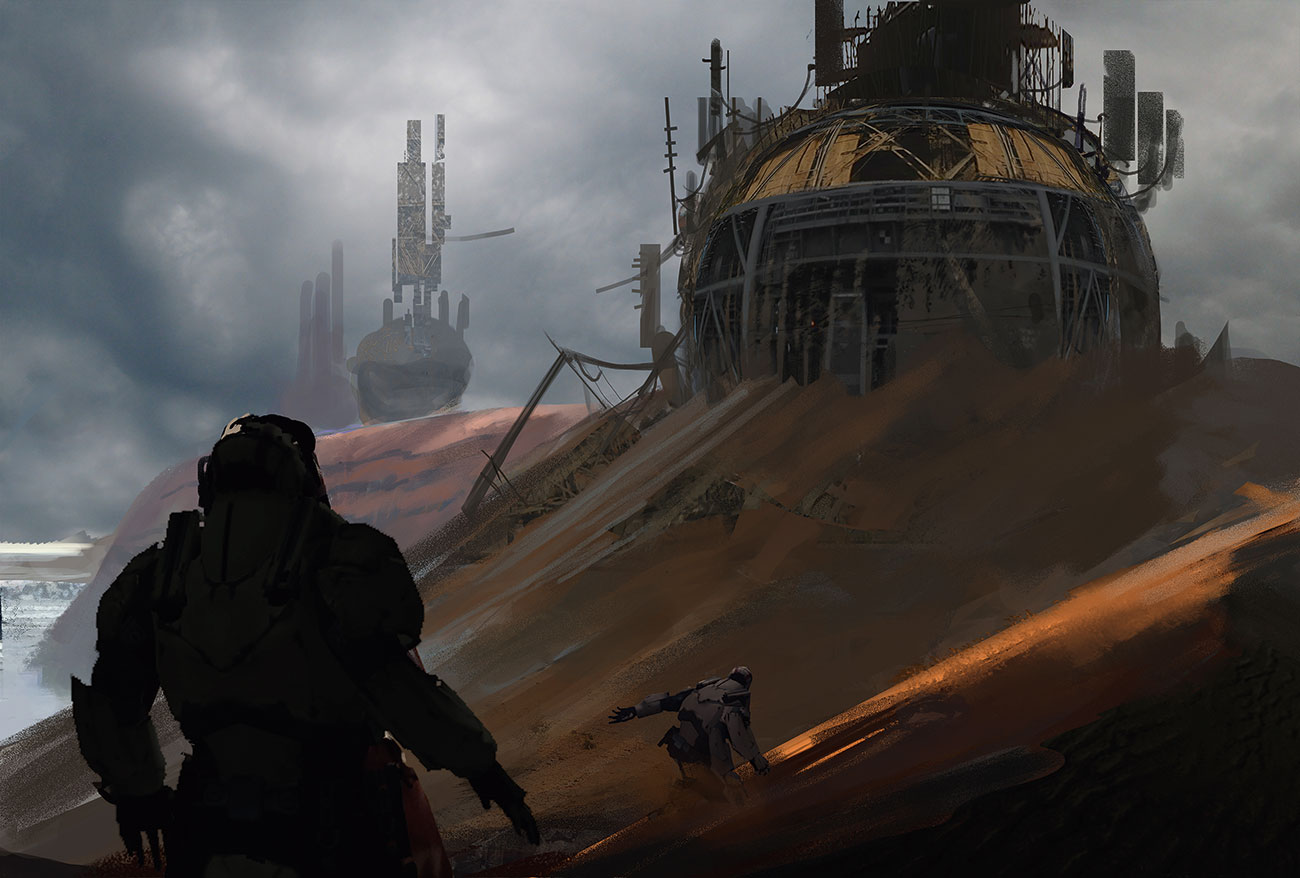
Using an interesting light and shadow pattern, I lead the viewer in and through the painting. By creating a repetition of shadows and lights I'm able to push the feeling of depth even more. I fix the values of the background hubs and add more perspective to the clouds in the sky.
13. Add greyscale and colour simultaneously
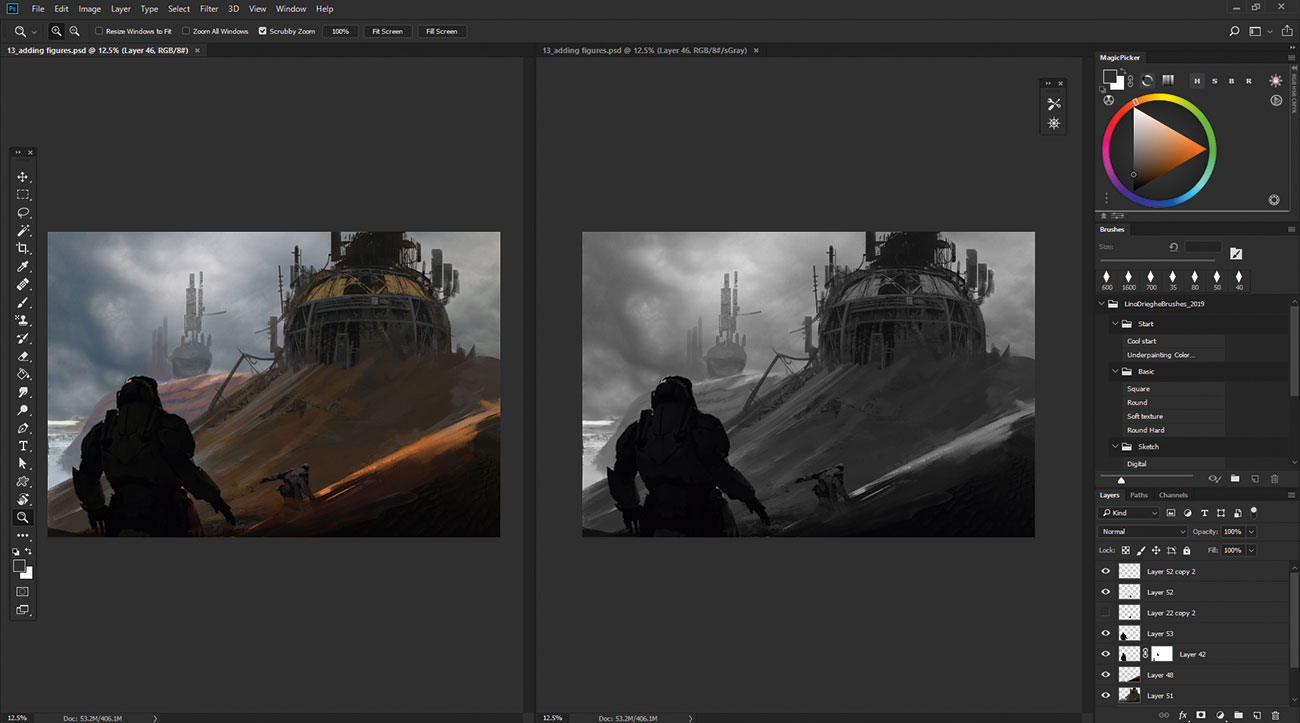
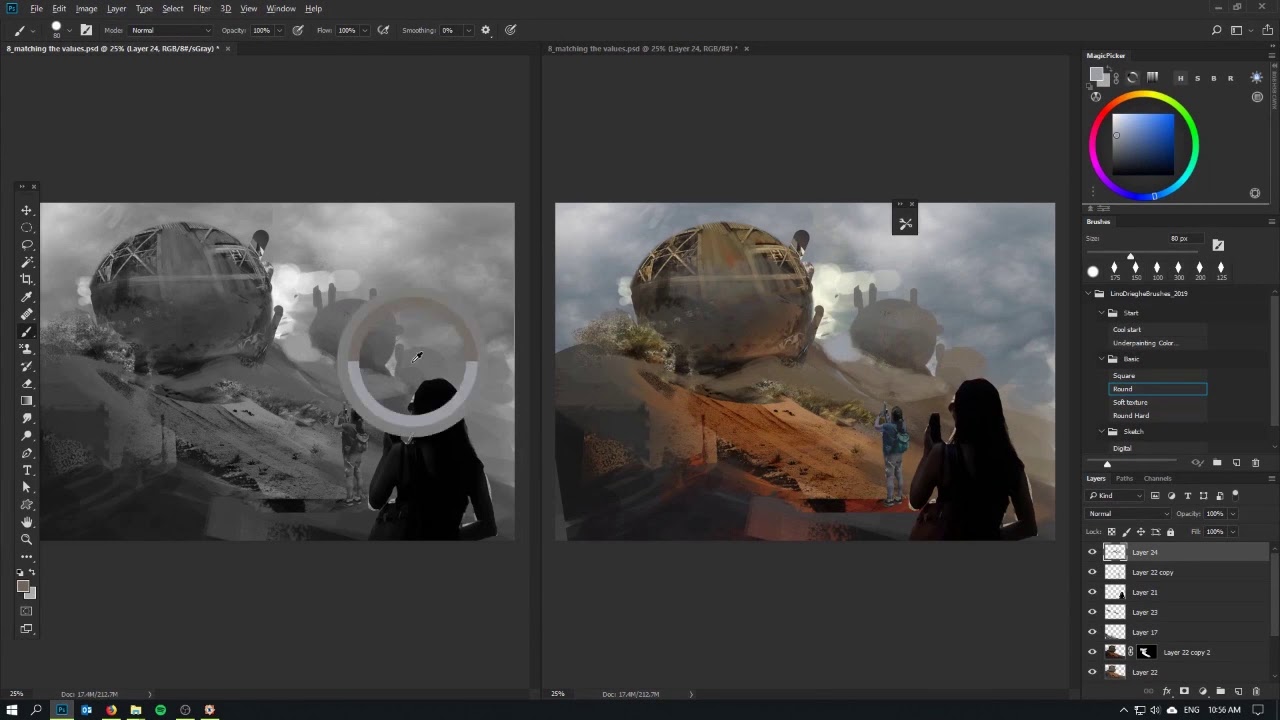
I go to Window > Arrange and create a new window for my open document. For this new window I change the viewing options: View > Proof Setup > Custom. In the dialog I choose sGray for the Device to Simulate menu. By placing the two windows next to each other, I can paint in colour and values at the same time.
14. Add finishing touches

Working on the values and colours at the same time enables me to keep my values in place while making the finishing touches. I rearrange my layers slightly to create some more breathing space around them. I add extra small details to give everything a more finished look. After getting feedback from friends, I fix small parts of the painting, such as the perspective of the clouds.
This article was originally published in issue 173 of ImagineFX, the world's best-selling magazine for digital artists. Buy issue 173 here or subscribe to ImagineFX here.
Related articles:
Lino is a part-time lecturer in concept art and freelancer with a primary skill in creating environment concepts and designs.
