How to use textures in Photoshop
Why you need textures, and how to use them.
Texture is often what blurs the lines between traditional and digital artwork. Often it’s easy to tell the difference between the two if your digital artwork doesn’t have any kind of canvas behind it, but by applying your own textures in Photoshop, you can help to give your artwork a little more realism.
In this Photoshop tutorial, we’re going to be applying a simple noise and canvas texture, which will look and feel a bit like paper. We’ve created a simply chalk and charcoal drawing to use it on so that we can see it clearly, and it’s going to help add a little more shape and tone to the image. This is why texture is great; without some kind of texture behind this picture, it looks rather obviously digitally drawn.
It’s not just paper textures that you can add to your artwork. You may want the illusion of a film texture for more realistic pieces, or even a wall of some sort for a street art effect in your urban sci-fi composition. There are plenty of pre-made and even free textures online that you can insert into your work and change the blend mode of.
Article continues belowOkay, let’s see how much of a difference a texture makes…
01. Add noise as the basis of your texture
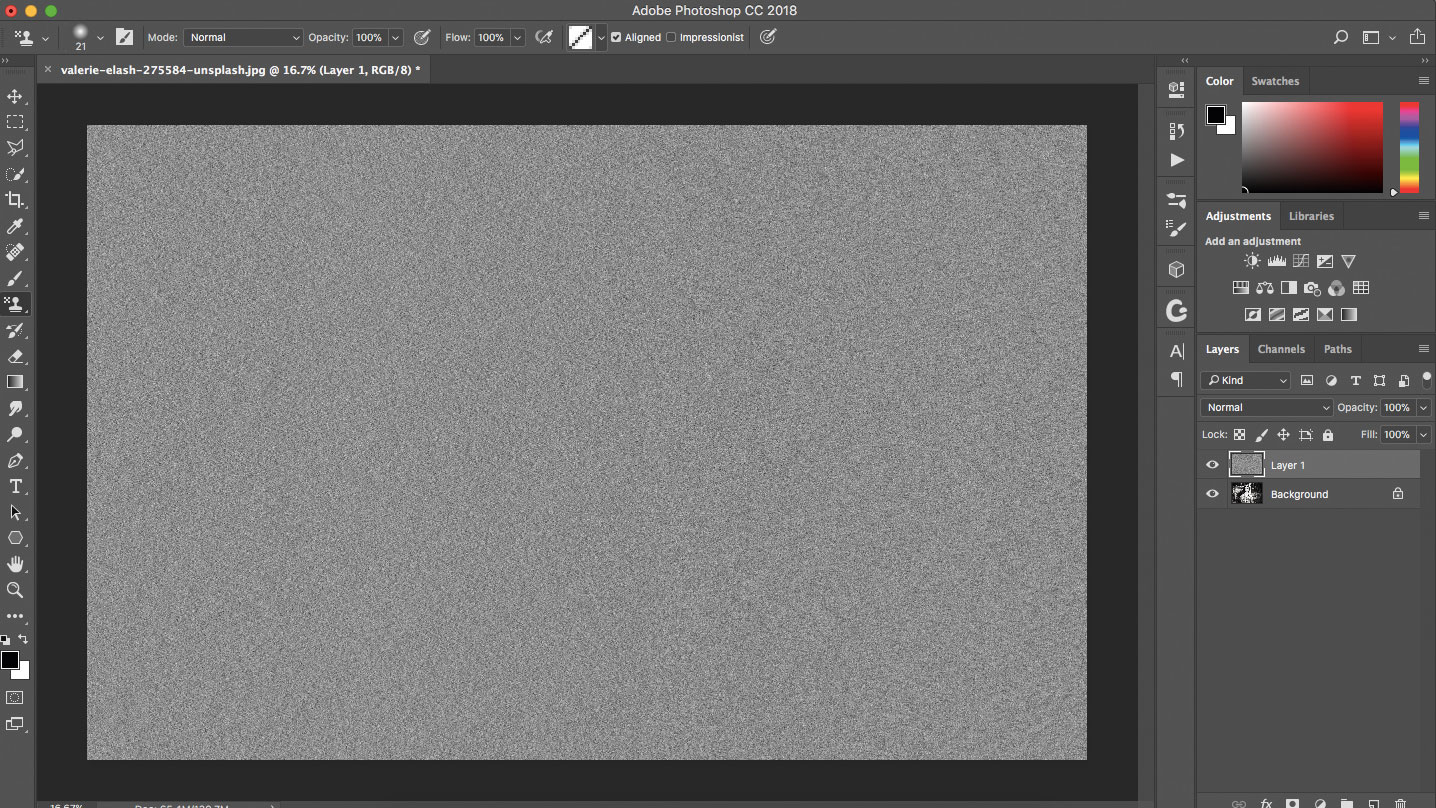
Start by setting your foreground and background swatches as black and white by hitting D. Create a new layer then go to Filter > Noise > Add Noise. Choose an amount of 400 per cent, check the Monochromatic box and make sure you choose Gaussian, before you hit OK.
We're using black and white as it makes a subtle grey colour from a distance; this means that altering the blend mode will display the texture cleanly. However if you wish to add a colourful tint to your texture, create a new layer, fill with colour and alt/opt-click to clip it to your texture.
02. Adjust the Blend mode of the texture
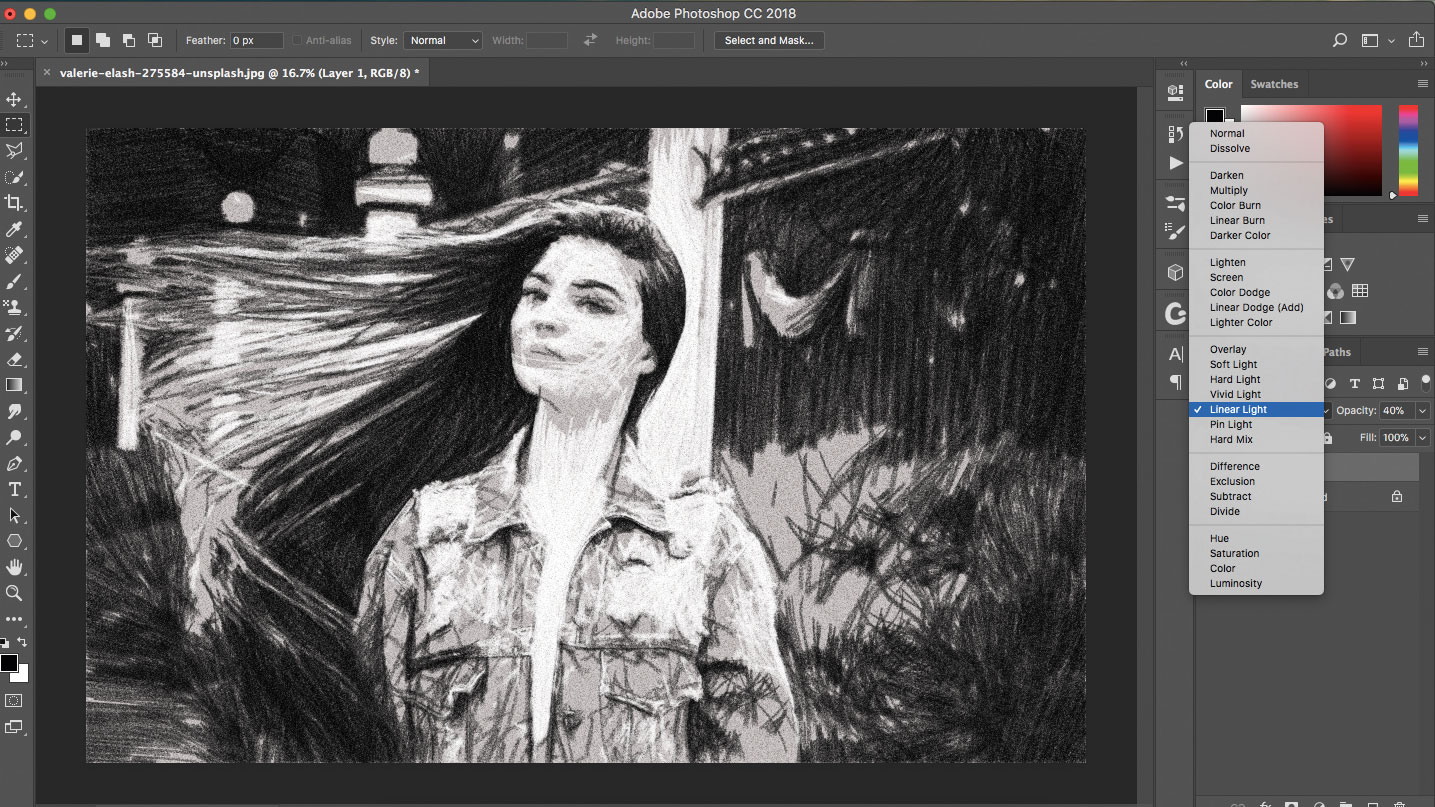
Because we want to blend our noise texture in a little with the digital artwork that’s sitting on a layer beneath it, this is the stage where we’re going to change the Blend mode. Set the Blend mode to Linear Light in this case, and reduce the Opacity to around 40 per cent.
Sign up to Creative Bloq's daily newsletter, which brings you the latest news and inspiration from the worlds of art, design and technology.
You don’t have to use Linear Light; experiment with Color Dodge for a more dramatic effect, or Overlay and Soft Light for a more subtle look.
Reducing the Opacity can also help to lessen the effect slightly without taking away from the actual noise. Press 4 to set the layer at 40 per cent Opacity. You can also drag horizontally where it says Opacity in the Layers palette, to change the Opacity.
You can tweak your custom texture by clipping adjustments to it using clipping masks. You may wish to edit the tone, brightness or exposure of the texture.
03. Blur the texture layer
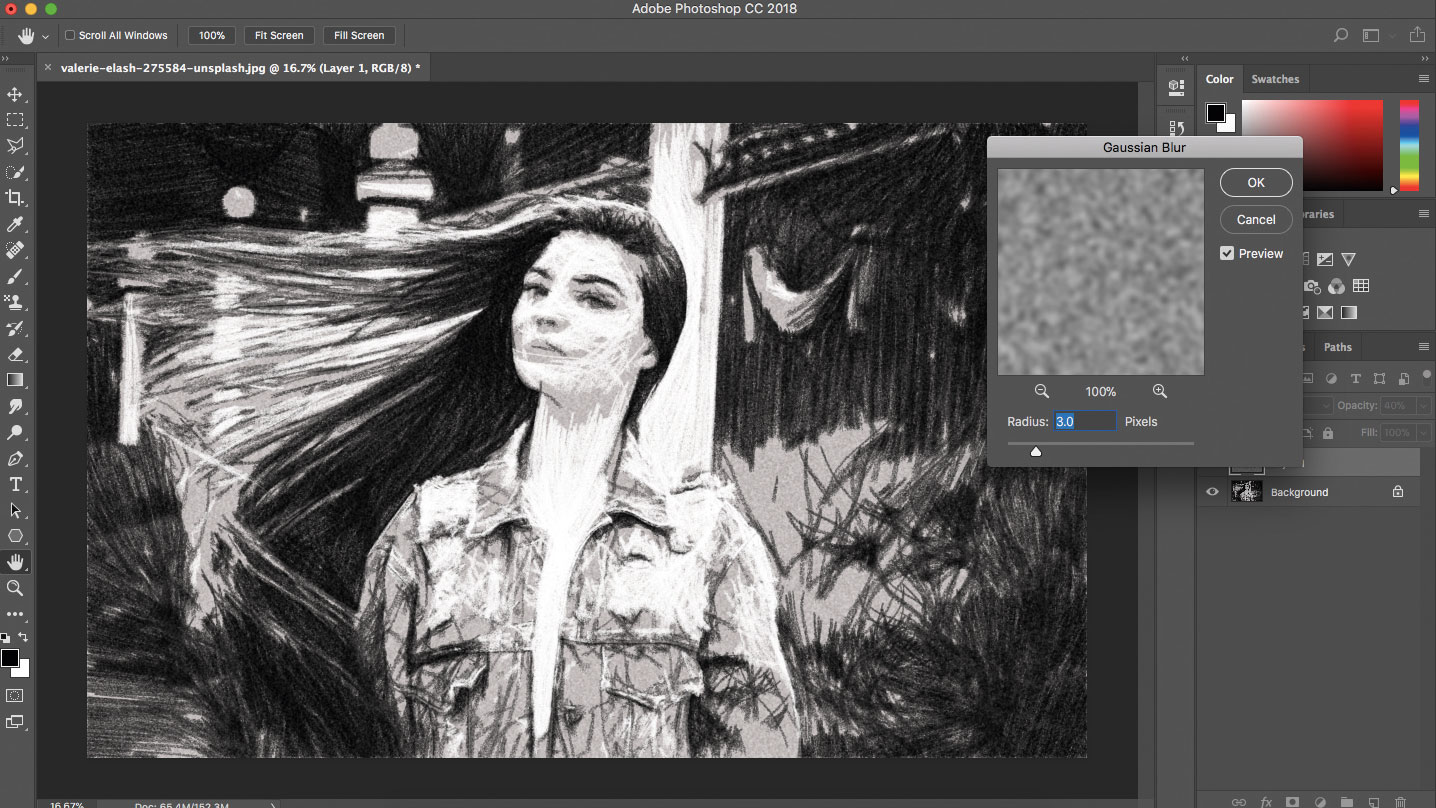
Now we’re going to apply a blur to the noise to just smooth it out a little. Go to Filter >Blur > Gaussian Blur to apply your blur, and choose a radius of around 3-5px before hitting OK. You can see in the preview dialog how it will affect your work before you apply it.
Photoshop will show you how the blur looks when applied over your actual picture, as well as in the preview. You can use the slider to alter the blur, or simply enter a value, and use the Magnifying glass icons to zoom either in or out of your image as a whole, to see the blur in action.
04. Set up a canvas texture
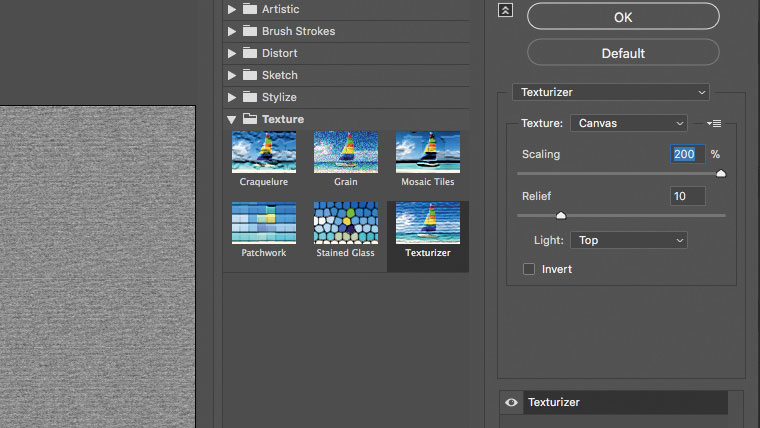
Next up we’re going to use a canvas texture, just to give this image a more believable base. Go to Filter > Filter Gallery and choose Texture, then Texturizer. Choose a Scaling value of 200 per cent and a relief setting of 10, with light in the image coming from the top, before you apply.
Also note that there are other canvases are available from the drop-down menu, including brick.
You can use the Invert option to display a reverse of what you’re applying. Hold cmd/ctrl to bring up the Default button, below the OK button. Clicking this will revert your changes back to the values that were originally set.
05. Sharpen and smooth your texture
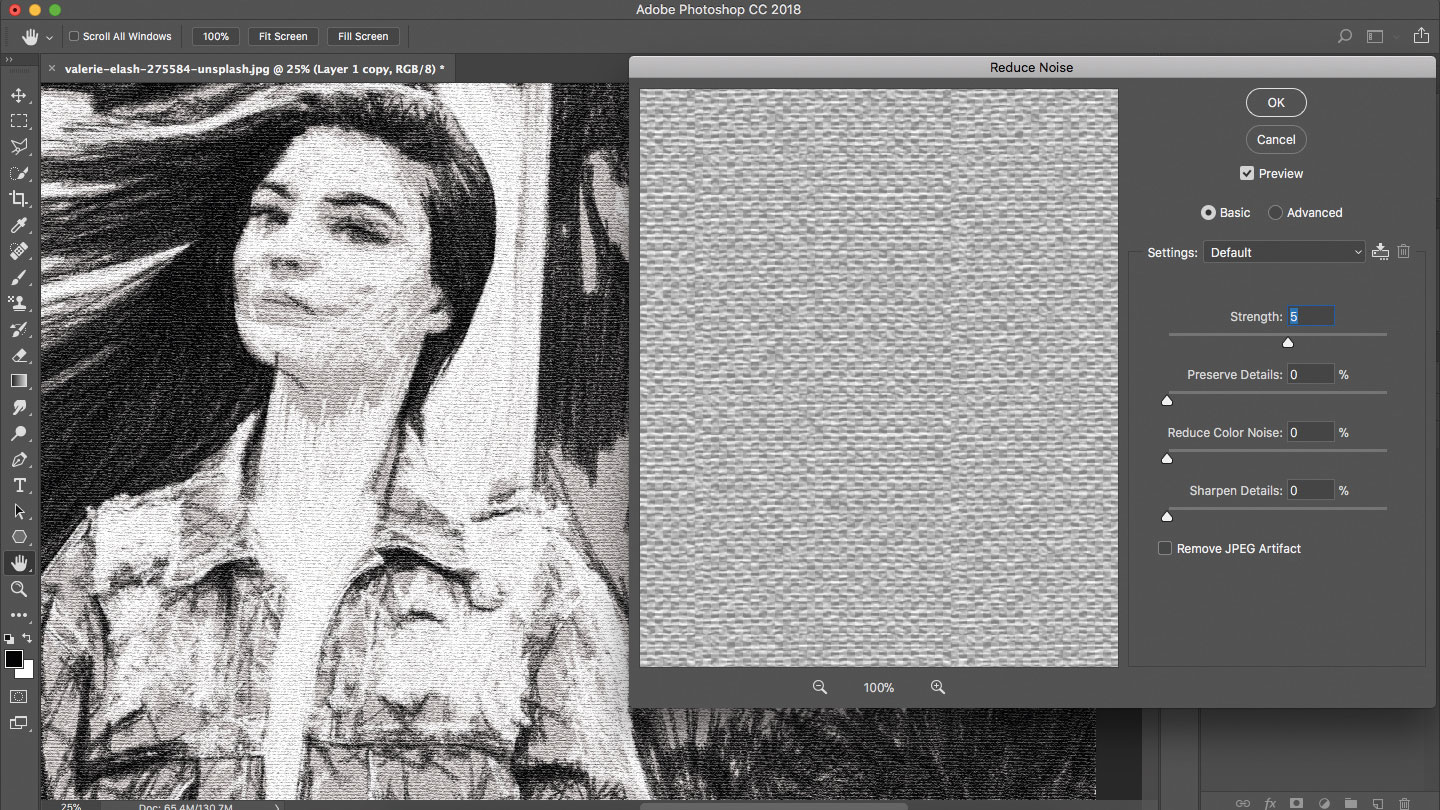
Finally, duplicate this texture layer and go to Filter > Other > High Pass. Set your value as 5px and click OK, before setting the layer to Overlay. Merge this with the layer below, set to Linear Light again and then go to Filter > Noise > Reduce Noise to further smooth out the texture.
Choose a strength of 5 and leave all other options free to smooth out the texture a little after you’ve sharpened it up slightly. If the texture now looks too prominent, reduce the Opacity a little further. By sharpening and smoothing the texture, you’re blending it further into the picture, while making sure it looks crisp.
This article originally appeared in ImagineFX, the world's leading magazine for digital artists. Subscribe here.

Mark is the former techniques editor at Photoshop Creative magazine. He uses Photoshop almost exclusively, and has been using the software for over a decade.
