How to extract CSS from Illustrator CC
You can now turn your designs in Illustrator CC into CSS. Here's how.
With Illustrator CC 2014, you can extract CSS from your layouts and paste it into your favourite code editor, which may include Adobe's own Dreamweaver CC or Edge Reflow. In this article we look at how that process works.
Getting started
Below is a simple layout in Illustrator with the Layers panel open. Each layer has been named to a CSS element.
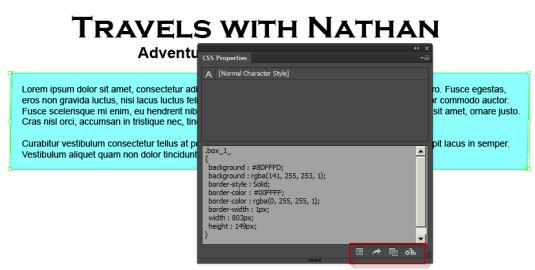
To obtain the CSS for each component, simply go to Window: CSS Properties. This panel lets you:
- View the CSS code for selected objects
- Copy the CSS code for selected objects
- Export one or more, or all selected Illustrator elements to a CSS file
- Export rasterizable images used
- Generate browser-specific CSS code
Be aware that if you don’t name objects in the Layers panel with class names, you'll receive this message in the CSS Properties dialog box: 'No CSS code was generated. To create CSS for unnamed objects, either name the object in layers panel, or enable Generate CSS for Unnamed Objects option in the CSS Export Options dialog.'
In the screen shot below, the box element is selected, which gives you access to the CSS.
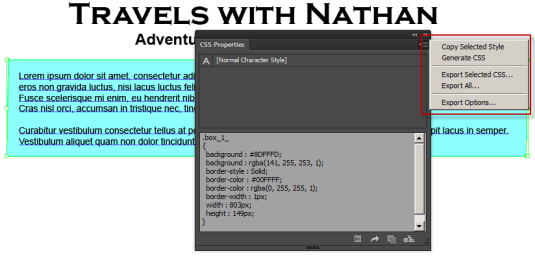
You can use the CSS from Illustrator in a variety of ways. At the bottom of the dialog box, there are several highlighted icons: Export Options, Export CSS, Copy Selected Style and Generate CSS. Another option is to simply copy the CSS from the CSS Export Options dialog box and use it as is. These options also appear at the top of the dialog box in a pop-up menu.
Export options
Selecting Export Options brings up the CSS Export Options dialog box, where you can choose what to export. When the dialog box appears, it does so with the default settings in place.
Daily design news, reviews, how-tos and more, as picked by the editors.

In the Options section one box is unchecked, which is 'Generate CSS for Unnamed Objects'. This option is open to you if you don’t name the layers in Illustrator. But it's better to name all the CSS elements in Illustrator, as this will make it easy to keep track of them in your code editor.
Also in the Options section, you'll notice that Illustrator can create vendor prefixes for Webkit, Firefox, Internet Explorer and Opera.
In the dialog box, you will see two other sections: Object Appearance and Position and Size. In the Object Appearance section, all the options are enabled. In the Position and Size section, we'll enable the dimensions checkbox, so the CSS will reflect that in our code editor of choice (which in this case will be Dreamweaver).
Copy or export
Once you're satisfied with your choices, click OK to accept. To get the CSS into your design program you can copy it directly or make use of the Export CSS options.
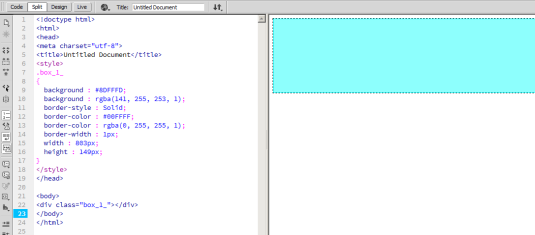
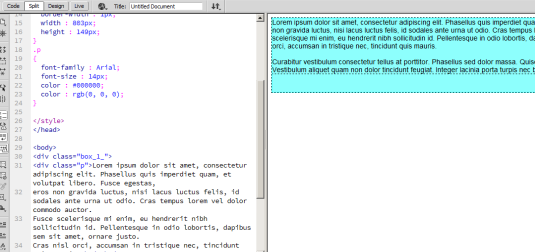
As you can see, our box in Illustrator is now present in Dreamweaver.
Another option is to copy over the text in the box shown below. To do so, click on the text to select it. The CSS will appear in the CSS Properties dialog box. Note that the text appears as: NormalCharacterStyle.
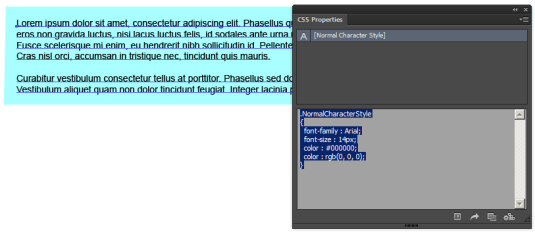
If you have different blocks of text you may want to rename these to web elements such as h1, h2, etc. Another option is to copy over the text to Dreamweaver and rename it to the appropriate web element, in this case 'p'. When you copy over the text into Dreamweaver, it will look like the text below.
Exporting SVG
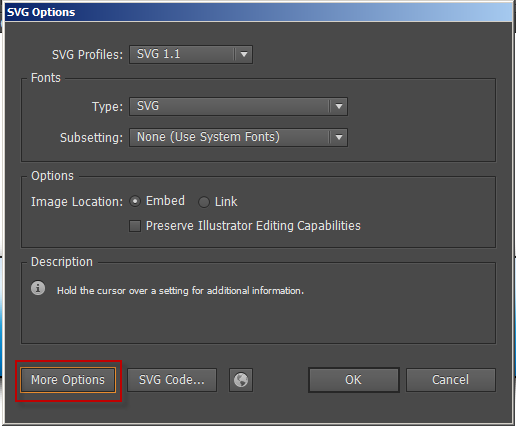
An important thing to realize is complex artwork cannot be represented as CSS and must be outputted as SVG (Scalable Vector Graphics). To do so, go to File: Save As. In the dialog box choose SVG and enter a file name. In the SVG Options dialog box, click on the More Options button.
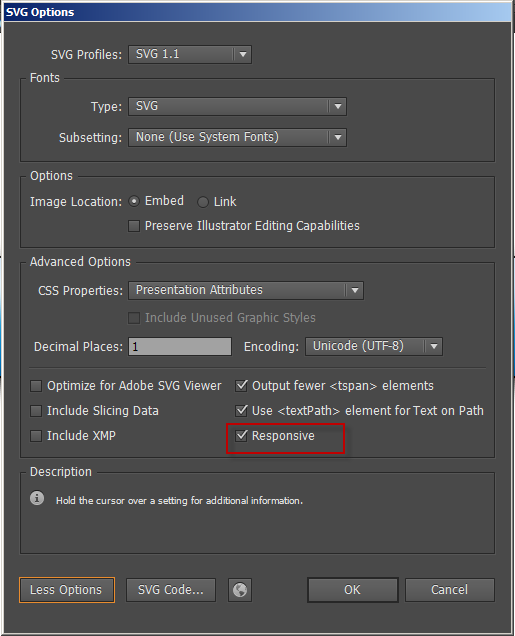
In the expanded view, make sure that the Responsive checkbox is enabled. When you save the artwork it will be scalable within the browser.
Limitations
As you can see, Adobe has created several resources to help web designers turn their projects into CSS. However, there is a learning curve and despite going through various tutorials the entire workflow hasn’t been mapped out. These gaps will create extra work for the user.
Unlike Photoshop, Adobe hasn’t created a Generator plug-in for Illustrator. To fill that gap, David Deraedt has created an extension called Layer Exporter, which can be used to automate the generation of image assets. There is a video tutorial to help you but no narration, which makes it difficult to follow.
These issues aside, Adobe is definitely moving in the right direction with their CSS conversion tools, all of which will speed up the workflow for web designers.

The Creative Bloq team is made up of a group of art and design enthusiasts, and has changed and evolved since Creative Bloq began back in 2012. The current website team consists of eight full-time members of staff: Editor Georgia Coggan, Deputy Editor Rosie Hilder, Ecommerce Editor Beren Neale, Senior News Editor Daniel Piper, Editor, Digital Art and 3D Ian Dean, Tech Reviews Editor Erlingur Einarsson, Ecommerce Writer Beth Nicholls and Staff Writer Natalie Fear, as well as a roster of freelancers from around the world. The ImagineFX magazine team also pitch in, ensuring that content from leading digital art publication ImagineFX is represented on Creative Bloq.
