
When learning how to draw or mastering your painting techniques, there are many elements to consider when creating a new composition. Light is a crucial element in a portrait painting, because it brings life, shape and volume to a character. Light and colours are connected, of course, and I need to work with them to achieve the right result. The light can also tell different stories about the same character.
If I need to paint a complex lighting scheme I always take reference shots. I consider what lighting I'm after during the very first stage of the concept. It helps me to develop the image, gives it a strong foundation, and saves time later on.
I always try to work the light with complementary colours: this brings balance to the final illustration
For this image I want the light to look magical but also mysterious and very contrasted, giving the scene a Chiaroscuro feel. Because it's a portrait, I decide to make the character's face the focal point and play with his eye colour. I want to give him a dangerous, unhealthy countenance.
To strengthen this effect I'll have two light sources. The primary source will be cold and bright, and is going to affect his face, while the secondary one will be warmer, more diffuse and will come from behind.
I always try to work the light with complementary colours: this brings balance to the final illustration. I start painting by working with big colours and light blocks, and keep the file size as small as possible. This helps me to develop a quick composition that's easy to correct or change if necessary. Okay, let's see how my portrait takes shape!
01. Find the concept

The first thing I do is to quickly find the concept and composition. I want to create a male fantasy character, with a touch of punk, surrounded by birds. So I start with a rough pencil line art and a messy colour test for the character's design. I like to be sure of the colour scheme before I start the painting proper. I also decide that the main light will come from the top.
02. Apply the first colours

After scanning in my sketch, I choose my colour scheme. I want it to be very desaturated at first with few hints of colours; just enough to see the different elements. I like to keep everything simple at the beginning. The light here isn't defined because I'm still looking for the character. I use a soft Round brush because there's no need for details yet.
03. Reworking the composition

It may be a portrait, but I think I need to add some space around him. So I decide to crop the illustration and expand his environment. Empty space is important in a composition – my character needs to breathe! I increase the main light on his face slightly and then place the warm light behind him as a diagonal shape, just to add more dynamism to the composition.
04. Define facial features

With the same soft brush, but with Shape Dynamic sets to 0 per cent, I start to define his facial features. I'm adding some reds around his eyelids and a very light mauve to create some dark rings under his eyes. I like to use these two colours as a skin base because they add a realistic touch to any complexion.
05. Defining the silhouette

I want my figure to be massive with the focus on his face. So I choose to wrap him into a huge, dark green cape. To increase the dynamism of the composition, I ensure the cape follows the same diagonal as the second light. This add a subtle sense of movement. I light his arm slightly by adding a pale green with my soft brush. I want contrast while avoiding strong shadows.
06. Tell a story with the eyes

Now I work on his eyes. I choose a pale blue that will contrast with the red skin base. I want him to look ill, with almost translucent eyes. I use both my custom Texture and Detail brushes for the eyelids, and paint small dots of light on the eyeballs. His skin must also reflect his story, and adding some scars around his mouth is a cool, mysterious detail!
07. Develop the dark cape

I gradually bring more volume and shape to the fabric using my soft brush. I gently increase the light intensity and colour saturation. The light here is very diffuse and soft, and I want to suggest folding fabric folds with an Old Masters look. I keep my brush strokes visible: this adds texture to the fabric.
08. A hand with a dagger

At this point I think the composition looks a bit empty, and so I decide to introduce a hand holding a dagger. I choose not to add too much detail to this new element and keep it in the shadows for now. The lower part of the character is too dark, and the dagger will help me to break up this darkness, as well as give the composition extra dynamism.
09. Colouring the skin

Now that the face is starting to come together, I decide to push the colours and choose a more vibrant colour scheme. I add some orange to the inner part of the eyes and increase the light and shadows to increase their intensity. I choose a pale violet and paint some veins on his forehead. Little details like these help to achieve a realistic look.
10. We need more contrast!

I bear in mind that the main light comes from above. As such, the forehead, nose and cheekbones all catch the light, so I have to apply more contrast on these specific facial features. To do this I simply use the Brightness/Contrast adjustment tool and play around with it until I'm happy with the outcome.
11. Completing the composition

I finish off the last few elements such as the golden halo and the hand. The dagger needs to stand out a bit more, otherwise it'll be lost in the shadows. I add a huge bright glow of light and refine the shape of the blade with the Detail brush. I also add some magical dots of light all around the character. This helps to emphasise the darkest parts of the composition.
12. Adjust the colours

Photoshop's Color Balance tool is ideal for giving an illustration those finishing touches. It’s good for quickly unifying the whole painting, especially when the light is really strong. I choose to apply a more subtle blue to my composition, because my background light is mainly orange.
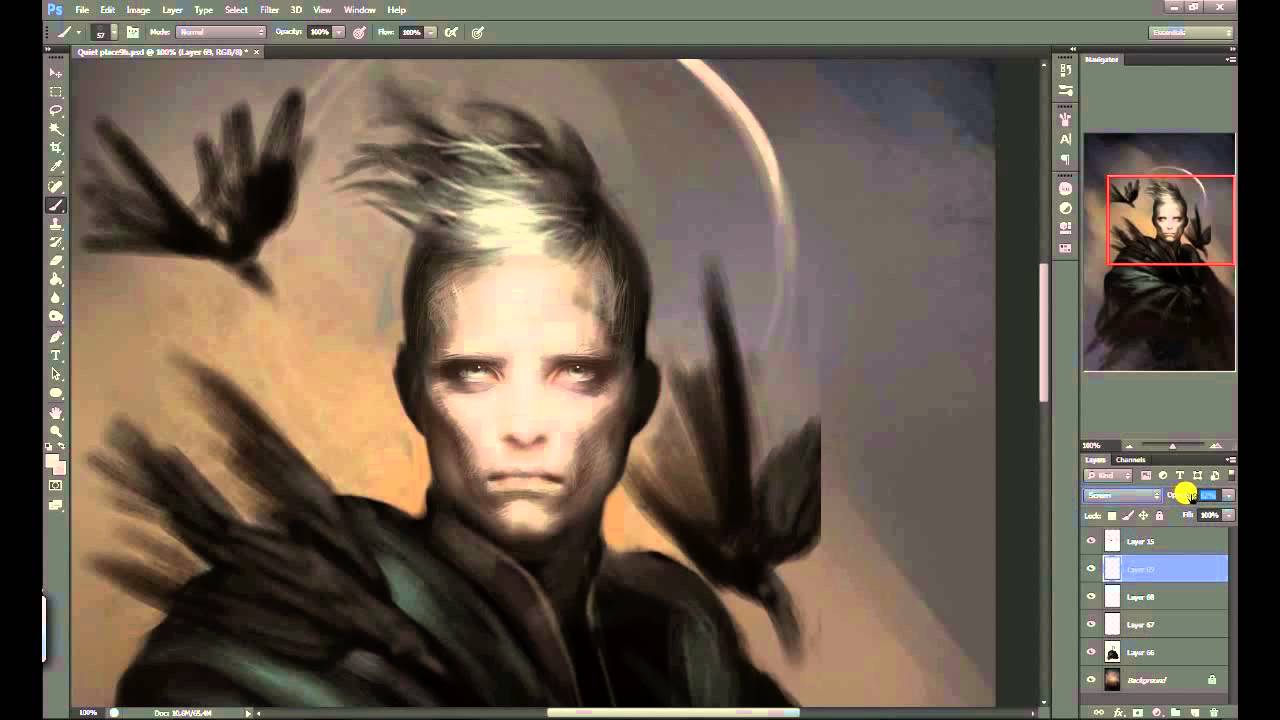
13. Boosting the intensity

It's now time to add the last touches of light to his face. I work it as a whole with a big Soft brush, like a glow. I pick a very light pale blue and apply it all over his face. Then I set the layer mode to Screen mode with a very low Opacity setting. I keep in mind that this light comes from the top and so I extend this glow all over his hair, too.
14. Adding the final details

The painting is almost finished. All I have to do is to add some extra glow on the halo, to make it a bit more magical. Then I slightly blur some parts of the silhouette to blend everything together. I use the Blur tool on a very low Opacity for this, because it gives me more control than the Blur filter.
Watch the video:
This article originally appeared in ImagineFX issue 130.

