Discover the secrets of sculpting faces
Titouan Olive uses ZBrush to take you through the key stages of creating characters with accurate muscle and bone structures.
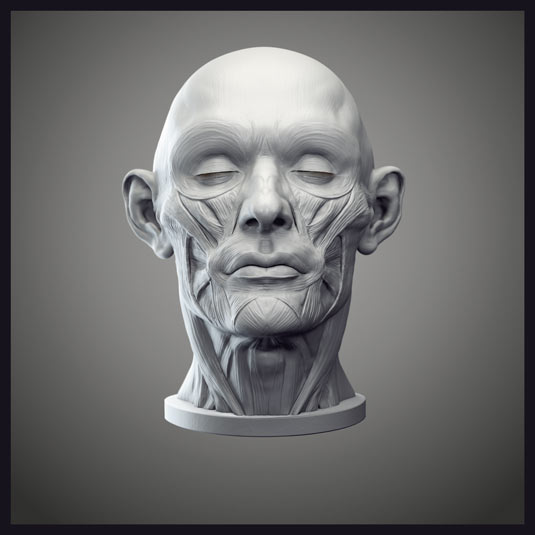
Anatomy is a basic art that has been studied for hundreds of years by all the great masters. It was, and always will be, the key to creating realistic and believable characters. Improving your knowledge of anatomy will also greatly improve your sculpting skills.
It's essential for realistic characters, of course, but it's also important for cartoon and stylised characters. The underlying anatomy is always there, but muscles, bones and cartilage - even if they might seem almost invisible at first sight - are still the main building blocks.
For this tutorial, I want to focus on facial anatomy. You'll learn about the underlying muscles and bones and how to sculpt the visible muscles directly on a skull. I used ZBrush for this tutorial, but it shouldn't be a problem to follow this training with other sculpting applications, as long as you're familiar with the software.
Article continues below- Download the source files for this tutorial here
01. Basic shapes
We shall start by drawing the basic shape on the skull. We'll then sculpt the main muscles and cartilaginous parts, such as the ears, and then finish by refining each part.
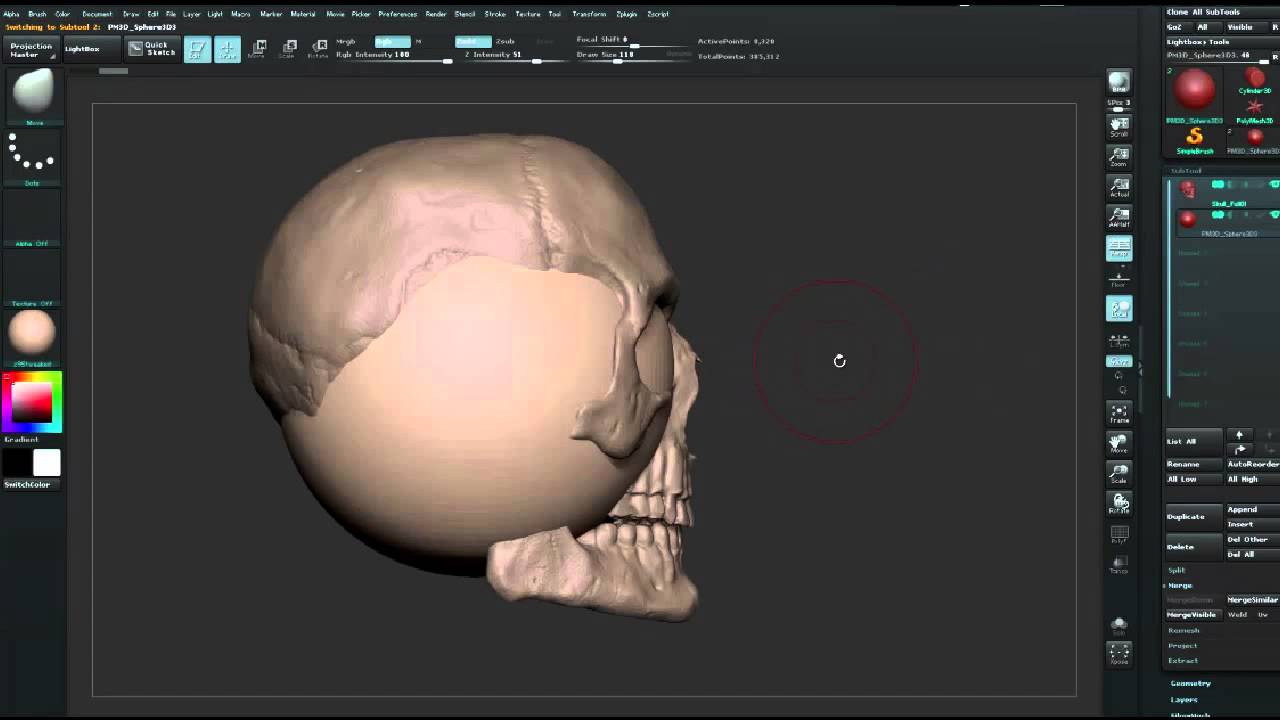
Load the mesh I've prepared for you. We'll build the muscles on top. For this, click on the Append button under the Subtools menu and choose a sphere in the pop-up window.
A sphere is now added in your subtools list and is, of course, also visible in your scene. Select it and start by activating Symmetry (X on your keyboard). Place it correctly on the skull using the Scale and Move tool: use the buttons at the top and click and drag on your mesh to draw a transpose line, then use this line to move and scale your sphere.
Under Geometry, click on the DynaMesh button to create a dynamic mesh. This function also enables you to be able to update your mesh as you work. If you think you need it, you just have to Ctrl-drag on the Canvas and ZBrush will calculate a new mesh adapted to all the modifications you make on it. You can repeat this action every time you need to, as often as you want. Doing this, you will have entirely new geometry that is evenly distributed across the mesh.
Sign up to Creative Bloq's daily newsletter, which brings you the latest news and inspiration from the worlds of art, design and technology.
02. Setting transparency
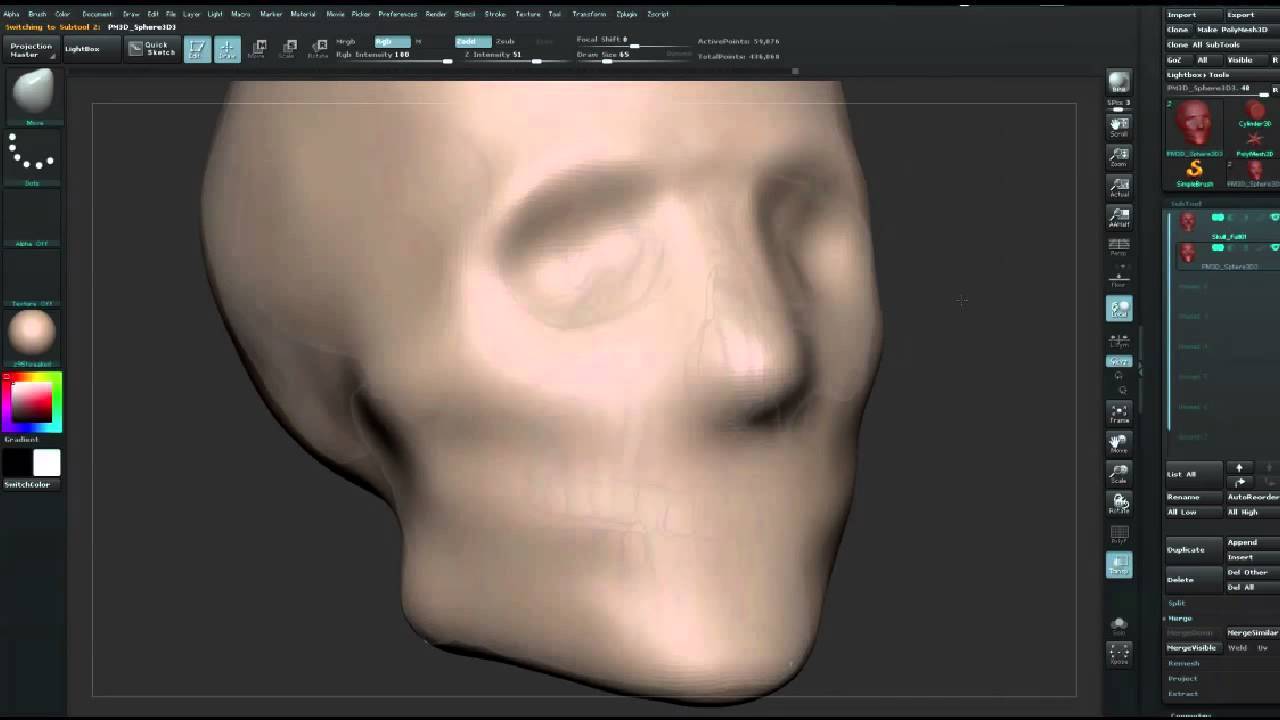
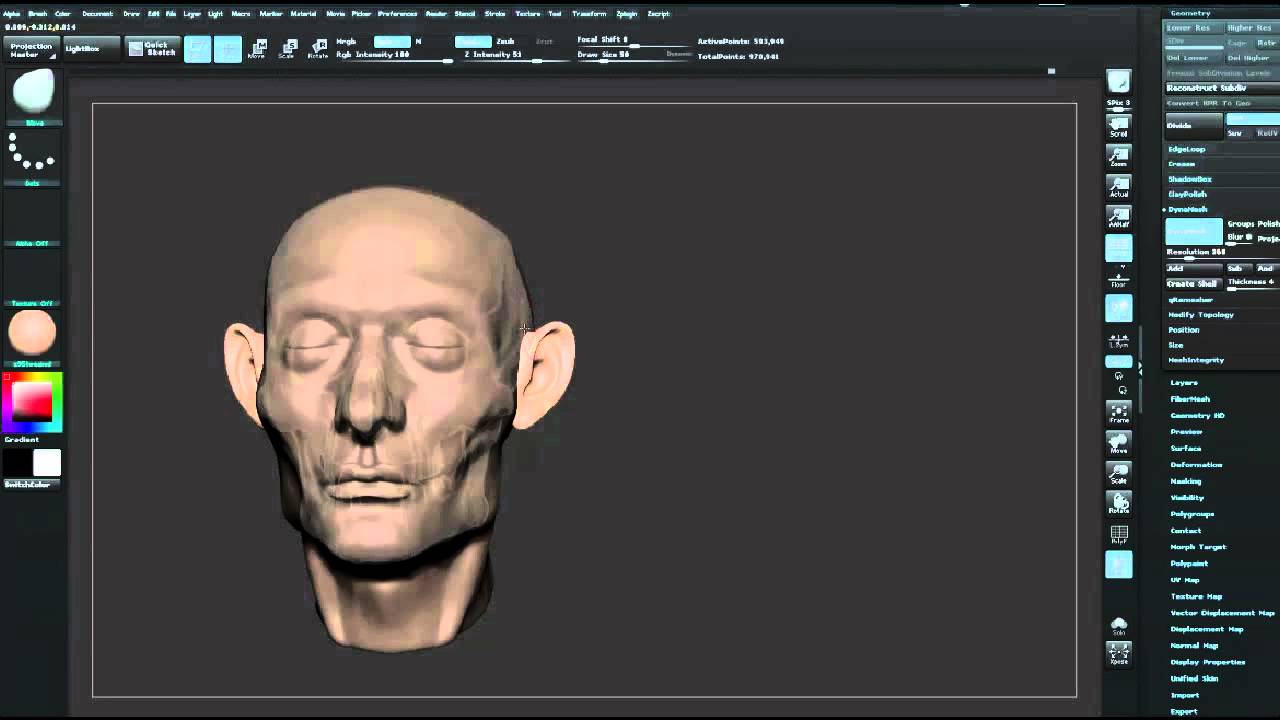
Now click on the Transp button on the right to enable transparency and to be able to see the skull under your sphere. This function is very helpful when sculpting, as it gives us a reference point. If you want to adjust the opacity/transparency level, you can do this by playing with the sliders in the Preferences under the Draw menu.
We can now adjust our sphere on the skull. Start by giving a basic shape with the Move Brush. Don't hesitate to stretch your mesh now that you are in DynaMesh mode. Hold the Ctrl key and click and drag on the canvas to update your mesh if you need to. You can also increase the resolution at any time if you feel you don't have enough polys to reasonably work with.
Adjust your mesh on the back of the head. You can adjust it very close to the skull, since the skin is very thin at this point.
03. Shaping the face
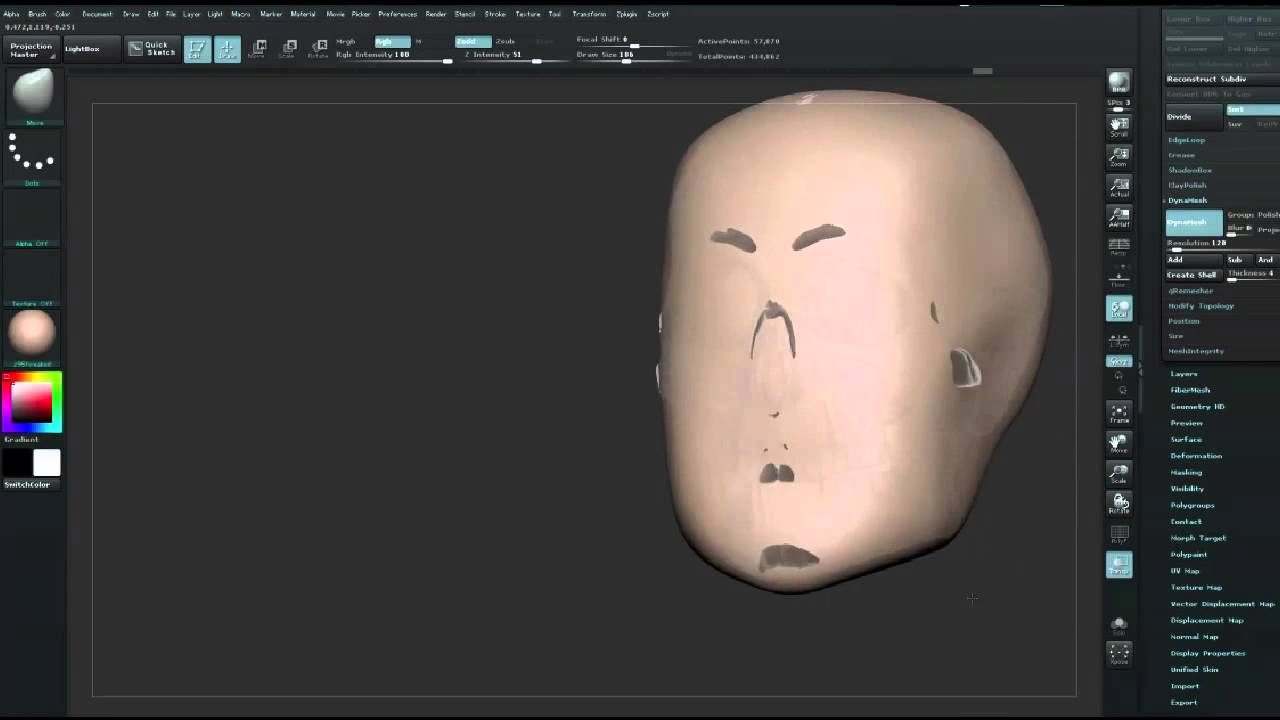
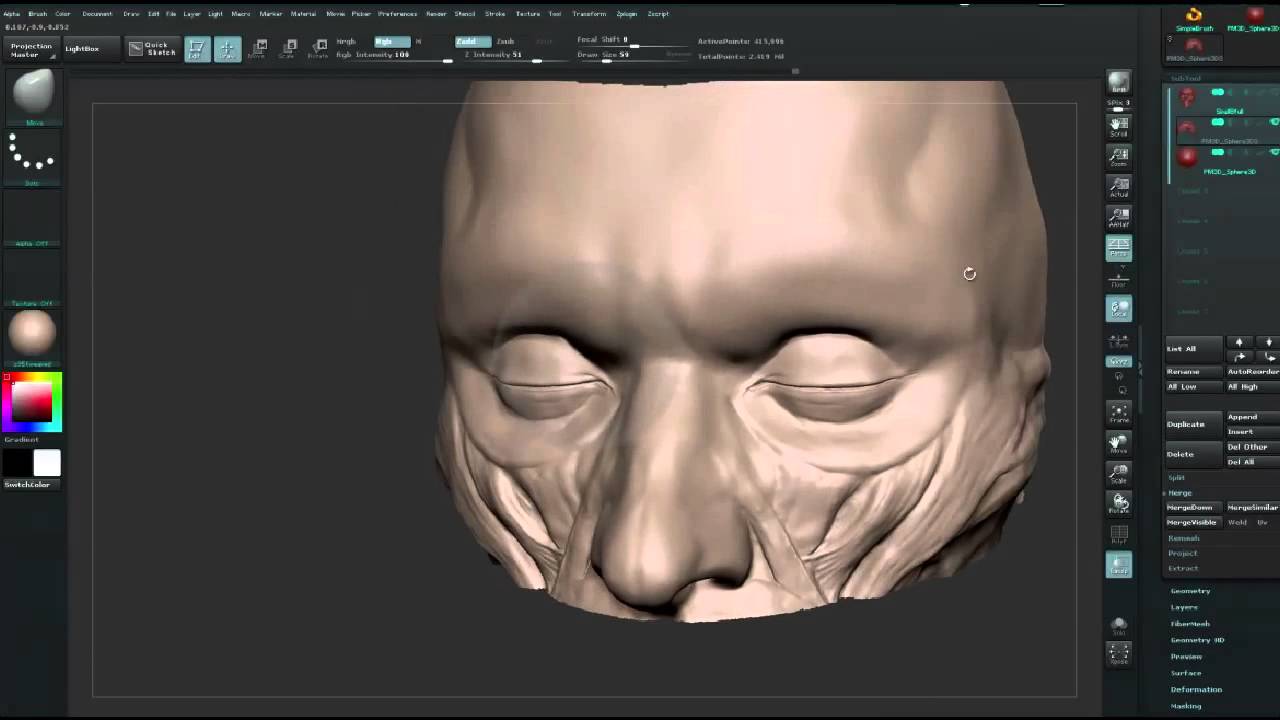
Once the main shape is roughly adjusted on the skull, you can start to shape the eyes and the nose. The skull will help you to sculpt each of these elements more accurately, so keep an eye on it through your mesh as you sculpt. You can add more volume to the eyebrow areas with the Standard or Clay Brush or your preferred sculpting brush; it's totally up to you.
We are now going to sculpt closed eyes in order to see more clearly the eyelid area. Use the Pinch brush on this part if you need it. When the shape is basically sculpted, switch to the nose and sculpt the nostrils and the main cartilage areas.
Look at the skull under your mesh and see how the bone structure has changed, if indeed it has changed at all. If you observe the nasal area, the bone here is very short and so, obviously, the nostrils and the tip of the nose are made with cartilage and muscles only.
Now sculpt the shape of the mouth and block out some of the surrounding muscles. Don't waste your time on details: rough shapes are enough at this stage.
04. Building muscle
At this stage, the goal is still to build the main foundations and to keep as many shapes as simple as possible.
Since it's hard to imagine a head without a decent neck, it seems obvious and indispensable to study those muscles in this training too. The neck plays a very important role and puts the head into action. The muscles of the neck also have a strong impact on facial expressions.
Draw a mask under the head (hold Ctrl and simply draw on your mesh). Invert your mask by holding Ctrl and clicking on the canvas. Use the Move tool to stretch down your selection and to shape the neck. Once it's done, hold Ctrl and click and drag on the canvas to erase completely your mask and to be able to sculpt everywhere. Use the Smooth brush to soften your work and the Move brush to improve the main form.
Block out the main muscles - those are very strong and pretty massive to sustain the head, so keep that in mind during your work. Their role is also to move the head - that's why their visibility changes as the head moves. The neck muscles are more obvious when it's turned than what it is faced forward, for example. Things should go pretty fast at this stage: don't waste your time on complicated shapes, and keep it simple.
05. Ear'ere!
We'll create the ears next. This part is mostly done with cartilage. We'll speed up the process using a base mesh already available in ZBrush. To do this, hit B on your keyboard to open the Brushes menu and choose IMM BParts Brush, then hold M on your keyboard and choose the ear in the pop-up menu.
Now click and drag on the side of the head, approximately where you want to place the ears. At this stage, ZBrush will mask the whole head to enable you to move, rotate, or scale the ears as if it was a new subtool, without worrying about the head.
Once the ears are placed, use the Move brush to adjust correctly the main shape on the head and update your mesh with DynaMesh (Ctrl-drag outside your mesh) to merge the ears onto the head.
06. Placement problems
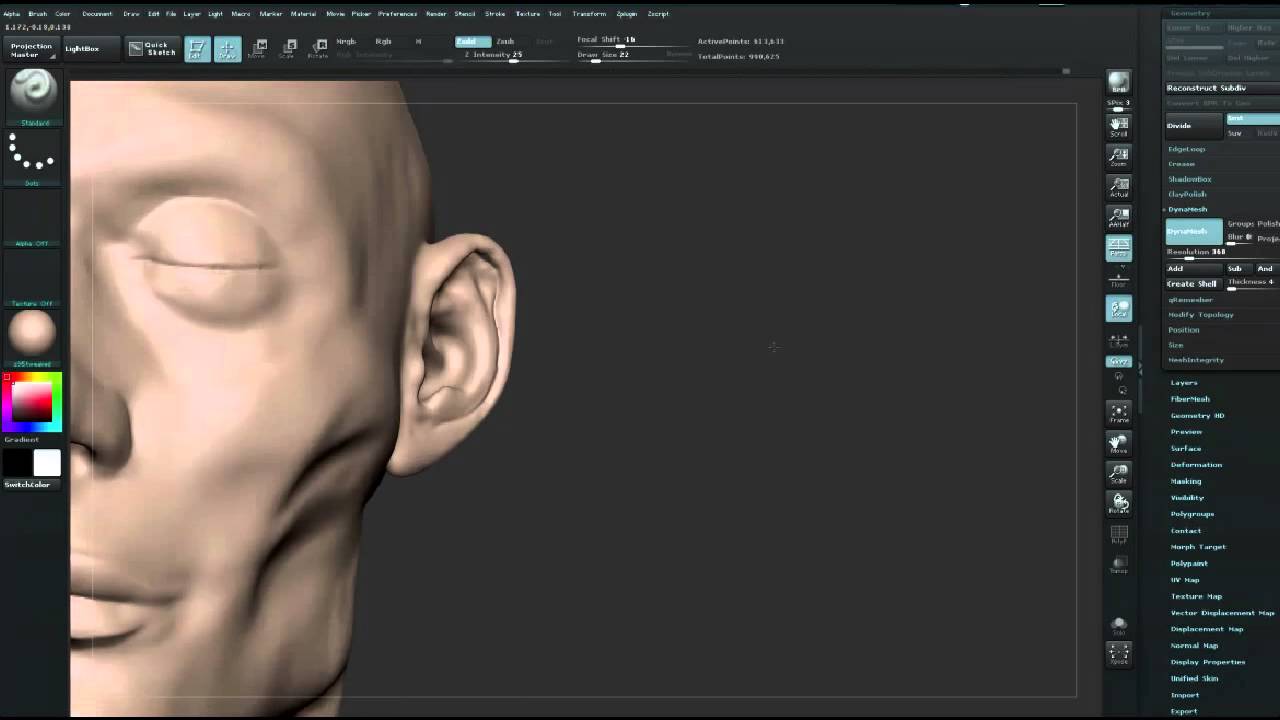
Smooth the merged area and sculpt the anatomy of the ears, which are made with cartilage but without visible muscles. Block in the main shapes and try to use reference to be more accurate.
Ears are not very difficult to sculpt once you've understood their anatomy, which is very particular. A good tip is to use a mirror to look at your own ears and to use as many references as possible. Take care with proportions and placement.
The ears will look wrong if you place them too high or too low, for example. Try to place them between the lower part of the nose and of the upper part of the eyebrows.
Continue your work on the face, roughly sculpting the jaw, and the cheekbones where several muscles are attached. It's a good idea to sculpt the eyelids and the chin as well, while at the same time trying to work on the whole face as a whole.
07. Visualise the muscles working
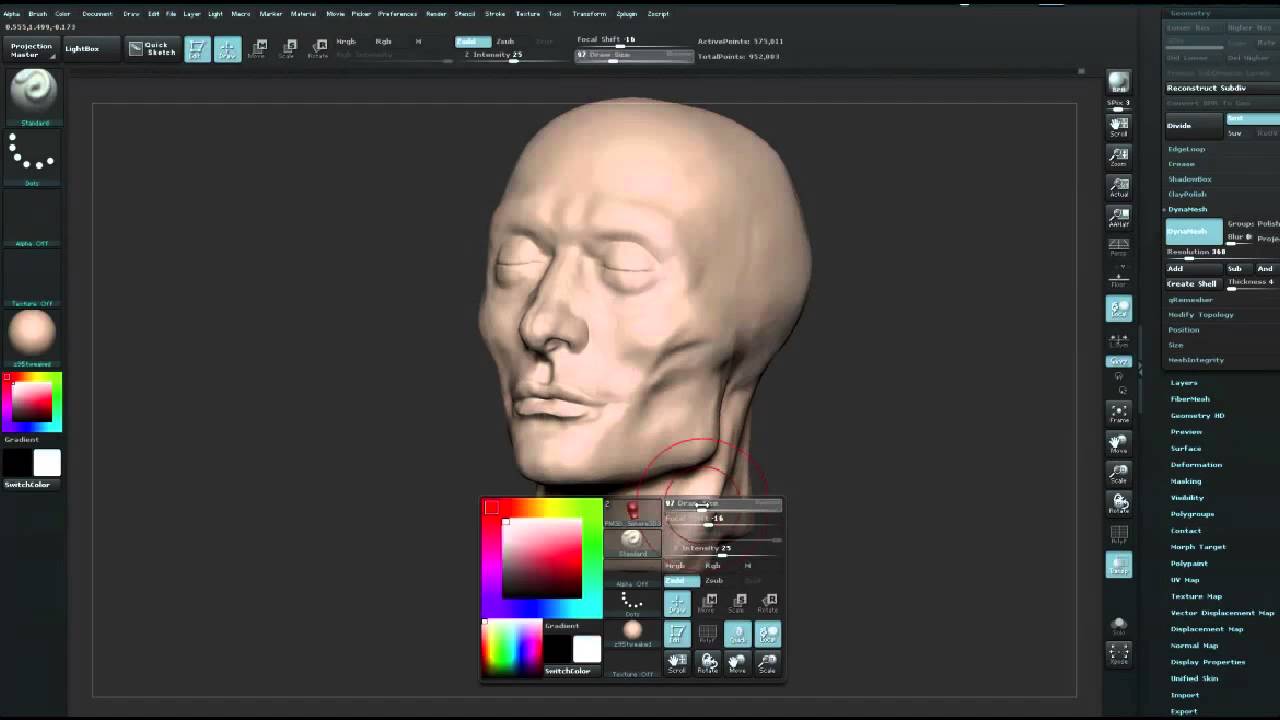
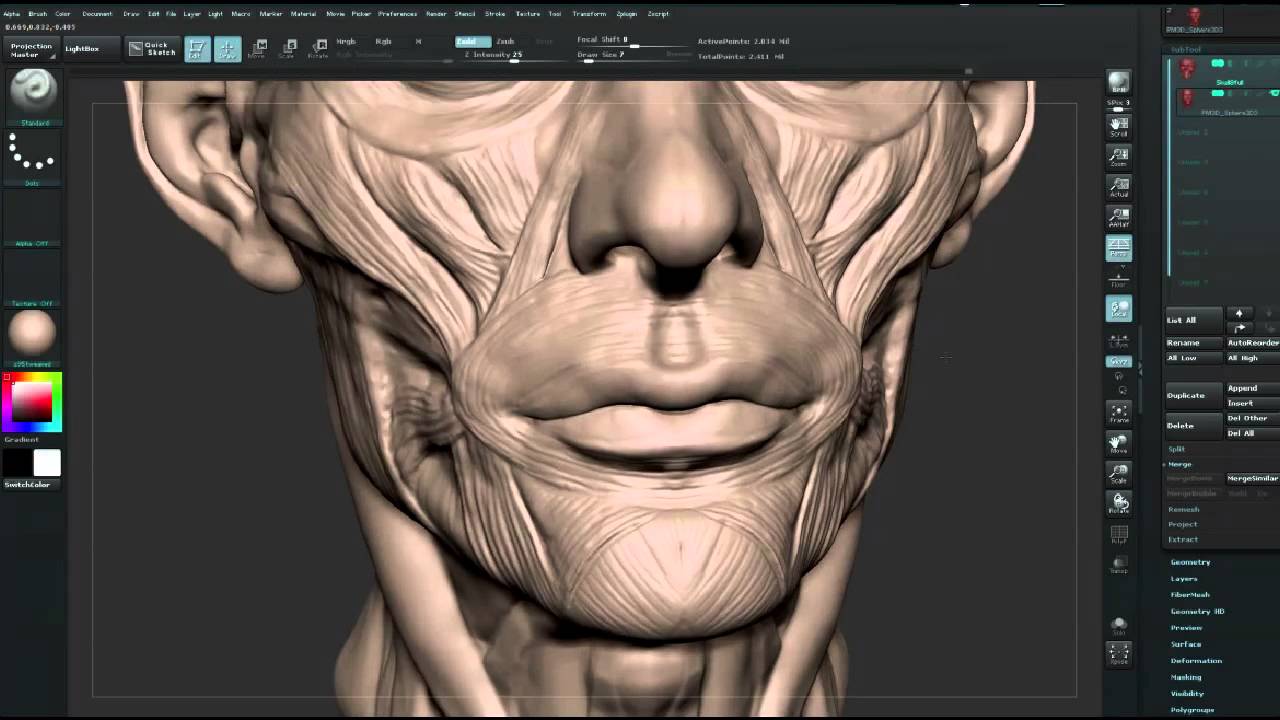
We are now going to focus our work on the muscles of the face, trying to sculpt them as accurately as possible. We'll sculpt them pretty roughly at first and we'll then refine them one by one.
Keep up your work on the muscular system, shaping the main muscles around the mouth and around the eyes. They look like circles and are moved by the other muscles attached on them to give the various expressions of the face. At this step, when you want to build
a base mesh with polygons ready for animation and which deforms properly, you need to create the same flow around eyes and mouth with edge loops.
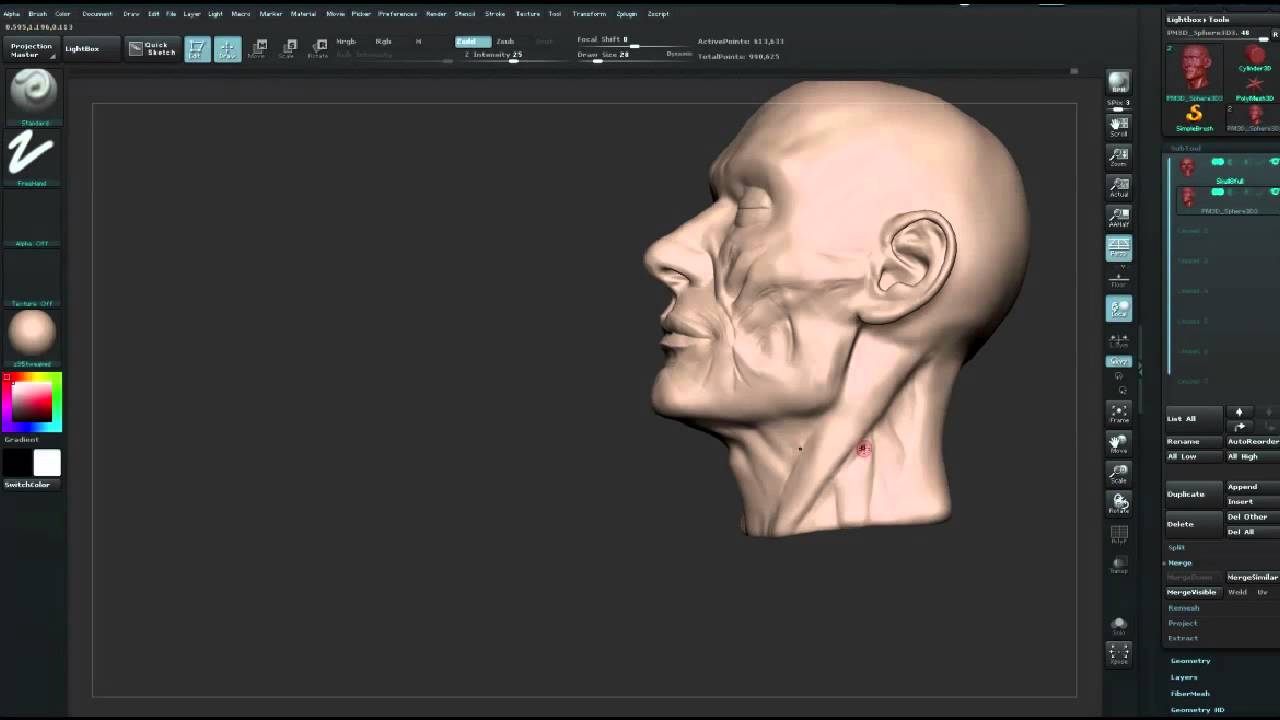
As you sculpt, try to understand what the role of each muscle is. For example, the minor zygomatic muscles pull up and outside the upper lip. The major zygomatic muscles plays the same role, but for the corner of the lips. That's why, when you smile or when you laugh, they are very useful. The orbicularis oculi muscles around the eyes are used to close the eyelids, and the orbicularis oris muscles act in the same way but for the lips and mouth.
As you sculpt, a good thing to do is to draw stripes on the muscles to keep the same flow. It will also help to visualise how each muscle works. Draw circular stripes around the mouth and vertical lines on the muscles of the neck for example. During this step, try to imagine how each muscle will react when the face will be happy or sad. Each muscle is important when the face expresses a mood, so try to keep that in mind when sculpting.
Now sharpen each muscle and give some more definition on the face. You can experiment to use a brush with a lower radius to do that and to be more accurate.
08. Muscle definition and refinement
Draw the muscles on the chin and on the jaw, bearing in mind this is a strong muscle that has to be able to move the lower jaw and to be able to chew food.
Continue to work on the skull and temporal areas. The muscle on the frontal area is very shallow since the underlying skull is very close. However, the temporal area is slightly deeper and a little bit stronger.
Now focus your work on the neck and refine the main muscles. If you feel you lack polygons, don't hesitate to increase the resolution using the slider under the DynaMesh button and update your mesh. (Ctrl-click and drag on the canvas.)
In some cases, you might also want to activate Lazy Mouse. This function helps a lot when you need to sculpt very smooth and accurate lines. To do this, the only thing you have to do is press L on your keyboard.
Check the placement for each muscle and the shape of the bones of the spine at the base of the neck. I slightly refine the lips at this stage and I also make some adjustments on the neck.
09. Beautiful eyes
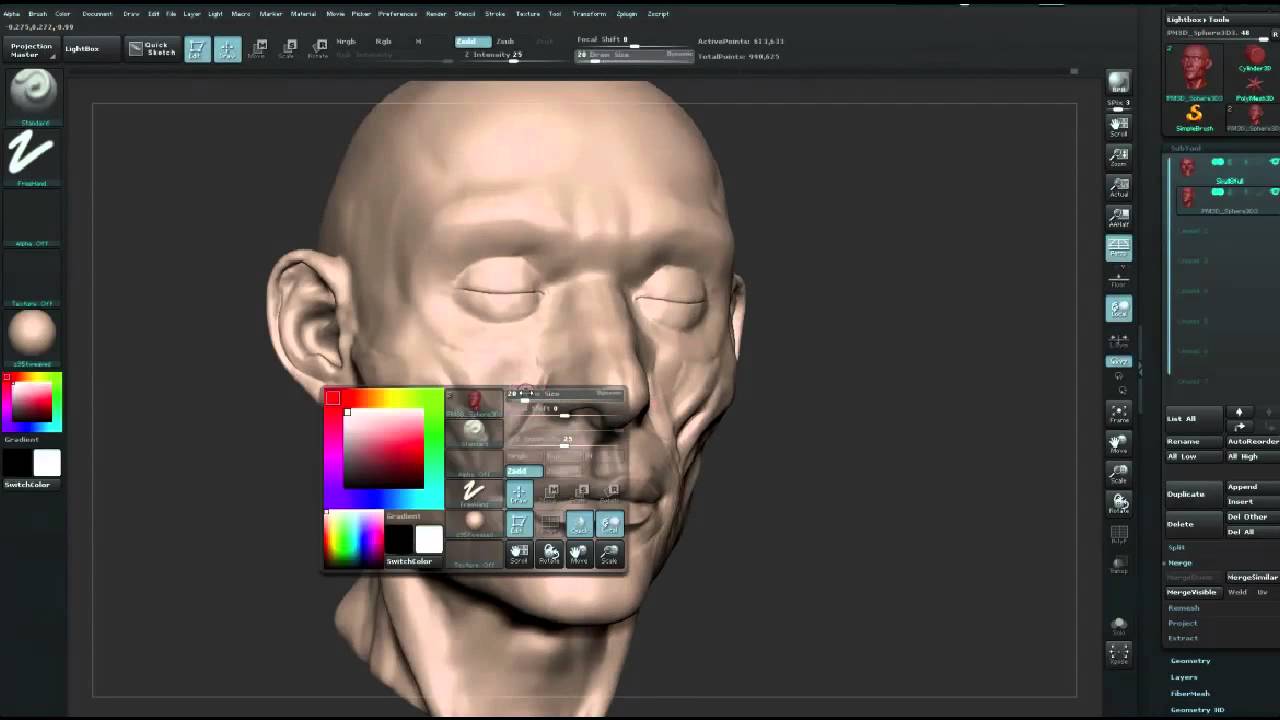
Let's refine the eyelids at this stage. To do this, import a sphere as a new subtool using the Append button. Then hide the face and select the skull. Now place your sphere in the orbital hole inside the skull. Check your mesh and adjust the eyelids on the sphere. It's a great way to get the right shape.
You can isolate the eye area, to enable it to be easier to work on, by holding the Ctrl+Shift keys and drag and drop onto the eyes area. A rectangle area will appear in green. When you release the mouse button, anything outside this area becomes hidden - unless you also hold down Alt, which will make the selection red and hides whatever is inside the selection area.
When it's done, hold Ctrl+Shift and click on the canvas to make the whole head visible. You can now delete the sphere since this one won't be useful anymore. Refine the muscles around the eyelids by drawing circular lines and giving them more volume.
10. Nose sculpting and finishing touches
When you're done, focus your attention on the muscles close to the nose. Paint stripes on each muscle to give the right flow and to make the muscles more readable. Keep in mind that each muscle has its own function.
Continue to refine the whole face. Draw bigger stripes when the muscles are stronger, on the jaw for example. It might sound logical, but it will help you to understand and to read more clearly the whole muscular system.
Sculpt the main cartilage on the nose and don't hesitate to smooth and to redraw a muscle if you think it's wrong or doesn't match your references. The nose is made with bones, muscles and cartilage - try to keep that in mind and sculpt each part differently and appropriately.
Finish the work by sculpting and adding stripes on the last muscles.
It's always much more easy to create something when you know what you have done to reach that stage, and I would strongly recommend to anyone willing to learn or to improve their knowledge about portrait and head sculpting to get a clear and solid understanding of portraiture through this kind of anatomy training. I would recommend you do this at least once, as it should significantly improve your workflow, as well as your quality of work. Good luck!
Words: Titouan Olive
Titouan Olive is a freelance 3D artist working as a lead character artist
on videogames and animated films. He has also worked on various freelance projects for rapid prototyping, product design and architecture.
This article originally appeared in 3D World issue 173.
Liked this? Read these!
- Create a perfect mood board with these pro tips
- The best 3D movies of 2013
- Download free textures: high resolution and ready to use now

The Creative Bloq team is made up of a group of art and design enthusiasts, and has changed and evolved since Creative Bloq began back in 2012. The current website team consists of eight full-time members of staff: Editor Georgia Coggan, Deputy Editor Rosie Hilder, Ecommerce Editor Beren Neale, Senior News Editor Daniel Piper, Editor, Digital Art and 3D Ian Dean, Tech Reviews Editor Erlingur Einarsson, Ecommerce Writer Beth Nicholls and Staff Writer Natalie Fear, as well as a roster of freelancers from around the world. The ImagineFX magazine team also pitch in, ensuring that content from leading digital art publication ImagineFX is represented on Creative Bloq.
