Create hand-drawn animation
James Wignall shows how to create hand-made animation using Photoshop
Sign up to Creative Bloq's daily newsletter, which brings you the latest news and inspiration from the worlds of art, design and technology.
You are now subscribed
Your newsletter sign-up was successful
Want to add more newsletters?

07 When you’ve finished your line test you can play it back to see how it works. To do this, either press Spacebar or click the little Play button lower left of the timeline. On first playback it might not be playing at full speed – you can see a small FPS indicator next to the timecode. Give it a few loops of the animation to load into memory then it should play back in real-time.
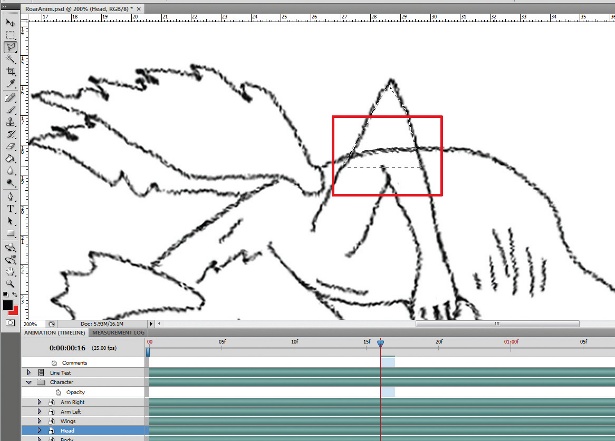
08 Happy with the movement and timings? Then it’s time to flesh out the bones! Create a new video layer (F6) and go to the start of your timeline. The idea is to use the line-test layer almost as a skeleton for your character to be drawn on top. Here you can see my simplified rendition of a character from Jon MacNair’s illustration.
09 While you can keep your character all on just one layer, I find my brain copes a little better if I split things up a bit. You can see in the example that I’ve used different layers for various body parts. It also means that if a part doesn’t need animating then I don’t have to keep redrawing it, which saves time.
10 Go along the timeline drawing your character, using your line-test as a guide. The technique is the same as before: draw your frame, F1 to make a new frame, repeat until the end of the timeline. Keep playing the animation back every now and then to check how the movement works and that it’s looking good.
11 When I’m drawing my animation I normally ignore whether it should be in front of or behind an object, I like to get the animation right before correcting that. Once I’ve finished the animation I will go back and, using the Eraser or Selection tool, remove all the unwanted lines to make limbs appear solid, as they should be.
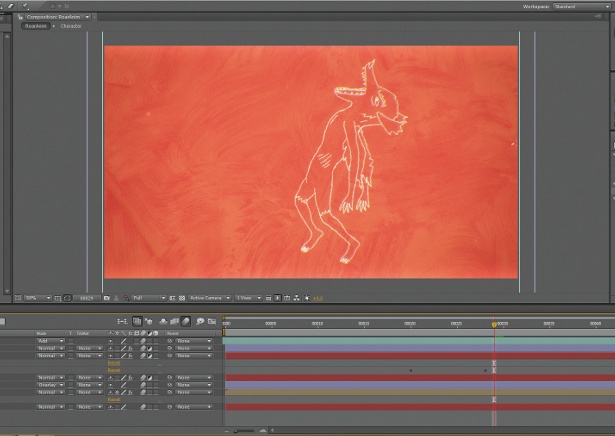
12 After the animation is all finished you can import it into After Effects if you want to make it look a little more polished. Adding a bit of noise, texture and grading can really make your animation stand out. Although, having said that, I wouldn’t make it too polished as I find the imperfections are actually what give your animation some personality.
Sign up to Creative Bloq's daily newsletter, which brings you the latest news and inspiration from the worlds of art, design and technology.

The Creative Bloq team is made up of a group of art and design enthusiasts, and has changed and evolved since Creative Bloq began back in 2012. The current website team consists of eight full-time members of staff: Editor Georgia Coggan, Deputy Editor Rosie Hilder, Ecommerce Editor Beren Neale, Senior News Editor Daniel Piper, Editor, Digital Art and 3D Ian Dean, Tech Reviews Editor Erlingur Einarsson, Ecommerce Writer Beth Nicholls and Staff Writer Natalie Fear, as well as a roster of freelancers from around the world. The ImagineFX magazine team also pitch in, ensuring that content from leading digital art publication ImagineFX is represented on Creative Bloq.
