How to create a futuristic city with Photoshop textures
Donglu Yu draws on her experience as a concept artist to quickly construct a futuristic city scene.
07. Colouring with a basic brush
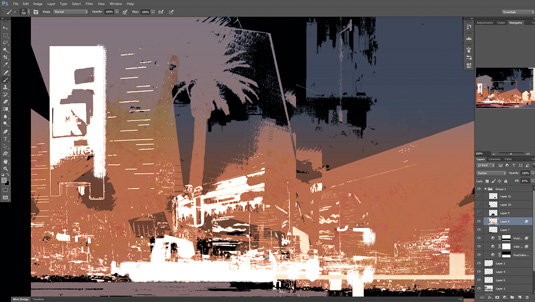
I select a sketching brush and introduce some colour noise in the shaded area. This produces a pleasing, painterly feel.
The default charcoal Photoshop brushes are fine for achieving such a look if you don't have your own custom brushes. I paint loosely, going with my instincts rather than over-analysing where I put down my brushstrokes.
08. Put together a custom swatch
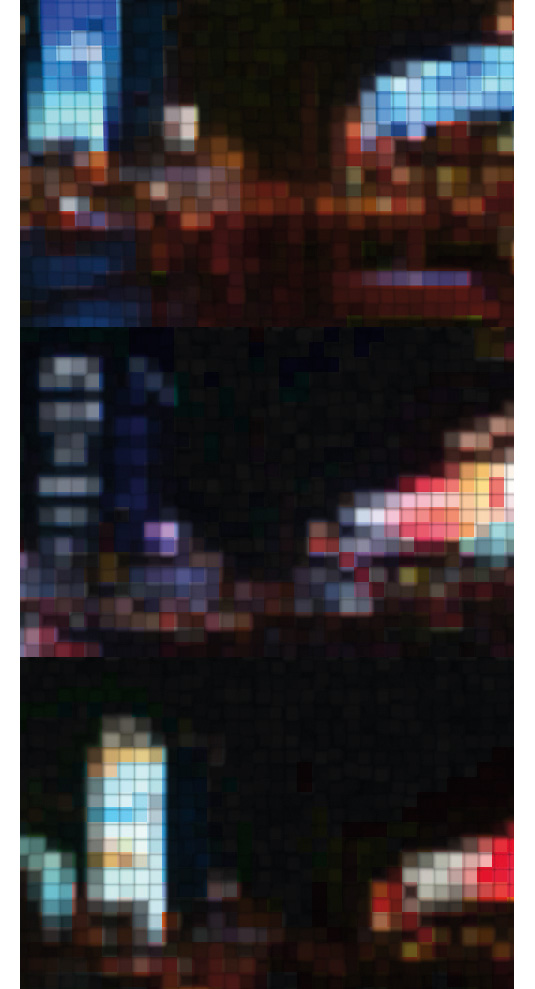
A personal colour swatch will speed up my colour choices. So I pick out a few lighting references, reduce their size to about 500 pixel wide, and click Filter Gallery>Texture Patchwork.
I increase the size of the square and deselect the Depth option. Now I can Color Pick from those swatches to introduce a few saturated lights into my scene.
09. Photo integration
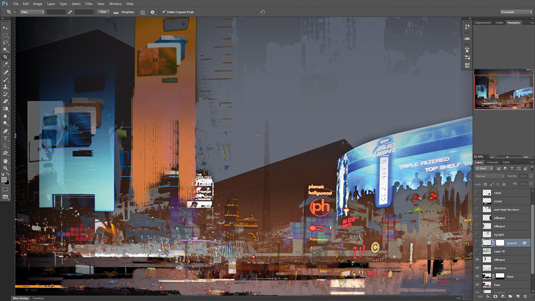
I drop in some photo textures to make the scene look more realistic, erasing elements of the photos to suit. When I rub out areas of the textures, some abstract shapes become visible through the erased part. This can sometimes give me new ideas on what shapes to use or create. I drag different photos for different purposes, such as to extract some interesting foreground shapes or to enhance the lighting.
10. Apply highlights
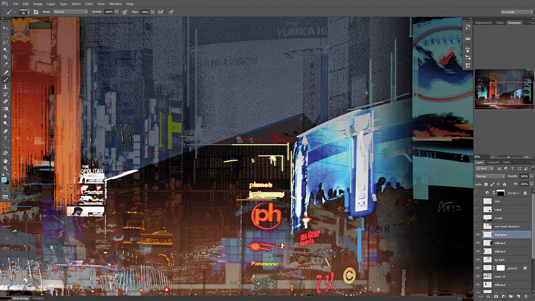
I introduce highlights as a quick method of creating the illusion of details. I take a hard brush and put down some distinct lines, then loosely erase part of them with a texture brush to produce a random look. Note that the highlights have to be consistent with the light source, so think about your sources of lighting first.
11. Populate the scene
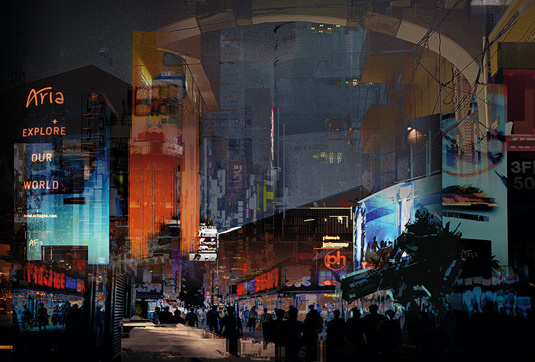
Here, I add in a set of random characters to generate contrast and to help me to create a living world. You can use either a custom shape or custom brush techniques to paint different sets of figures, such as civilians, soldiers or robots.
Daily design news, reviews, how-tos and more, as picked by the editors.
I integrate a crowd of people into the image, and use a robot's silhouette to contrast with the scale of the humans.
12. Polishing the composition
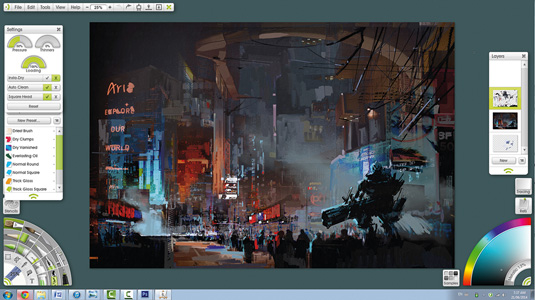
To help blend all the elements together, I do some extra brush work on the painting. I often use a brush that mimics a traditional tool, such as an oil or watercolour brush.
You can approach this stage by simplifying the shapes or increasing the colour vibrancy. I use ArtRage here, because it has a complete set of painting tools that mimics the feel of traditional paintings.
13. Apply zoom blur
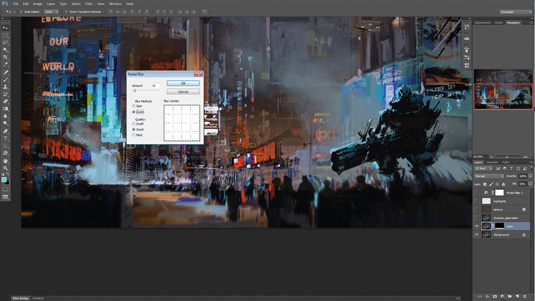
I return to Photoshop and add a subtle zoom blur. This will give my art a sense of motion and helps to blend the textures and my brushstrokes.
First, I merge the image on a new layer, then pick Filter>Blur>Radial blur, choose Zoom and set it to 10 pixels. I combine my zoom layer with the Masking tool: I apply a gradient on a mask, so only the bottom part is revealed.
14. Colour aberration and Sharpen
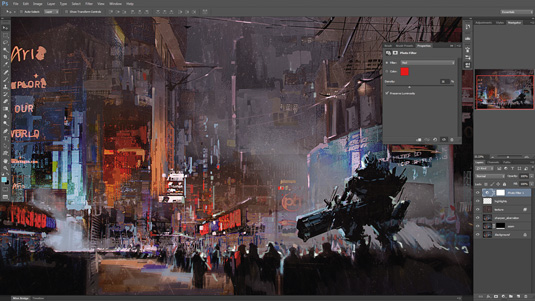
I complete my scene by applying colour aberration and a Sharpen filter. For the former, I go to Filter>Lens Correction..., click the Custom tab and play with the Chromatic Aberration sliders.
I then click Filter>Sharpen>Unsharp Mask, and adjust the Amount, Radius and Threshold settings. Finally, I enhance my highlights with a subtle texture placed over my painting
Words: Donglu Yu
Donglu is a senior concept artist in the video game industry. She's worked on the sequels to Assassin's Creed, Deus Ex: Human Revolution and Far Cry 4.
Like this? Read these!
- 3 top tips for creating a concept environment
- 9 Ways to stay focused when working from home
- Free Photoshop brushes every creative must have

The Creative Bloq team is made up of a group of art and design enthusiasts, and has changed and evolved since Creative Bloq began back in 2012. The current website team consists of eight full-time members of staff: Editor Georgia Coggan, Deputy Editor Rosie Hilder, Ecommerce Editor Beren Neale, Senior News Editor Daniel Piper, Editor, Digital Art and 3D Ian Dean, Tech Reviews Editor Erlingur Einarsson, Ecommerce Writer Beth Nicholls and Staff Writer Natalie Fear, as well as a roster of freelancers from around the world. The ImagineFX magazine team also pitch in, ensuring that content from leading digital art publication ImagineFX is represented on Creative Bloq.
