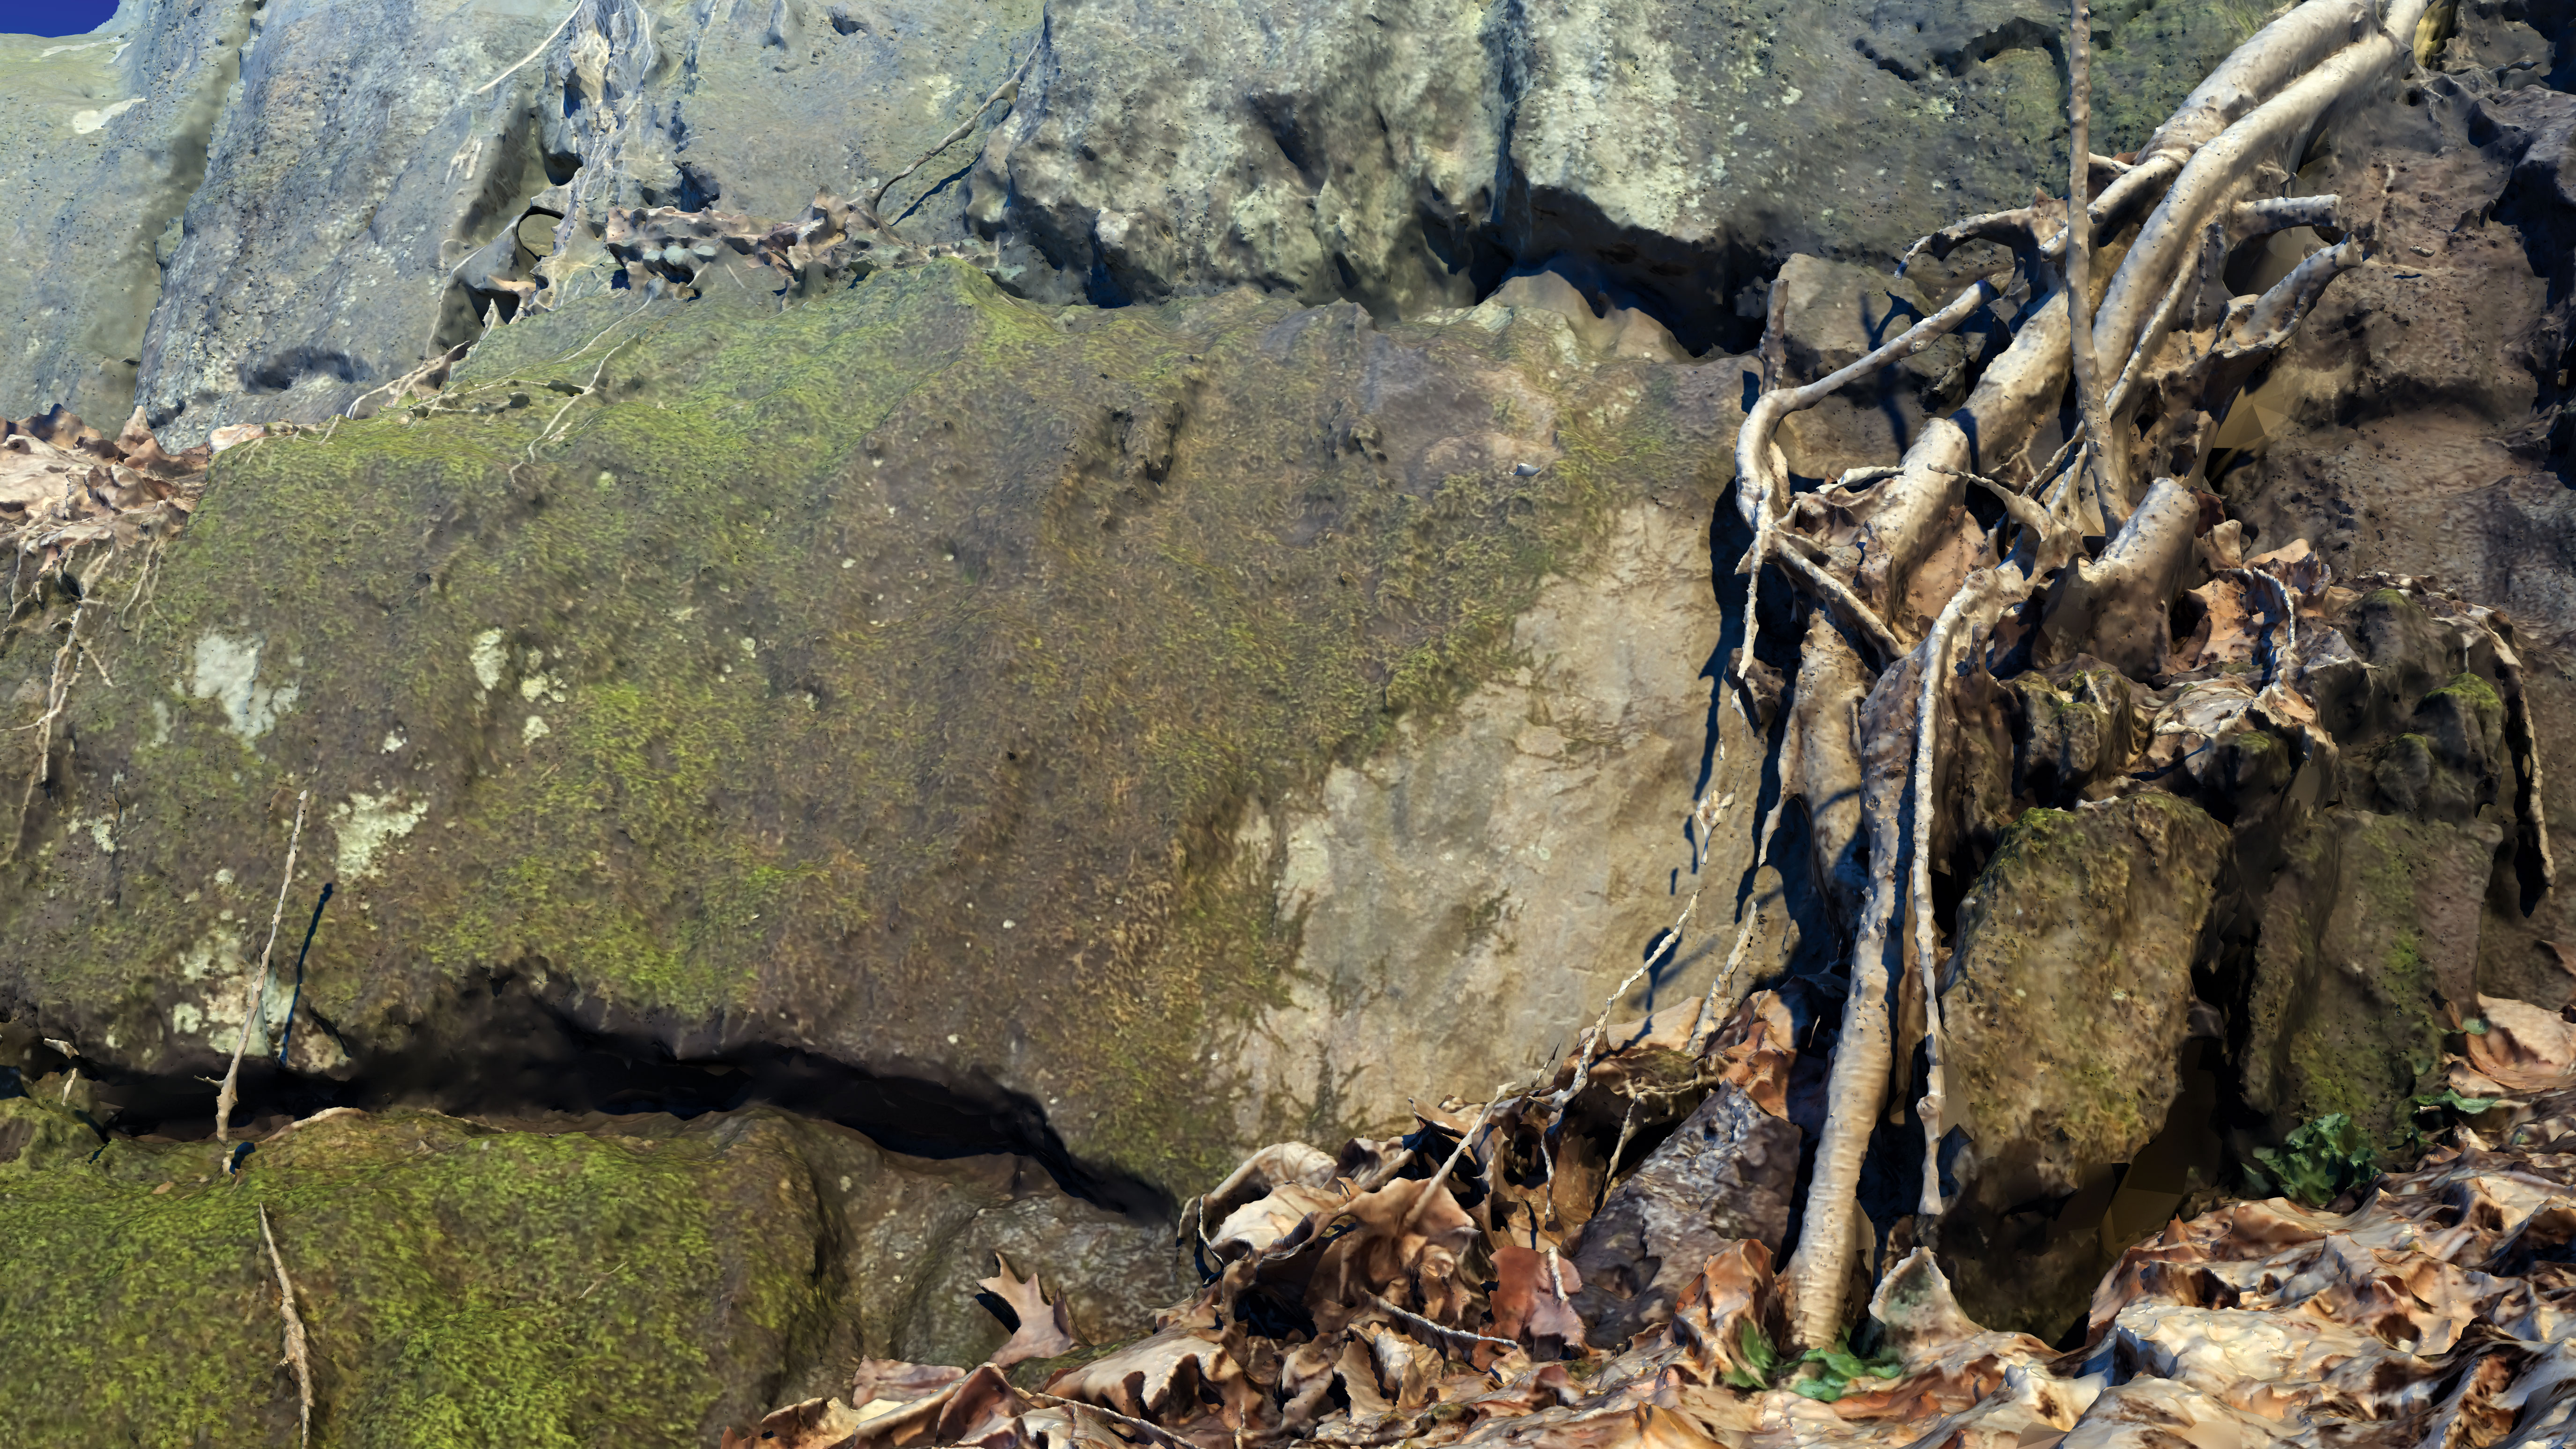
How to create 3D scans with Reality Capture
Use Reality Capture to make assets for a game background.
Sign up to Creative Bloq's daily newsletter, which brings you the latest news and inspiration from the worlds of art, design and technology.
You are now subscribed
Your newsletter sign-up was successful
Want to add more newsletters?
Reality Capture is a great way of making your own 3D scans. All you need is your camera and you can scan a range of objects to make your own assets – in this case, to use in game or animation backgrounds. This saves you creating your own models.
In this tutorial we’ll be doing some 3D scanning out in nature using any digital camera – see our best camera phones if you're in need of an upgrade – and the Reality Capture software. You can quickly build up a large collection of models to use in various projects or for one big job.
We’ll start with techniques for taking the pictures, then move on to Reality Capture where the pictures are loaded in, then aligned and turned into a point cloud in 3D space. Next we’ll look at merging the point cloud into a polygonal model with different levels of detail. See our roundup of 3D art for some modelling inspiration.
Article continues belowWhen you’re satisfied with the model, we’ll look at a couple of different ways to add colour texture (get free textures here). Finally, we’ll export the model and load it into 3D-Coat, where you can do some quick retopology and bake the textures and normal maps to a lower-resolution model so it can be used in your animation or game.
Download the files you need here
01. Select shooting equipment
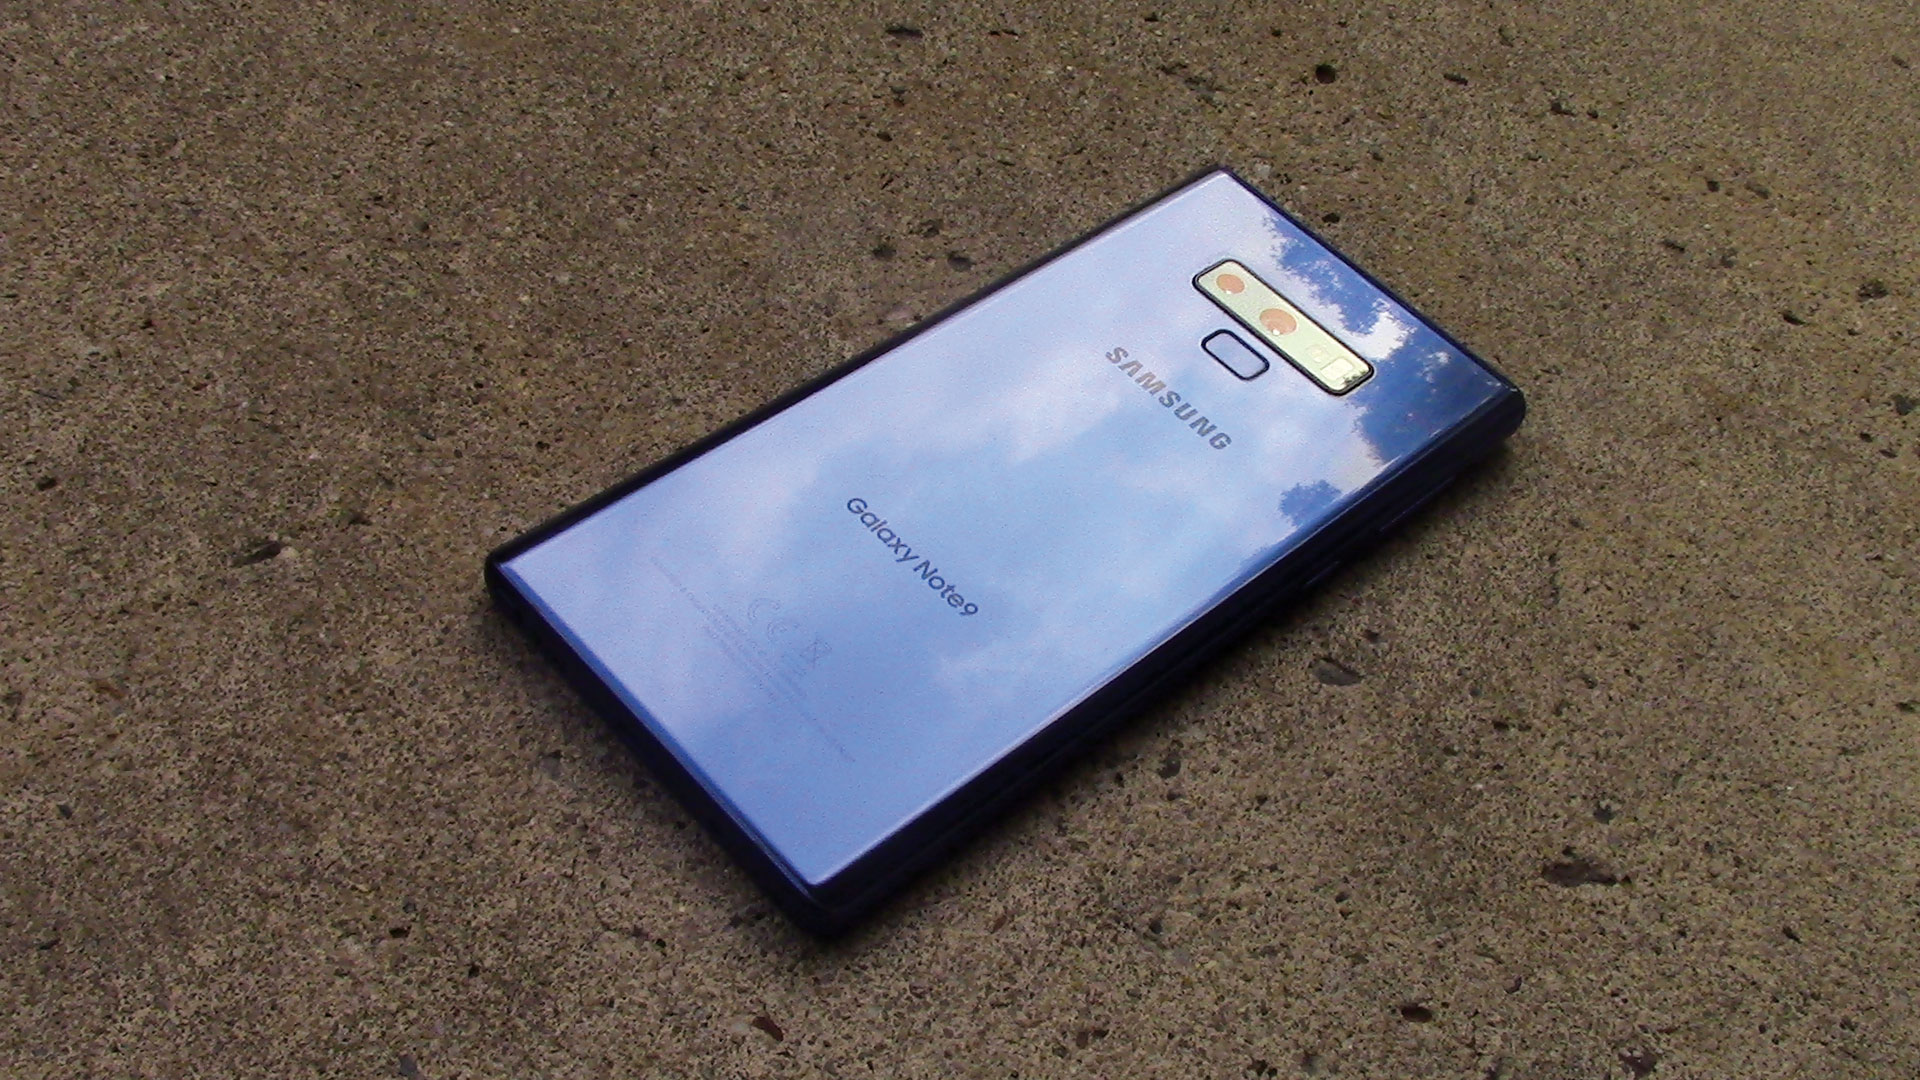
When shooting pictures for photogrammetry like we’re doing today, you don’t really need any special equipment, but there are some things you should keep in mind. For your camera you could choose a high-end DSLR or mirrorless camera, but you can also just use your smartphone’s camera. The main things that matter are getting the highest resolution you can and making the pictures as sharp as possible. It can also help to use a longer lens, either in your phone or other camera to avoid distortion.
02. Choose the right conditions
If you’re shooting outdoors you don’t have a lot of control over the lighting and shadows, and that is important because they will appear in your final texture and probably won’t match the lighting in your 3D scene. Choose a day when it’s overcast but not raining. Also keep in mind that photogrammetry doesn’t work well with objects that are transparent, shiny or smooth with little detail. The more random details the object has, the better.
03. Get the right shot
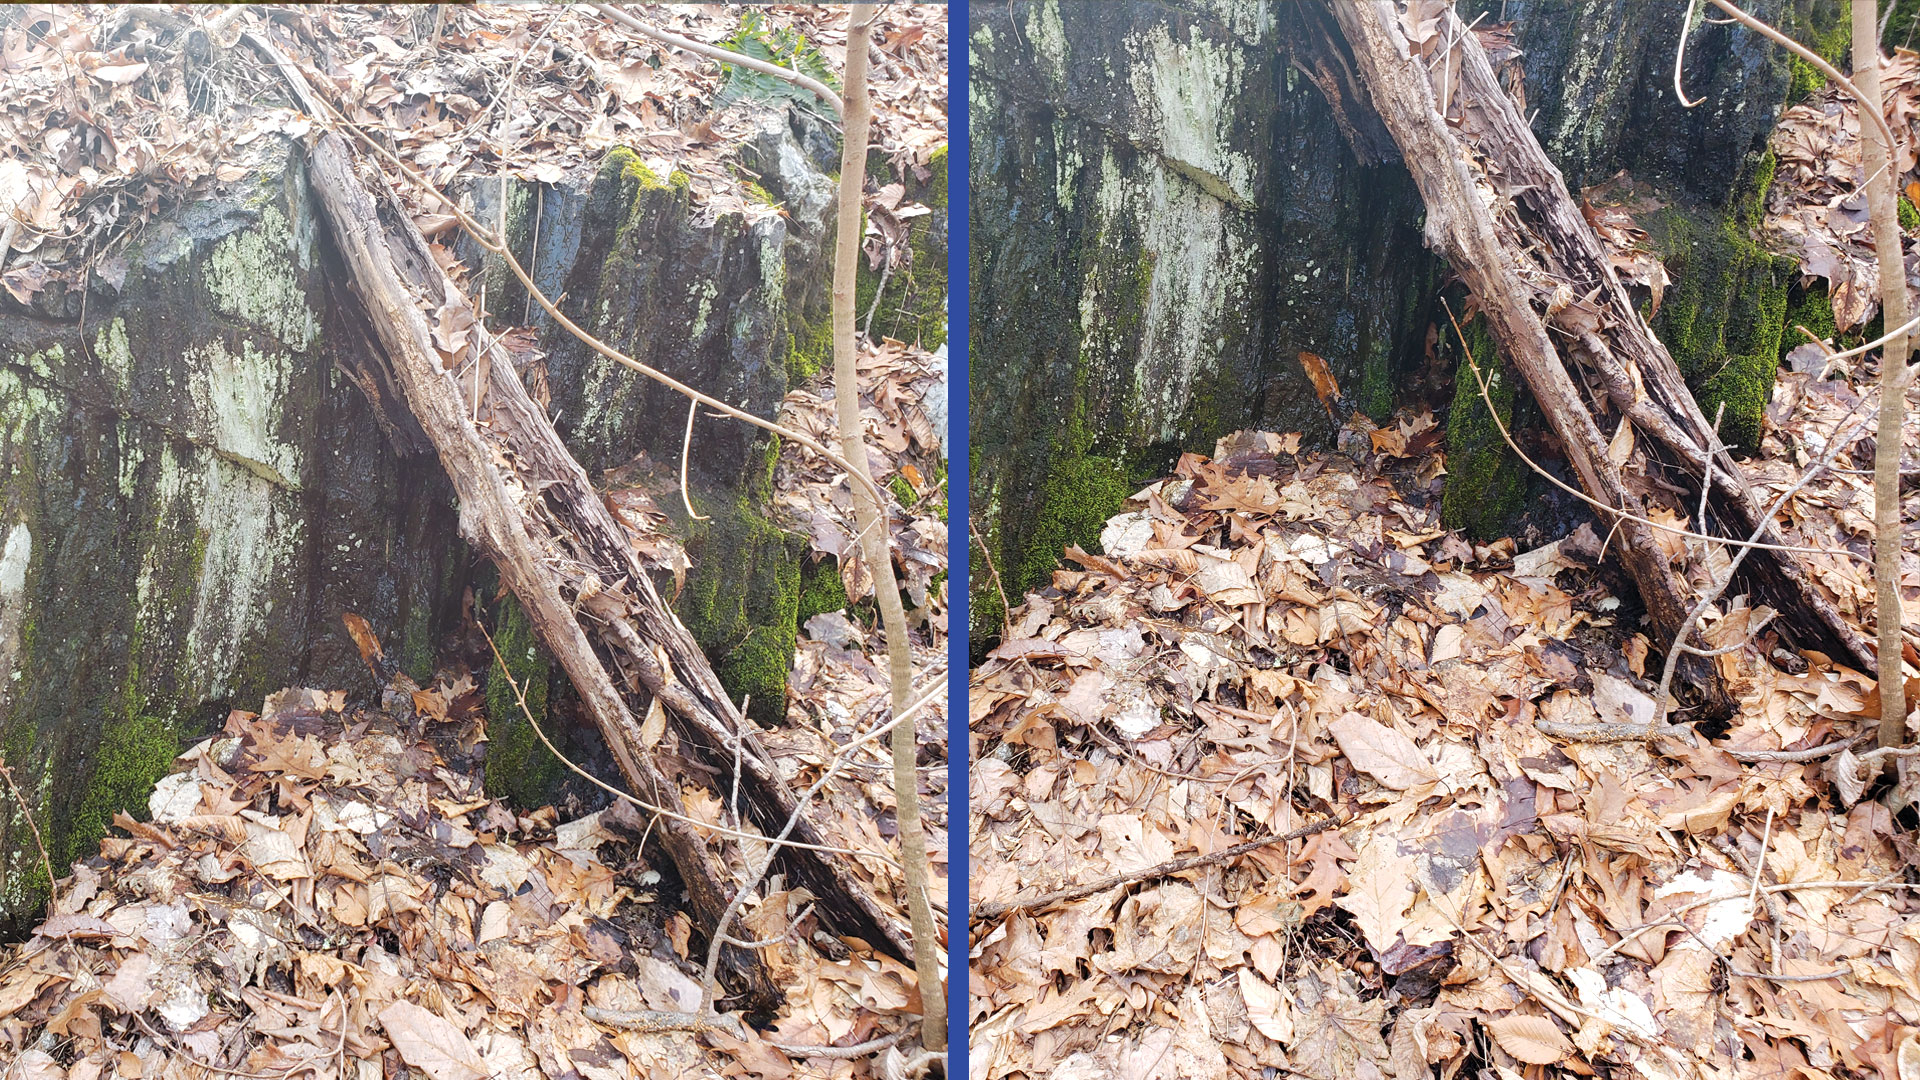
Ideally you’ll want to shoot as many pictures as you can, the more the better, but don’t just go shooting willy nilly. You’ll need at least two shots of every angle, one slightly offset from the other, and they should have at least 30 per cent overlap between them. A good technique is to shoot one, then take one step to the side, shoot again, another step to the side, etc until you get around the object or to the end of it. Then, raise the camera up or down and repeat until you have a grid of overlapping images covering every part of the object.
After you’ve shot the general images you can move the camera in close to get extra details in a specific area. Keep in mind the scale of the object in your 3D scene. If you’re scanning a large rock wall like in this tutorial you probably won’t need fine detail well over the character’s height. If this will be used further back in the distance you may not need fine detail at all.
Instead of shooting photos you may want to consider shooting a video. You need to make sure that it’s high quality and that you cover every part of the object. Try to keep your movement smooth to avoid motion blur. When you import the video in Reality Capture it will ask for a place to save frames from the video. By default it creates a folder in the same place as the video. It will also ask for the ‘jump length’ – the default is 1.0, which is one frame saved for every second of video, 0.5 would be two frames for every second, and so on.
04. Start in Reality Capture

Once all of our photos are shot we’ll transfer them to the PC. By default Reality Capture has one viewport showing Help. With the buttons along the top choose the two-viewport option. In the menu in the top right select 2Ds on the left and 3D on the right. Drag and drop your photos into the 2Ds side. In the 3D side you can navigate with your mouse. Right-click dragging will rotate around the object, left-click dragging will move the camera along the ground plane. Left and right together will pan and the mouse wheel will zoom.
05. Align the images
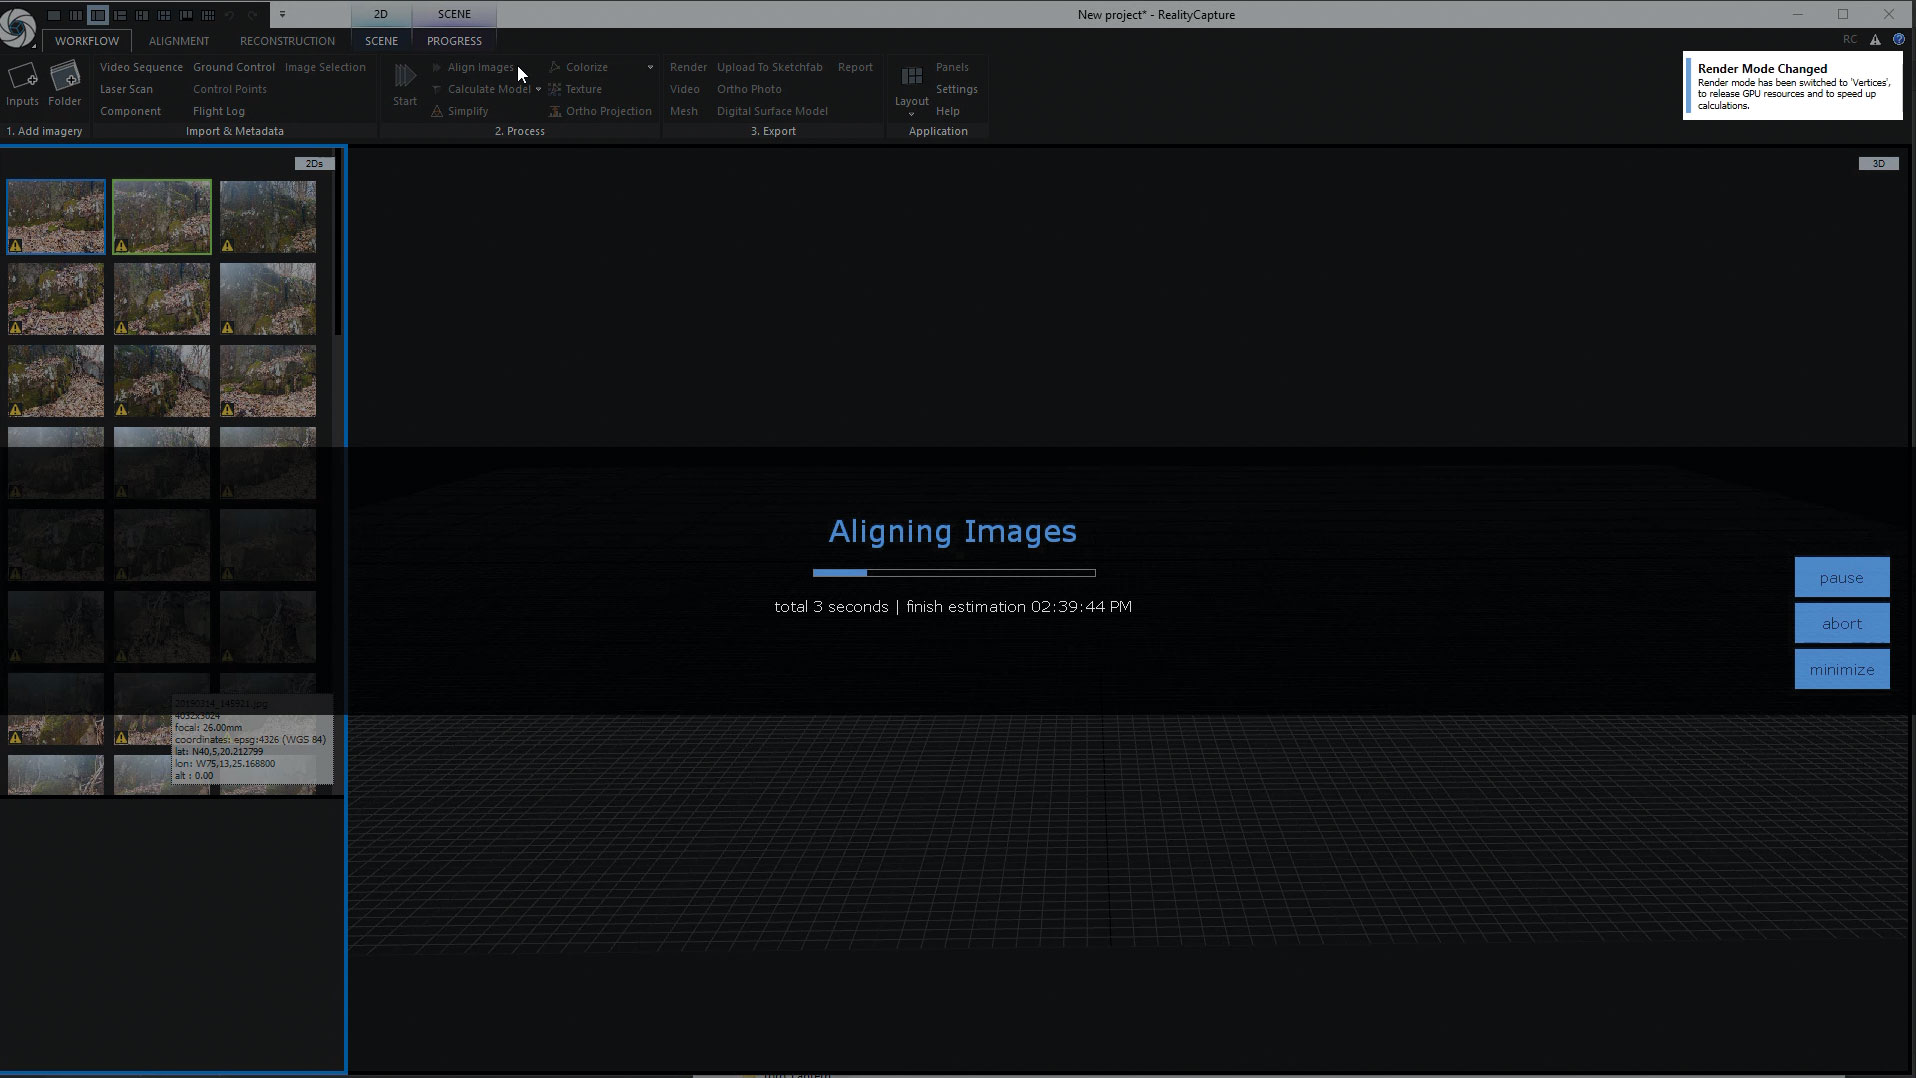
Along the top of the Reality Capture viewport you’ll find a ribbon similar to Microsoft Word. This is where we’ll spend most of our time, in the Workflow tab of this ribbon. On the Workflow tab there’s a big Start button that will do the entire scan with default settings, but it’s a better idea to go through each step individually, so let’s do that. Next to that button you’ll find six smaller buttons. Click the one marked Align and Reality Capture will start matching the images together. This should only take a few minutes.
06. Adjust the orientation

You’ll now have a point cloud that will give you an idea of what data was acquired. If you want to rotate the object to face it up, go to the Reconstruction tab and click Define Ground Plane. You can now use the gizmo that appears to adjust the orientation of the model. For more accurate adjustment you can choose the camera angle from the Display dropdown on the Scene tab.
07. Remove unneeded data

You’ll probably notice that a lot of elements surrounding the object got picked up that you don’t really want, and if you rotated the cloud the surrounding box is now at a strange angle. This box defines what parts of the cloud will be calculated. On the Reconstruction tab click the small arrow on the Set Reconstruction Region drop-down menu and pick Set Region Automatically. This will adjust the box to fit the point cloud and be right side up. You can then use the coloured dots to adjust the shape of the box to get just what you need.
08. Create the mesh

Let’s go back to the Workflow tab. You’ll find the Calculate Model button with a down arrow on it. In this menu there are three options for quality: Preview, Normal and High. Preview is really good for processing the images very quickly and to see if you need to take any more pictures. Normal is fine for most situations. High will give you the most detail possible, but will take much longer to process and will need a lot of video RAM to display a complex model like ours. Depending on your PC these can take anywhere from a few minutes to an hour or more.
09. Decimate the mesh
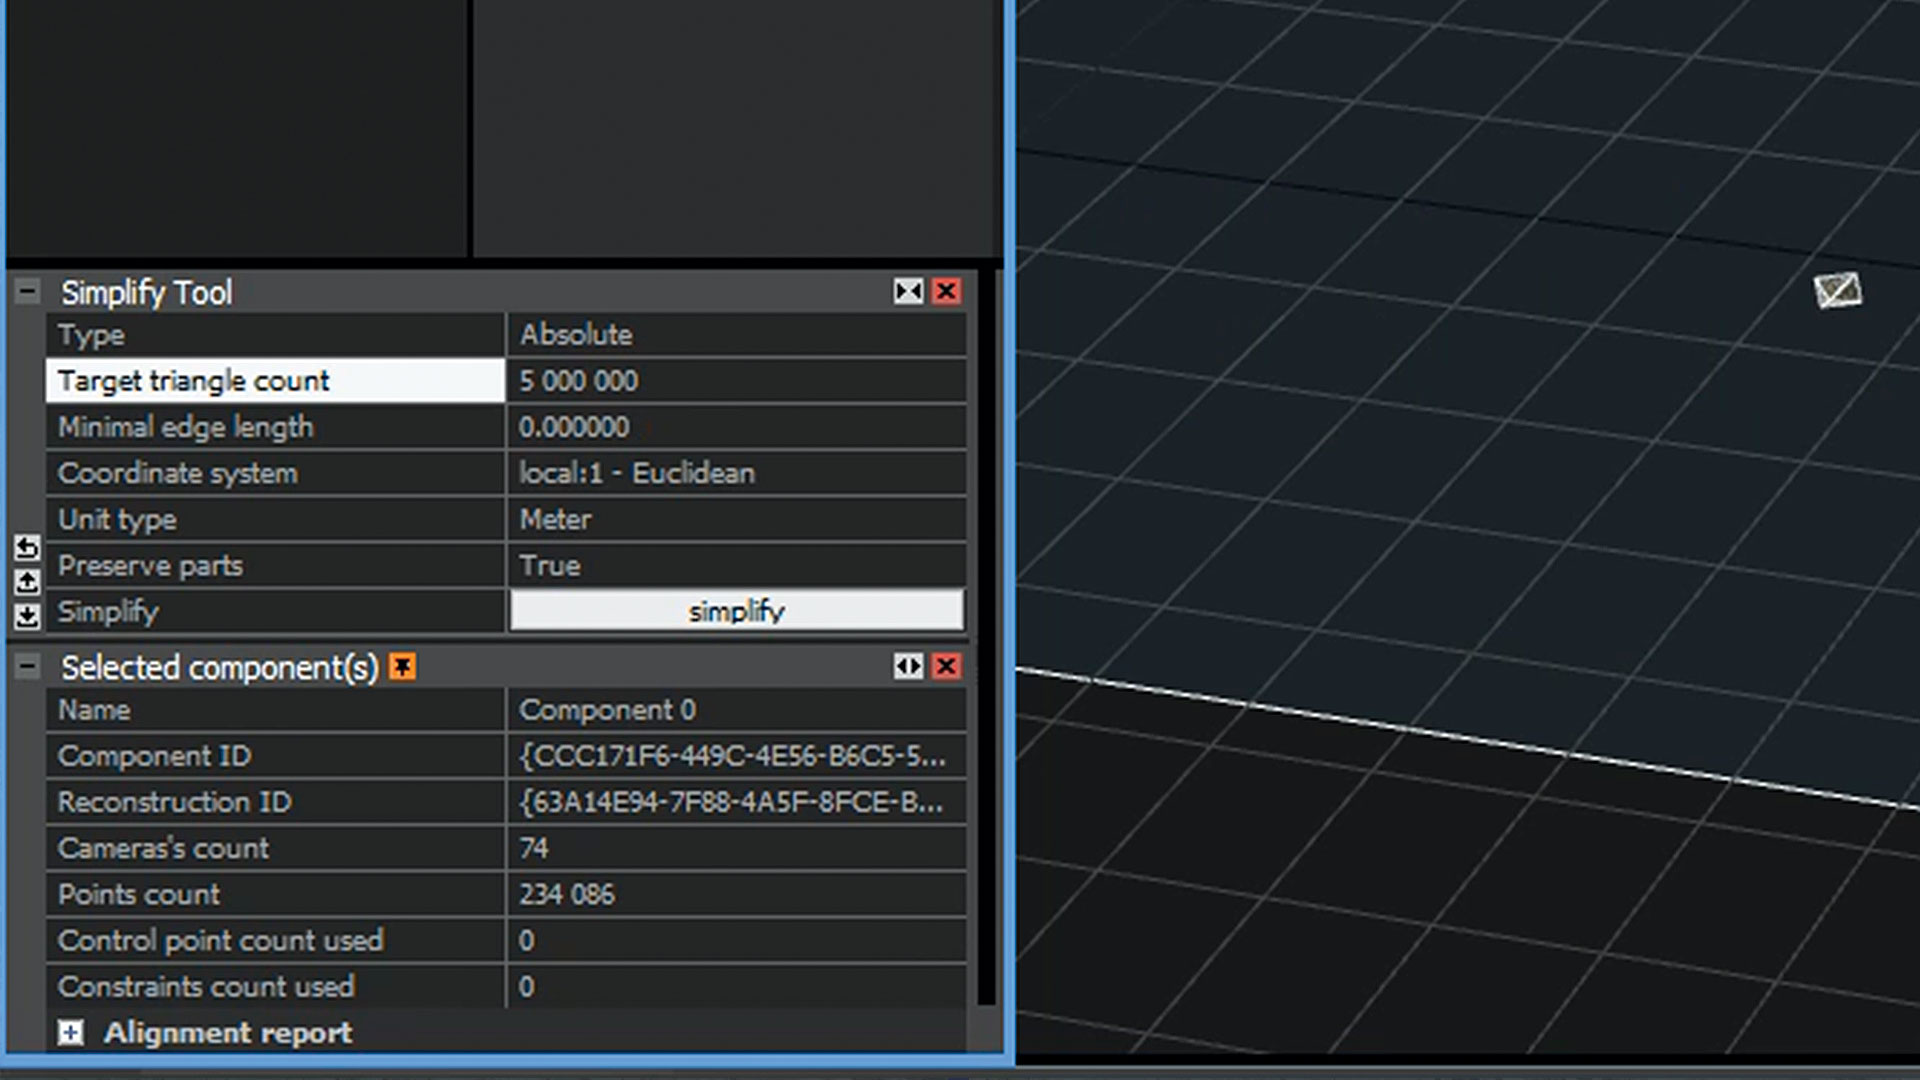
This step is optional depending on your needs. The mesh will be very dense, so you can reduce the poly count if you like. If you switch the left viewport to 1Ds and expand Component 0 you’ll see the current models appear and their triangle count. On the Workflow tab next to the big Start button is Simplify. Click that and settings will appear at the bottom of the left viewport. Here you can choose the triangle count you want and click Simplify at the bottom.
10. Texture the model
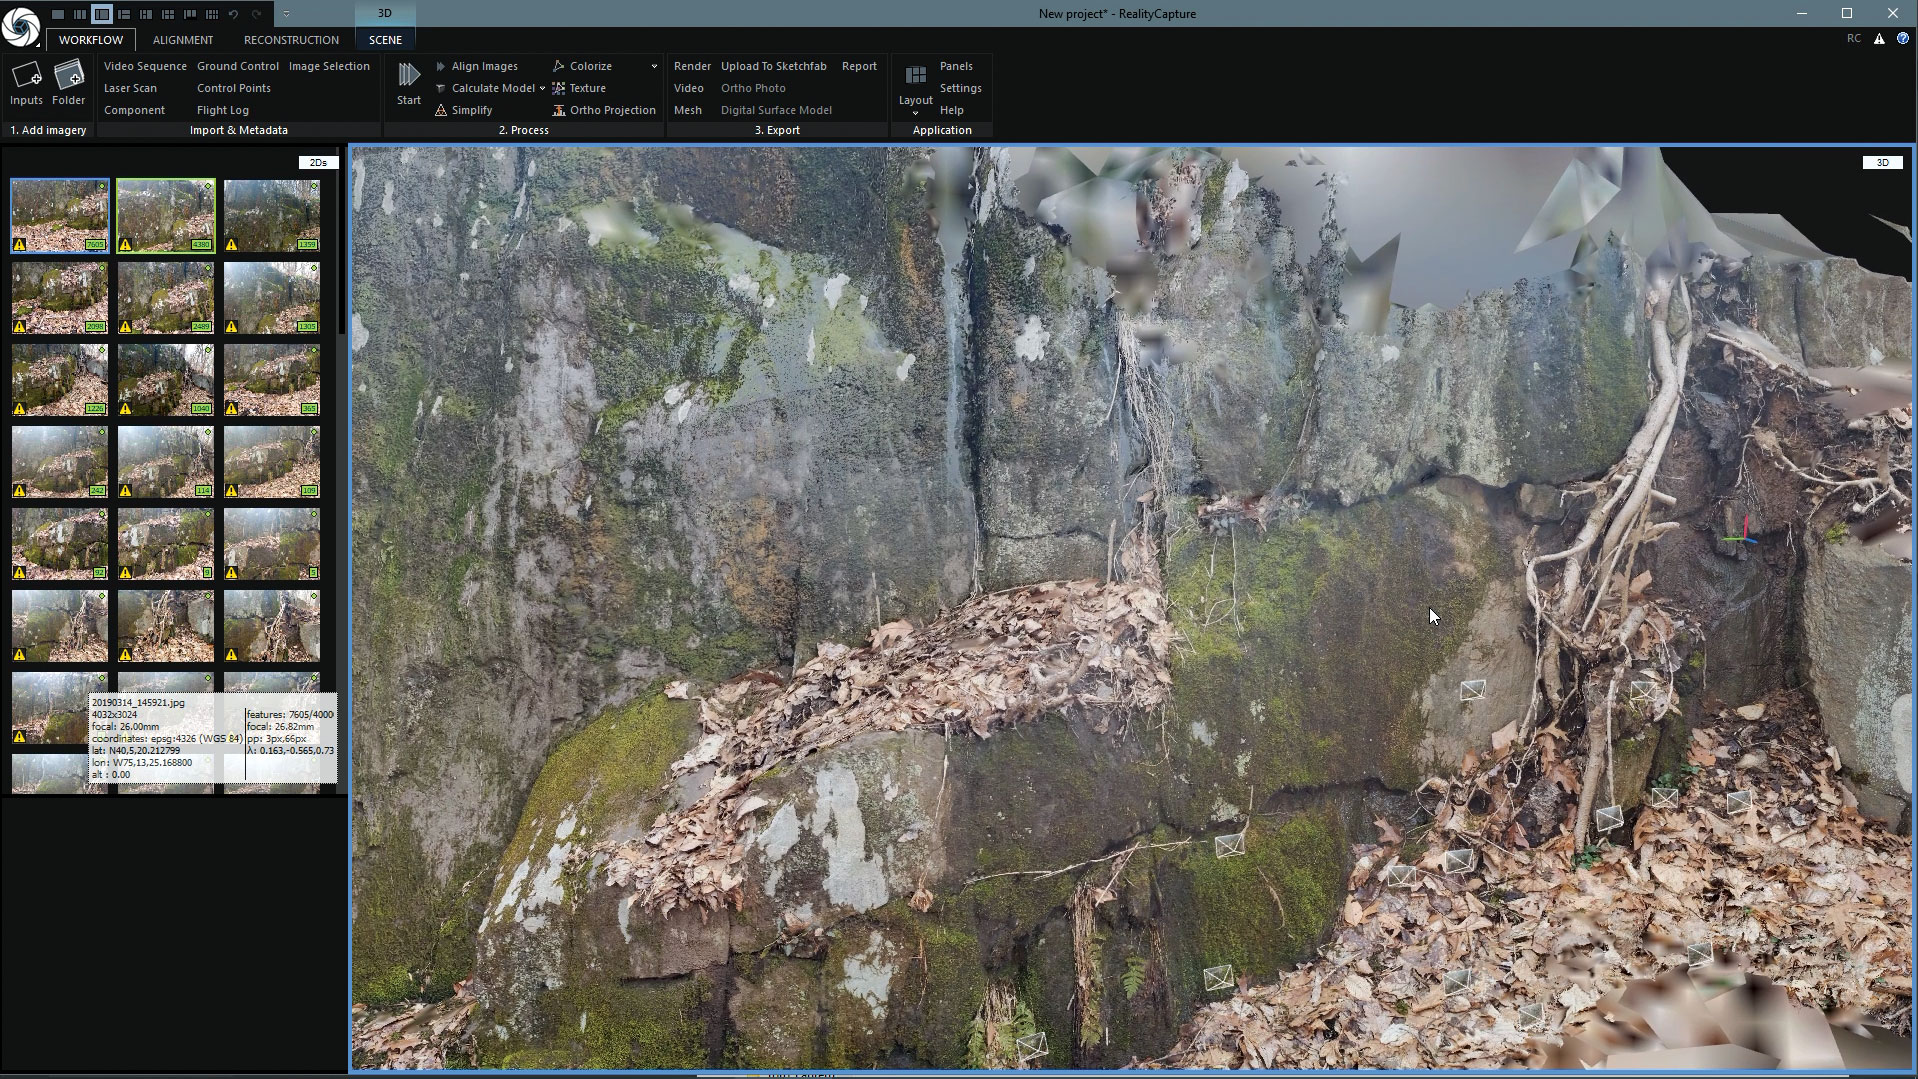
Back in the Workflow tab again we have two options for applying colour. Colourize will simply colour the vertices. This detail will depend on how many vertices your mesh has. A low-poly mesh will give poor texture quality here. The Texture button will generate a UV map and bake the colour to an image for you. You’ll often find that this gives the best results and the exported model can be used in any software that accepts image textured models.
11. Final cleanup
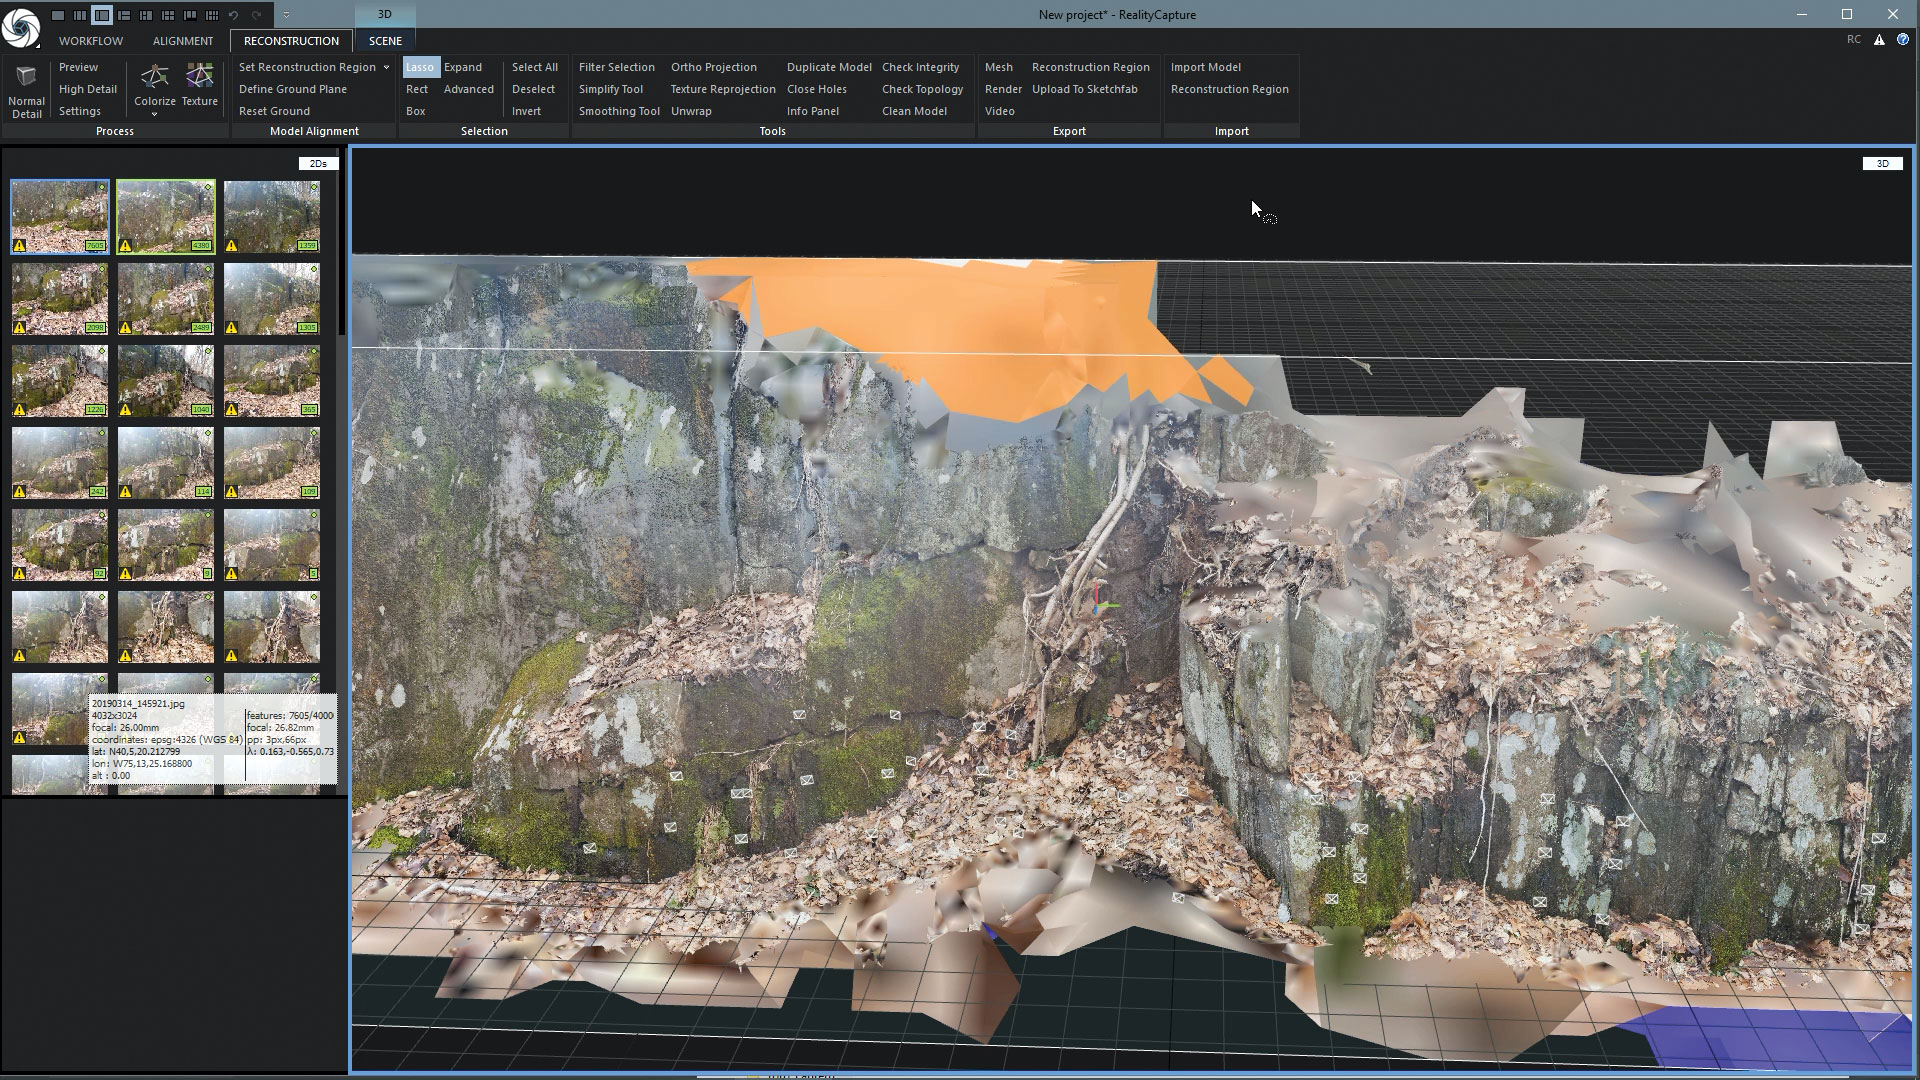
You’ll probably still have some parts of the scan that you don’t want to keep. On the Reconstruction tab in the Selection area there are tools for Lasso, Rectangle and Box. You can use these to select areas to delete. Remember, in the Scene tab you can choose the camera angle to make it easier. After each selection hit the Filter Selection button next to the selection tools to remove those polygons.
12. Export the mesh
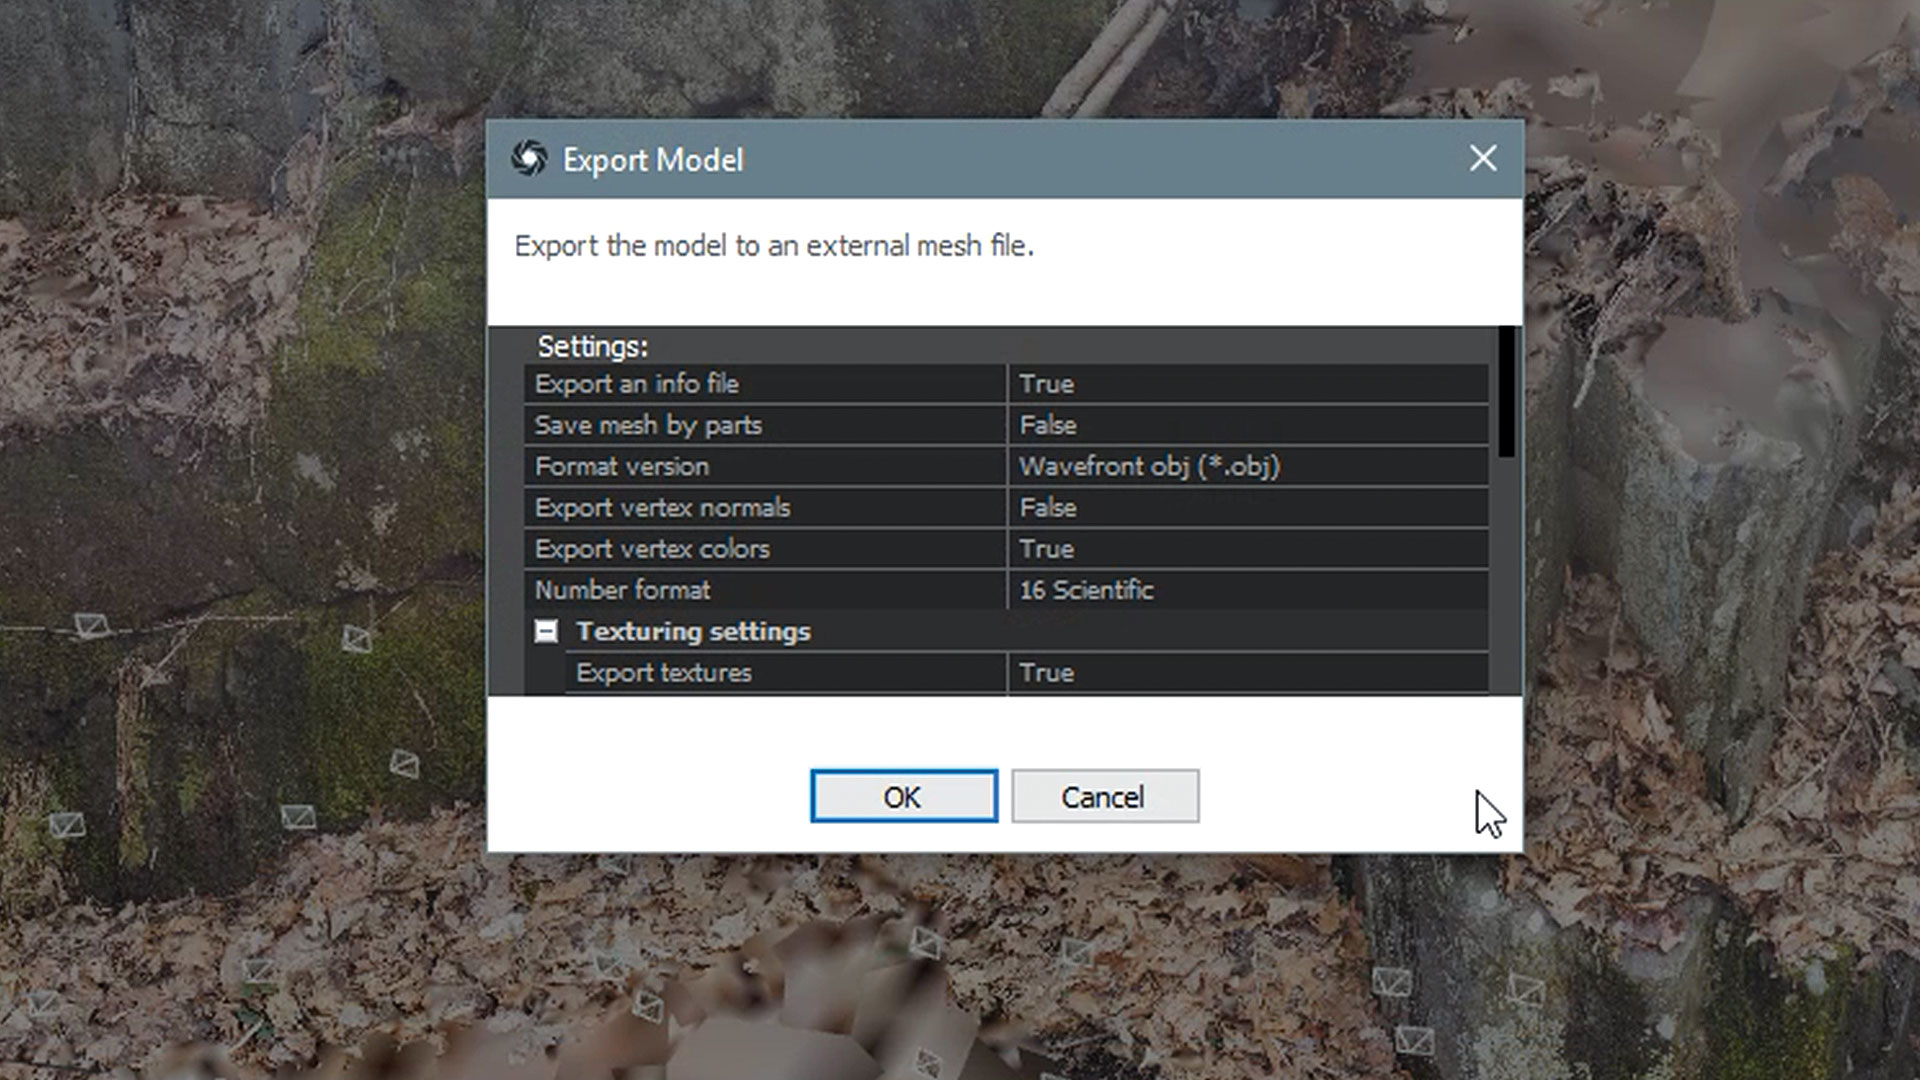
When finished find the Export section of the Workflow tab and the Mesh button. Click that and choose the file name and location. In the next window a number of options are presented but the defaults should be fine. If you wish you can choose a different image file type and resolution, keeping in mind that a big model in your scene like this rock wall will need a high-resolution texture to maintain close-up detail.
13. Start retopology in 3D-Coat
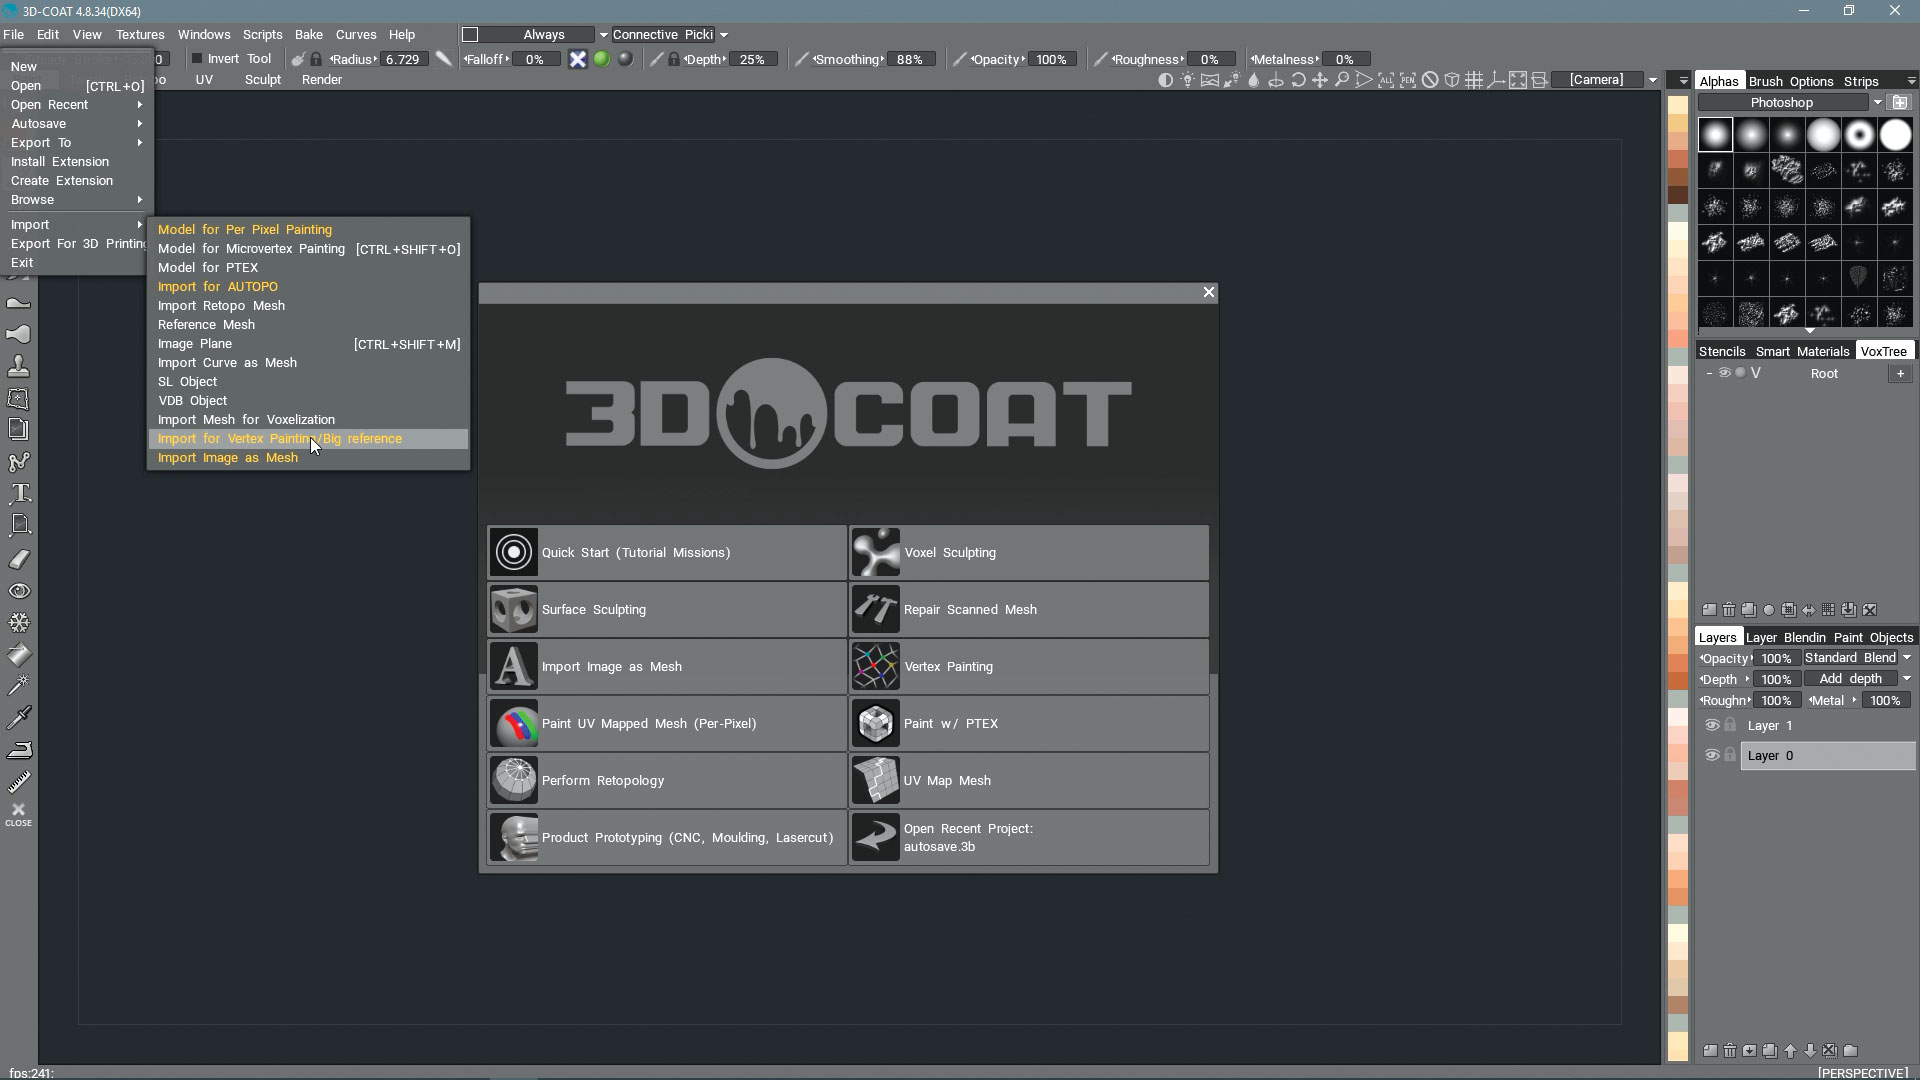
In order to use this scan you’ll probably want to retopologise it. Let’s open 3D-Coat and choose File > Import > Import For Vertex Painting/Big Reference. The model will load in the Paint room so for now let’s switch over to the Sculpt tab. If you find the object is at a strange angle, find the Transform tool in the Spacebar menu or on the left toolbar and use the gizmo to rotate it. While holding Alt you can rotate with RMB, zoom with LMB, and pan with MMB.
14. Use the VoxTree panel

Look at the VoxTree panel. If you don’t have it, get it from Windows > Popups > VoxTree. Right-click the object in there and pick AUTOPO, then Instant Meshes (Auto). After a moment you’ll be asked what output polycount you want. Let’s choose about 7,000 and click OK. This with generate a retopo mesh with almost all square polygons.
15. Create a UV map
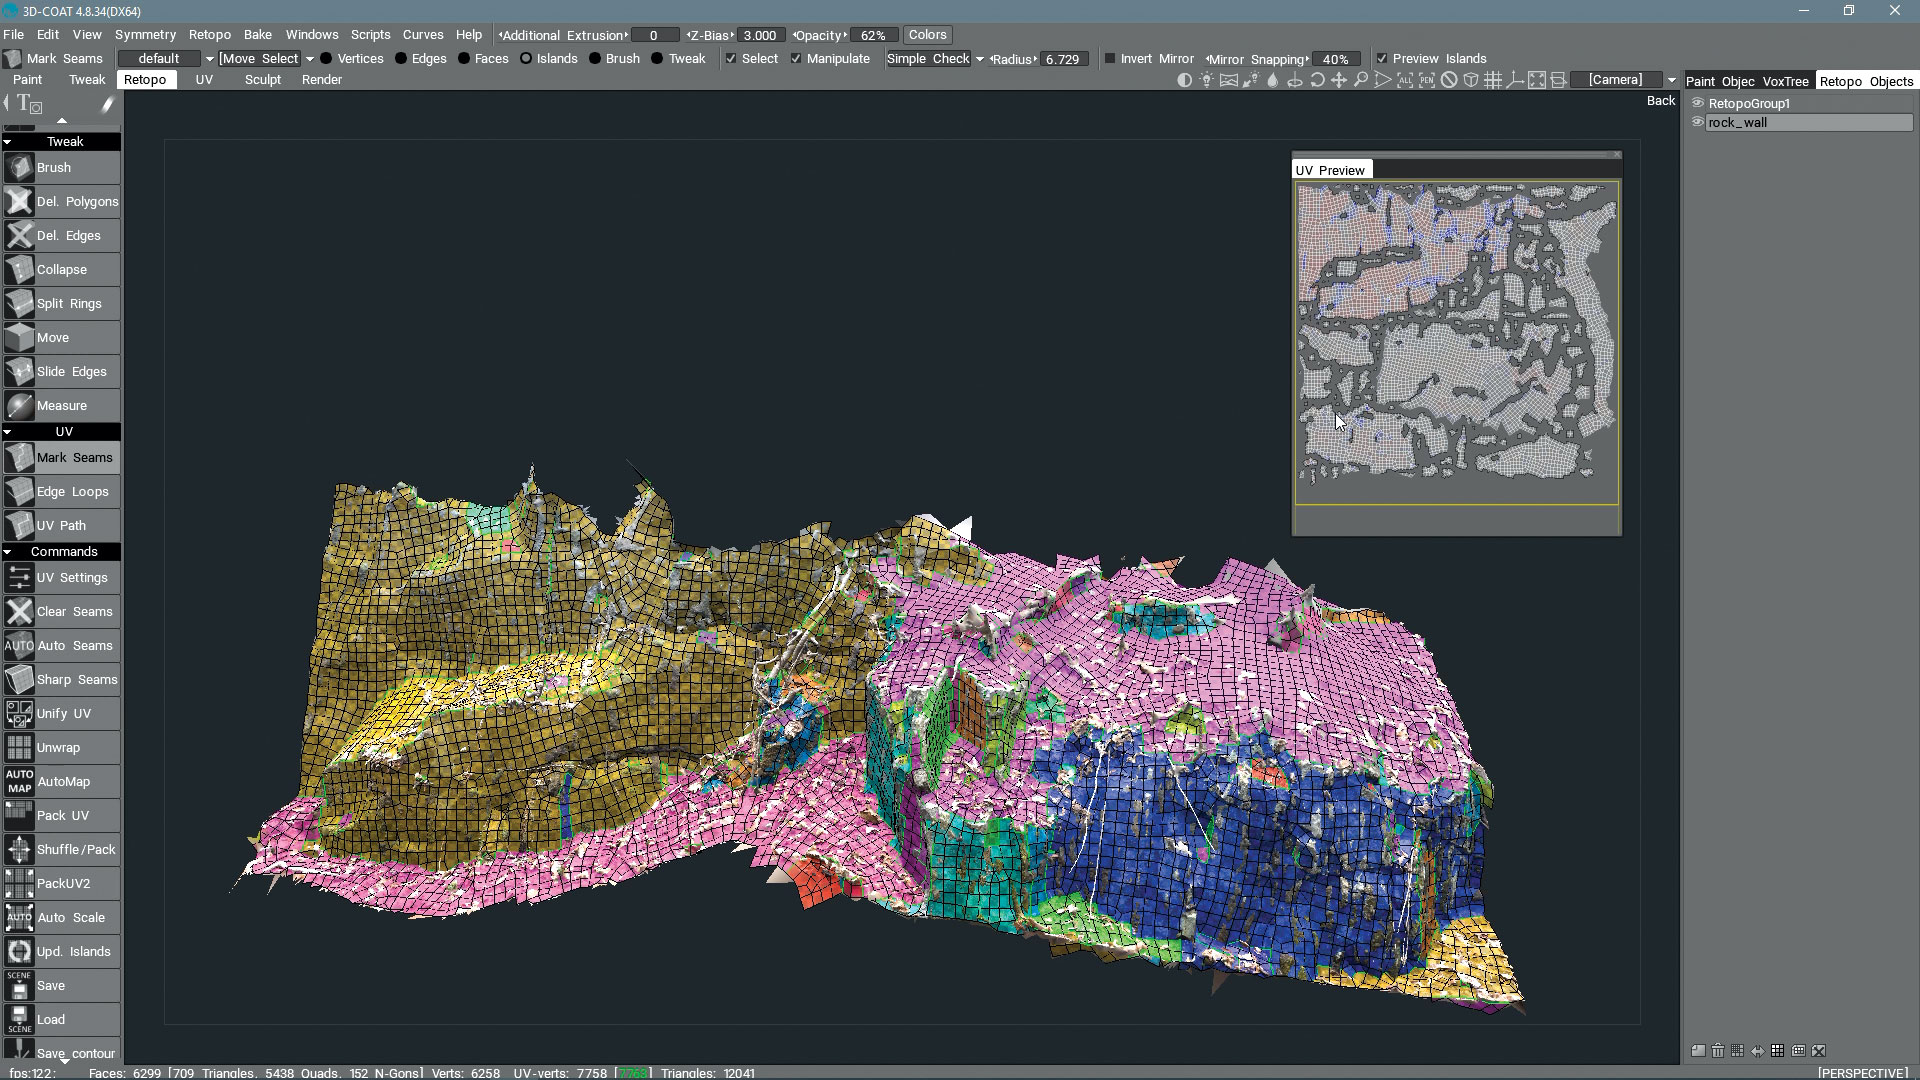
We’ll need to unwrap this new mesh so the flat texture can be applied to it. On the left toolbar of the Retopo room click Mark Seams. Some new tools will appear underneath. Choose Auto Seams and it will create seams on the mesh; for a static object like these rocks the autoseams should be fine. Click the Unwrap button under that and the UV map will be created. You can pick Pack UV or Pack UV2 if you want to try fitting them better on the map.
16. Bake the new mesh
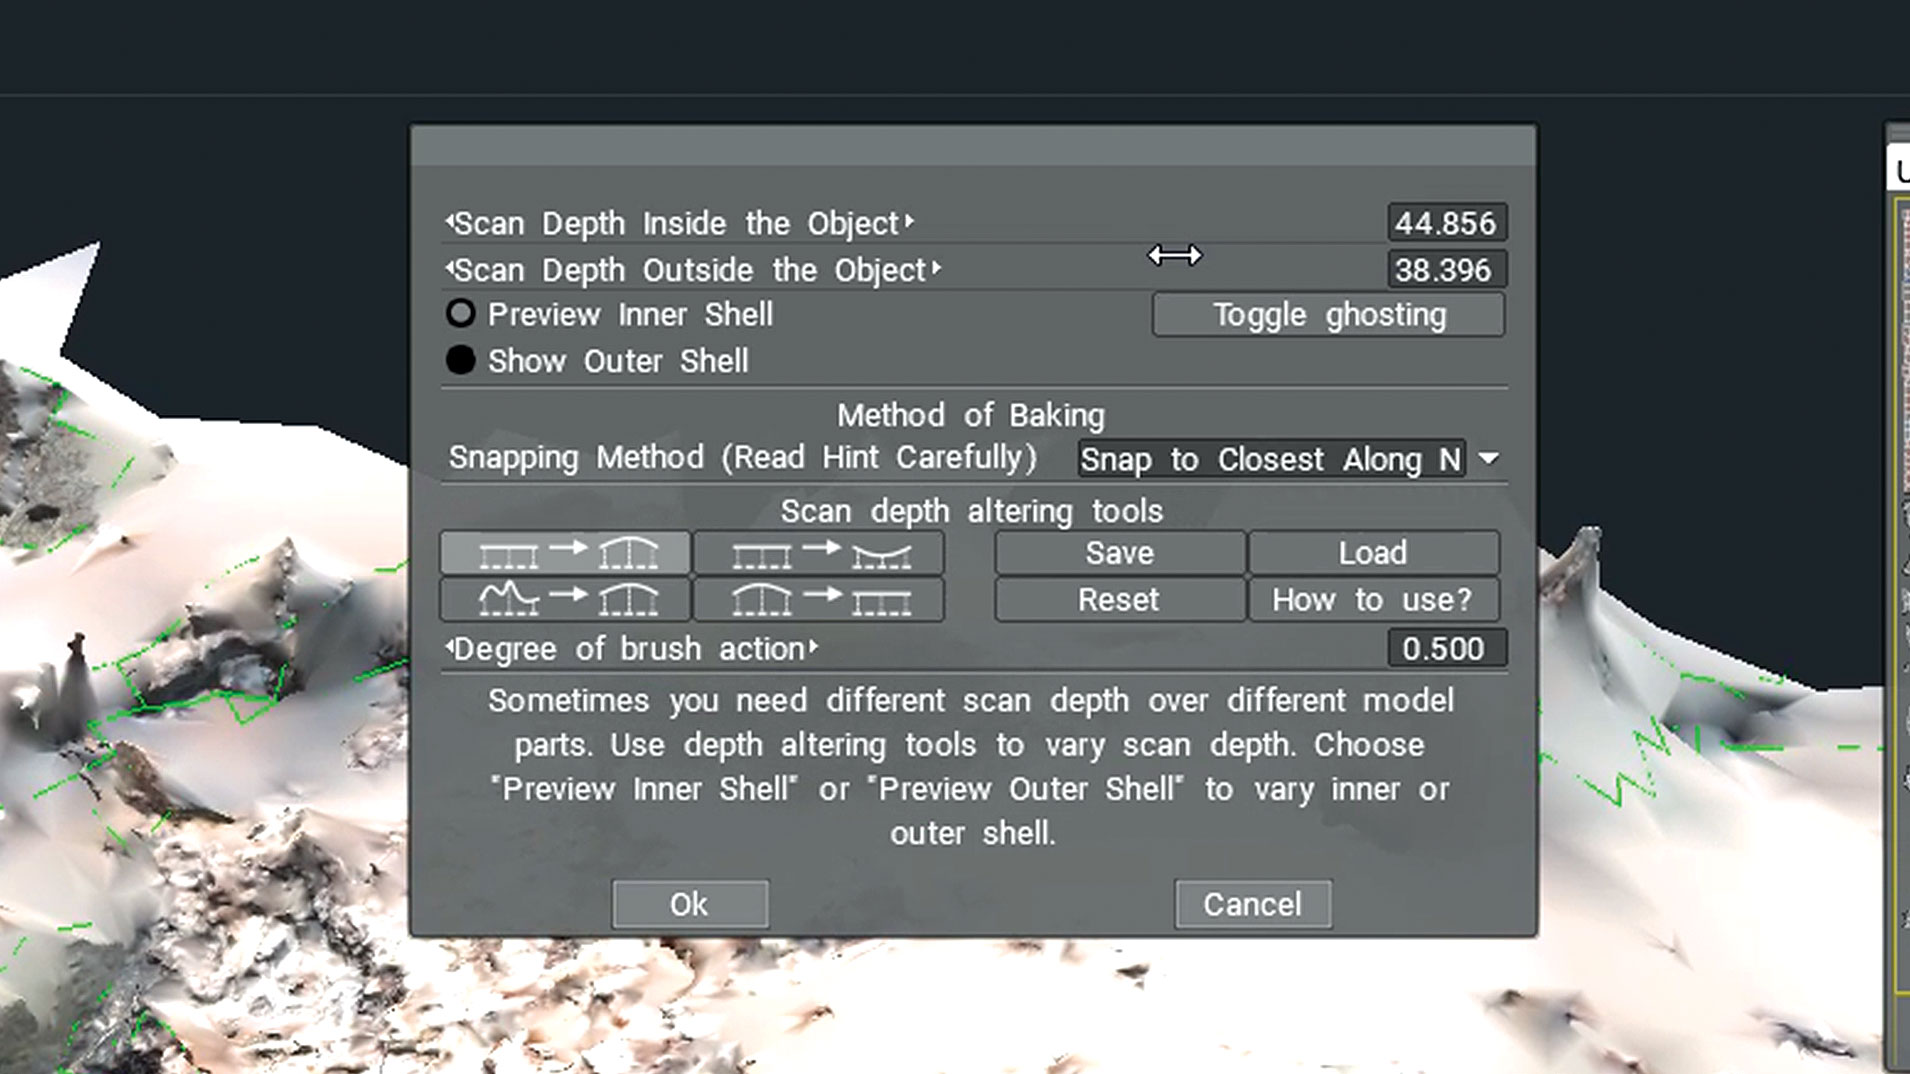
Now let’s bake the colours and normal maps from the high-res mesh down to the new one. Under the Bake menu choose the highlighted option, Bake w/ Normal Map (Per-Pixel). In the window pick Outer Shell and drag the Outside Depth slider right until you can no longer see the original scan mesh, then do the same with Inner Shell and Inside Depth until you can’t see the retopo. Click OK and on the next panel turn on Auto Smoothing Groups, set to about 68. Choose the texture size, 8,192 for both, then click OK.
17. Export your new model
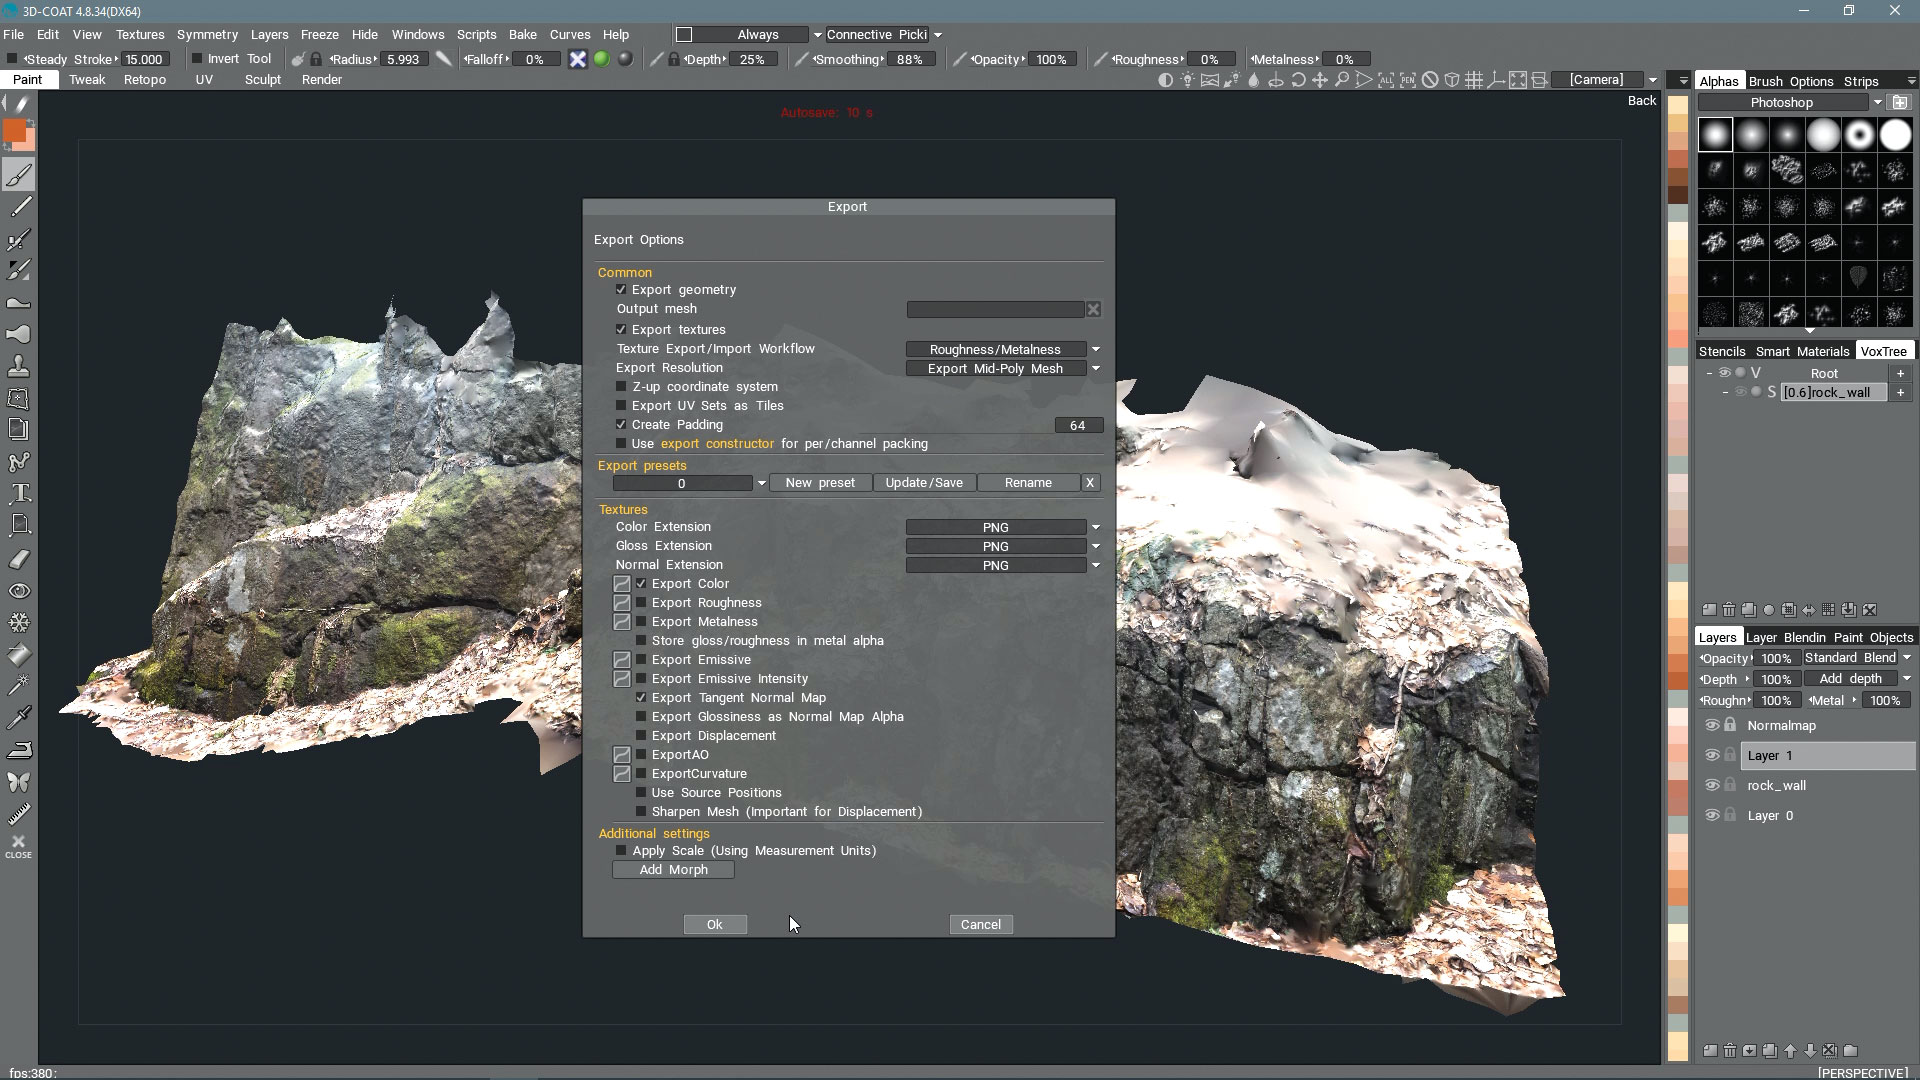
We can now go to the Paint room and we can hide the original mesh on the VoxTree. There’s your final mesh with full textures and normal maps! The W key will toggle wireframes if you’d like to see them. To export go to File> Export Objects & Textures. Choose a file name in the Output Mesh box. Next make sure boxes are ticked for Export Textures, Export Color and Export Tangent Normal Map. Click OK and you’re all done!
This article originally appeared in issue 133 of 3D Artist. Buy issue 133 or subscribe here.
Read more:
Sign up to Creative Bloq's daily newsletter, which brings you the latest news and inspiration from the worlds of art, design and technology.
After spending five and a half years in school for art, animation and film, Phil has worked as a freelancer for about 16 years. He also makes 3D models that you can buy as 3D prints.
