How to create a digital oil painting using ArtRage
Follow this 10-step tutorial to create a digital portrait in ArtRage.
Sign up to Creative Bloq's daily newsletter, which brings you the latest news and inspiration from the worlds of art, design and technology.
You are now subscribed
Your newsletter sign-up was successful
Want to add more newsletters?
Painting digitally using a drawing tablet and drawing software ArtRage. Using on a graphics tablet or mobile device means that you are not tied to just the office or studio – you can paint anywhere.
In this tutorial, we'll show you how to create a believable digital portrait using only the pixels on the screen (to help you get set up, see our ArtRage introduction). If you don't already have a suitable touchscreen device, check out our pick of the best graphics tablets.
We’ll take you through each step of the process, from creating a new file and loading up a reference image, to sketching out ideas and thumbnails, making initial realistic pencil drawings right through to blocking in and adding thick textured paint. We'll also show you how to add some final digital flourishes before explaining how to save your finished digital artwork, ready for printing.
Article continues belowPainting digitally is pretty much the same as painting with real oils and acrylics, so hopefully the process won’t feel too alien if you come from a fine art background. The tutorial helps to show how the screen really does become a canvas before you.
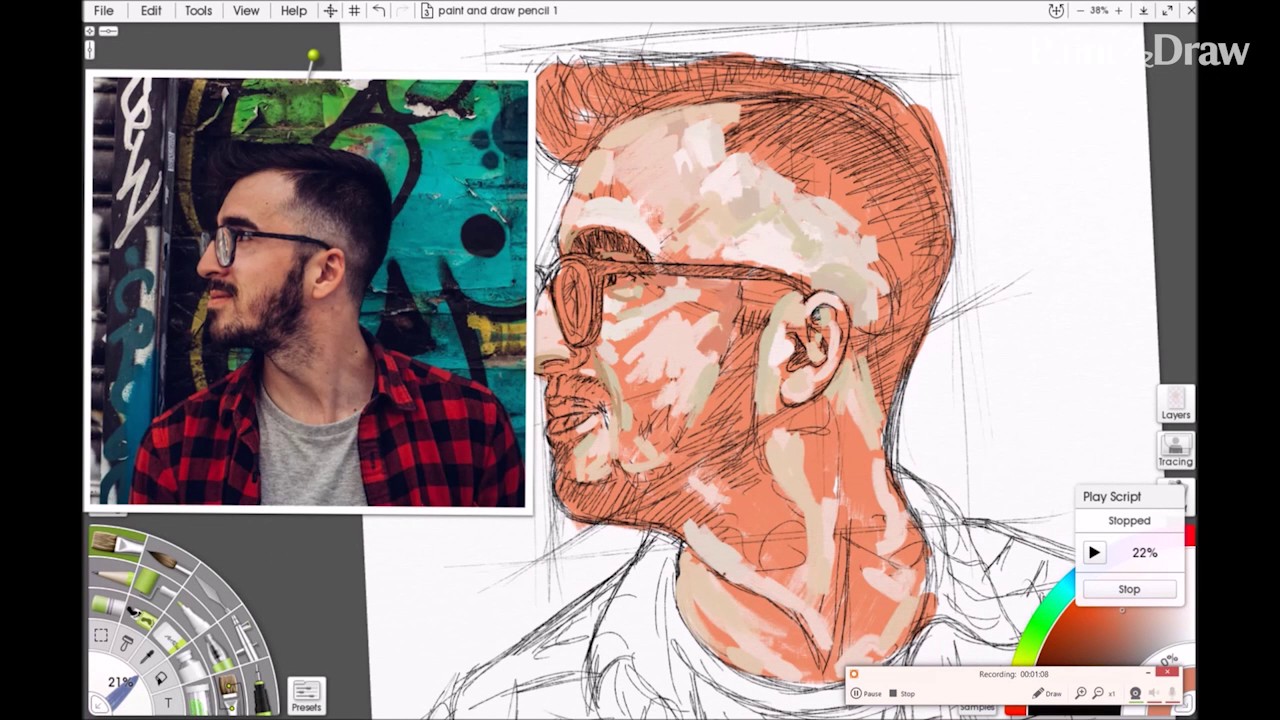
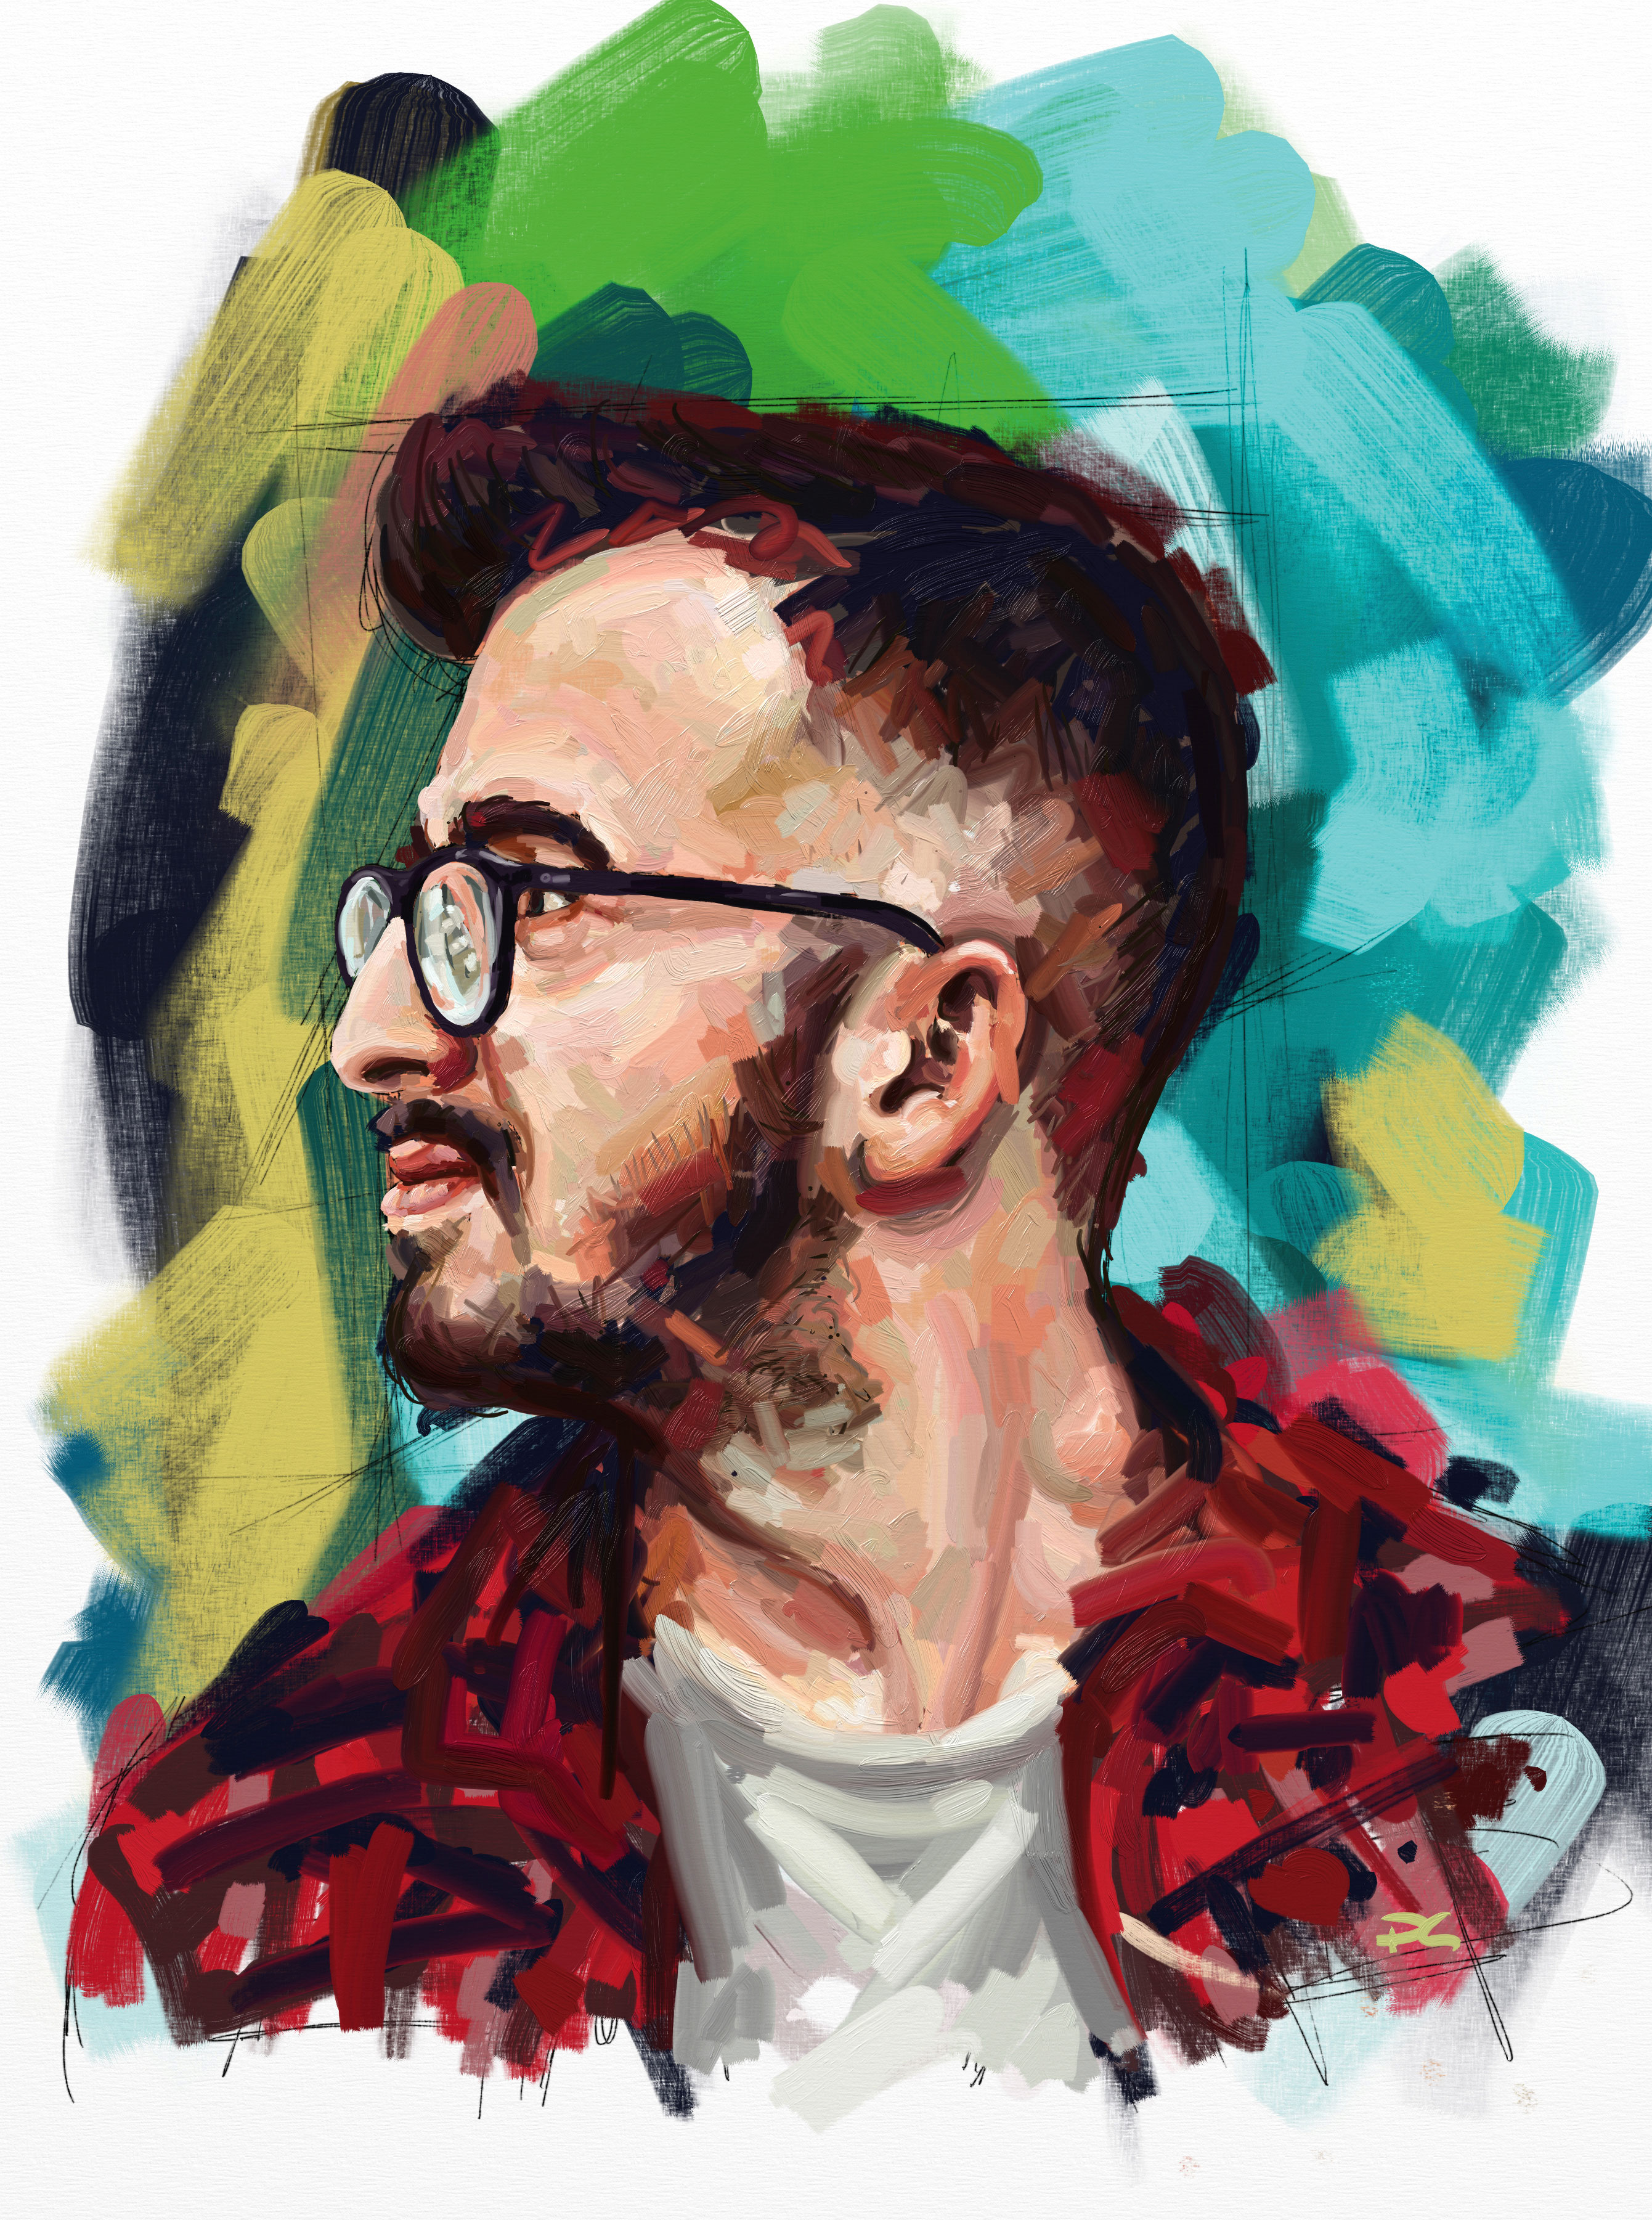
The portrait we're walking you through here is of a young man in a modern setting. We'll keep the paint loose and choppy to create movement and interest while maintaining a vibrant feel, all the while adhering to real-world painting techniques.
Follow the steps below to learn how to create your own portrait in ArtRage, and watch the video above to help you along further.
01. Pick a subject
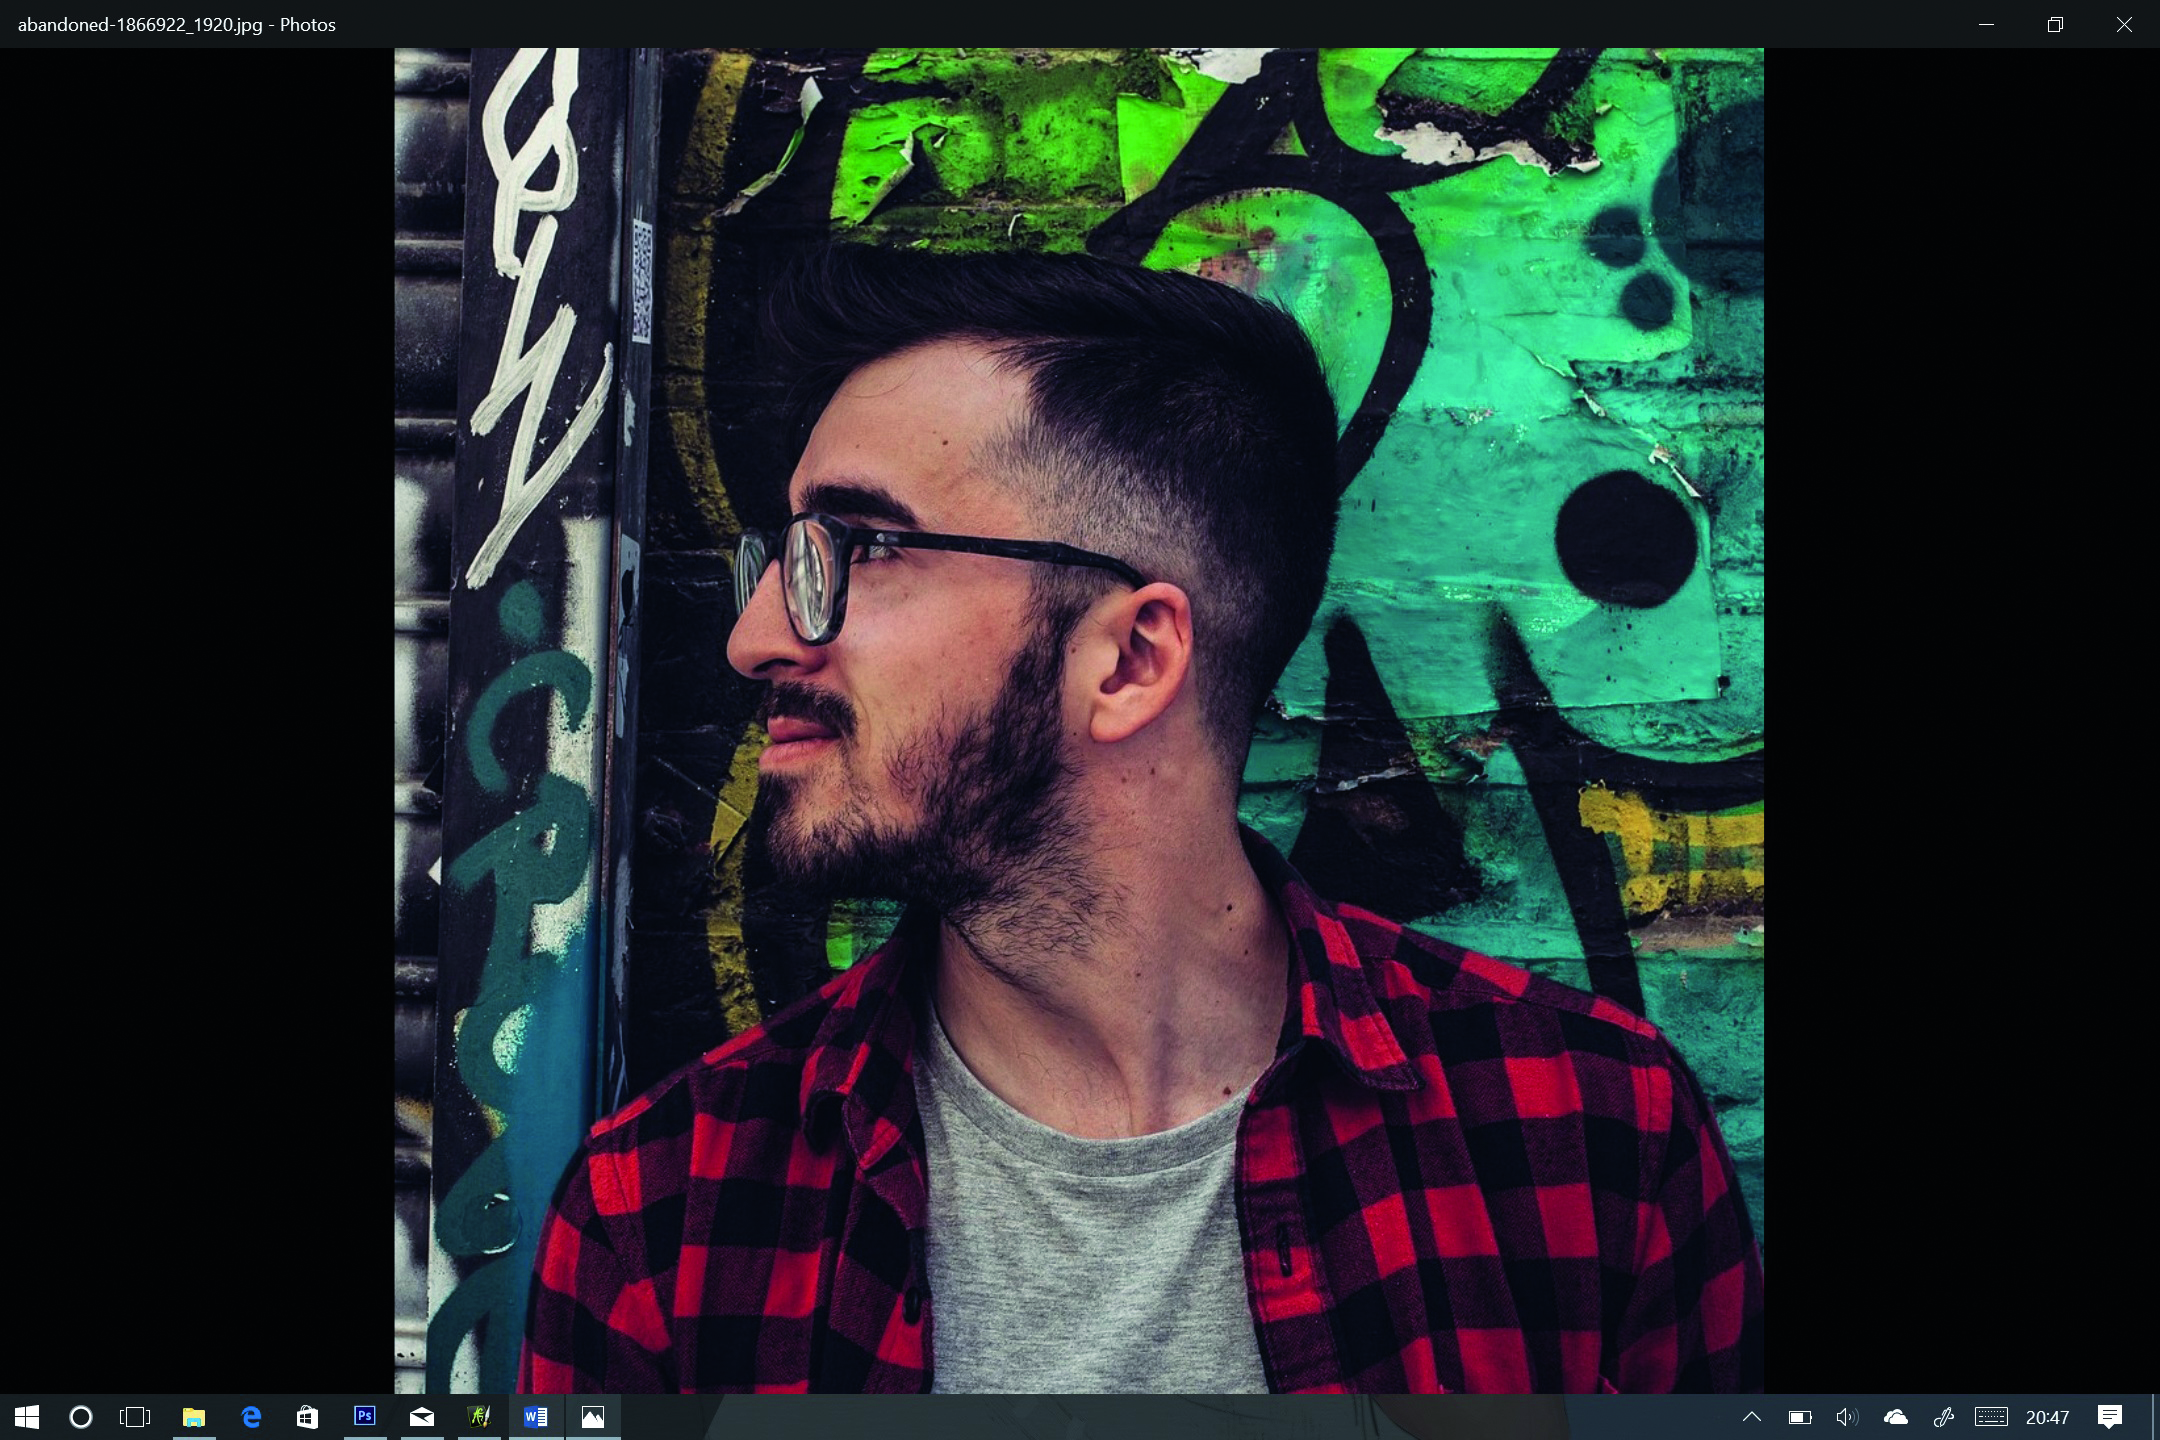
It can sometimes be a bit of a struggle to source a model, or royalty free images that you are allowed to draw from. No need to worry, as with a bit of searching you can find a plethora of websites that have stock images ready for you to use. Pixabay or Flickr Commons have a vast array of great reference images, for example.
Sign up to Creative Bloq's daily newsletter, which brings you the latest news and inspiration from the worlds of art, design and technology.
02. Create a new file for your painting
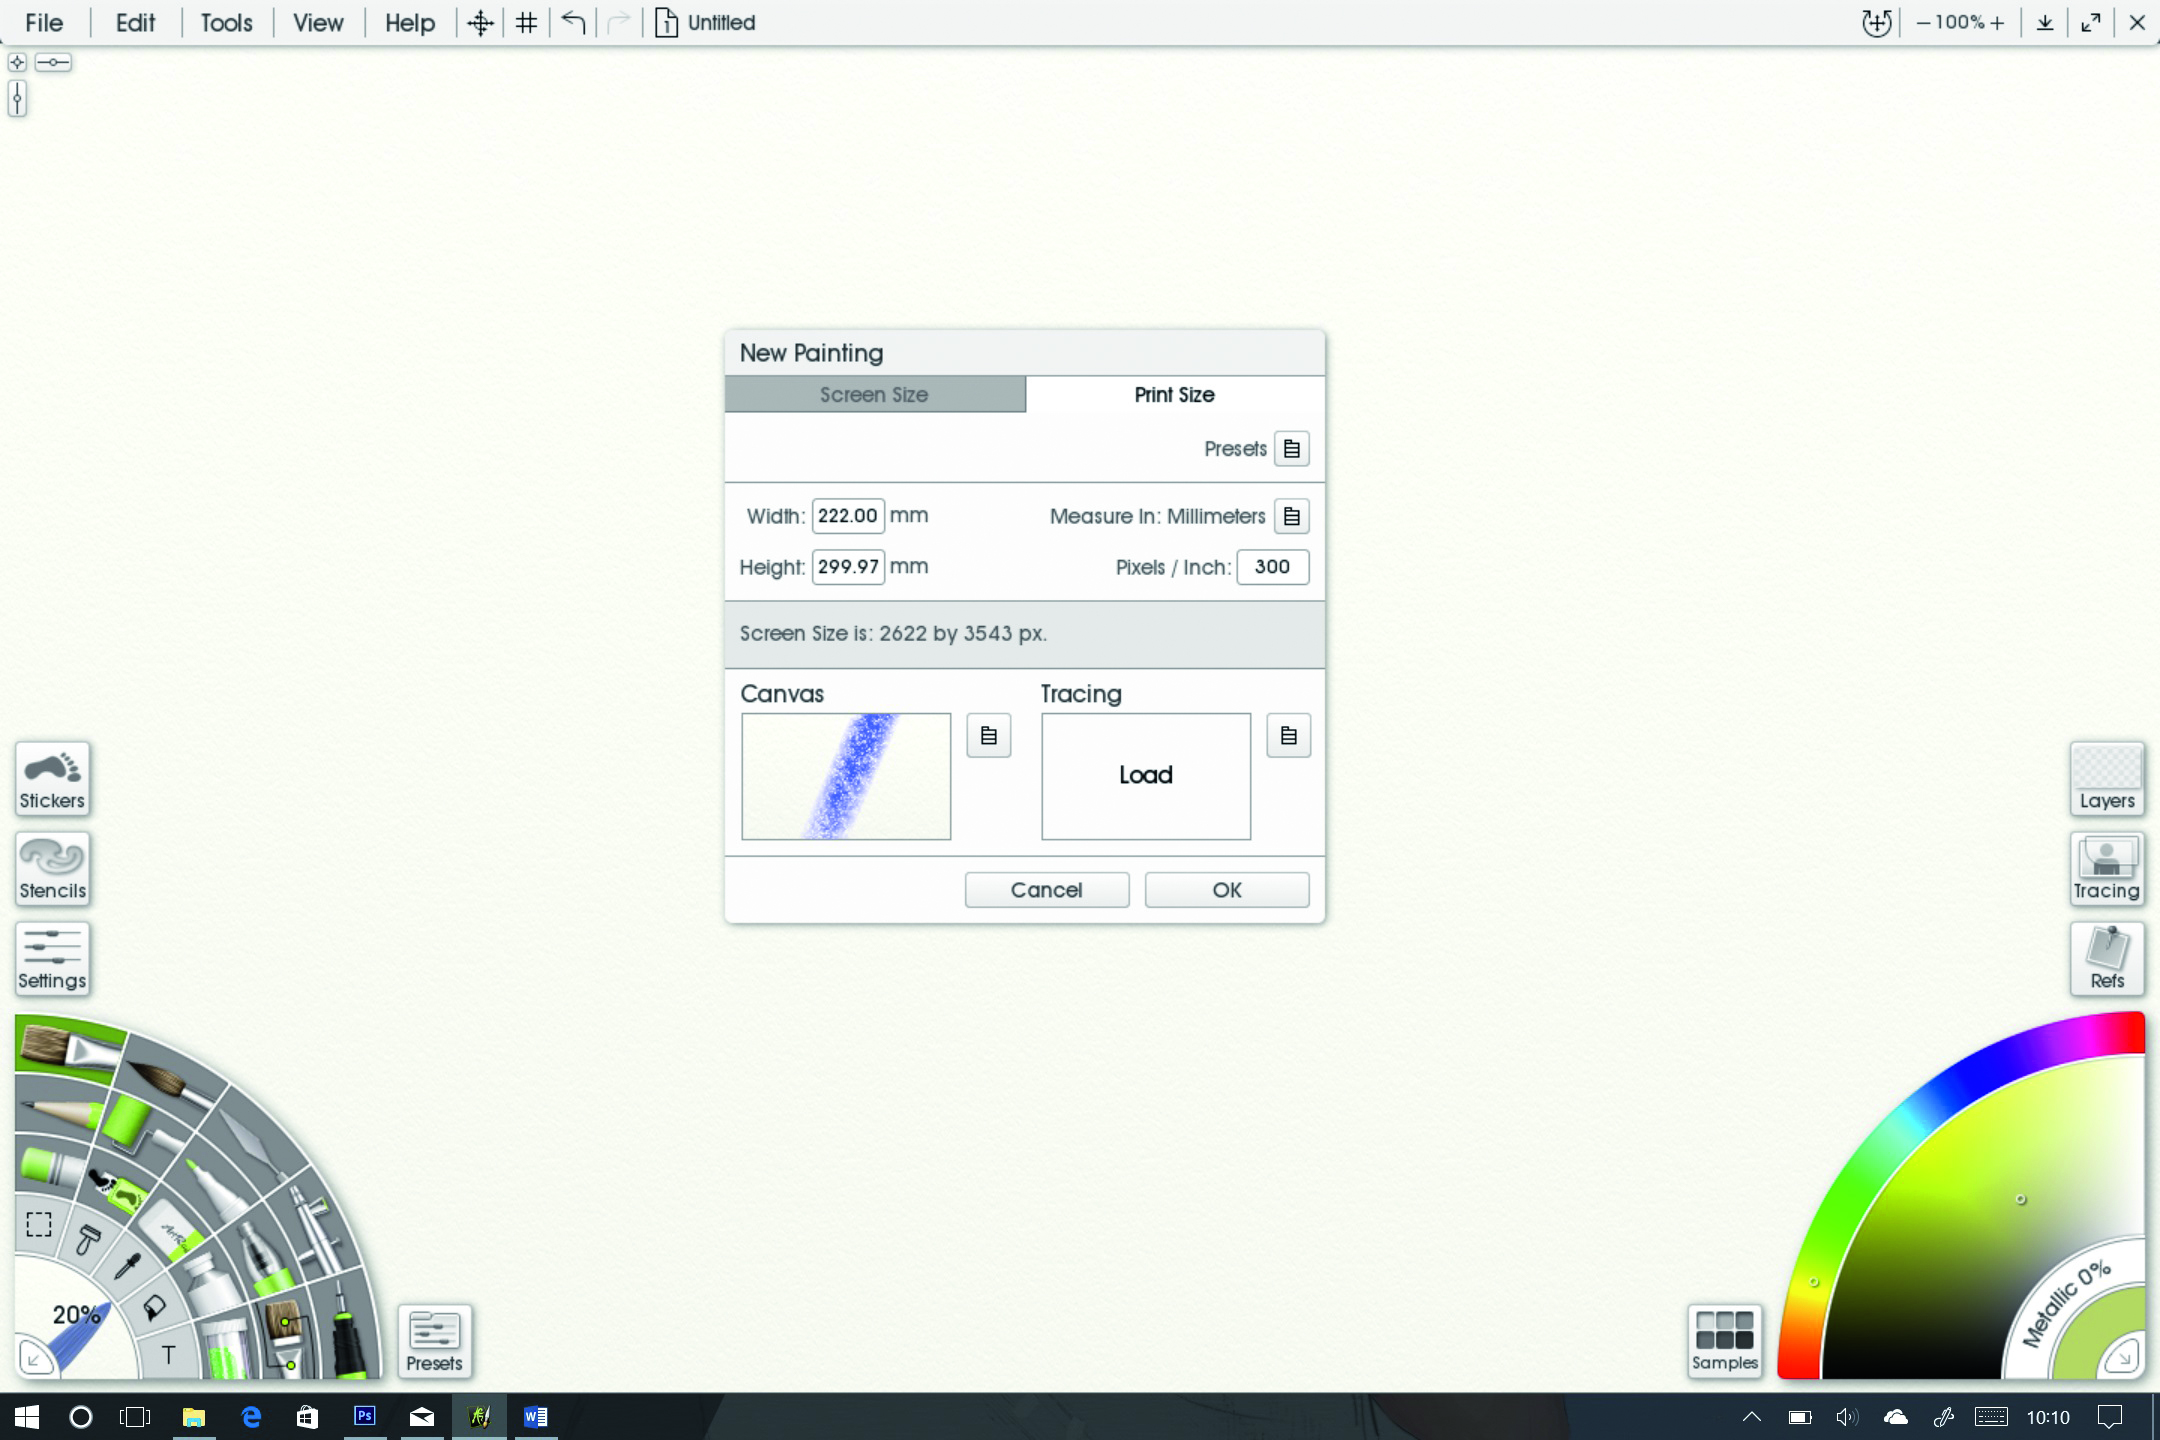
Open ArtRage and click on File in the top-left corner. In the drop-down box, select New Painting and then in the Print Size tab, set the dimensions for the painting (in this case, 222 x 300mm, but these could be any size). Make sure to change the default 72 pixels/inch setting to 300 for a high-resolution painting.
03. Import the reference photo into ArtRage
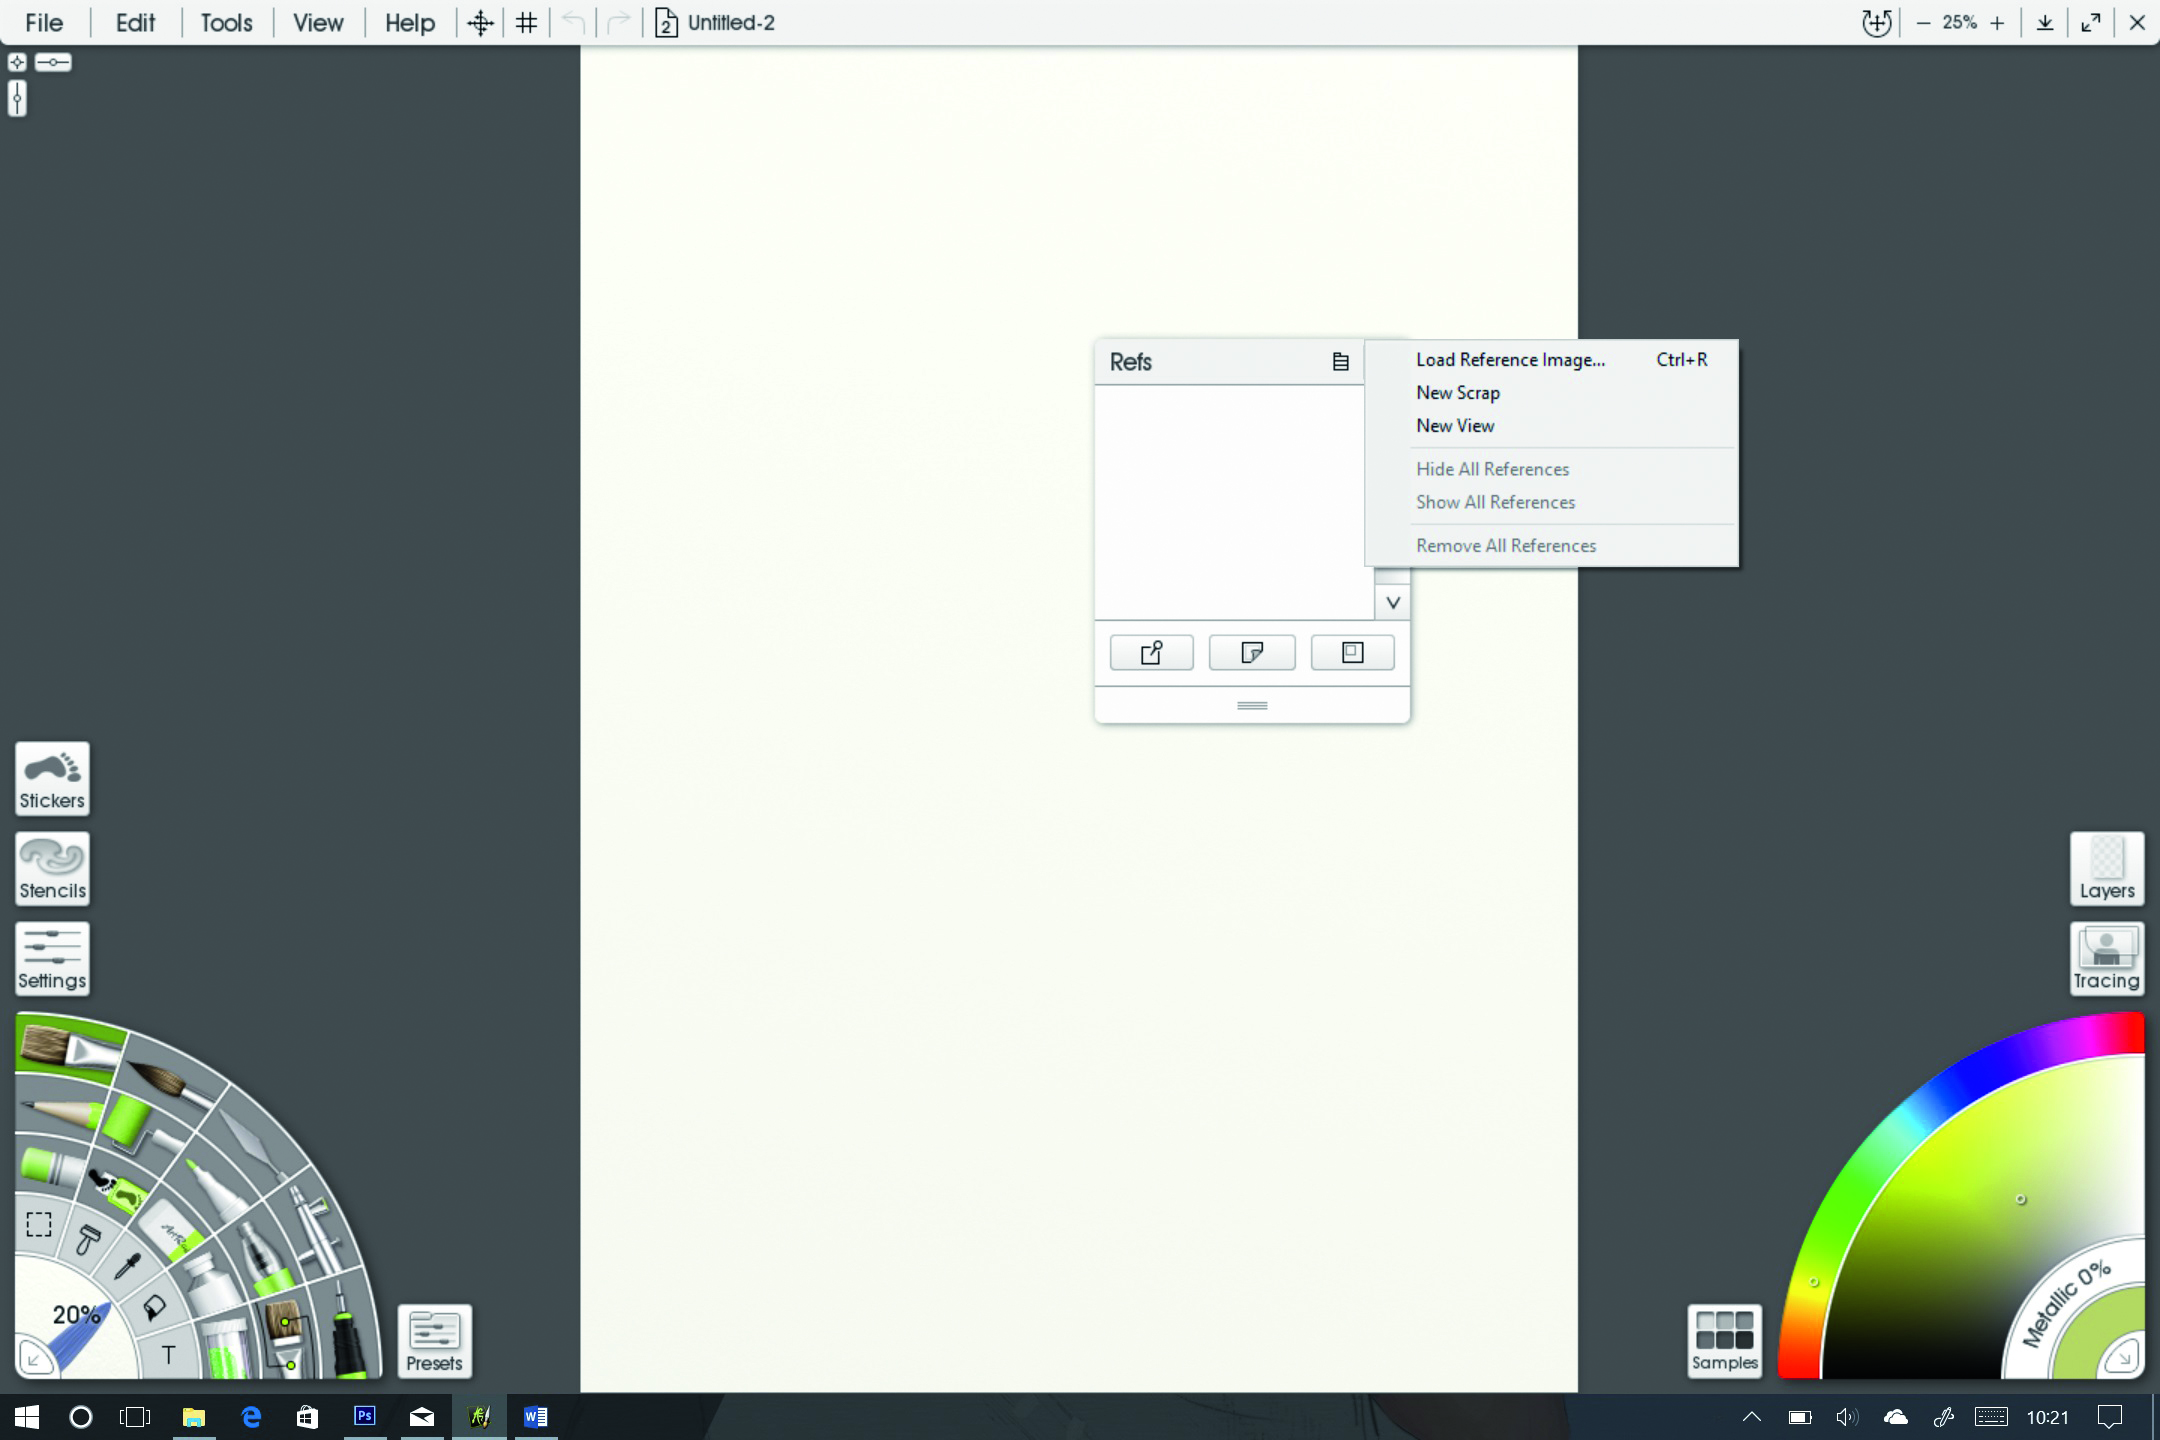
To import your chosen reference image, simply select Refs on the right-hand side of the screen and in the new box that opens, either click the file image or the Post It note with a pin in it. A new window will open that enables you to search your computer for your chosen picture. Double-click the image for it to open, ready to copy.
04. Make thumbnail sketches
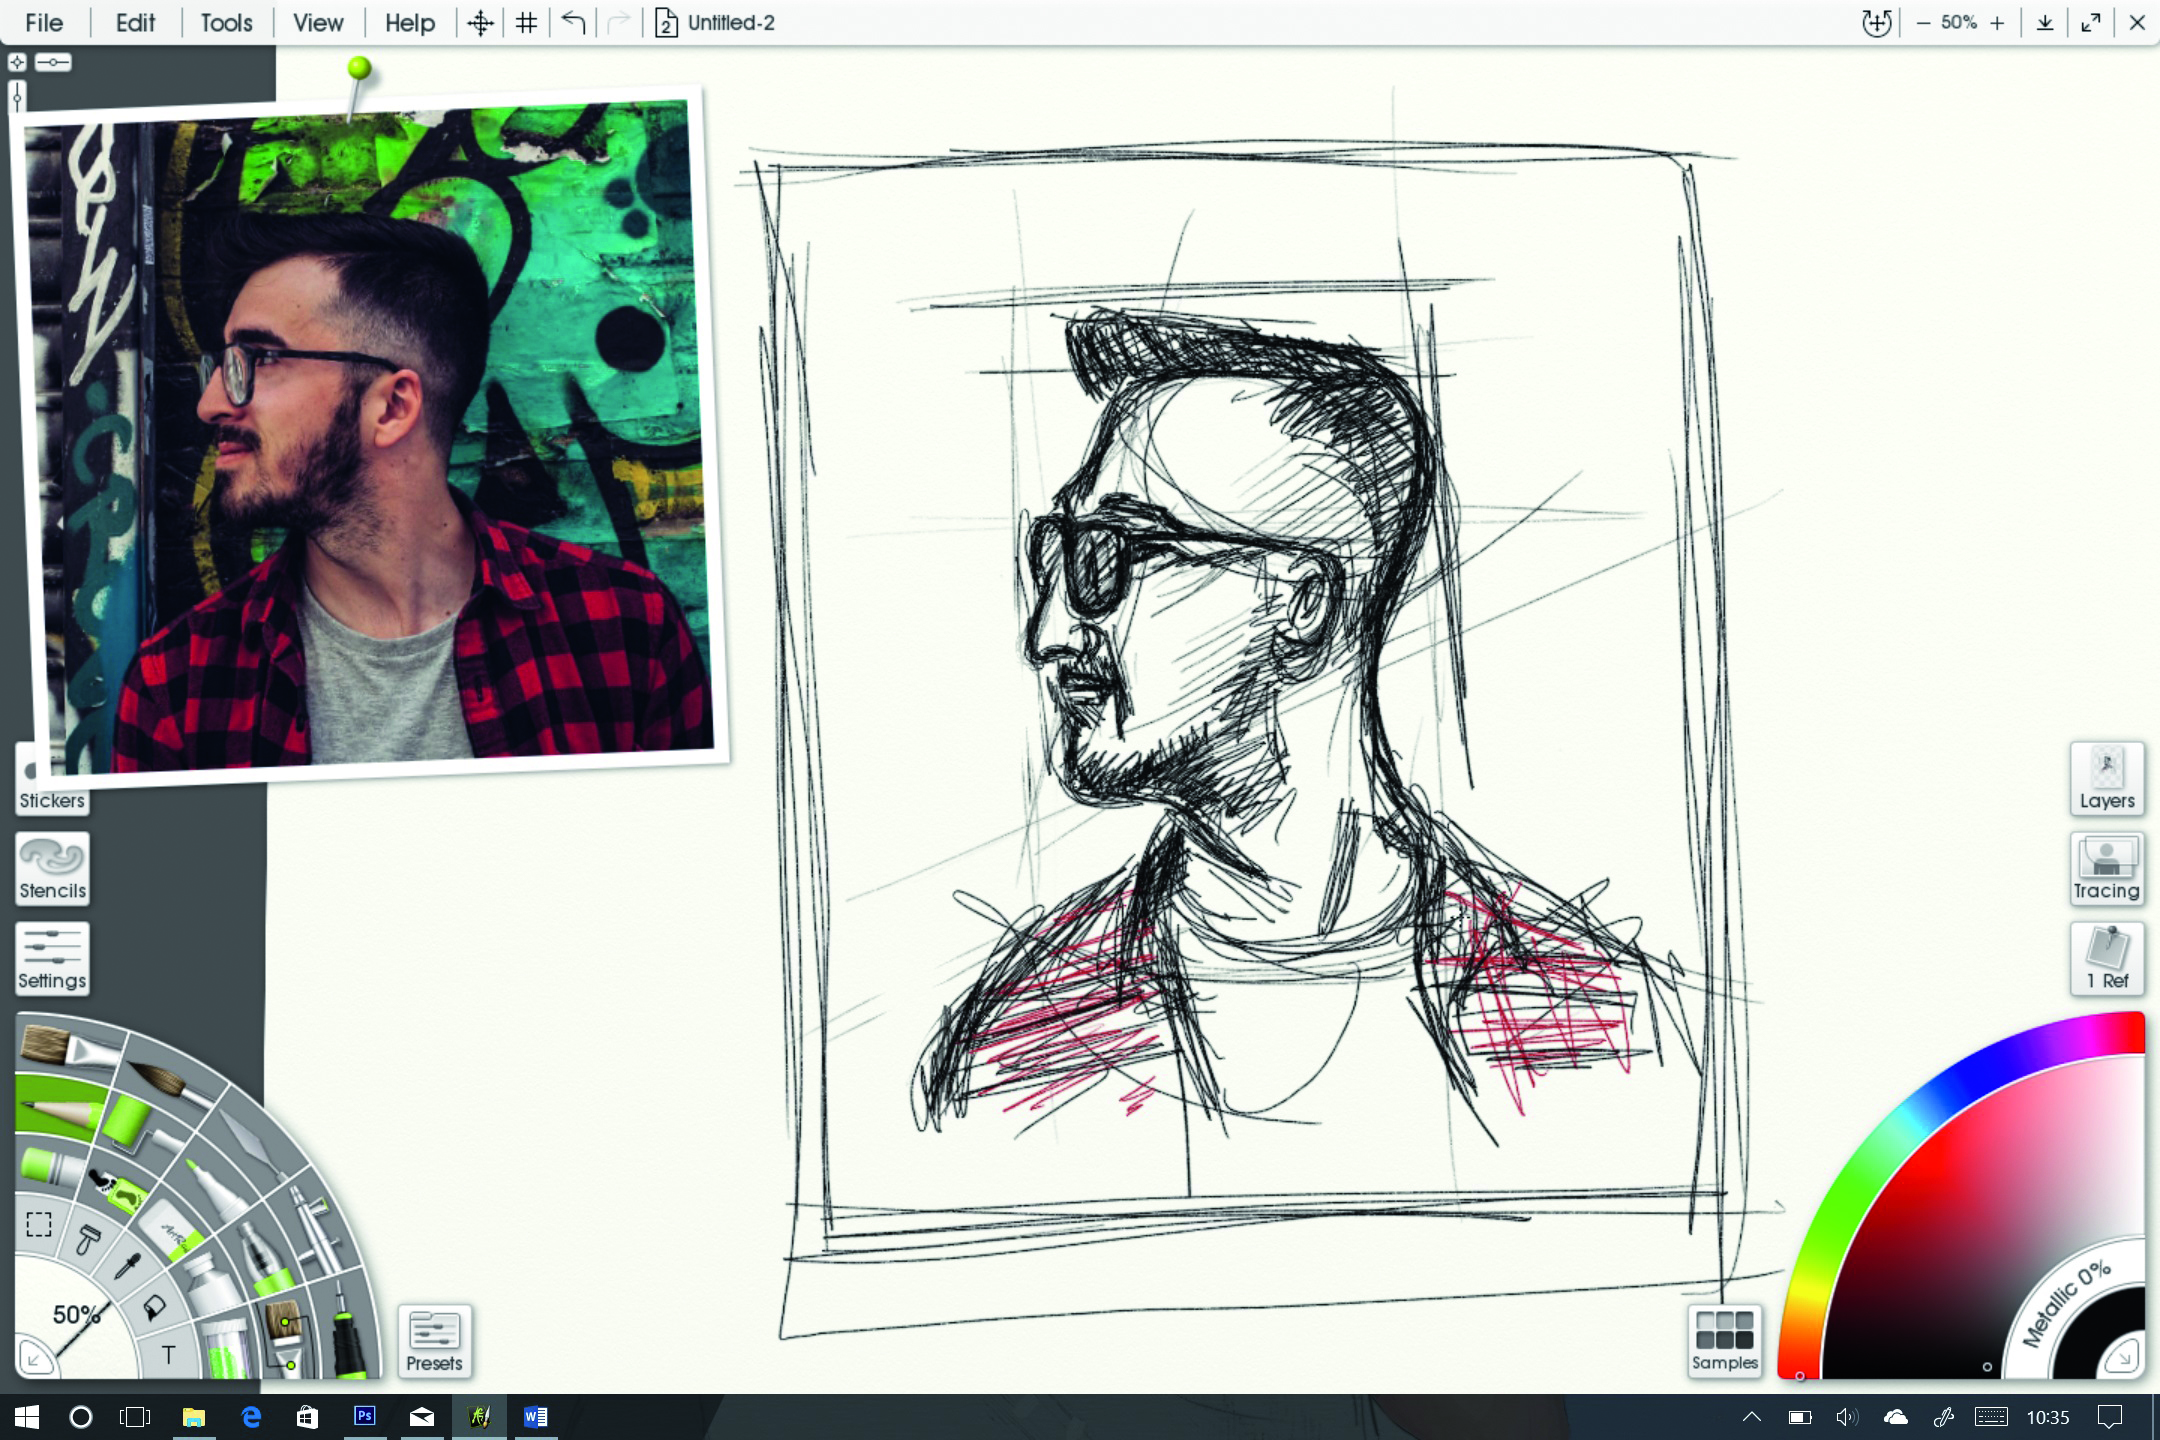
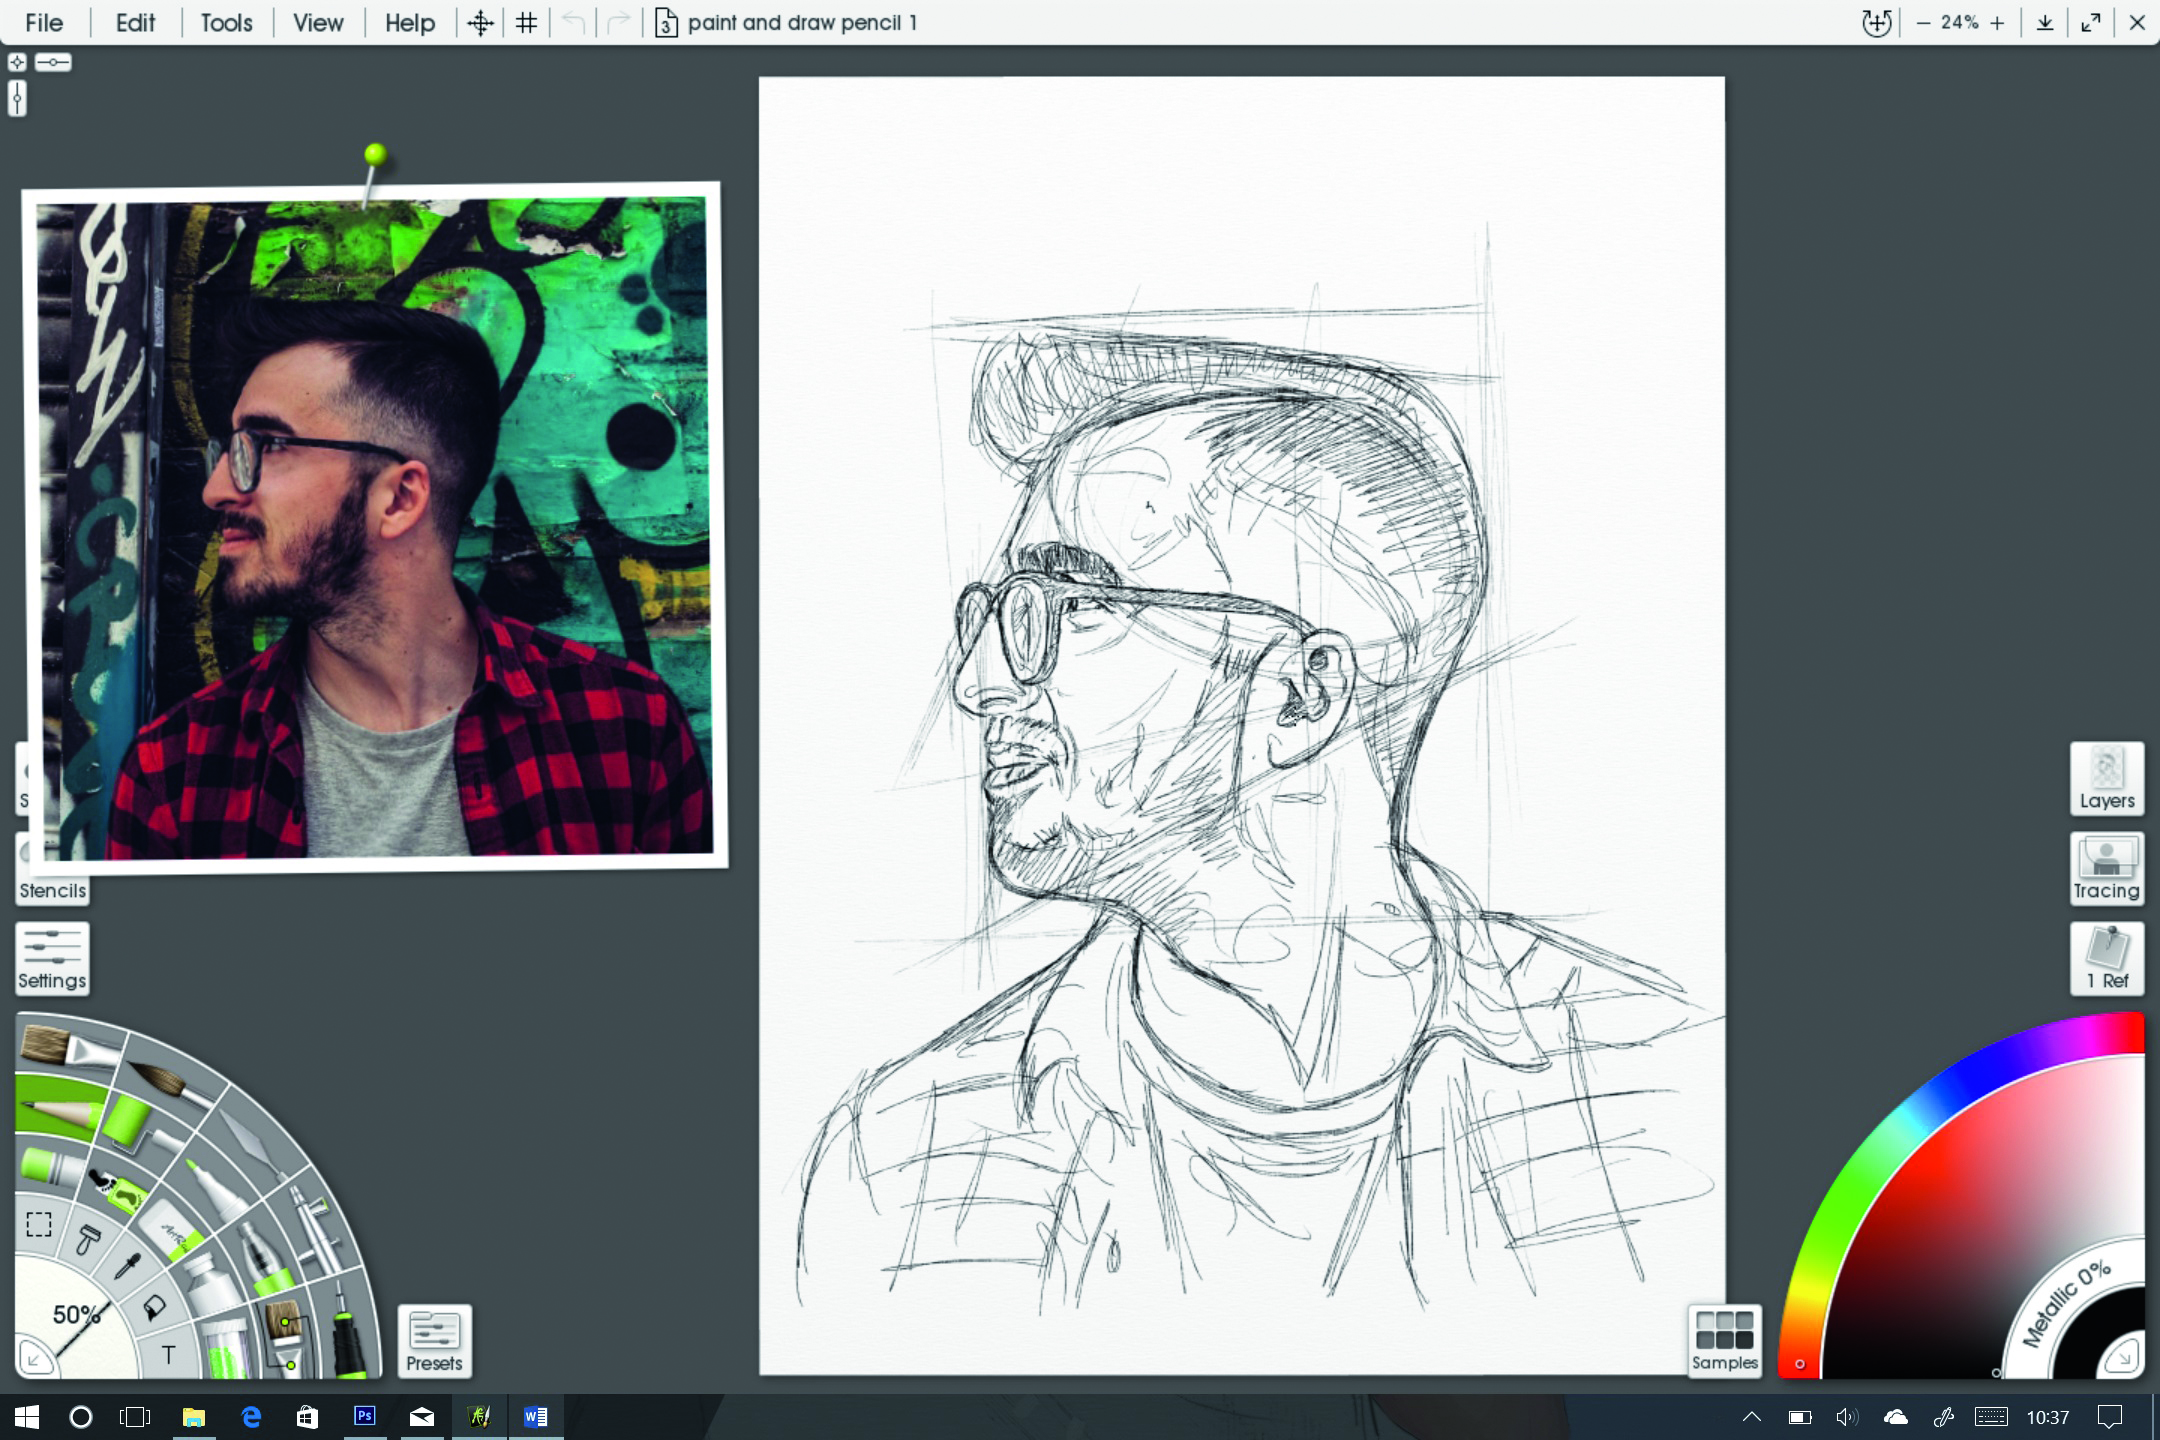
Doodling thumbnail sketches often helps you to understand the space better and to choose where to place the drawing on the canvas. Draw a very rough rectangle to mimic the canvas dimensions and sketch the head roughly. This does not have to be a masterpiece, but it will get you warmed up and ready to begin.
05. Make an initial pencil sketch
Select the default Pencil tool from the tool selection panel on the left of the screen. Start by drawing in guidelines for where the top and sides of the figure’s head will be, along with the neckline and shoulders. Begin drawing in the eye and work outwards, roughly at first then adding more detail as you go.
06. Add layers
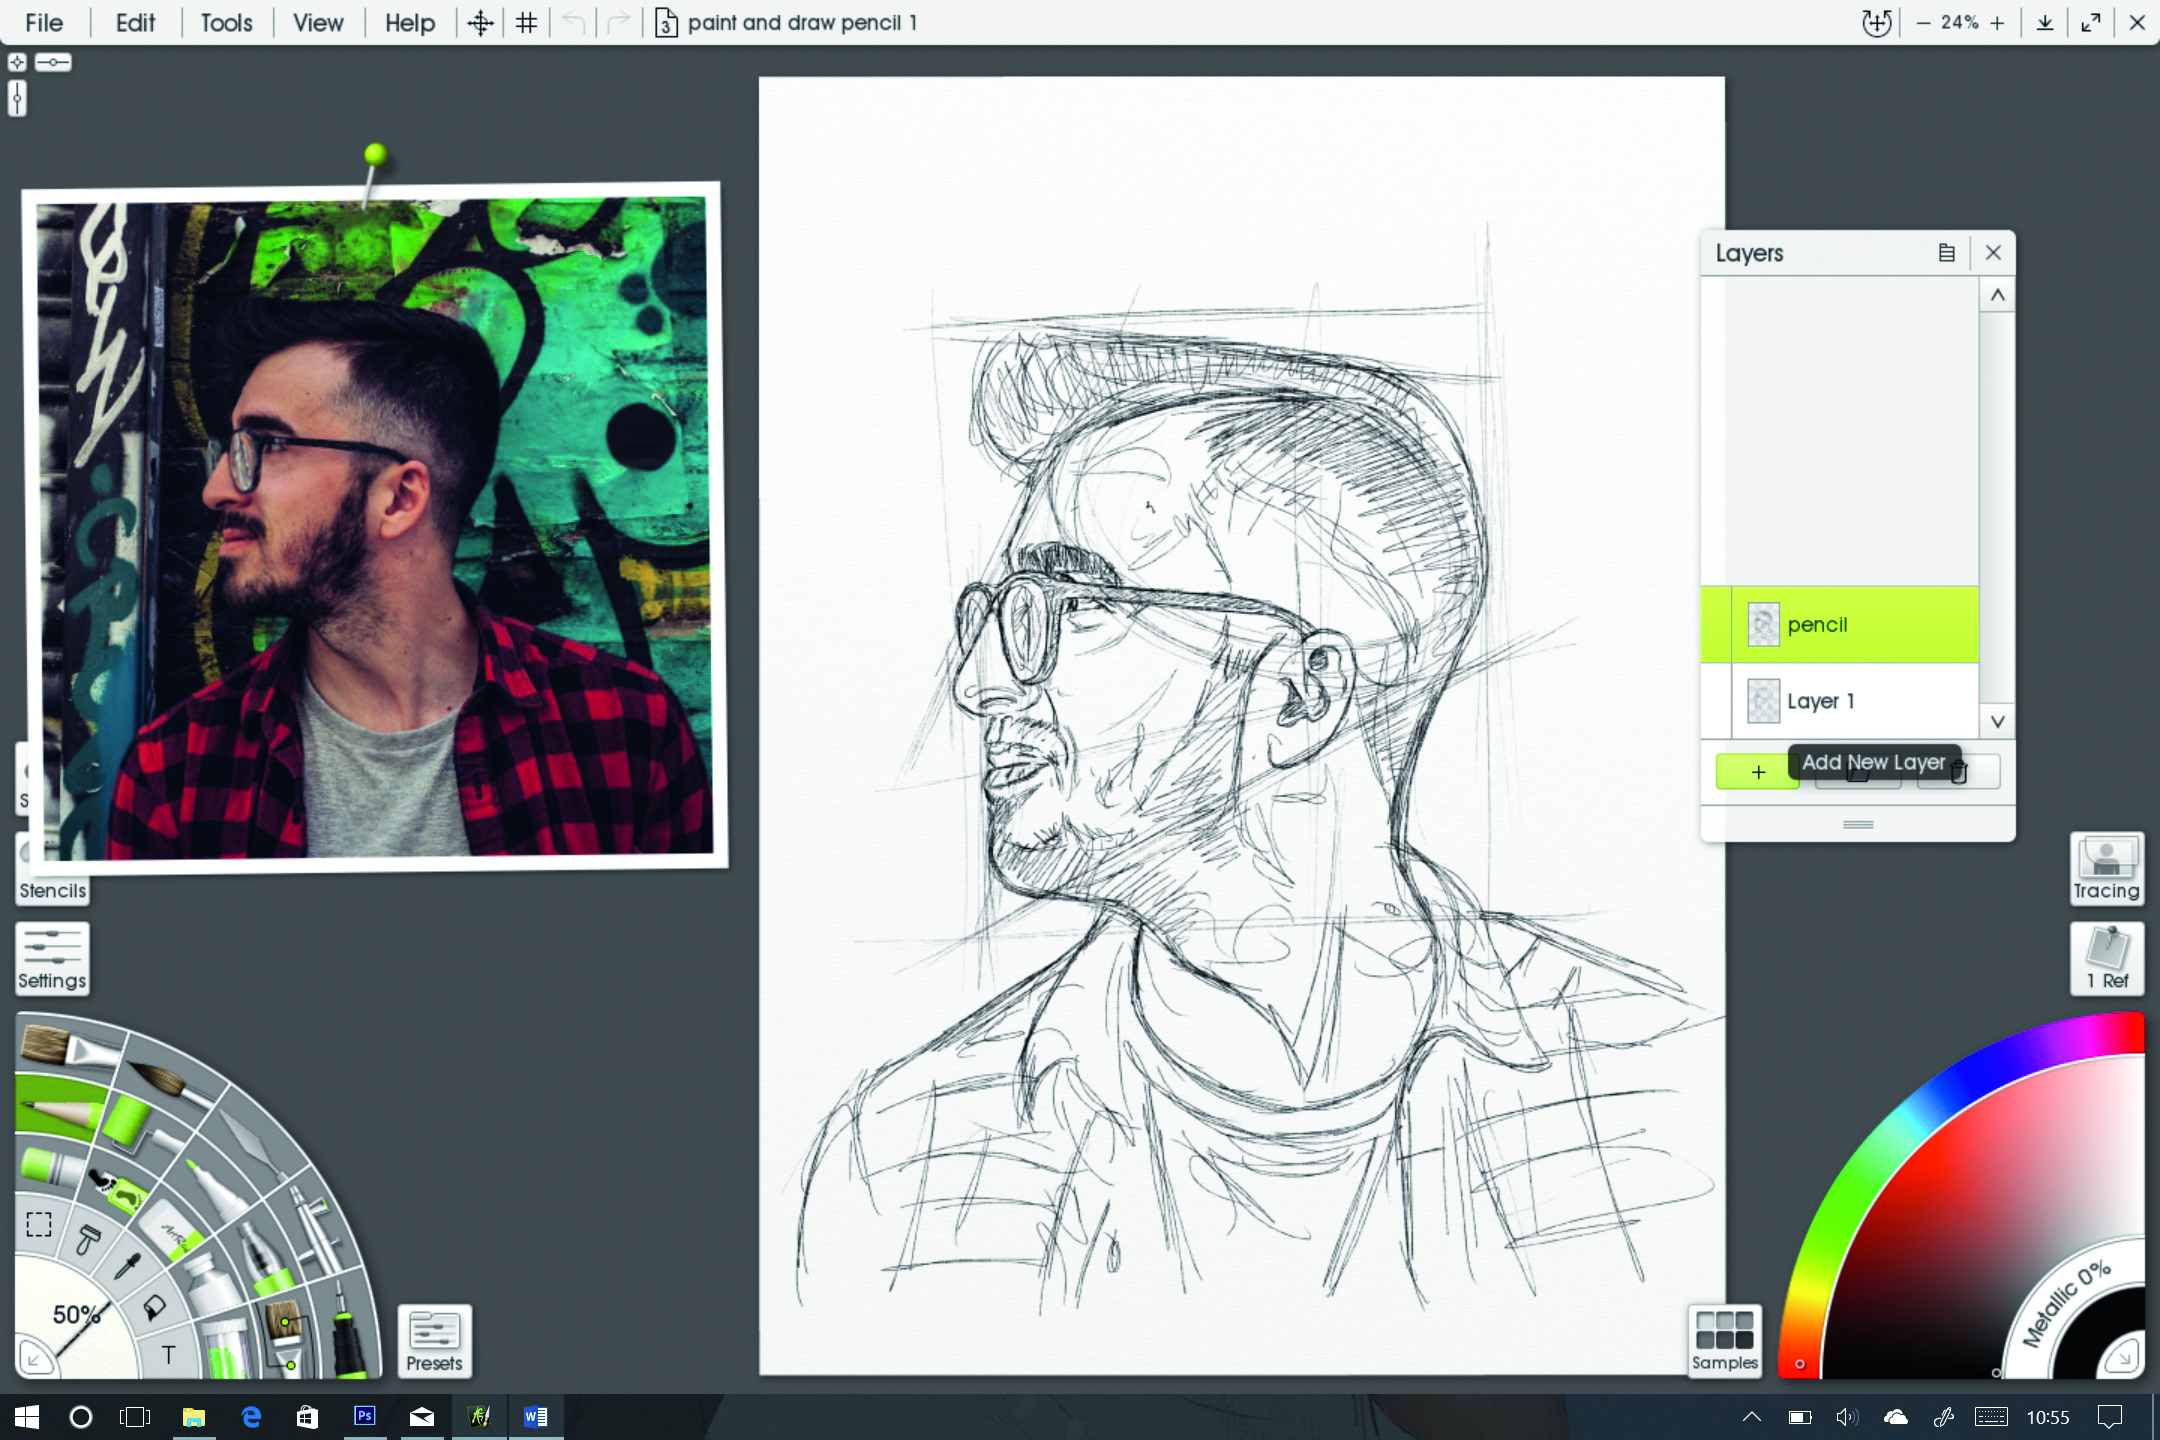
If we were using real paint, we would paint directly over the sketch on the canvas. However, in digital art you can keep these lines on a separate layer in case they need tweaking at a later stage. Select the Layers box on the right-hand side of the screen and click the plus button. A new layer is now created and selected for you to paint on, without losing your pencil sketch.
07. Block in the basic colour
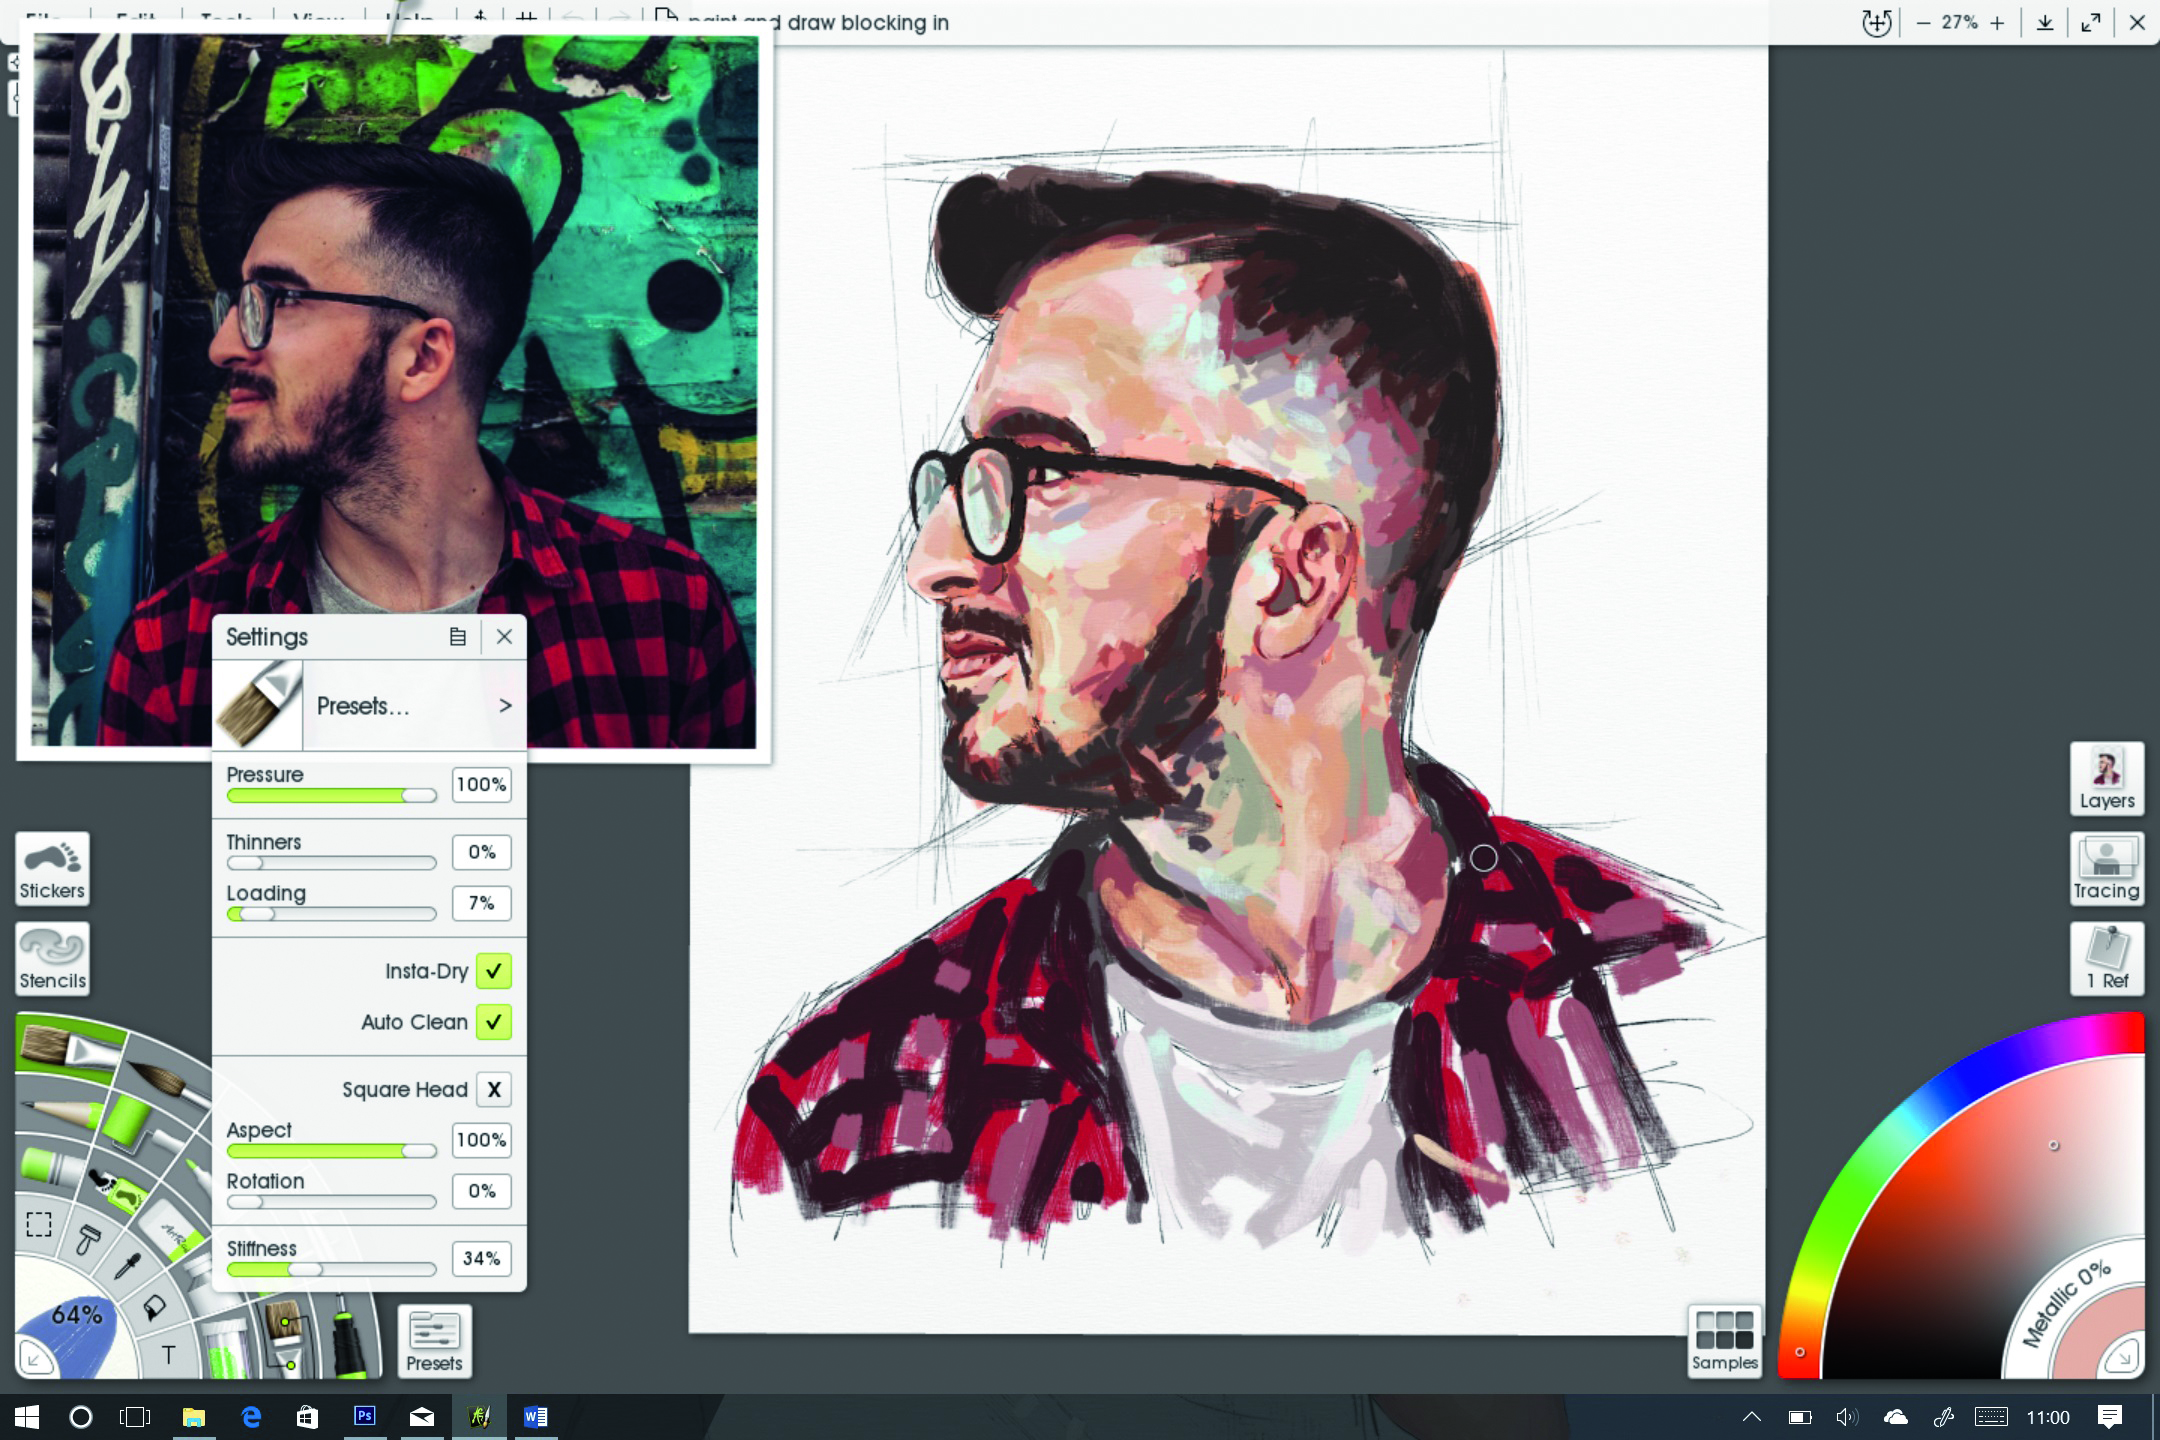
Select the Oil Brush tool, but don’t add too much paint just yet. This is to stop the painting becoming muddy and hard to manage. Once selected, click the Settings box and pull the slider labelled Loading right down to between 4% and 9%. This now gives you a dry brush with which to paint in the tones, highlights and shaded areas.
08. Apply thicker paint
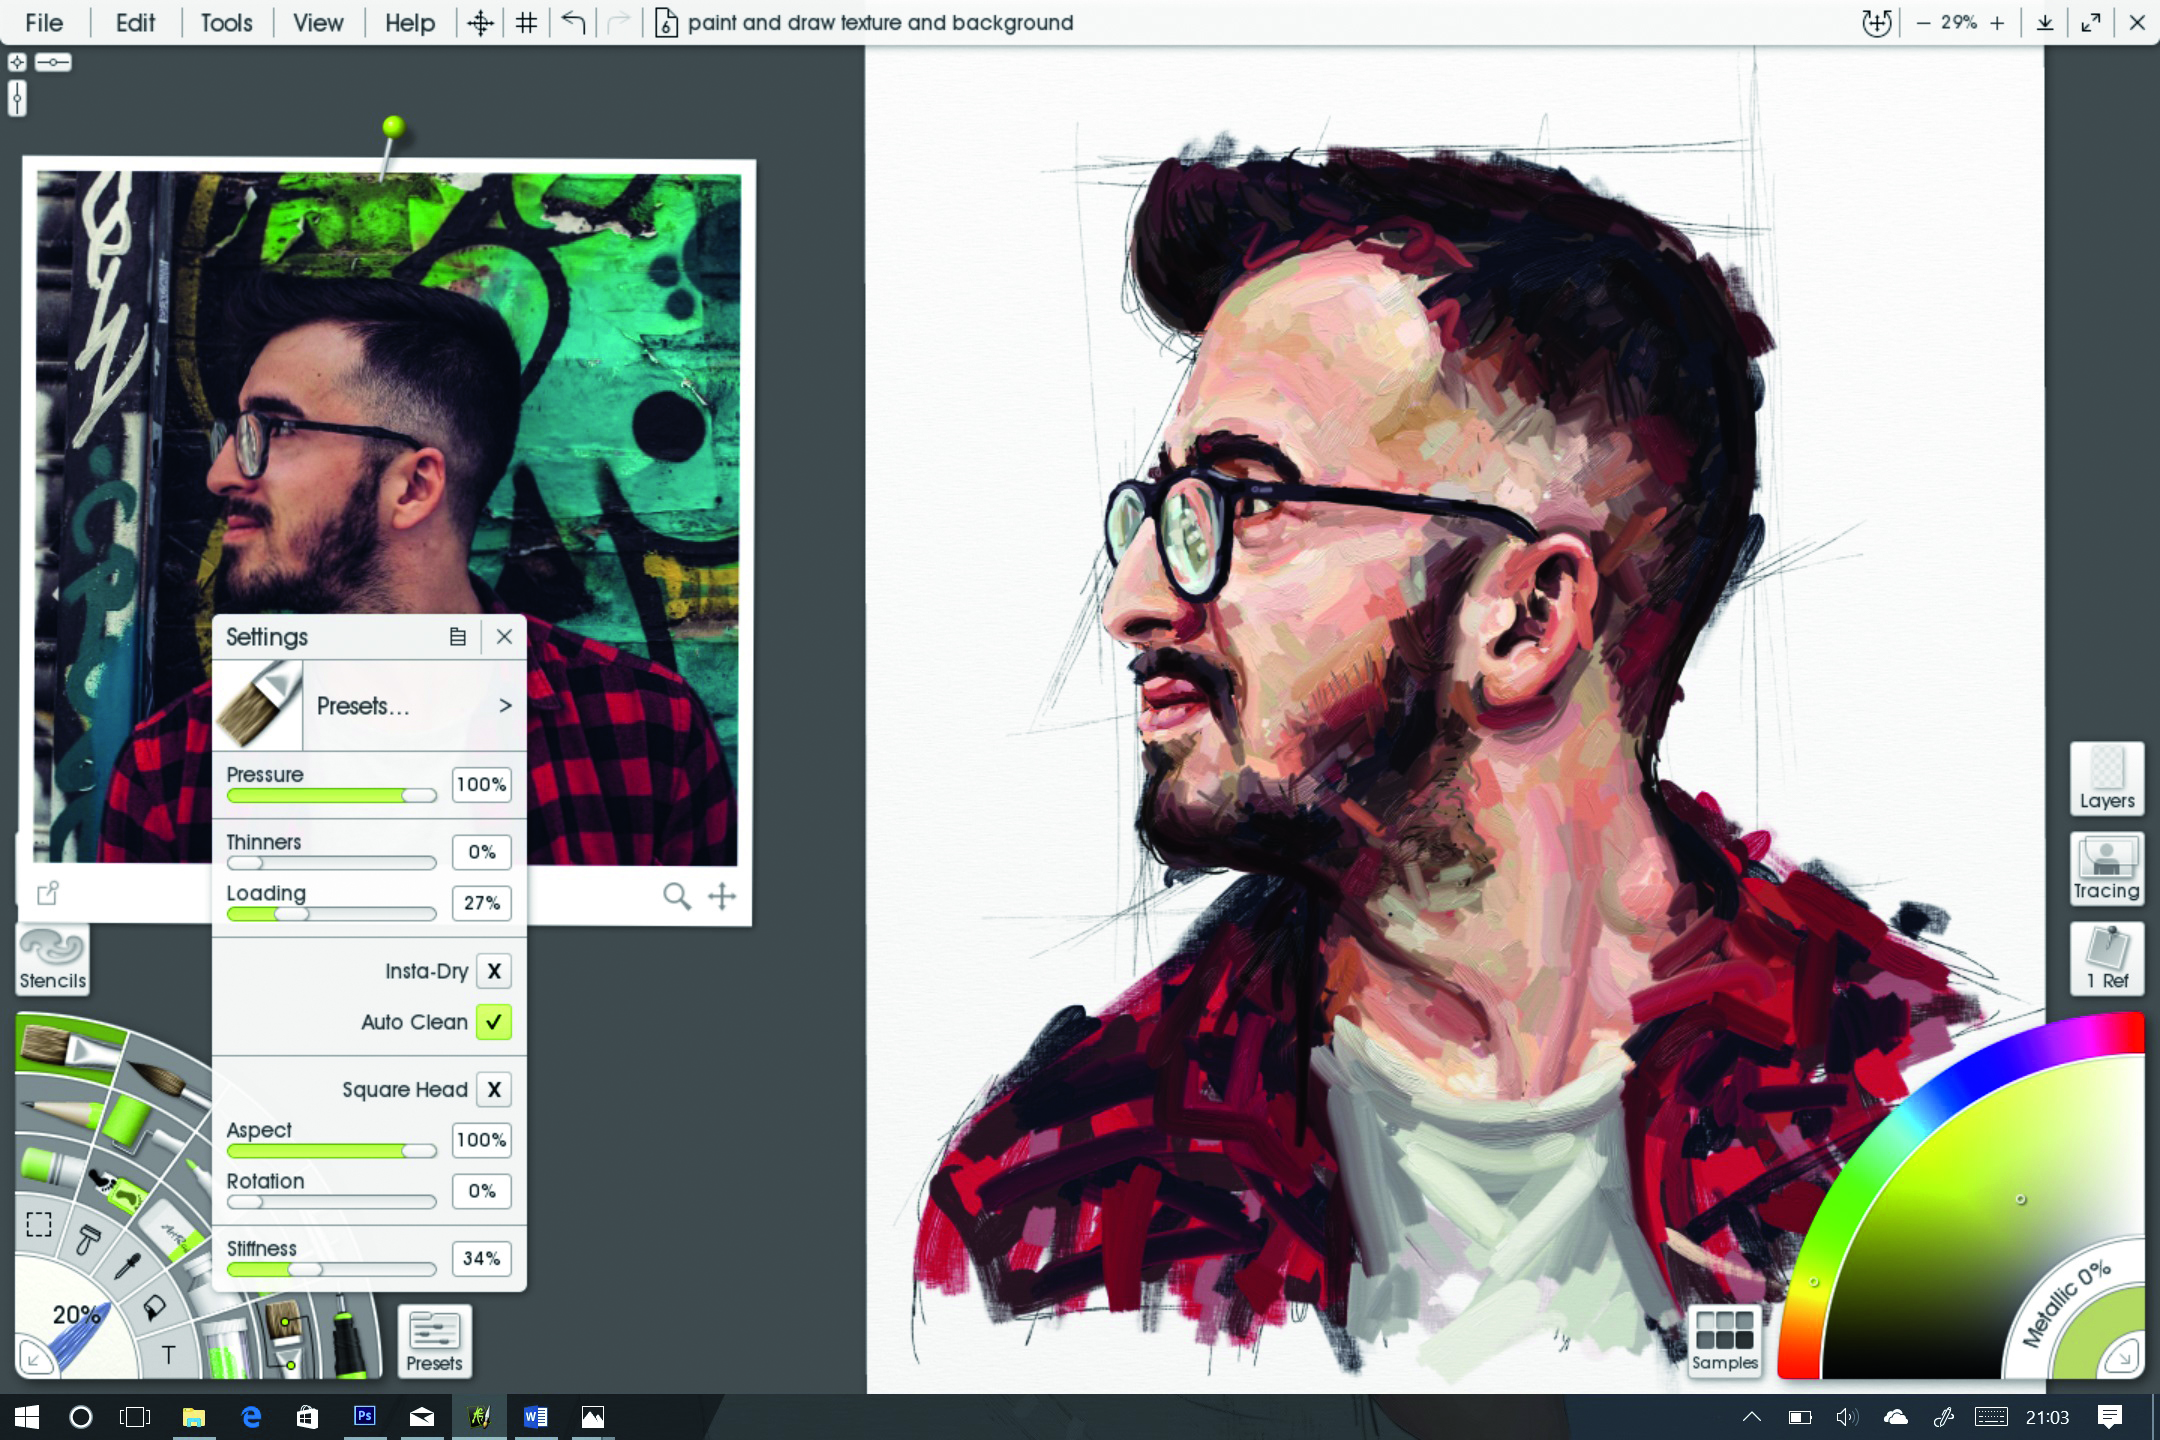
Select a new layer and in the Settings box of the Oil Paint brush, slide the Loading setting up to between 16% and 30%. Now the paint flows far more freely and you can begin to load it onto the canvas heavily with chunky strokes. The paint now mixes believably on the surface and enables you to form the shapes, shading and contours better, while bringing the painting to life.
09. Paint the background
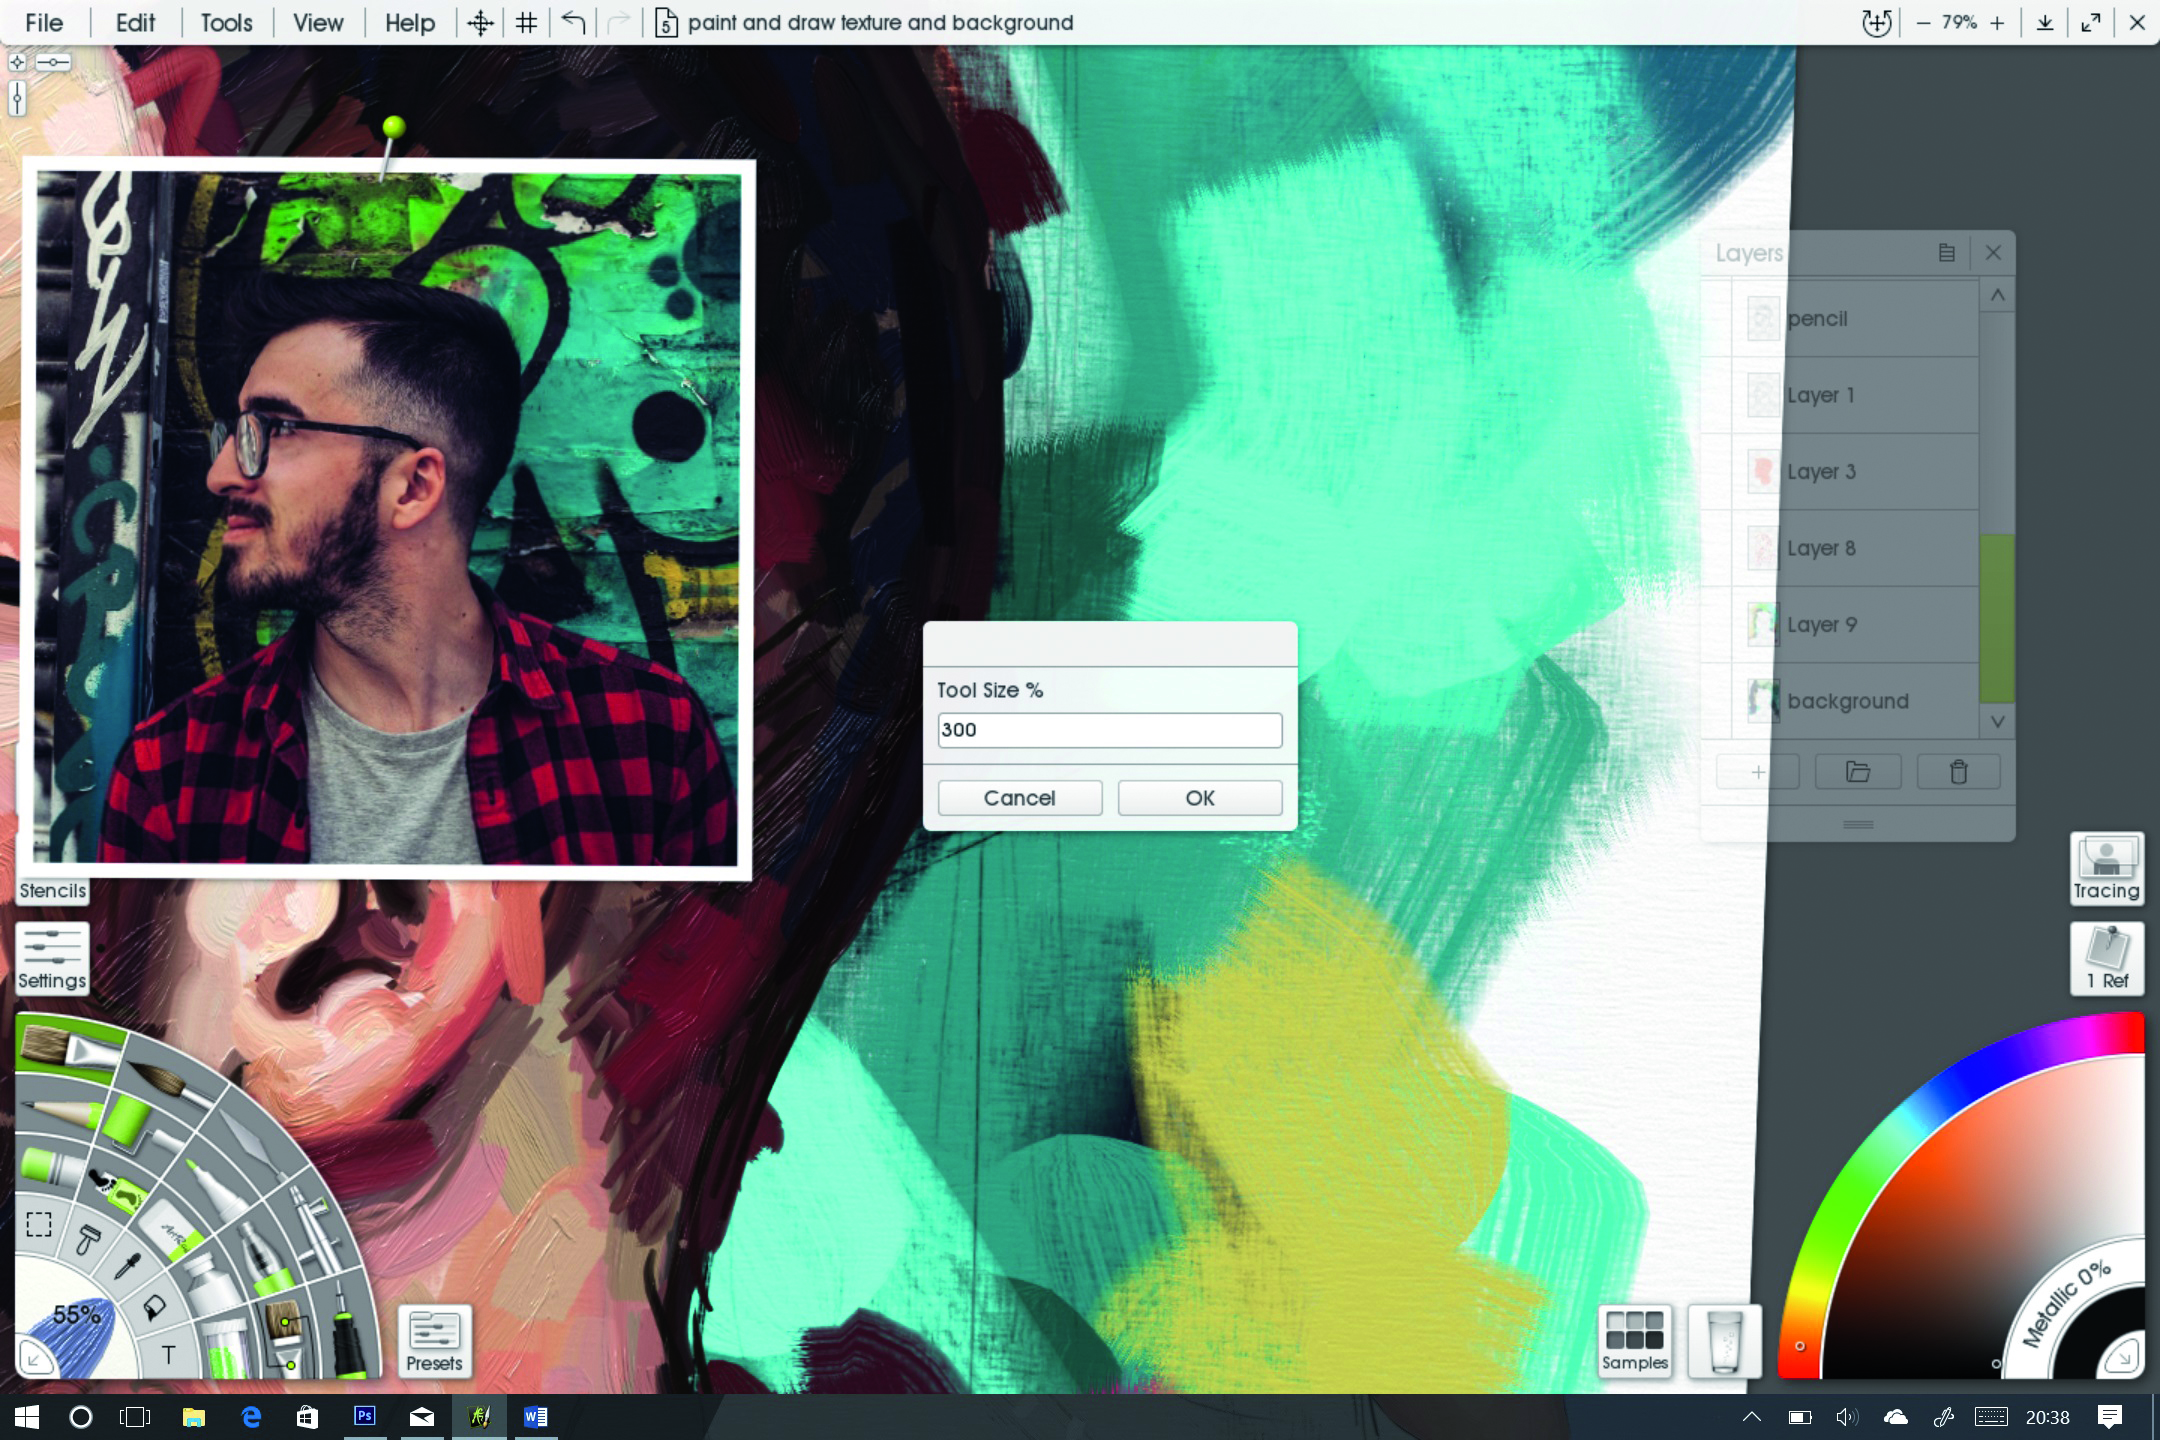
Create a new layer as we did before and drag it right down to the bottom of the other layers. Any thick paint or texture you put on this layer will add depth and chunkiness to the brushstrokes above. For the background, decrease the Loading on the brush to 3 and click in the Brush Size box and select 300. You can now fill in an abstract background easily.
10. Save and export the painting
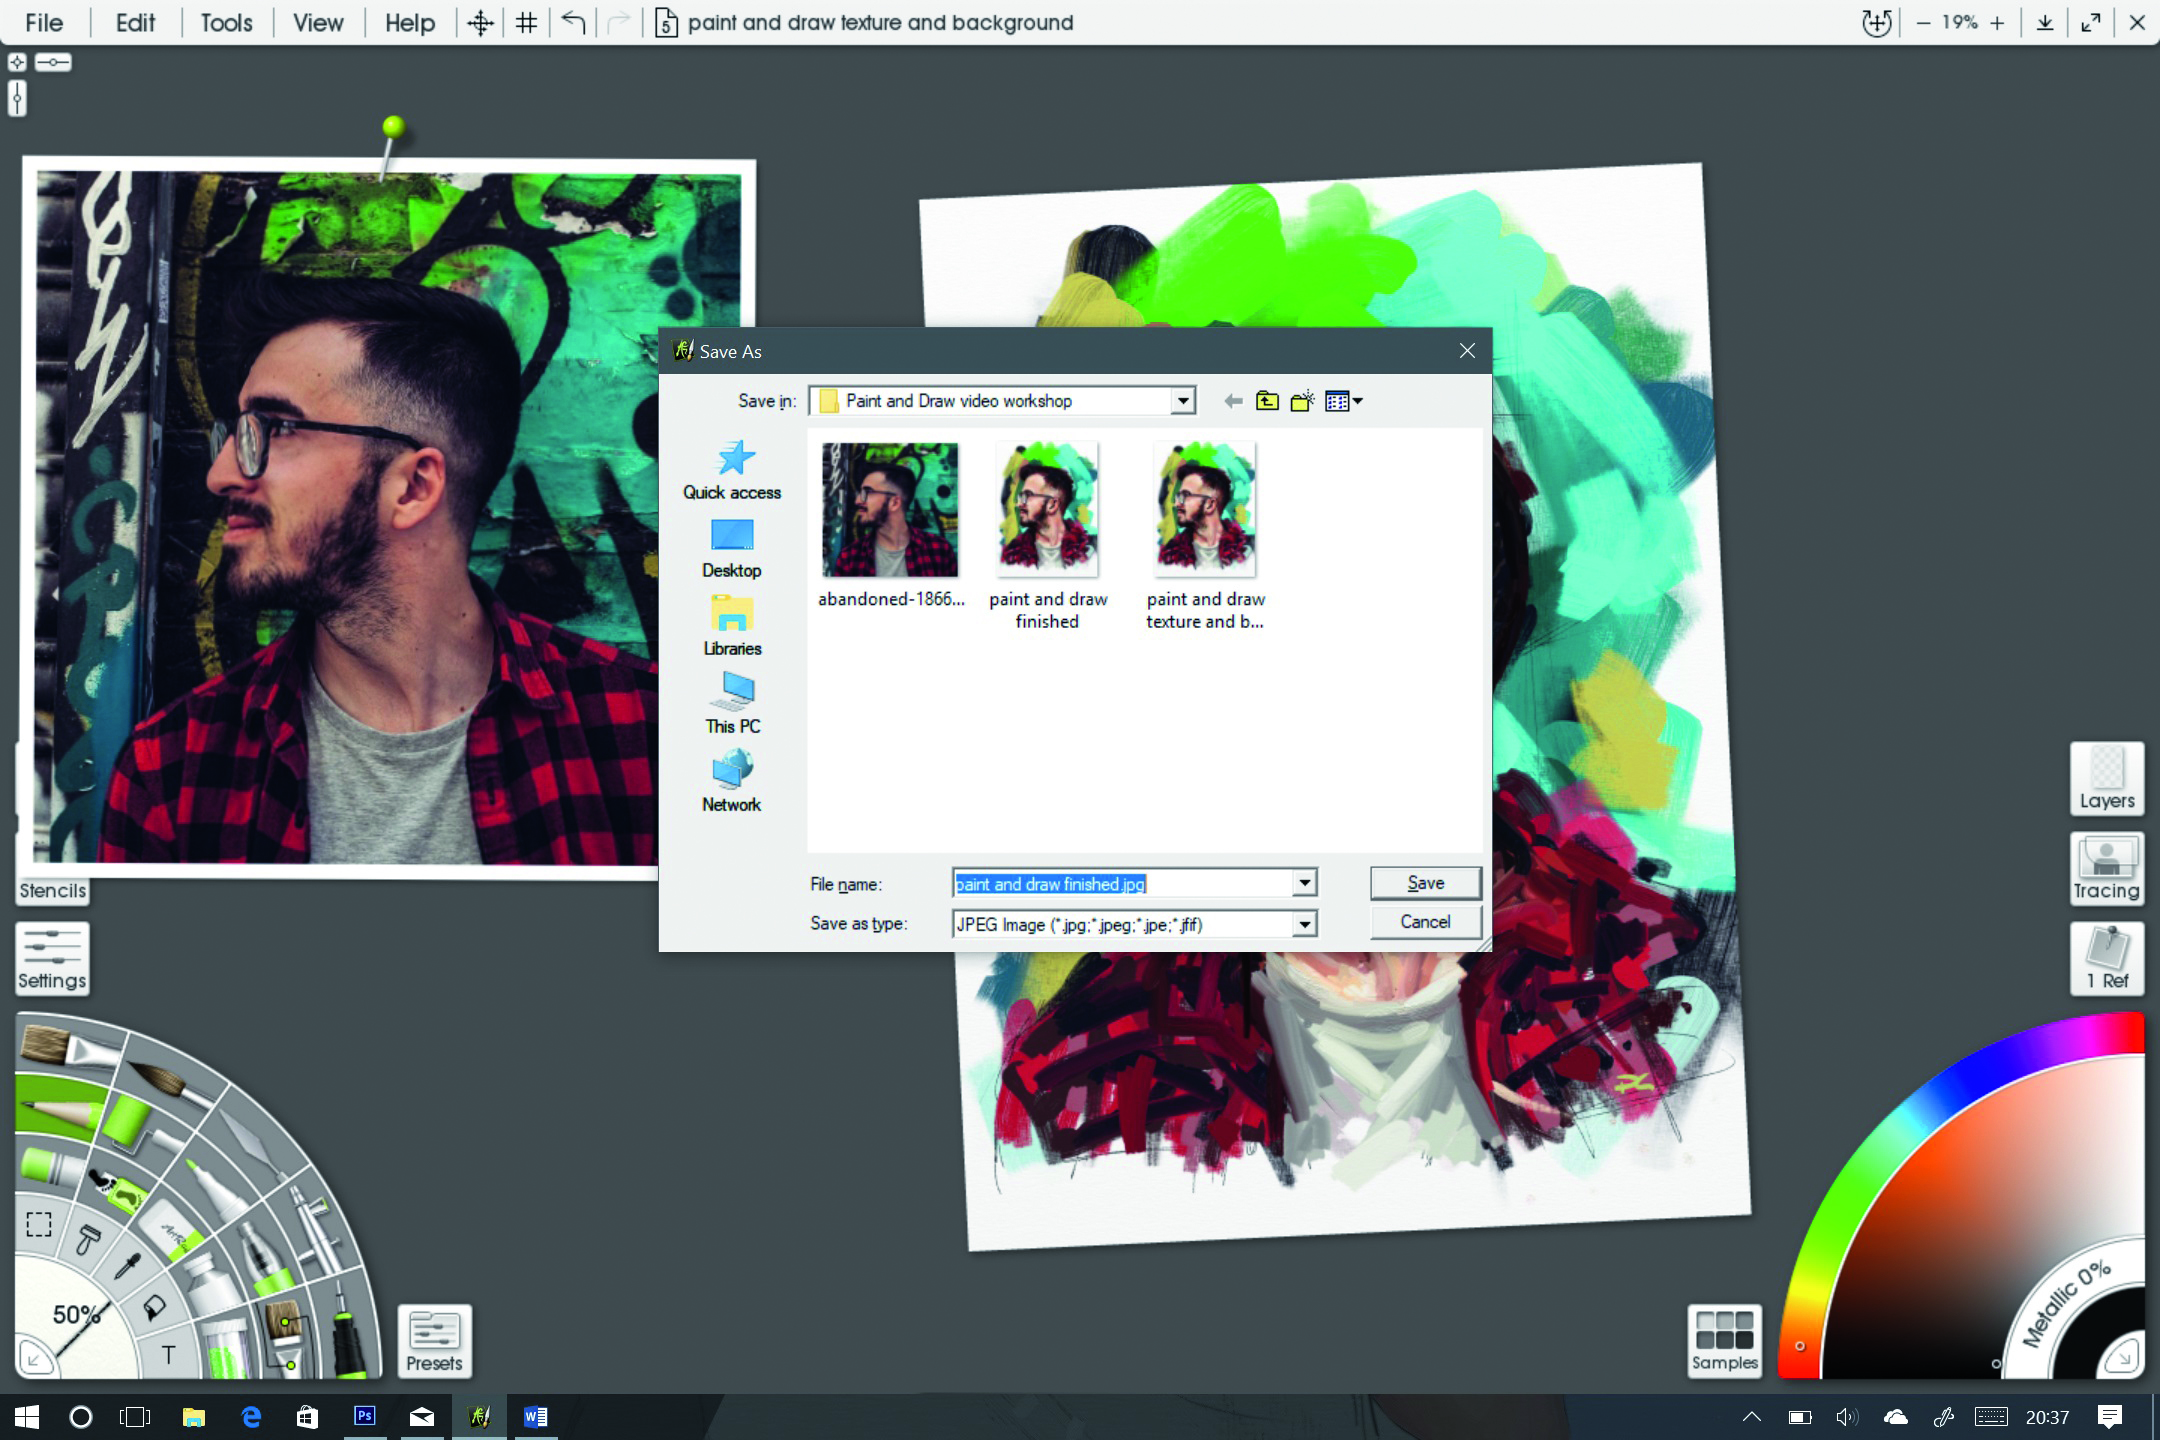
Make sure you save your artwork throughout the painting process, just in case the app crashes or you spill tea on your tablet. Simply click the File button and select Save Painting As and name the file. Once named, only click the Save button as you progress. When you've finished your painting, click Export Image File and save as a JPEG from the drop-down box.
Related articles:
Phil is a fine and digital artist specialising in expressive portraiture. His MA in The History of Art has helped shape his artistic style. He's a proud father, an outdoors lover and a keen beard enthusiast!
