In this figure drawing tutorial we will focus on the torso and breasts, particularly on how the breasts change shape due to compression and the effects of gravity. On first impression these simple forms look easy to draw, and for that reason they’re often drawn poorly.
A common mistake is to treat them as solid globes, instead of shape-shifting mounds that move, fall, bounce and flatten out. Another common error is drawing them as if both are facing front like a pair of eyes, when in fact each breast sits on the curve of the ribcage. I’ve chosen this pose to demonstrate the changing shape of the breasts due to their shifting weight against a solid rib cage, and the pull of gravity, evident even on a young, physically fit woman.
Above, you can watch the accompanying in-depth video tutorial of how to show compression and gravity when drawing a female figure, or, read on to find a step-by-step guide to how to draw the breasts and torso of a female figure.
For more general advice on figure drawing, check out our guide to how to draw a figure, or how to draw muscles. Or for drawing tips on all manner of subjects, see our how to draw roundup.
The effects of shifting forms

Pencil: General’s soft charcoal pencil, Pitt charcoal pencil
Charcoal: General’s compressed charcoal sticks
Erasers: Kneadable eraser, mono eraser, electric eraser, pencil eraser, grip eraser
Misc: Paper stumps, tissue, shammy leather cloth, newsprint
In the photo above, I’m measuring Alana for an online classroom. I measure the forms by eye, compare their shapes – their boxy or tubular nature – then draw the biggest shapes first and measure on the pinch side of the figure where shapes are closer together. Learning proportions is important for the figurative artist, but I don’t see it as an inflexible rule.
Apart from drawing the illusion of soft flesh against a hard surface, we’ll also deal with relationships of form. Although the ribcage expands when we breathe, the hips and ribcage are basically solid, with all the twisting done by the abdominals and obliques (the waist side muscles). These hard shapes against soft shapes cause pinching flesh, most noticeably at the waist.
01. Learn to really see

When it comes to drawing the figure, I think of how the basic structures work together. Making structural drawings such as this one helps me understand how everything locks together. Learning to see structure as a form of simplified anatomy is the key to drawing with confidence.
02. Direct with the power of Austin

In this photoshoot I direct Alana using emotional themes. I call out, “Cruelty, spite, anger, joy, elation!” while Alana moves from one pose to another. As fun and Austin Powers-like as this may sound, it works. With this sorcery pose, Alana becomes a raging symbol of creation. I’ve often found that enthusiastic and confident art direction results in an energetic, productive photo session.
03. Act suspicious

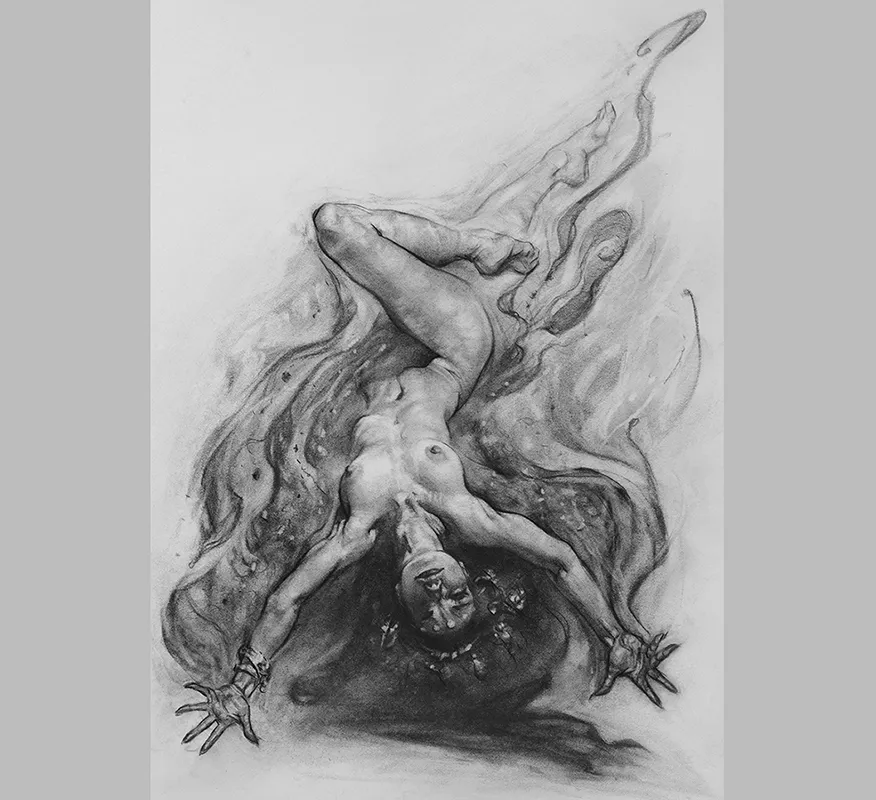
I draw lightly using a small piece of willow charcoal. As usual, I treat the photo with deep suspicion. The arms look too long and the head feels too small. I want the body to be flying rather than lying over a support, so I lengthen the foreshortened midsection.
04. Chase the echoes


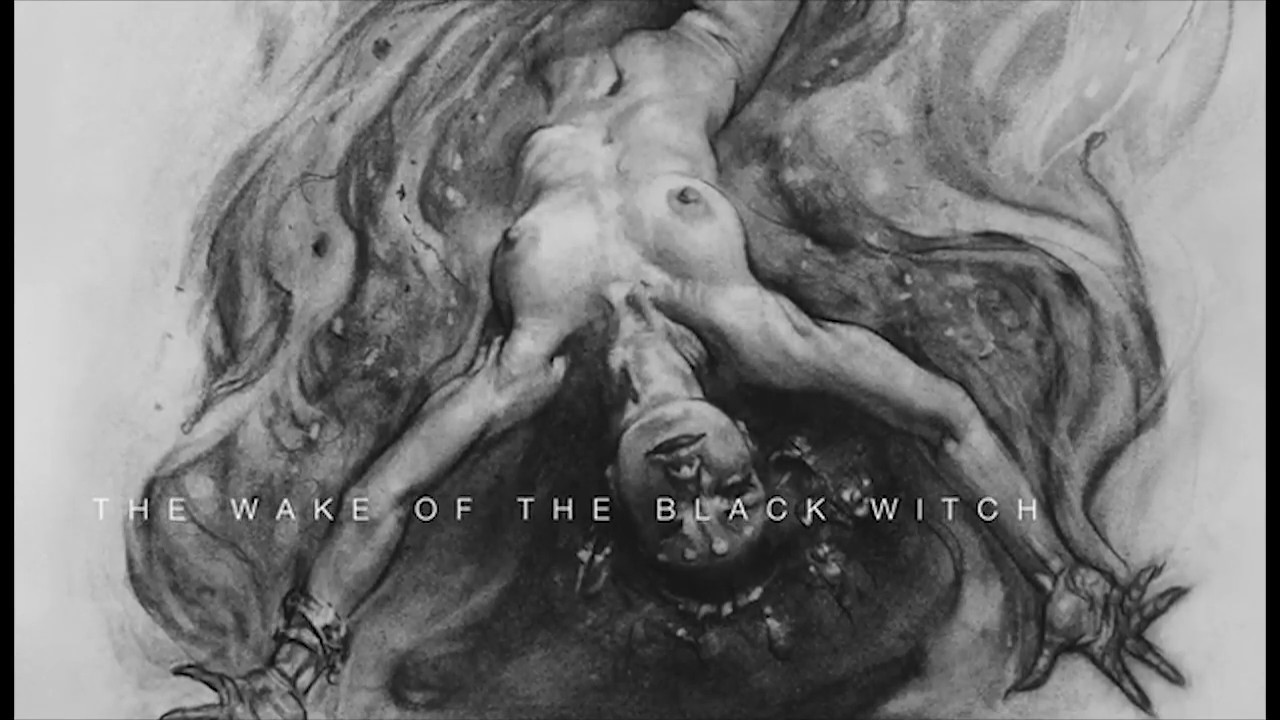
With our motivational theme of ‘creation’ in place I think about what kind of supernatural being Alana is as I draw, and decide she is a witch conjuring spells. I name the drawing, The Wake of the Black Witch. With a title and motivation the drawing gains a driving force.
I smudge tones around using the charcoal that I’ve already laid down on the newsprint paper. It’s important in the early stages to keep the drawing light, because this method allows for changes. I’m chasing the echoes of similar forms as I go, blending nature’s rhythmic shapes down the body.
05. Create a sense of movement

I step back from the drawing and take time to evaluate before committing to darker lines. I feel the overall drawing has solidity, and more importantly, a sense of movement. I lay in darker lines, placing a sheet of paper under my hand to keep the surface clean.
06. Consider the effect of gravity

Add gravity to the situation and the breasts change shape. See how each breast is slightly different – because they always are. Note also how the nipple changes shape as the breasts stretch or flatten out. Take time to study these ever-changing forms. I’d advise drawing the breasts after you’re happy with the shape and position of the ribcage, rather than draw them first.
07. Draw the hands

When drawing hands there are notes to keep in mind, for instance, the forefinger and middle finger take up more than half the width, and the little finger splays outward more. Drawing the little finger and thumb first also makes it easier to plot and place the other fingers.
08. Blend and draw

There is enough charcoal on the newsprint paper for me to blend with a paper stump, and I improve the forms as I push the charcoal around. I also dim the torso area by lifting off some tone with tissue. This suggests a central light source that draws our eye.
09. Make use of leftovers

I blot texture down with tissue dipped in charcoal powder. You can buy charcoal powder, but I use the stuff already on the sandpaper pad left over from sharpening my pencils, which saves money and a trip to the art store. I then use a kneadable eraser to pull out highlights.
10. Use your imagination

With the figure work mostly behind me I come back to the story of the witch casting spells. I use swirls to suggest sorcery afoot and engage my electric eraser to suggest crackling energy. This also frames the figure and adds contrast, bringing the figure more into focus.
11. Erase into the swirls

Using a large compressed charcoal stick I draw large swirls, twisting the stick as I draw for thick and thin marks, I then use a Faber Castell grip eraser to change the swirls into more interesting shapes. Note how the figure appears brighter now against the outside dark tones.
11. Add the small stuff

Putting in the small stuff is always a danger, because we tend to tinker and lose sight of the big picture.
I’m feeling that it’s time to stop before the drawing suffers. Was this drawing better than the step before? Perhaps. The main thing is we explored further and by exploring further we get to feel when it’s time to stop.
Gravity and Compression study sheet

Learning to see the breasts as soft forms compressed against a hard, curved surface will help us draw forms that convey both weight and movement. Lots of life drawing will help further as we have the chance to study how the breasts change shape as the model changes their pose.
This article was originally published in issue 169 of ImagineFX, the world's best-selling magazine for digital artists. Buy issue 169 or subscribe here.
Read more:

