Build an iPad app with Sencha Touch
Create a web app that feels native on the iPad and other mobile devices, using the Sencha Touch library. Robert Douglas of mobile design specialists ribot explains how
This article originally appeared in issue 213 of .net magazine - the world's best-selling magazine for web designers and developers.
Sencha Touch is a cross-platform library aimed at next generation, touch-enabled devices. That means we can use all those years of front-end experience to build native-feeling web apps on iOS and Android devices. Plus they’ll run just lovely on your desktop WebKit-based
browsers, Chrome and Safari.
You can get the most recent build at sencha.com/products/touch/download. The documentation, examples and community are superb so get them bookmarked. The API docs are at docs.sencha.com/touch/1-1/.

So what makes it so special? Well, the folks behind Sencha (based on ExtJS) have done all the hard work for us and created a rich and extremely powerful set of tools with which to design and control your app. Features include:
1. Solid layout components including headers, menubars, popovers, panels and carousels
2. Custom events, built for mobile, including tap, double-tap, swipe and pinch
3. Hardware-accelerated transitions
4. An incredible data-powered templating system
This means you can easily create app-like layouts that have all the transitions and interactions users expect on their mobile device, with screens that update easily from your data source. You’ll see over the course of this tutorial that with basically no HTML, a smattering of CSS, and a couple of hundred lines of JavaScript (including comments) we can create something quite impressive for your iPad. C’est cool, non?
We’re going to create an iPad app that pulls in the latest (or random) videos from Vimeo’s lovely ‘Staff Picks’ channel and enables users to swipe through these pages of videos in a carousel and tap to watch their favourite ones in a popover. In the background we’ll make use of Sencha’s data stores and proxies so updating is dead simple. And, finally, we’ll store data locally, so we can save the state. Let’s get started...
Daily design news, reviews, how-tos and more, as picked by the editors.
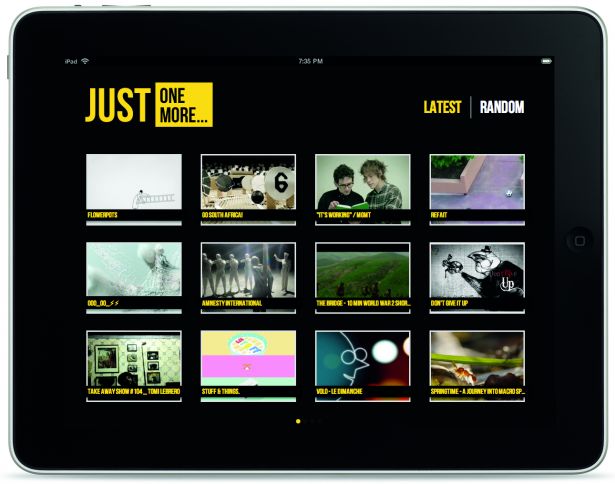
Setting up the HTML
This couldn’t be simpler. We start with an empty <body> tag, add JavaScript and CSS files for Sencha Touch and OAuth to the <head>, and then finally our own JavaScript and CSS application files. Let’s take a look:
<!DOCTYPE html><html><head><title>Just One More</title><link rel="stylesheet" href="resources/css/sencha-touch.css"/><link rel="stylesheet" href="resources/css/jom.css"/><script src="src/js/sencha-touch.js"></script><script src="src/js/oauth/sha1.js"></script><script src="src/js/oauth/oauth.js"></script><script src="src/js/jom.js"></script></head><body></body></html>Now we’re ready to start on our main application file. Sencha Touch fires an onReady event once it’s finished setting up the page for touch events and the like. We simply add our code within this onReady event.
Ext.setup({tabletStartupScreen: 'Default-Landscape.png',icon: 'appIcon256.png',glossOnIcon: false,onReady: function() {// Our code will go here...};});So, after setting a couple self-explanatory variables for our application, we can start building up our code.
First we’ll define the model and store for our data, then create the views, and finally whip up some Ajax to power it all.
Models, stores and proxies
Let’s define some terms. Models describe the information we keep for an object (in our case, videos). We retrieve our data via a proxy, which converts the individual data items into model instances. These instances are then kept in a store, which populates our views.
First, we describe our model, providing the fields and methods a video should have:
// Set up the model that will be kept in our StoreExt.regModel('Video', {fields: ['id','available','description','height','thumbnail_medium','thumbnail_large','title','url','username','width','watched'],markAsWatched: function() {var videoId = this.data.id;if (!isVideoWatched(videoId)) {localStorage.watched += videoId + ',';}this.set('watched', 'watched');this.store.sync();}});The fields are straightforward; we’ll get these directly from the Vimeo API. We do add two extra fields: available, with which we can tell users which videos have mobile versions (and so are available on the iPad), and watched, to keep track of which they’ve watched. The store and proxy are a little more complex.
// Our JSON Store which uses a proxy tied to localstoragevar videoStore = new Ext.data.JsonStore({storeId: 'videos',proxy: {id: 'video',model: 'Video',type: 'localstorage',reader: {type: 'json',root: 'video'}},listeners: {add: {fn: function(store, records, index) {handleVideosAddedToStore(store, records, index);}},load: {fn: function(store, records, index) {handleVideosLoadedFromLocalStorage(store, records, index);}},clear: {fn: function(store, records) {handleVideosRemovedFromStore(store, records);}}}});We give the store an id and define its proxy, which acts as a bridge between our data source and our store:
1. type: localStorage: this means that data will be synced with the device’s HTML5 local storage
2. model: videos: this is the model we defined earlier and is what the proxy will create instances of
3. reader – this specifies what kind of data the proxy is expecting and the root within a JSON object.
We then attach listeners for when data is added to the store (from our Ajax call), when data is loaded into the store (from localStorage through our proxy), and for when we clear the store. Each of these listener functions just calls updateCarousel, which we’ll get to soon.
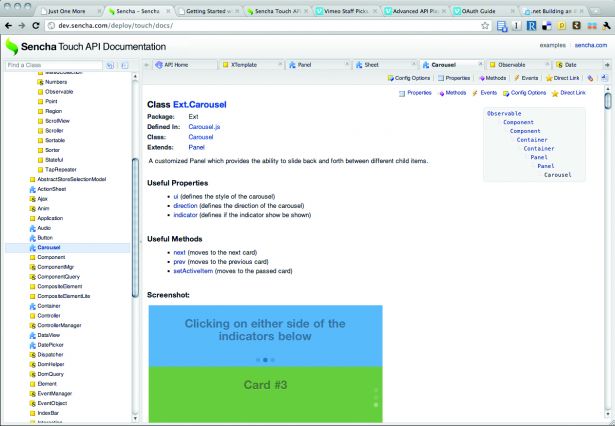
Models, stores, proxies and readers are the trickiest to come to terms with, so it’s worth reading up on the different options in the API documentation. But that’s the model side of things defined. Let’s move on to layout components. If we were to lay out our app in simple pseudo-code it would look like this:
<wrapper><header><logo><menu></header><carousel><page1><page2><page3><page4></carousel></wrapper>I like to work from the inside out, so we’ll create the four pages (numberOfPages below) for our carousel and keep them in an array we can access later:
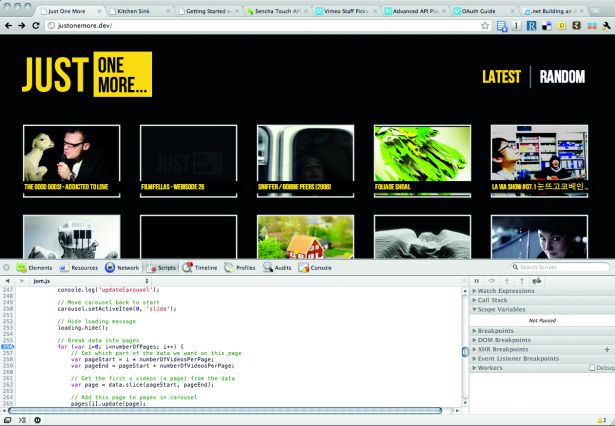
// Create pages for the carouselvar pages = [];for (var i=0; i<numberOfPages; i++) {pages.push(new Ext.Component({id: 'page'+i,cls: 'page',tpl: ['<tpl for=".">','<div id="summary{data.id}" class="summary {data.watched} {data.available}">','<img src="{data.thumbnail_medium}" />','<h3>{data.title}</h3>','</div>','</tpl>']}));}Each page is given an imaginatively named id of page1, page2 and so forth, and an equally imaginative class of page.
The fun part is the tpl section, where we create an HTML template for each video thumbnail. So, when we update our pages with an array of videos, each div will have the id of the video, the img src will get the value of the video's thumbnail_medium, the h3 will be the title and so on.
Next, we create the carousel:
// Create the carouselvar carousel = new Ext.Carousel({id: 'carousel',items: pages,flex: 1,listeners: {tap: {element: 'el',fn: function(evt, target) {showEmbeddedVideo(evt, target);},delegate: '.summary'}}});The items of the carousel will be the pages we defined before, while flex dictates how much of the screen the carousel should take up, with 1 being all available space.
We add a listener for the ‘tap’ event, making use of the rather nifty delegate parameter. This means the tap event is only fired when I hit a DOM element with class summary – which will subsequently be passed as the ‘target’ argument to our showEmbeddedVideo handler.
// Create the headervar header = new Ext.Panel({dock: 'top',id: 'header',height: 185,html: '<h1>Just one more</h1><ul id="menu"><li id="latest">Latest</li><li id="random">Random</li></ul>'});The only special feature of the header is the dock attribute. This specifies that the header will be ‘docked’ to the top and not scroll with the rest of the screen elements.
// Create the wrapper (which has the fixed height header and scroller)var wrapper = new Ext.Panel({fullscreen: true,layout: {type: 'vbox',align: 'stretch'},items: [carousel],dockedItems: [header]});Finally, we create the wrapper panel to hold everything. Of note is the layout attribute, which dictates that the elements within it are laid out one on top of the other (vbox) and that it’s stretched to fill the whole screen.
Items and dockedItems are the components we created above. So we’ve got the model defined and the layout elements set up: now we just need to add some functionality.
Tying it all together
The functional part of the app, again using pseudo-code, goes like this:
On startup:
1. Load videos from local storage into the store
2. Update the carousel
When the user taps on a menu item:
3. Make an Ajax call to get more videos
4. Add these to the store and sync back to local storage
5. Update the carousel
When the user taps on a thumbnail:
6. Display the video in a pop-up
7. Mark the video as watched in the store and local storage
When the app starts up, we call the init function:
/* INIT */var init = function() {// Get state ('latest' or 'random')state = getState();if (!calling) { calling = state; }// Set the menu to the current state and add tap handlersetSelectedMenuItem(state);Ext.select('li', false, 'menu').on({tap: handleMenuTap});// Load the store from local storagevideoStore.load();// Make sure we've got the latest videosif (state == 'latest') {getNewVideos();}}();After checking whether the user was last looking at latest or random videos (and updating the menu accordingly), we load videos from localStorage into the store. This is as easy as calling videoStore.load().
The store then fires a load event, which we catered for with the event listener we set on videoStore earlier. This event listener essentially called updateCarousel:
var updateCarousel = function(data) {// Move carousel back to startcarousel.setActiveItem(0, 'slide');// Hide loading messageloading.hide();// Break data into pagesfor (var i=0; i<numberOfPages; i++) {// Break our data into 4 pagesvar page = pages[i];var pageStart = i * numberOfVideosPerPage;var pageEnd = pageStart + numberOfVideosPerPage;// Get the first x videos (a page) from the datavar pageData = data.slice(pageStart, pageEnd);// Add this page to pages in carouselpage.update(pageData);}};updateCarousel takes in an array of videos. For each page in our carousel we’re going to grab a page-sized chunk of these videos (pageData will be an array of 12 videos) and load them into the page by calling page.update(pageData).
New videos
Back when we defined the pages of the carousel, we defined a template (the tpl attribute) which is used when we call page.update – for each video in the pageData array, a div is created with the id of the video, an h3 with the title and so on.
Consequently, when a user taps latest or random in the menu we call getNewVideos:
var getNewVideos = function() {var page = 1;if (calling == 'random') {// Set page to be a random one in Vimeo's 40 pages of Staff Pickspage = Math.floor(Math.random() * 39) + 2;}var apiUrl = 'http://vimeo.com/api/rest/v2';var parameters = {method: 'vimeo.channels.getVideos',channel_id: 'staffpicks',per_page: numberOfVideosToDownload,page: page,full_response: 'true',format: 'jsonp',callback: 'Ext.util.JSONP.callback'};Ext.util.JSONP.request({url: getUrlWithSignature(apiUrl, parameters),callback: function(response) {handleNewVideos(response);}});};This is fairly straightforward. After deciding which page of Staff Picks to request from Vimeo, we make a JSONP call using Sencha’s built-in function. In the callback we check the status is okay, then call handleNewVideos.
var handleNewVideos = function(response) {if (response.stat == 'ok') {videos = response.videos.video;// Remove the current videosvideoStore.removeAll();// Loop through videos creating new Model instancesvar instances = [];for (var i=0, j=videos.length; i<j; i++) {var video = videos[i];var instance = Ext.ModelMgr.create({id: video.id,description: video.description,height: video.height,available: (video.urls.url.length > 1) ? 'mobile' : 'online',thumbnail_medium: video.thumbnails.thumbnail[1]._ content,thumbnail_large: video.thumbnails.thumbnail[2]._ content,title: video.title,username: video.owner.realname,width: video.width,watched: isVideoWatched(video.id) ? 'watched' : ''}, 'Video', video.id);instances.push(instance);}// Insert new items into the storevideoStore.add(instances);// Save statesaveState();} else {alert('Sorry, we couldn\'t reach Vimeo to get more videos.Please try again later...');setSelectedMenuItem(state);loading.hide();}};When we get videos back from Vimeo we do three things:
1. Remove existing videos from the store: videoStore.removeAll()
2. Loop through the videos and create video model instances of them, ready for the store
3. Add the new videos to the store: videoStore.add(instances)
Remember that when we loaded videos from localStorage into the store, it fired the load event from which it called updateCarousel? The same happens here when we add videos to the store.
The add event is fired, which syncs the store (copies our new videos to localStorage) and calls updateCarousel.
And we're done!
And that, my friends, completes the loop. On startup, the app loads videos from localStorage and displays them in the pages of the carousel, which you can swipe through.
Tapping the menu makes an Ajax call for new videos, adds these videos to the store, syncs back to localStorage then displays them in the carousel again.
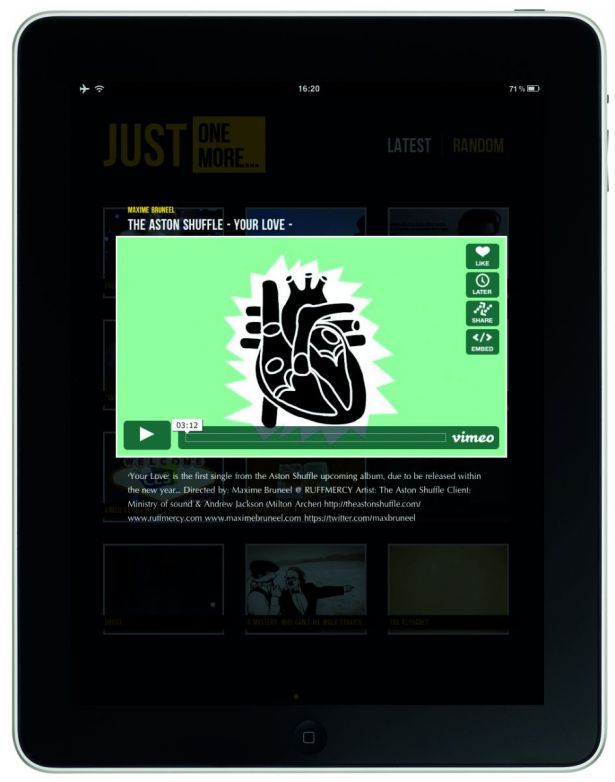
We haven’t touched on watching a video but this is in the source code, which you can download above. Have a play with the code and see what you can create. Best of luck!
You can play with the final app in all its iPad glory by downloading it from the App Store (search for ‘just one more’). We hope you enjoy whiling away the hours watching the choicest Vimeo short films. Go on, just one more ...

The Creative Bloq team is made up of a group of art and design enthusiasts, and has changed and evolved since Creative Bloq began back in 2012. The current website team consists of eight full-time members of staff: Editor Georgia Coggan, Deputy Editor Rosie Hilder, Ecommerce Editor Beren Neale, Senior News Editor Daniel Piper, Editor, Digital Art and 3D Ian Dean, Tech Reviews Editor Erlingur Einarsson, Ecommerce Writer Beth Nicholls and Staff Writer Natalie Fear, as well as a roster of freelancers from around the world. The ImagineFX magazine team also pitch in, ensuring that content from leading digital art publication ImagineFX is represented on Creative Bloq.
