Colour a mono portrait by hand
Add subtle colouring to mono portraits to make them really eye-catching using Photoshop in just four easy steps!
Sign up to Creative Bloq's daily newsletter, which brings you the latest news and inspiration from the worlds of art, design and technology.
You are now subscribed
Your newsletter sign-up was successful
Want to add more newsletters?
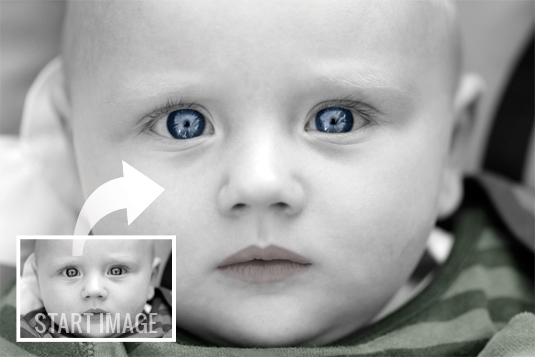
Back in the days before colour film was even invented, photographers used to hand-colour their black-and-white prints using little more than a paintbrush and a bottle of toner. Getting it right took patience and a steady hand, and involved watering down the toner until it was exactly the right shade before painting it on slowly and methodically. It was all too easy to get it wrong, and just one small mistake could be enough to ruin an entire print.
These days, it's much simpler. Thanks to Photoshop, you can choose from thousands of colours and, best of all, you can correct mistakes as you go along. In this lesson, we'll show you how to add impact to any mono image with the help of some subtle hand colouring.
Read on to find out how it's done with Photoshop Elements (you can also use all versions of of CS up to and including Photoshop CS6) - there's a sample image for you to use below.
Article continues belowClick here to download image
01. Create some layers
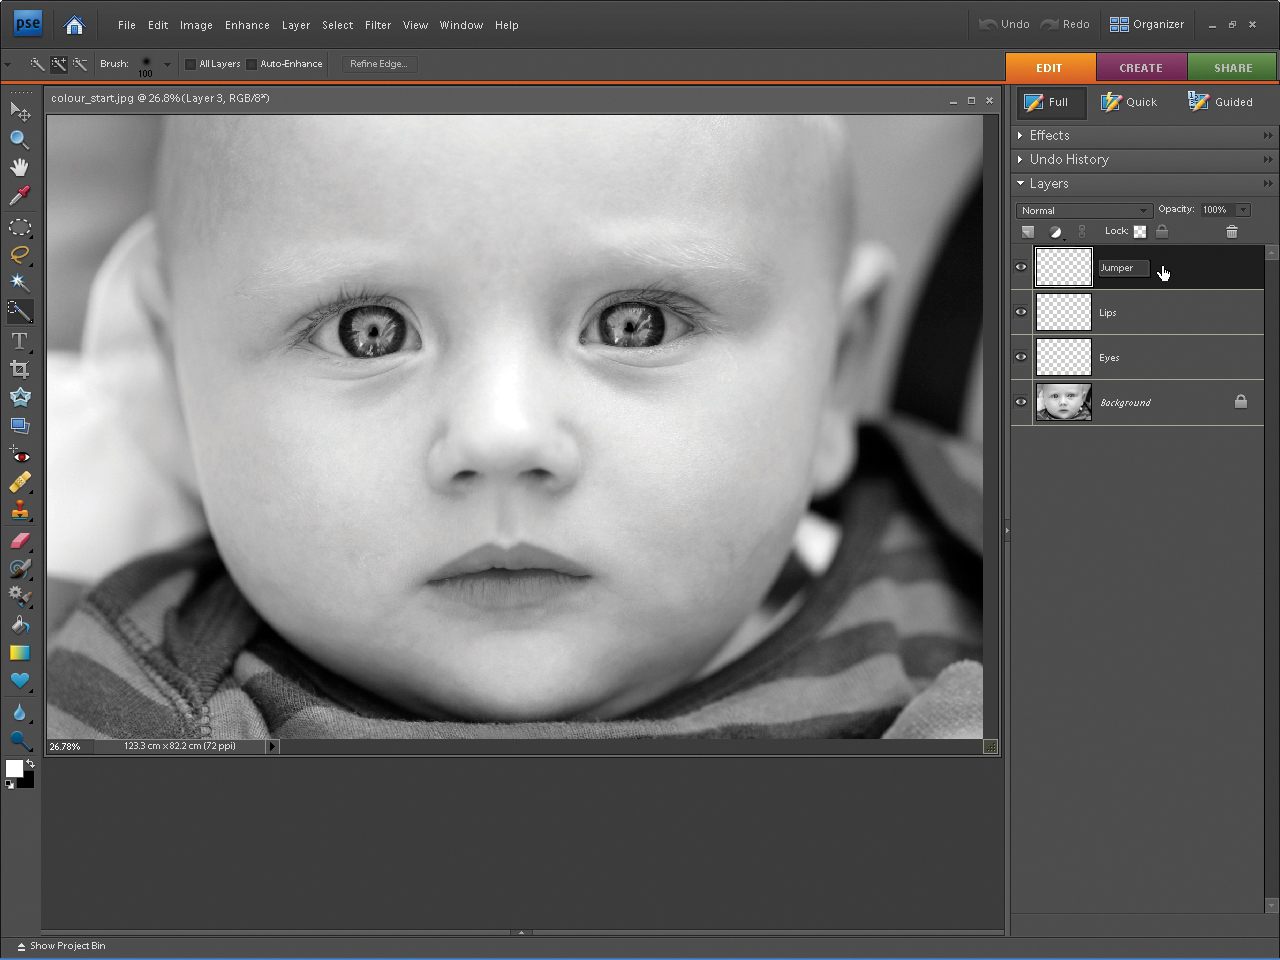
Open the file named colour_start.jpg in Elements, go to Window>Layers to open up the Layers palette and then click on the Create New Layer icon. Double-click on the words 'Layer 1' and rename the layer 'Eyes'. Create a third layer and rename it 'Lips', then make a fourth layer and rename it 'Jumper'.
02. Grab a brush
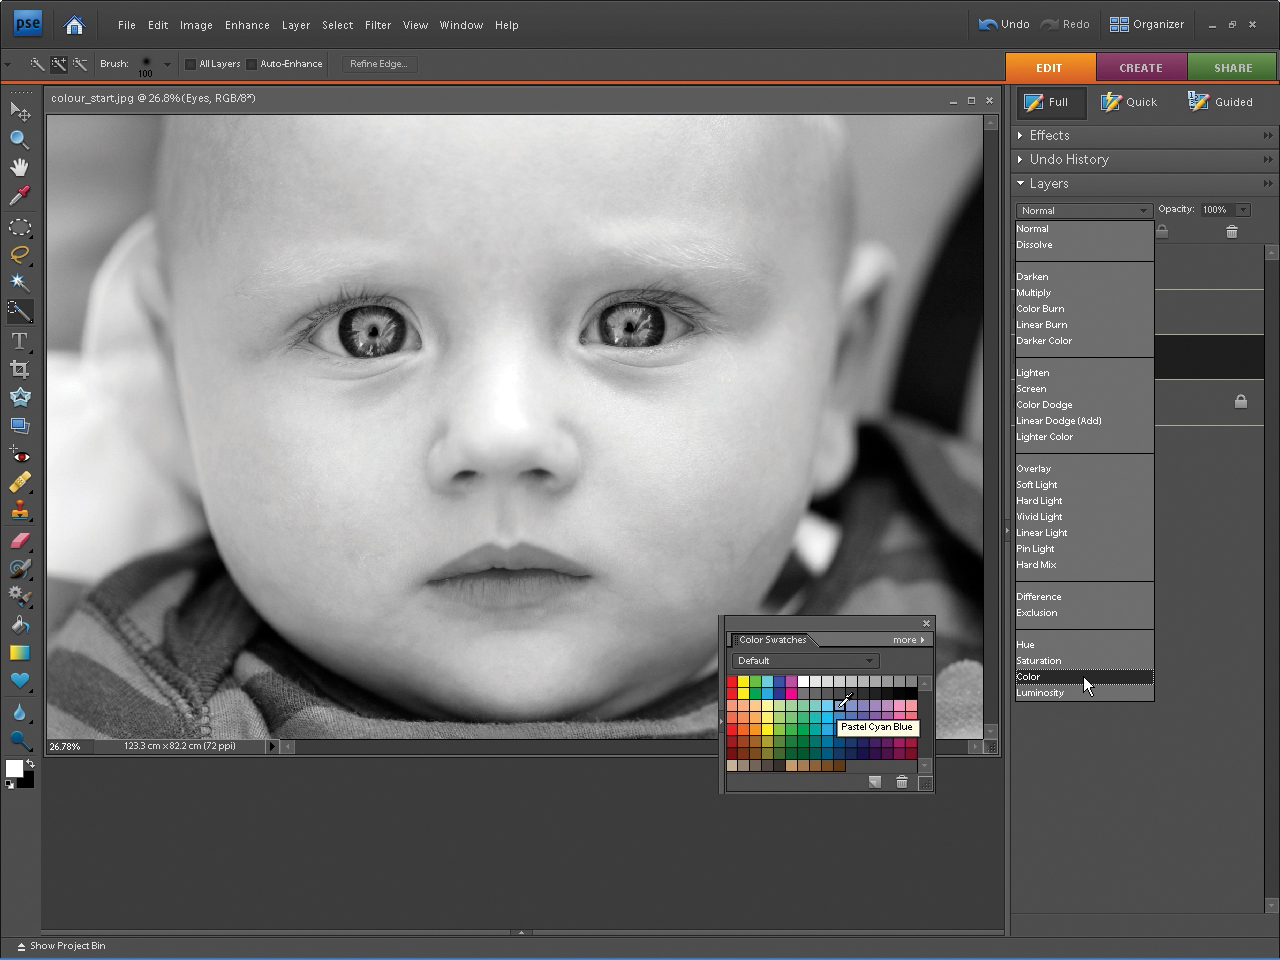
Click on the 'Eyes' layer, zoom in on the eyes and choose Colour from the Blending Mode menu at the top of the Layers palette. Grab the Brush tool and select a soft-edged brush with a Diameter of 100. Set Hardness to 10% and Brush Mode to Normal. Drag the Opacity slider to 80% and go to Window>ColourSwatches. Select Pastel Cyan Blue.
03. Start painting
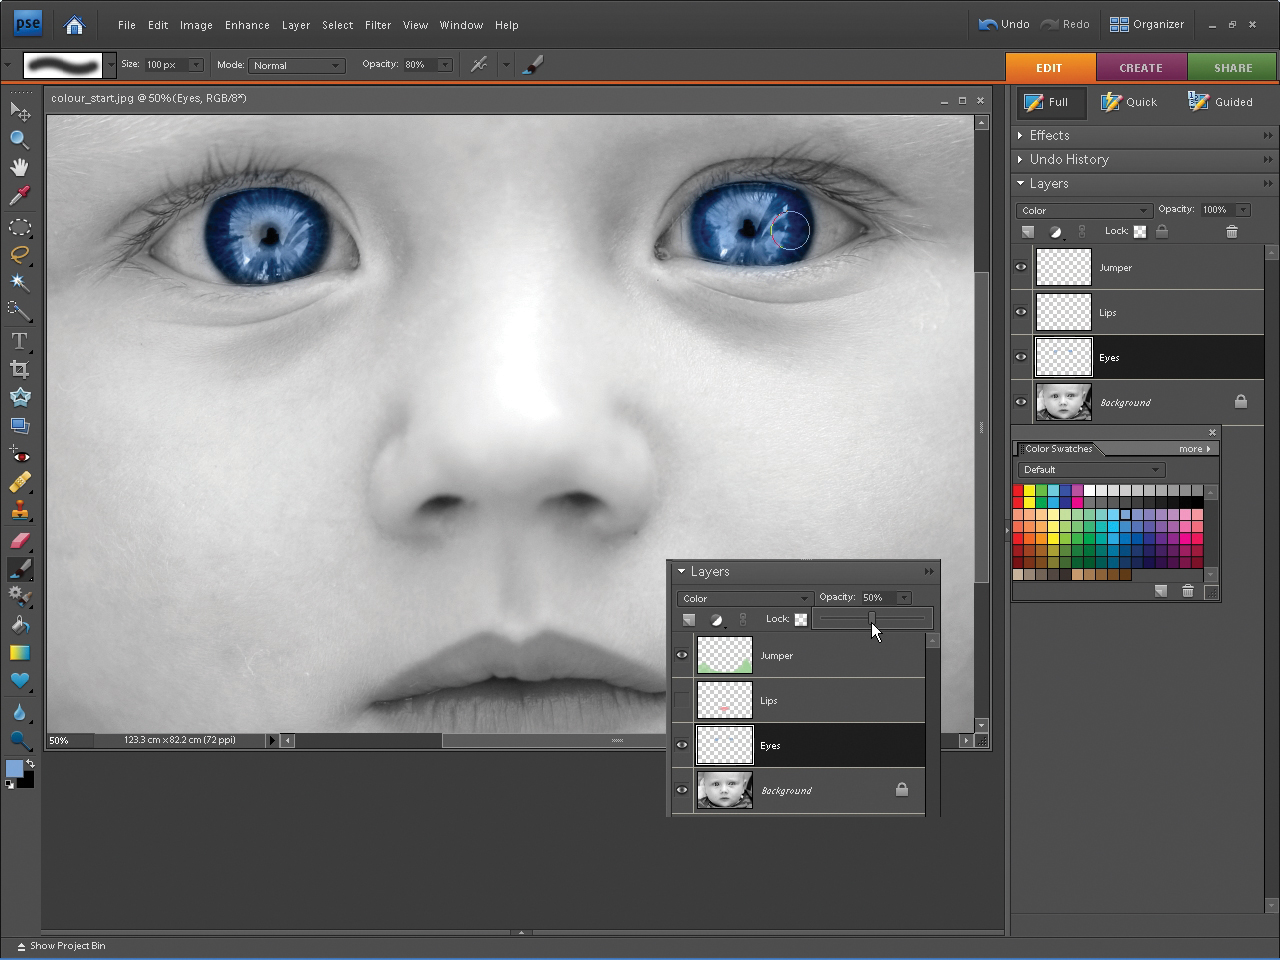
Paint over the irises, taking care not to stray into the whites of the subject's eyes. At this stage they'll look a bit startling, so drag the Opacity slider at the top of the Layers palette to 50% to tone things down. Next, select the 'Lips' layer and repeat step two, this time using Pastel Magenta to paint in the lips. To tone them down, drag the Opacity slider to 10%.
04. Go green
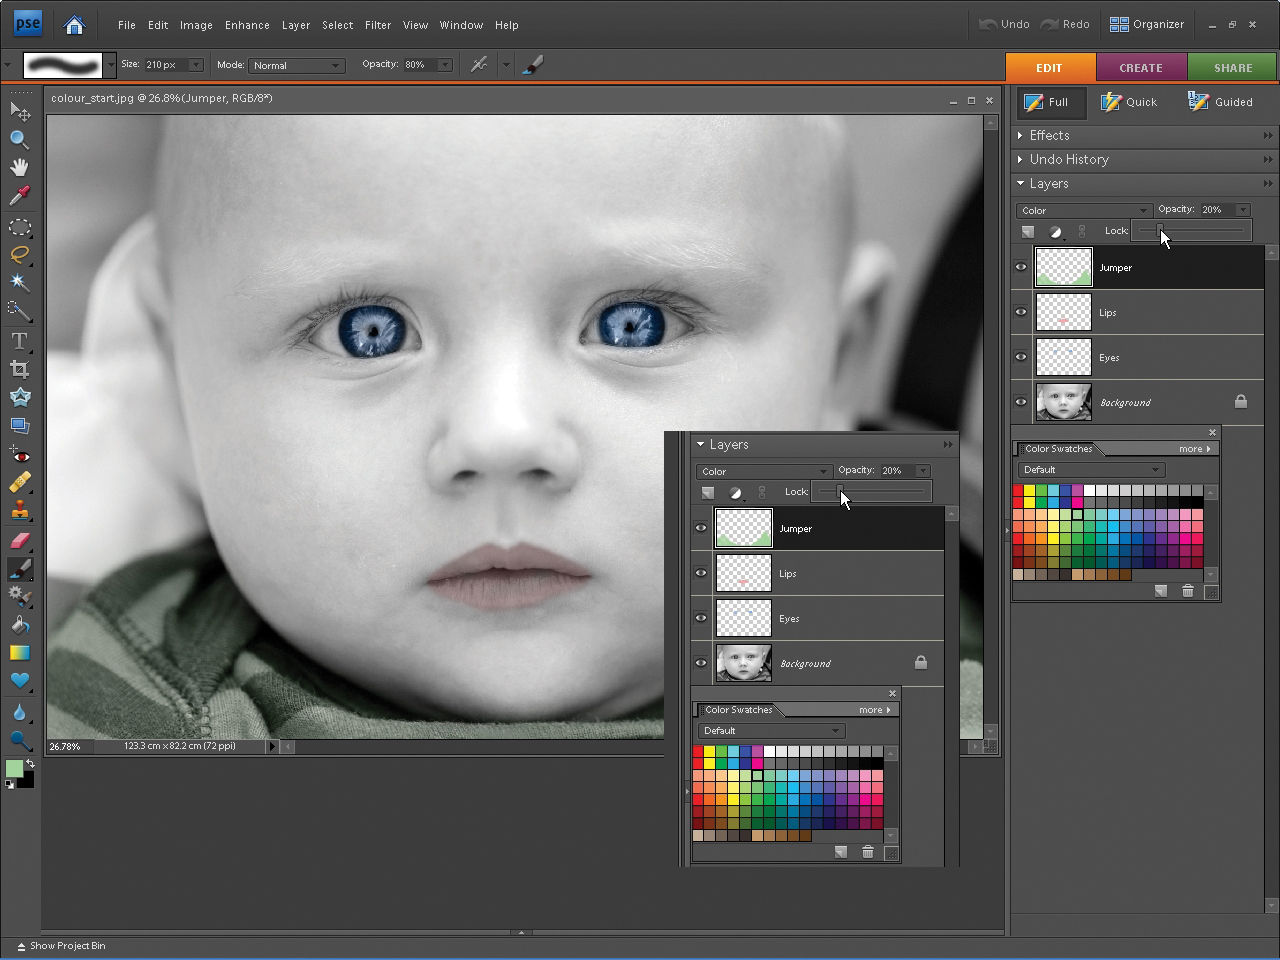
Zoom back out, select the 'Jumper' layer and set the Blending Mode to Colour. Increase the size of your brush to 400, select Pastel Yellow Green from the colour swatches and paint over the jumper, reducing the brush size with the [ key on your keyboard to avoid painting the baby's chin. When you're finished, move the Opacity slider to 20%.
Sign up to Creative Bloq's daily newsletter, which brings you the latest news and inspiration from the worlds of art, design and technology.
This tutorial first appeared in Portrait Photography Made Easy - a bookazine from the makers of PhotoPlus.
Now read:
- 30 free Photoshop brushes every creative must have!
- 101 Photoshop tutorials
- 20 best Photoshop plugins

The Creative Bloq team is made up of a group of art and design enthusiasts, and has changed and evolved since Creative Bloq began back in 2012. The current website team consists of eight full-time members of staff: Editor Georgia Coggan, Deputy Editor Rosie Hilder, Ecommerce Editor Beren Neale, Senior News Editor Daniel Piper, Editor, Digital Art and 3D Ian Dean, Tech Reviews Editor Erlingur Einarsson, Ecommerce Writer Beth Nicholls and Staff Writer Natalie Fear, as well as a roster of freelancers from around the world. The ImagineFX magazine team also pitch in, ensuring that content from leading digital art publication ImagineFX is represented on Creative Bloq.
