Create a contemporary cutout in Photoshop
Produce a modern print using colour distortion and an artistic filter in this guide to Photoshop basics.
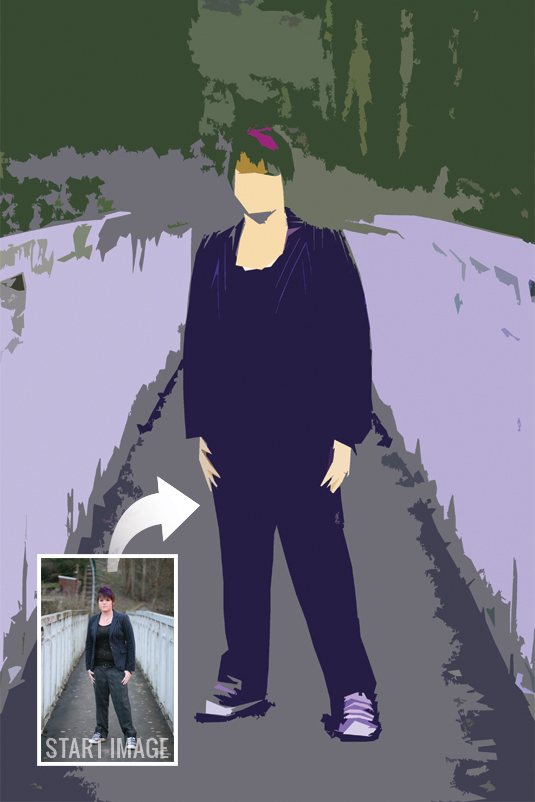
Simple painted prints based on stark, contrasty photos are currently popular; printed on large canvases, they feature iconic images such as silhouetted jazz musicians or vivid flower macros.
This style originates from both the minimalist and cubist movements - the basic shapes and lines with the three-tone colour palette keep things simple, while the angular shapes of the subjects catch the eye. Yet these images aren’t freehand paintings, rather derivatives of images captured on camera. We show you which types of photo suit this cutout style, and how to transform your images into artistic prints using Photoshop Elements 6 (you can also use all versions of CS up to and including Photoshop CS6).
Click here to download start image
01. Tidy and declutter
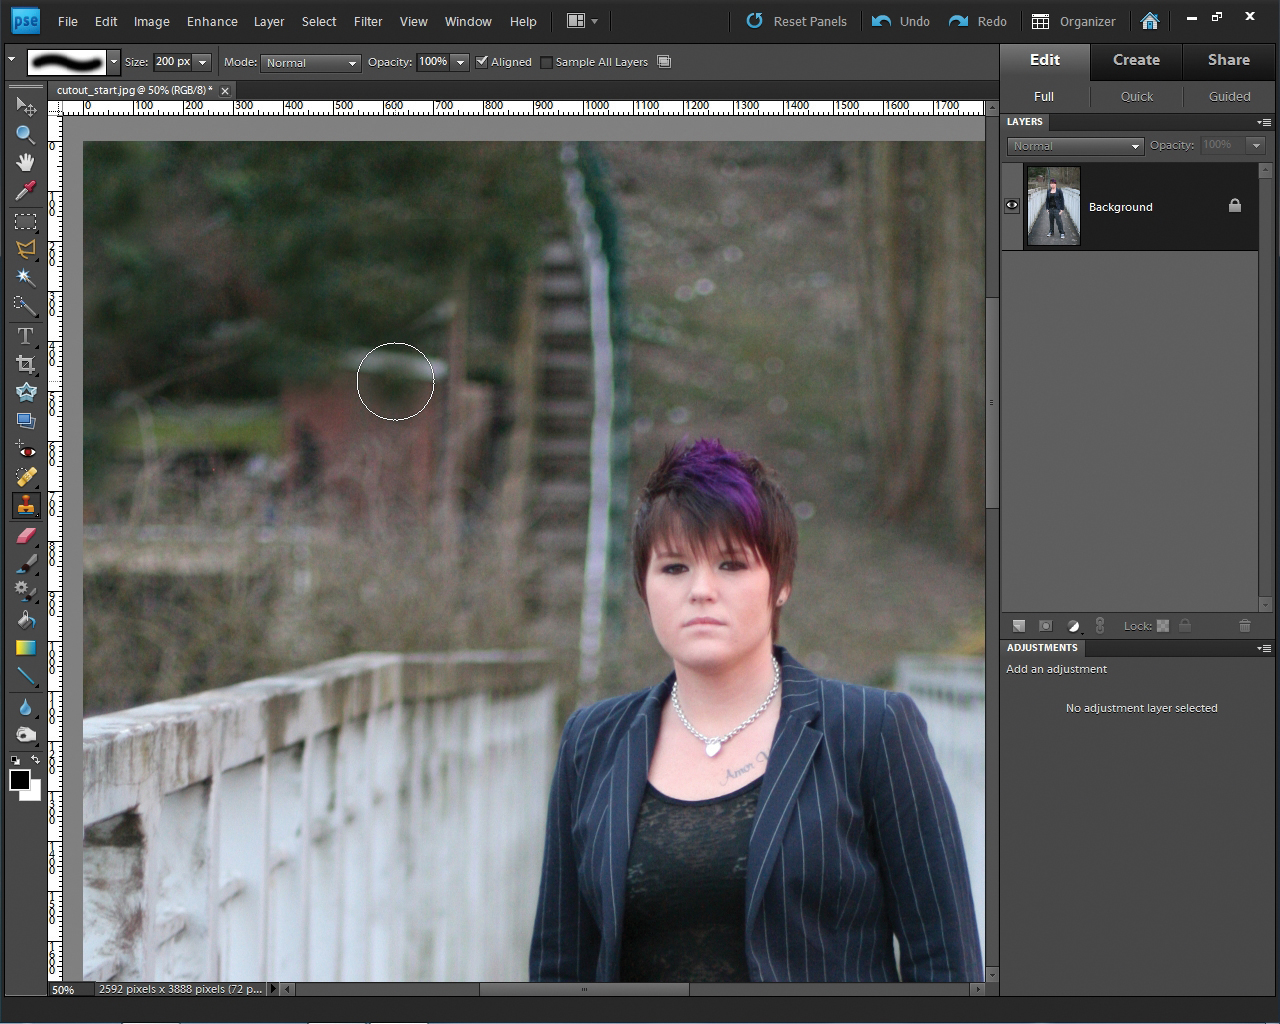
Open cutout_start.jpg. The image has a strong composition, but enhance this further by removing any distractions. Select the Clone Stamp tool, with a soft-edged brush at around 200 pixels. Ensure Opacity is at 100%, then Alt-click on the trees in the top-left corner to sample them. Click over the shed, washing line and building at the top.
Article continues below02. Boost contrast
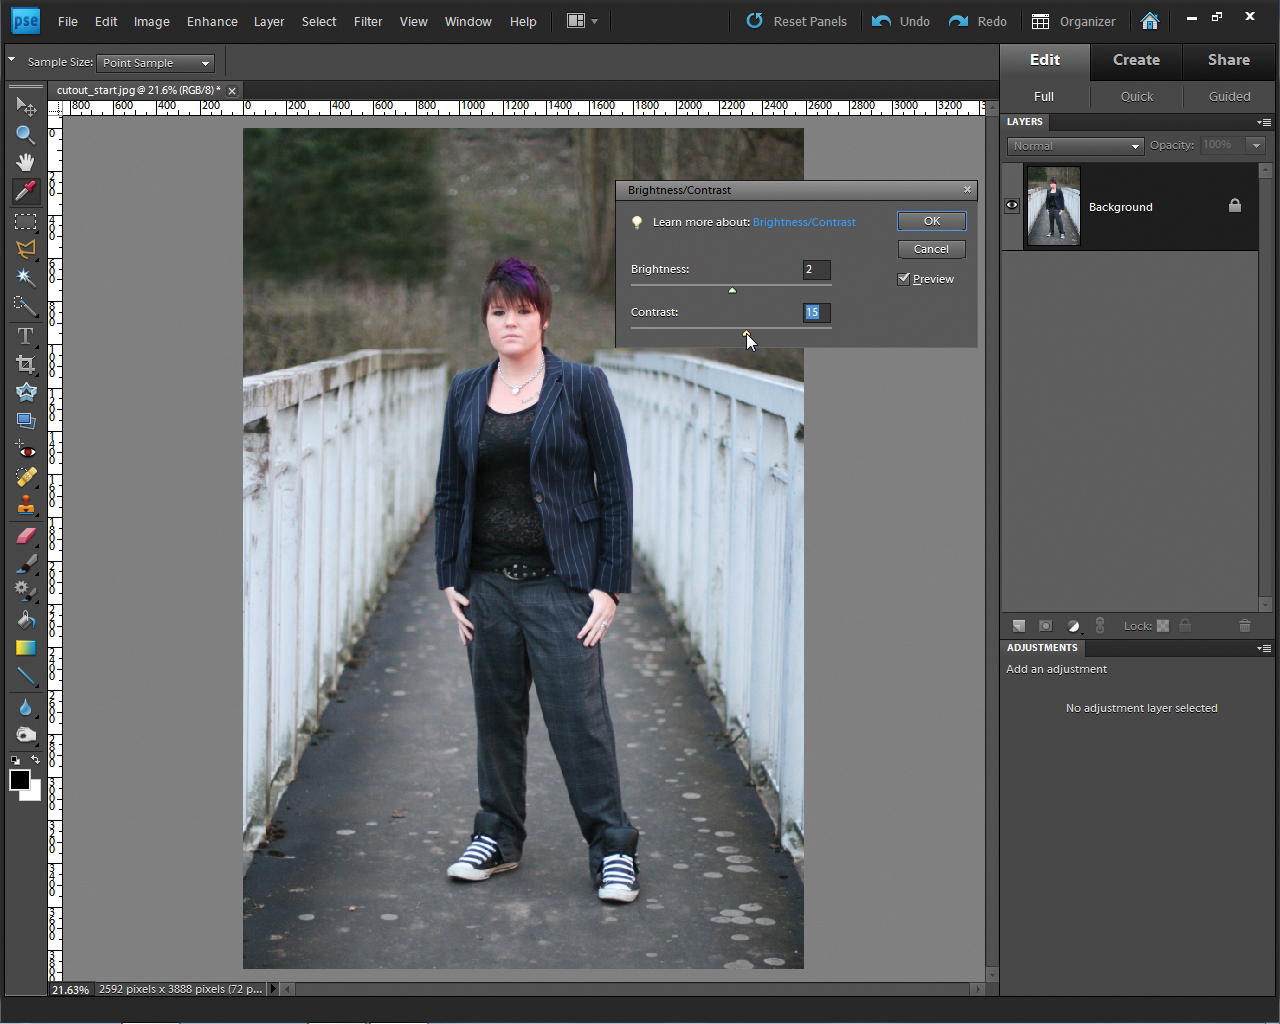
Resample another clear area of foliage and keep cloning, to remove the steps in the middle and the roof on the right and make the background look much neater. For a clean cutout make the colours and lines bolder - go to Enhance>AdjustLighting>Brightness/Contrast. Move the Brightness slider to 2 and Contrast to 15. The photo will now look more punchy. Click OK.
03. Distort colours
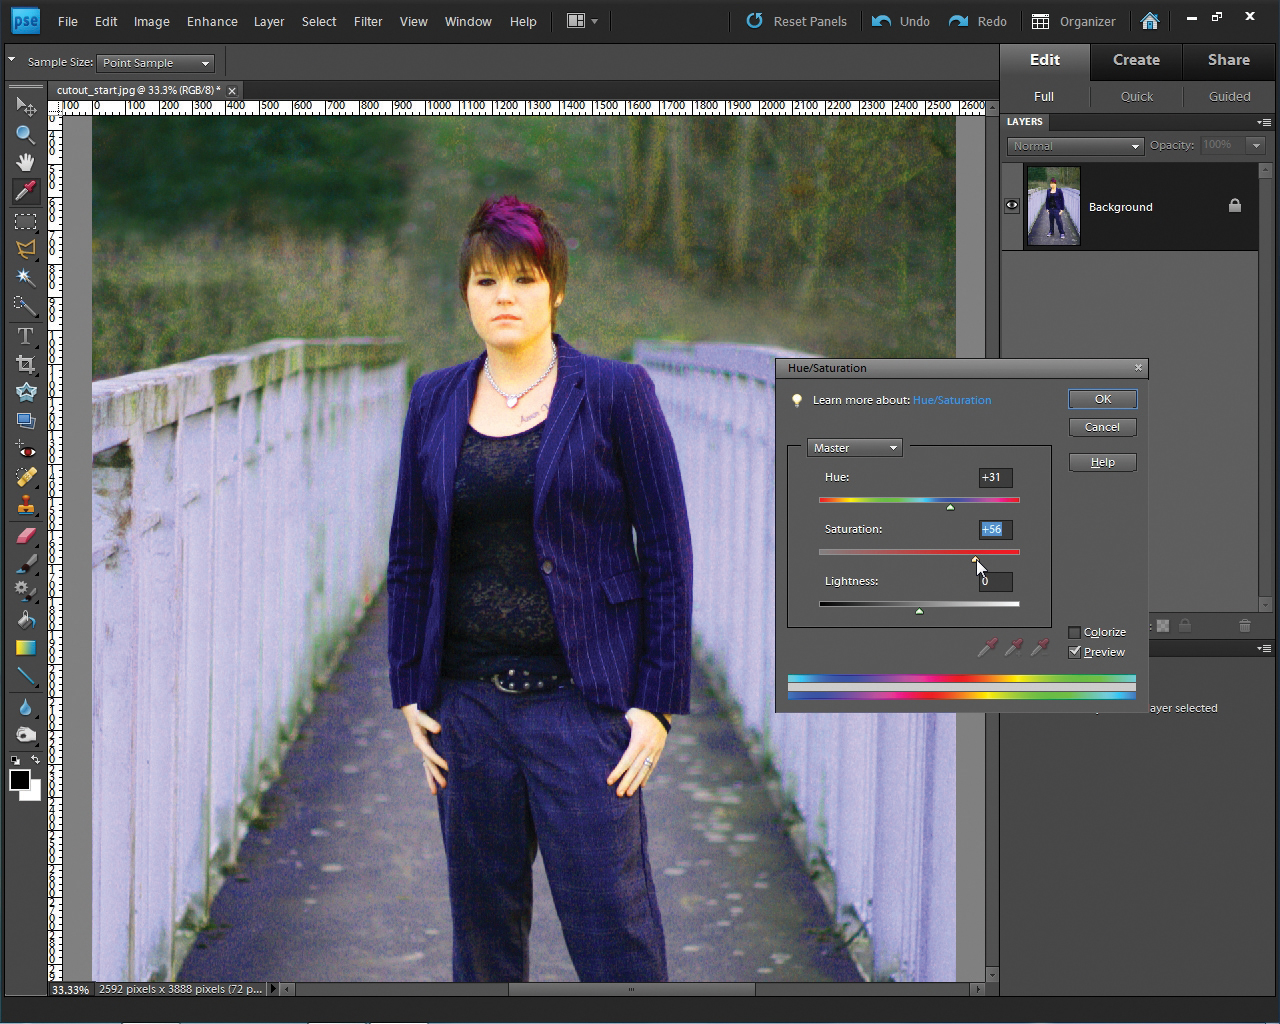
Go to Enhance>AdjustColour>AdjustHue/Saturation. Ensure Preview is ticked, then move the Hue slider to +31 and Saturation to +56. Leave Lightness at 0. The model now looks somewhat jaundiced and the background colours seem blown-out and distorted, but the Cutout Filter will simplify these in the next step.
04. Clean cut
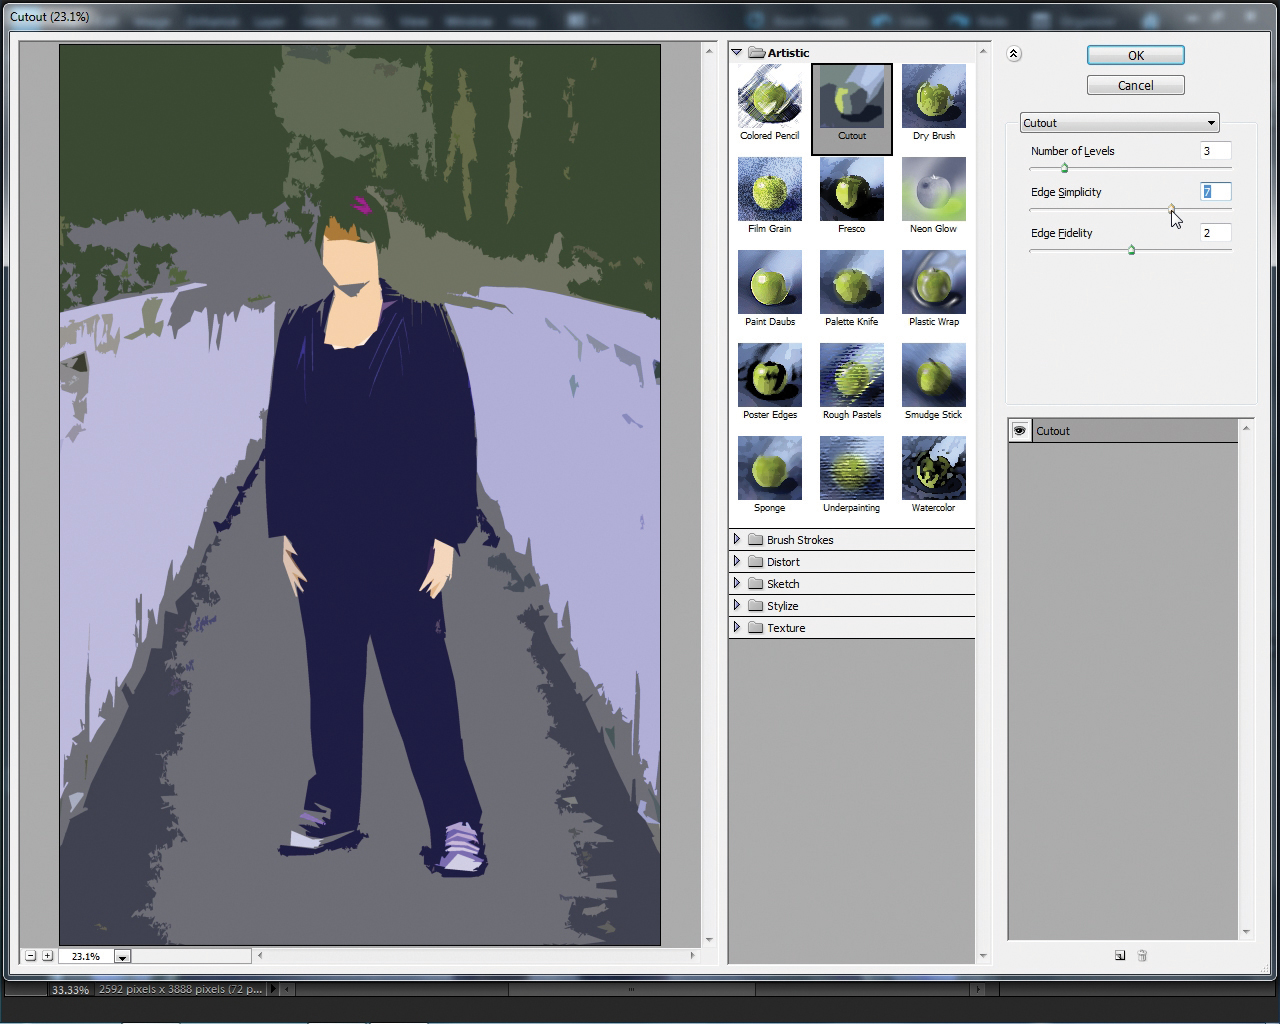
Go to Filter>Artistic>Cutout. In this new window are three sliders. The Number Of Levels slider refers to how many different levels of colour and brightness you want; we selected 3. Edge Simplicity adjusts the angularity of the corners, so set this to 7 for a cubist look. Edge Fidelity changes the smoothness of the edges, so select 2 for a soft effect and click OK.
This tutorial first appeared in Portrait Photography Made Easy - a bookazine from the makers of PhotoPlus.
Sign up to Creative Bloq's daily newsletter, which brings you the latest news and inspiration from the worlds of art, design and technology.
Like this? You'll love these!
- 30 free brushes for Photoshop
- Learn more about Photoshop with these 101 tutorials
- Our selection of the 20 best Photoshop plugins - click here

The Creative Bloq team is made up of a group of art and design enthusiasts, and has changed and evolved since Creative Bloq began back in 2012. The current website team consists of eight full-time members of staff: Editor Georgia Coggan, Deputy Editor Rosie Hilder, Ecommerce Editor Beren Neale, Senior News Editor Daniel Piper, Editor, Digital Art and 3D Ian Dean, Tech Reviews Editor Erlingur Einarsson, Ecommerce Writer Beth Nicholls and Staff Writer Natalie Fear, as well as a roster of freelancers from around the world. The ImagineFX magazine team also pitch in, ensuring that content from leading digital art publication ImagineFX is represented on Creative Bloq.
