How to design a spaceship
Top techniques for a spaceship concept, as part of the video game pipeline process.
Sign up to Creative Bloq's daily newsletter, which brings you the latest news and inspiration from the worlds of art, design and technology.
You are now subscribed
Your newsletter sign-up was successful
Want to add more newsletters?

Five times a week
CreativeBloq
Sign up to Creative Bloq's daily newsletter, which brings you the latest news and inspiration from the worlds of art, design and technology.

Once a week
By Design
Sign up to Creative Bloq's daily newsletter, which brings you the latest news and inspiration from the worlds of art, design and technology.

Once a week
State of the Art
Sign up to Creative Bloq's daily newsletter, which brings you the latest news and inspiration from the worlds of art, design and technology.

Seasonal (around events)
Brand Impact Awards
Sign up to Creative Bloq's daily newsletter, which brings you the latest news and inspiration from the worlds of art, design and technology.
Designing spaceships for games is a fun experience. If you're interested in 3D art, science, exploration and the cold, haunting darkness of space then you should definitely give it a try.
Designing a spaceship for a game is a different challenge compared to illustrating a scene. You have to consider all distances and directions of view, as well as ensuring that your design fits into the game's world.
In many science fiction games the spaceship is a character in itself, and this is a good way to approach the topic. Is your ship brand spanking new, or a beaten-up bucket of bolts? Are the owners rich or poor? How about adding unique elements that suggest it's a semi-sentient craft, or a plant-based bioship? Perhaps the ship's been created from a hollowed-out asteroid to look inconspicuous?
Thinking of your spaceship design in the same way as your characters will help you to create an interesting ship that people can relate to and want to fly in the game.
01. Answering the brief's requirements
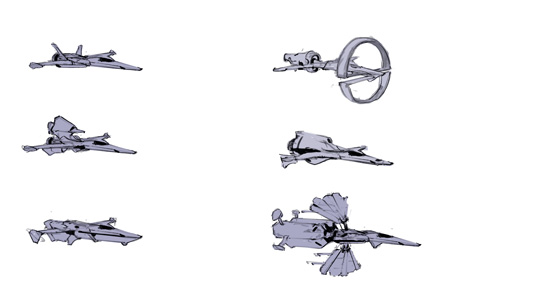
I'm going to design a fast scout ship that's able to defend itself and rescue colonists under threat. Defining your universe's technology will shape your design. As an example, what's the propulsion technology? A fast, fuel-intensive method would mean less space for supplies. Perhaps it's achieved with a specific drive that takes up more room than conventional engines?
02. Thumbnailing designs

In a game that features a range of ships, it's crucial that they have distinctive silhouettes. Think about basic design language: for example, rounded edges can be seen as safe shapes, so use them for passenger crafts.
My thumbnails fit the brief because their flat undersides would be able to handle planetary re-entry. The wings convey manoeuvrability and speed.
Sign up to Creative Bloq's daily newsletter, which brings you the latest news and inspiration from the worlds of art, design and technology.
03. Mood check
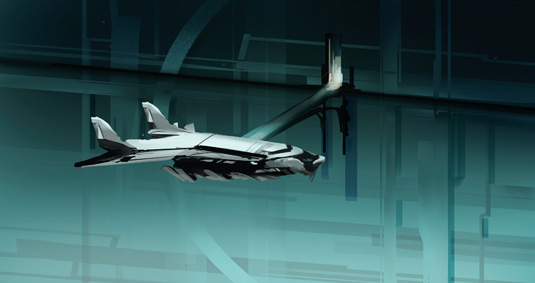
Once I've completed the thumbnails I take my favourite ones further. I drop them quickly into more appropriate surroundings, such as this simple space dock.
This helps give me a better sense of what my ships will look like in-game. If I already have some other ships created for this game then I sit them alongside each other for comparison.
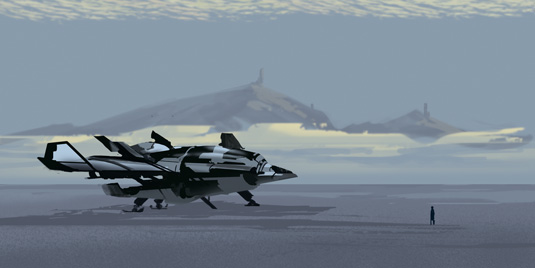
A handy trick often used in car design that will help you make your work look more plausible is to add some of the ground's colour into the underside of your spaceship and some of the sky's colour to the top.
Typically, this would be brown and blue, respectively. But you can use whatever you think fits your spaceship and its surroundings.
04. Refining thumbnails
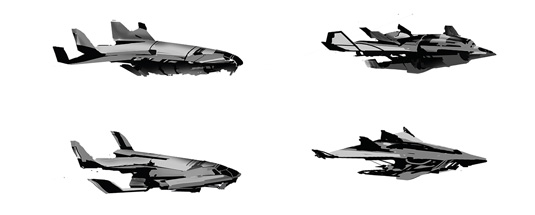
At this stage I can usually tell what areas I want to focus on. I work up my favoured thumbnails, taking them in slightly different directions and seeing if I like the results.
I still try and keep the amount of tones I use to a minimum. The spaceship is going to be under a lot of lighting conditions in-game, so I want it to work in all of them, and making sure it reads like this helps.
05. Developing clean line work
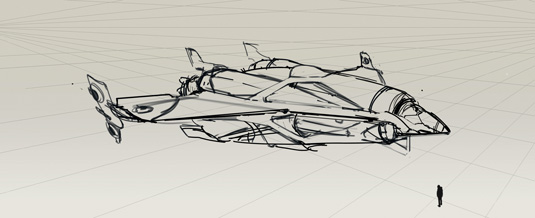
I chose this thumbnail because it fits the brief. I imagine that the flat underside is able to enter the atmosphere safely, the wings indicate that this is a highly manoeuvrable craft, while its chunky body alludes to a cargo-based role. I feel the ship is at once small enough to lead on to some bigger ships later in the game, while big enough to feature offensive weaponry.
I take the design into a new document and start sketching out the linework. Doing this on a perspective grid avoids problems later on. I throw in a figure to give the 3D modellers an idea of scale.
06. Tone block-in
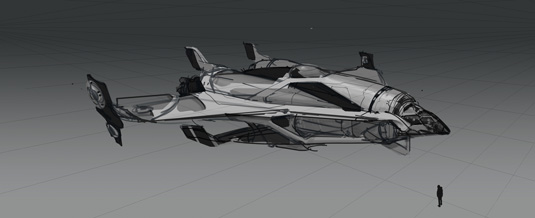
Next I block out the basic tones of the ship. For gaming purposes you have to think about what areas of the bodywork might be customisable. This could be either as simple as adding a decal, or something more complex such as applying a new colour scheme as chosen by the player.
07. Colouring the craft
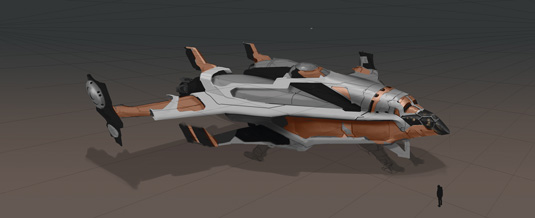
My view of colour is that it's an important tool for breaking up the panels and giving more life to my design. If your game has faction colours then now's a good time to add them in – it'll help establish its place in your gaming universe.
08. Refining your design
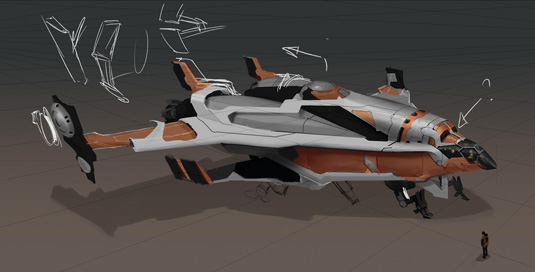
Don't be afraid to question your design. Here I've experimented with the wing shapes, and left myself little visual prompts. Your design will keep throwing up new challenges to resolve, so keep looking at real-life reference.
09. Using the Path tools
A top tip is to draw your perspective line with the Path tools, so you don't have to worry about going off canvas. First select the Path tool. Then select the Line tool and set the Pixel Width to 1. Create a new path and draw your horizontal line with vanishing points at either end.
You can also create a new layer and use the Stroke Path tool to bring these perspective lines to the canvas. Don't forget that you can choose the colour of your stroke paths – it will simulate whichever brush and colour you've picked.
10. Landing gear
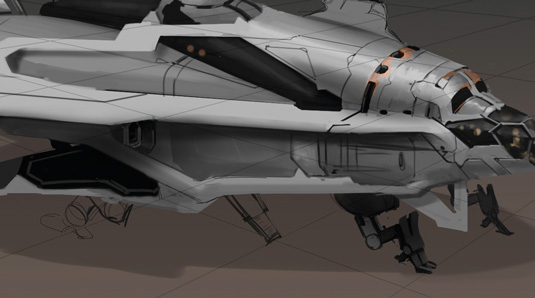
The ship is going to need to land, and the crew will probably want the ability to get out! I add doors and landing gear to my ship design; I don't want to have to squeeze these elements in after someone has started to turn my drawing into a 3D model.
11. Weathering design elements
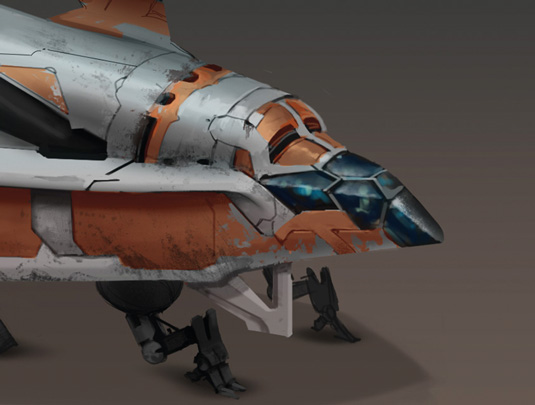
I add weathering to my designs. This helps sell what the ship's life is like, enriches the game world and gives everything a sense of depth. Think about how a ship could experience wear and tear.
An asteroid miner might be covered in dust and small dents. A long-distance goods freighter could feature mismatched body panels, with worn paint work around cargo doors.
12. A modular approach
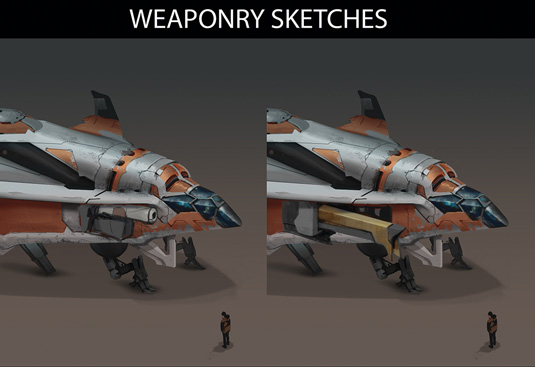
I ensure that the craft I've designed will fit in with the current game mechanics by dropping in some weaponry that I've quickly concepted. Modular parts such as better engines or a long-distance scanner gives the players something to aim for, in terms of in-game achievements.
13. Clear labelling
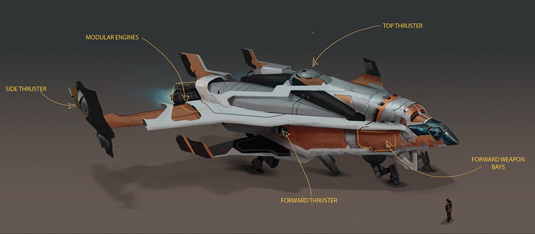
In the games industry a group of artists further down the production pipeline will be turning your concept into a three-dimensional model.
For the best translation of your idea – and to avoid lots of emails going back and forth – you should explain your art as much as possible, as simply and clearly as possible. Here I label where I think moving and modular parts should go.
14. Produce an orthographic sketch
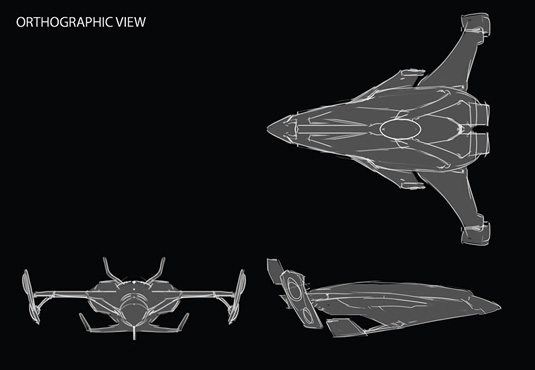
Once I'm happy with the beauty render, I'll send this to the 3D modellers along with an orthographic sketch of the basic forms from a variety of angles. However good your concept might seem from one angle, someone else’s view of it might be completely different. Your sleek spaceship might come back looking like a duck. We’ve all been there!
This article originally appeared in ImagineFX issue 115.
Related articles:
