Sharpen your human anatomy modelling skills with the help of this expert advice.
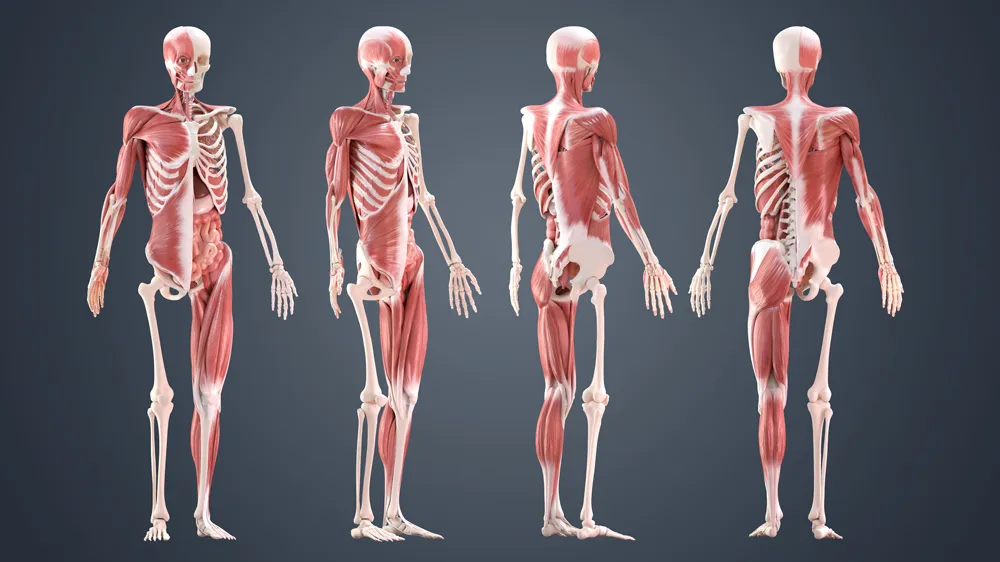
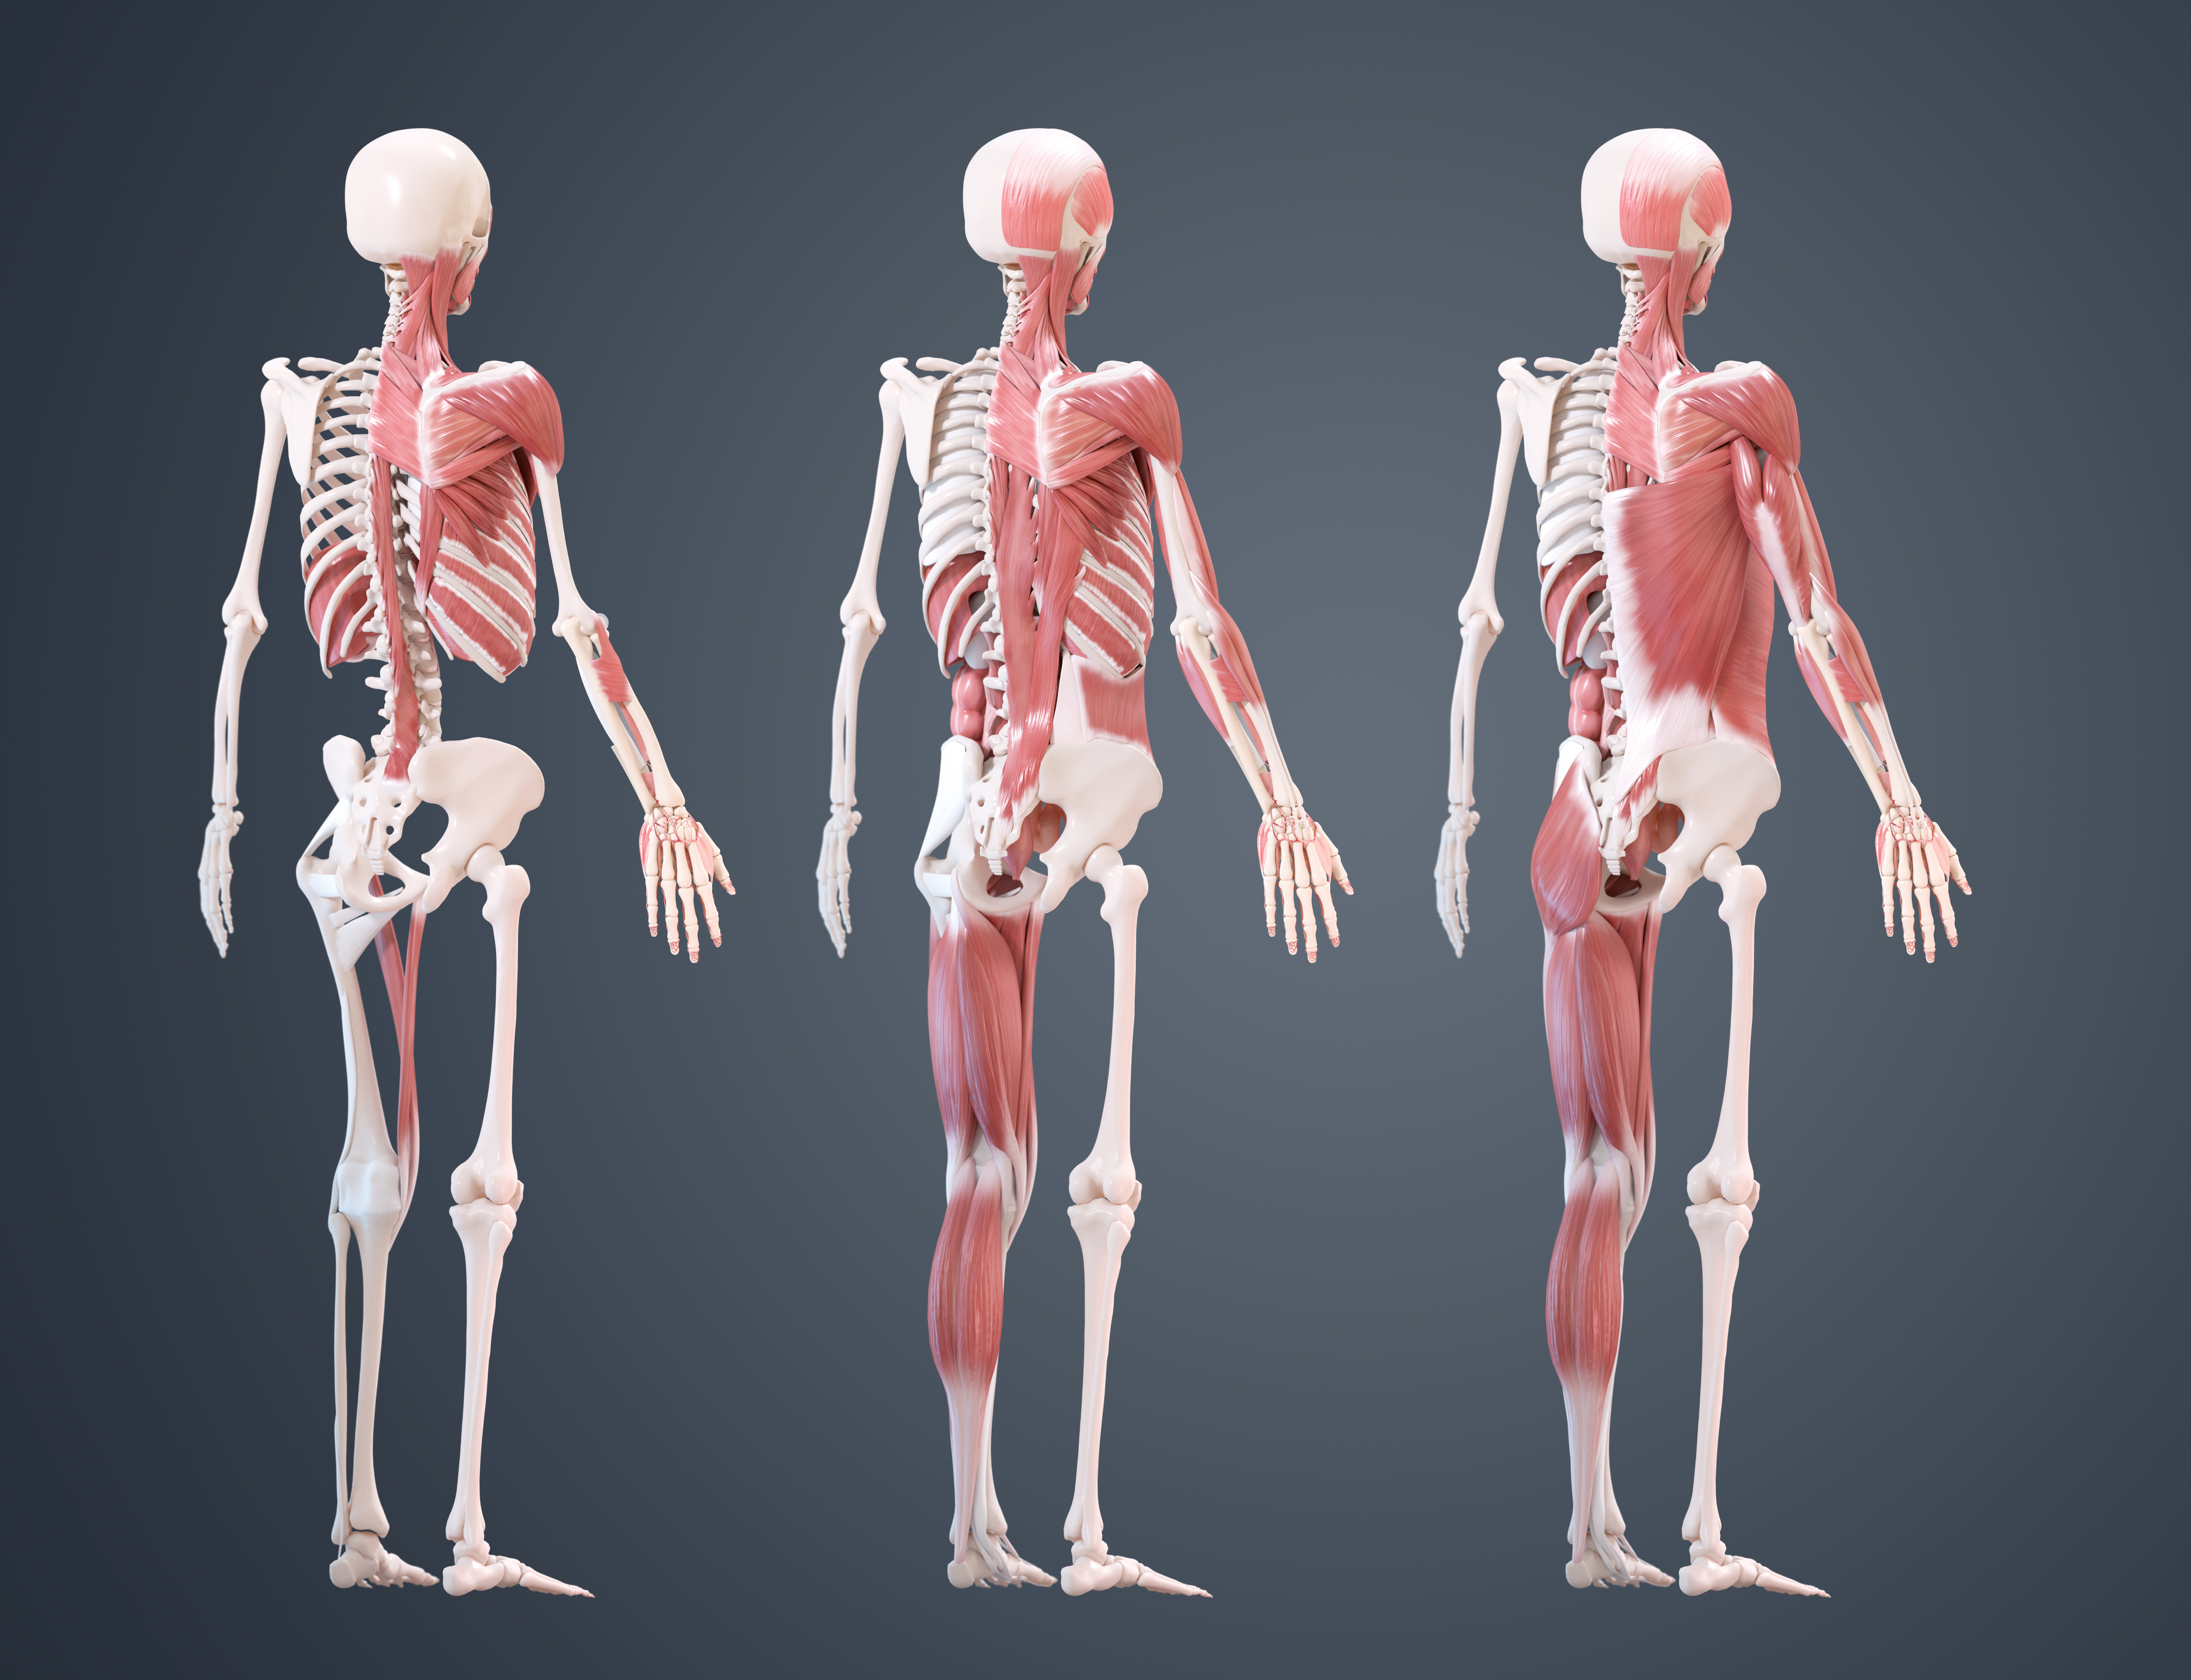
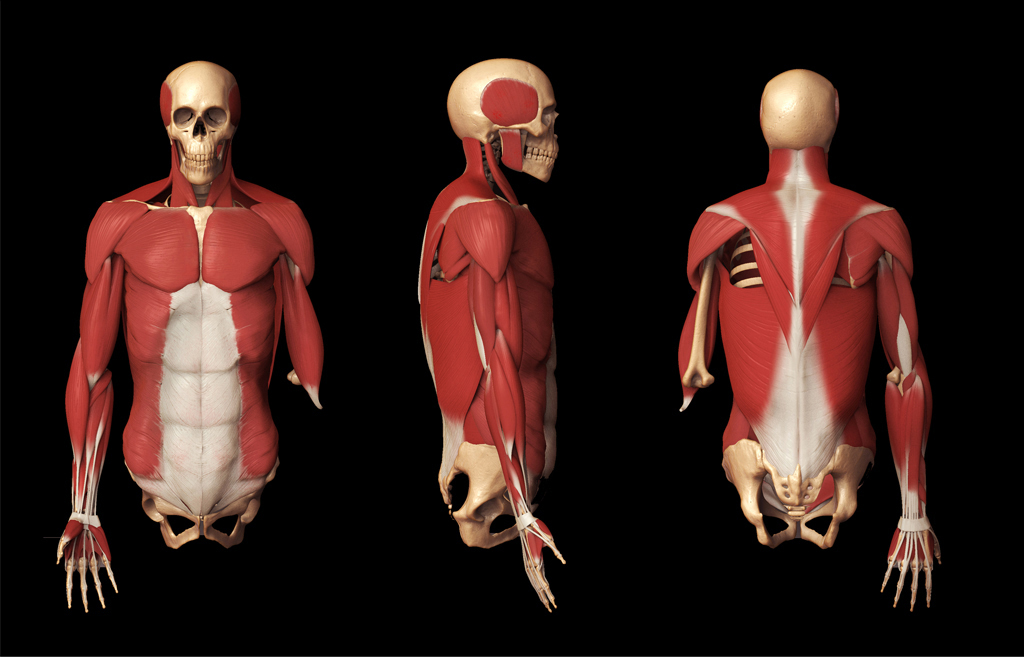
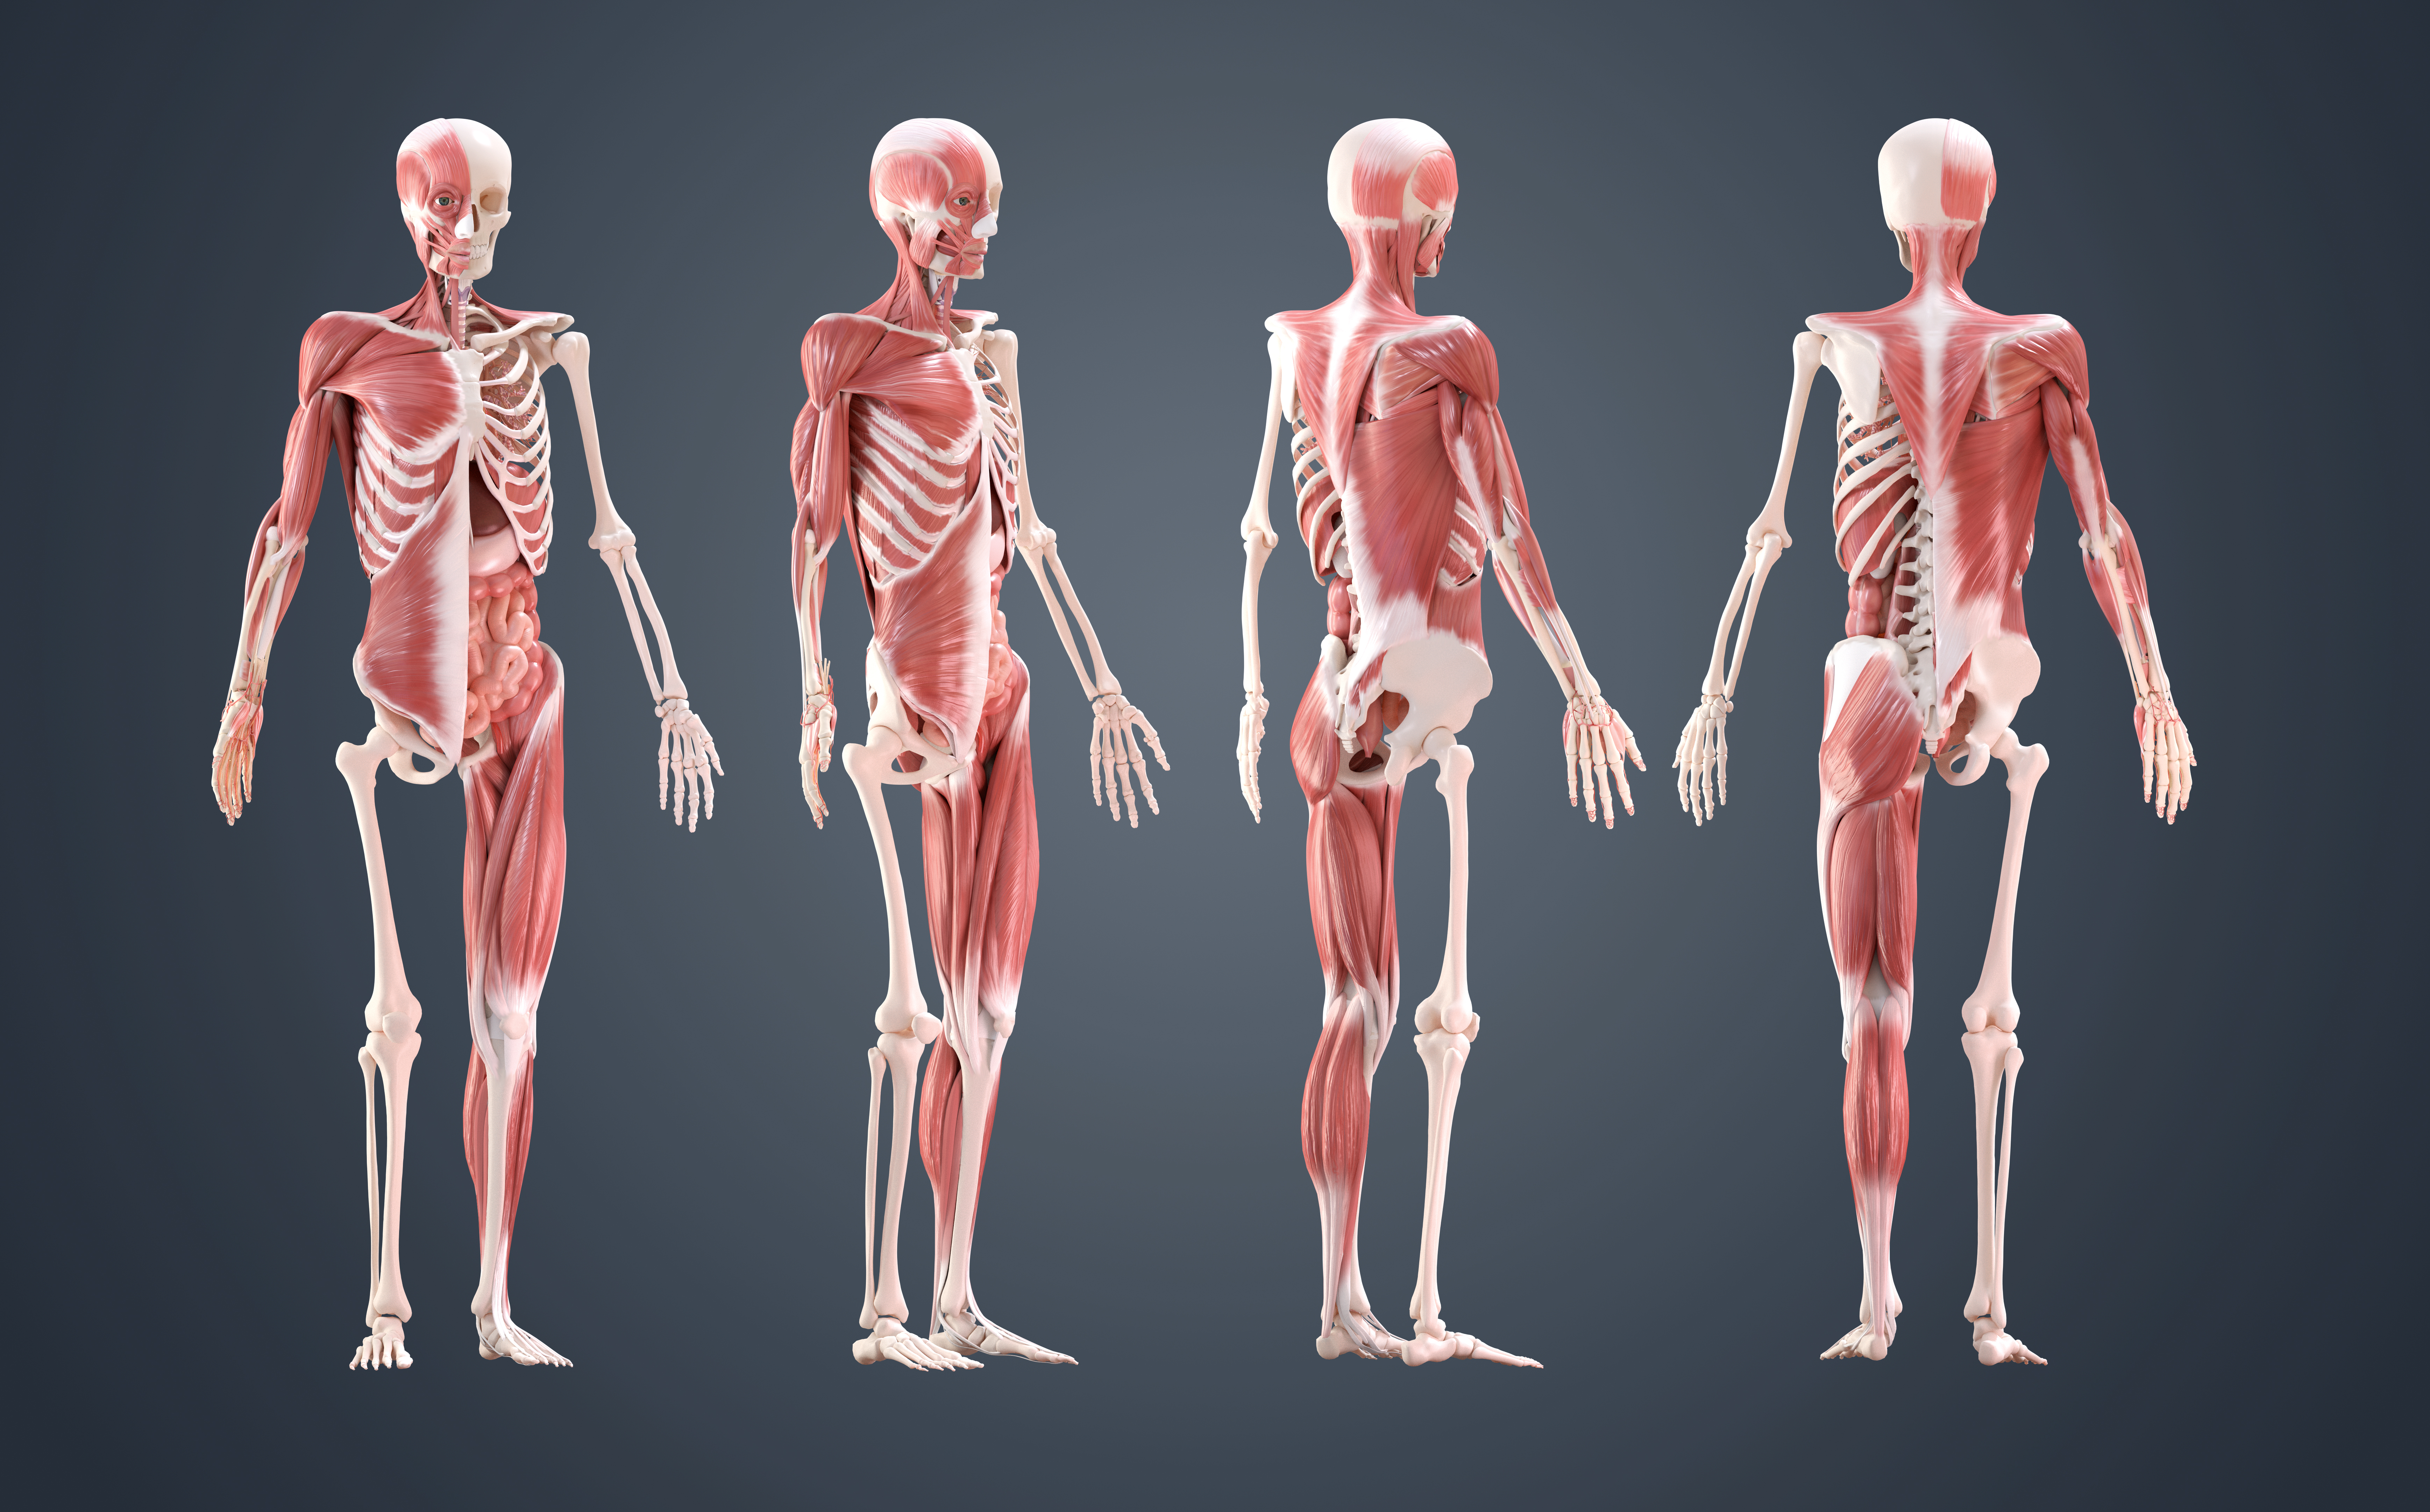
Having a comprehensive 3D anatomical model of the human body is essential for medical illustrators, among others. The ability to rotate the model and render from any angle is particularly useful and time-saving, as is the ability to hide or slice individual muscles, organs and blood vessels, essentially creating different levels of dissection.
The following 10 tips are based on my own personal workflow, where I jump between Blender and ZBrush to create a 3D model of the human body.
Don’t worry if the subject looks too complicated – the core workflow can be applied to many modelling and sculpting processes, particularly if you’re aiming to create realistic, accurate human figures.
Latest Videos From Creative Bloq
I’ll begin by explaining my process with an overview of how you should prepare for a complex project like this, then we’ll get into the software tools that can really help make anatomical modelling a lot easier, plus how to use them.
The quality of your reference material is very important in creating a successful and accurate model. It’s important to consider the function of the anatomical structure before modelling. Learn and understand what it does: does it extend, flex or rotate the bone?
“Leave paper and pencil alone until the mind has grasped the meaning of the object,” said Max Brödel, first professor of medical art and founder of the Art as Applied to Medicine Degree at the Johns Hopkins School of Medicine.
There are numerous sources of reference out there, including anatomy/biology books, video tutorials/demonstrations, pathology museums and exhibitions, such as body worlds and, of course, the internet.
The internet can be a valuable source of reference for finding images, illustrations and movies. However, this should be used with caution as there are numerous inaccurate and misleading illustrations that may cause you to incorporate mistakes into your model.
You should try to use several different illustrations for your reference, and these should always be obtained from reliable sources.
The very best source of reference (and the most difficult to access) is first-hand experience of surgical procedures or within a university cadaveric research setting. This allows you to appreciate the various textures, colours and functions of different anatomical structures. There are several courses around the world offering access to these facilities, and many of these courses are part-time. It’s always worth contacting your local medical university to see if they can help, as there may be mutually beneficial collaborative projects on offer.
By creating the skeleton model, first you are able to create the framework for all the other anatomical structures. The muscles can then be overlaid onto the skeleton and the human form will slowly appear. The ribcage and pelvis will also define the boundaries for the internal organs.
Bones have a very specific shape and have numerous flat surfaces and protuberances where muscles attach. Pay particular attention to the proportions of the skeleton – if the skeleton is wrong this will have a knock-on effect and the overlying structures will also be wrong.
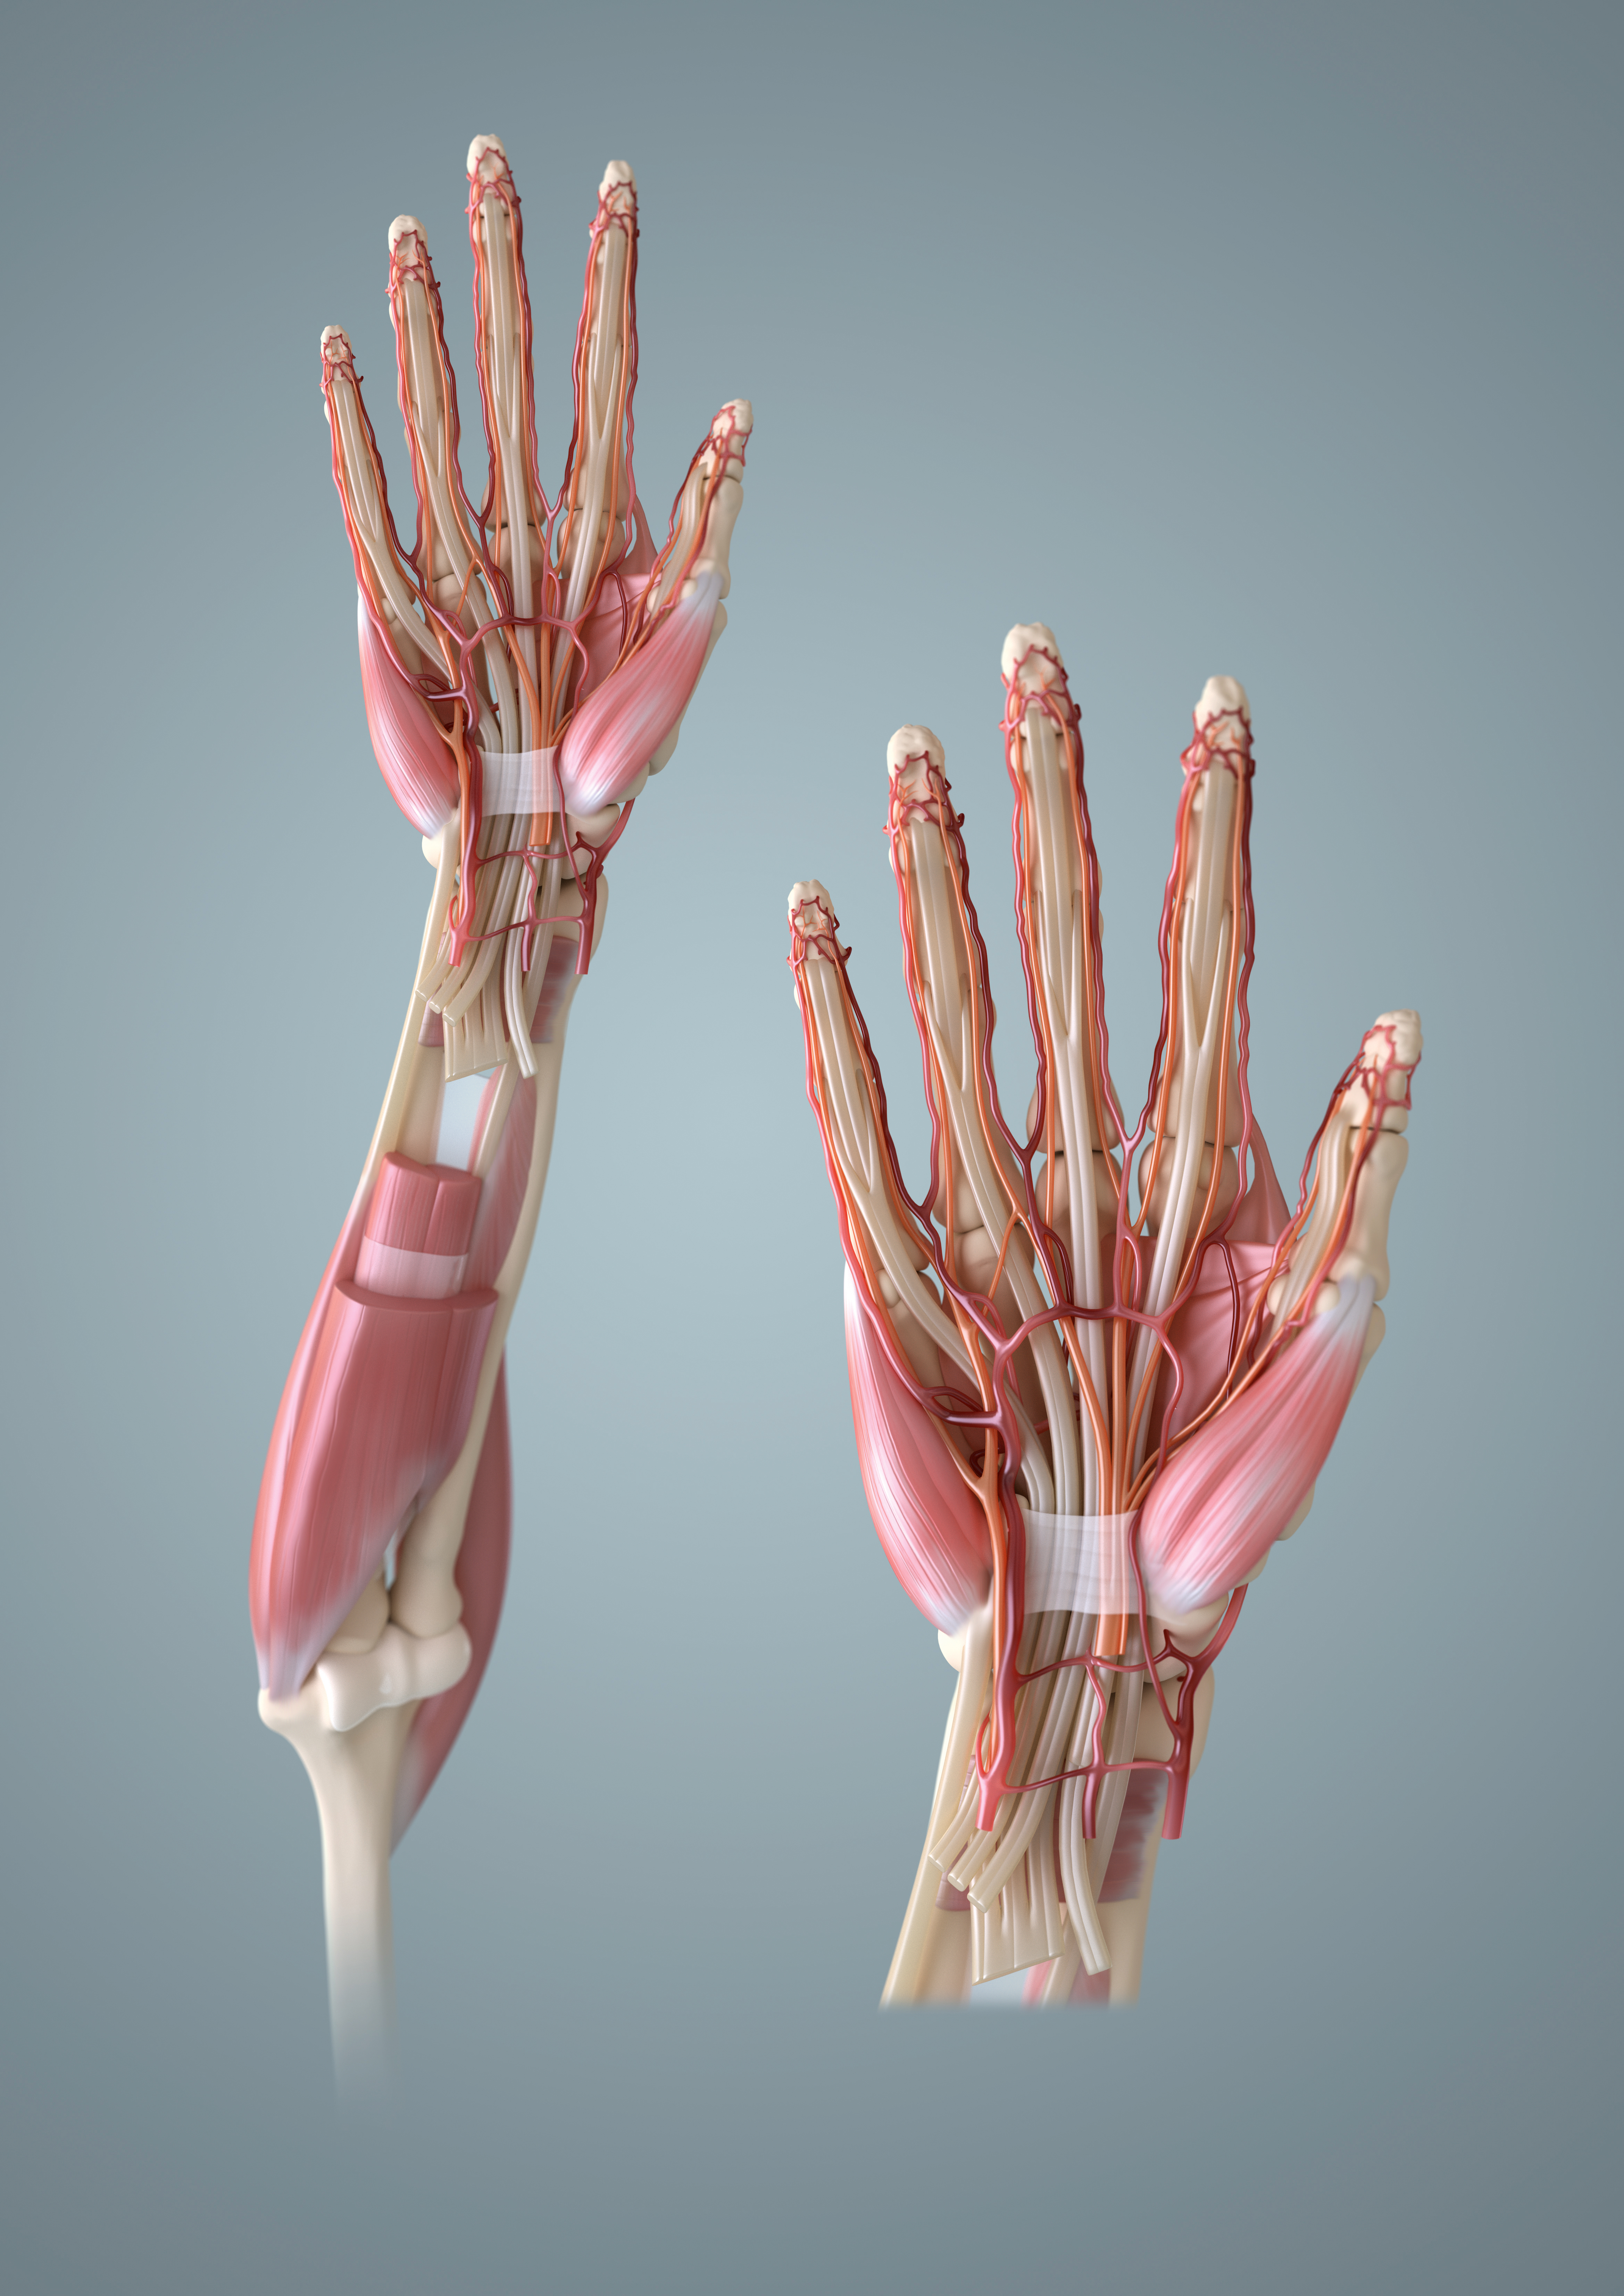
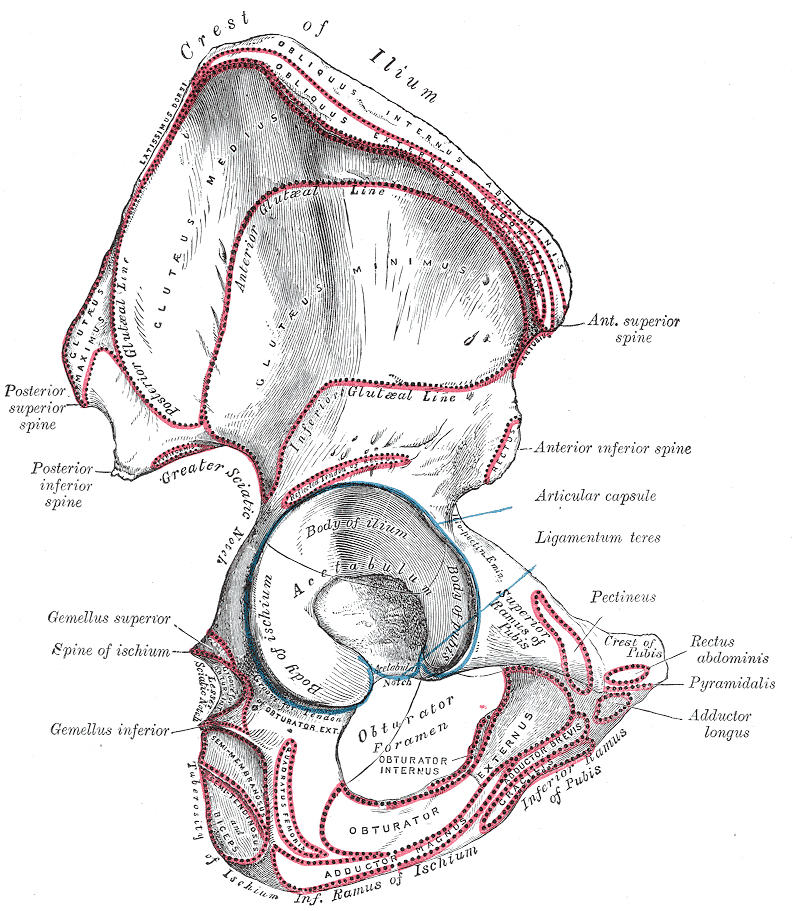
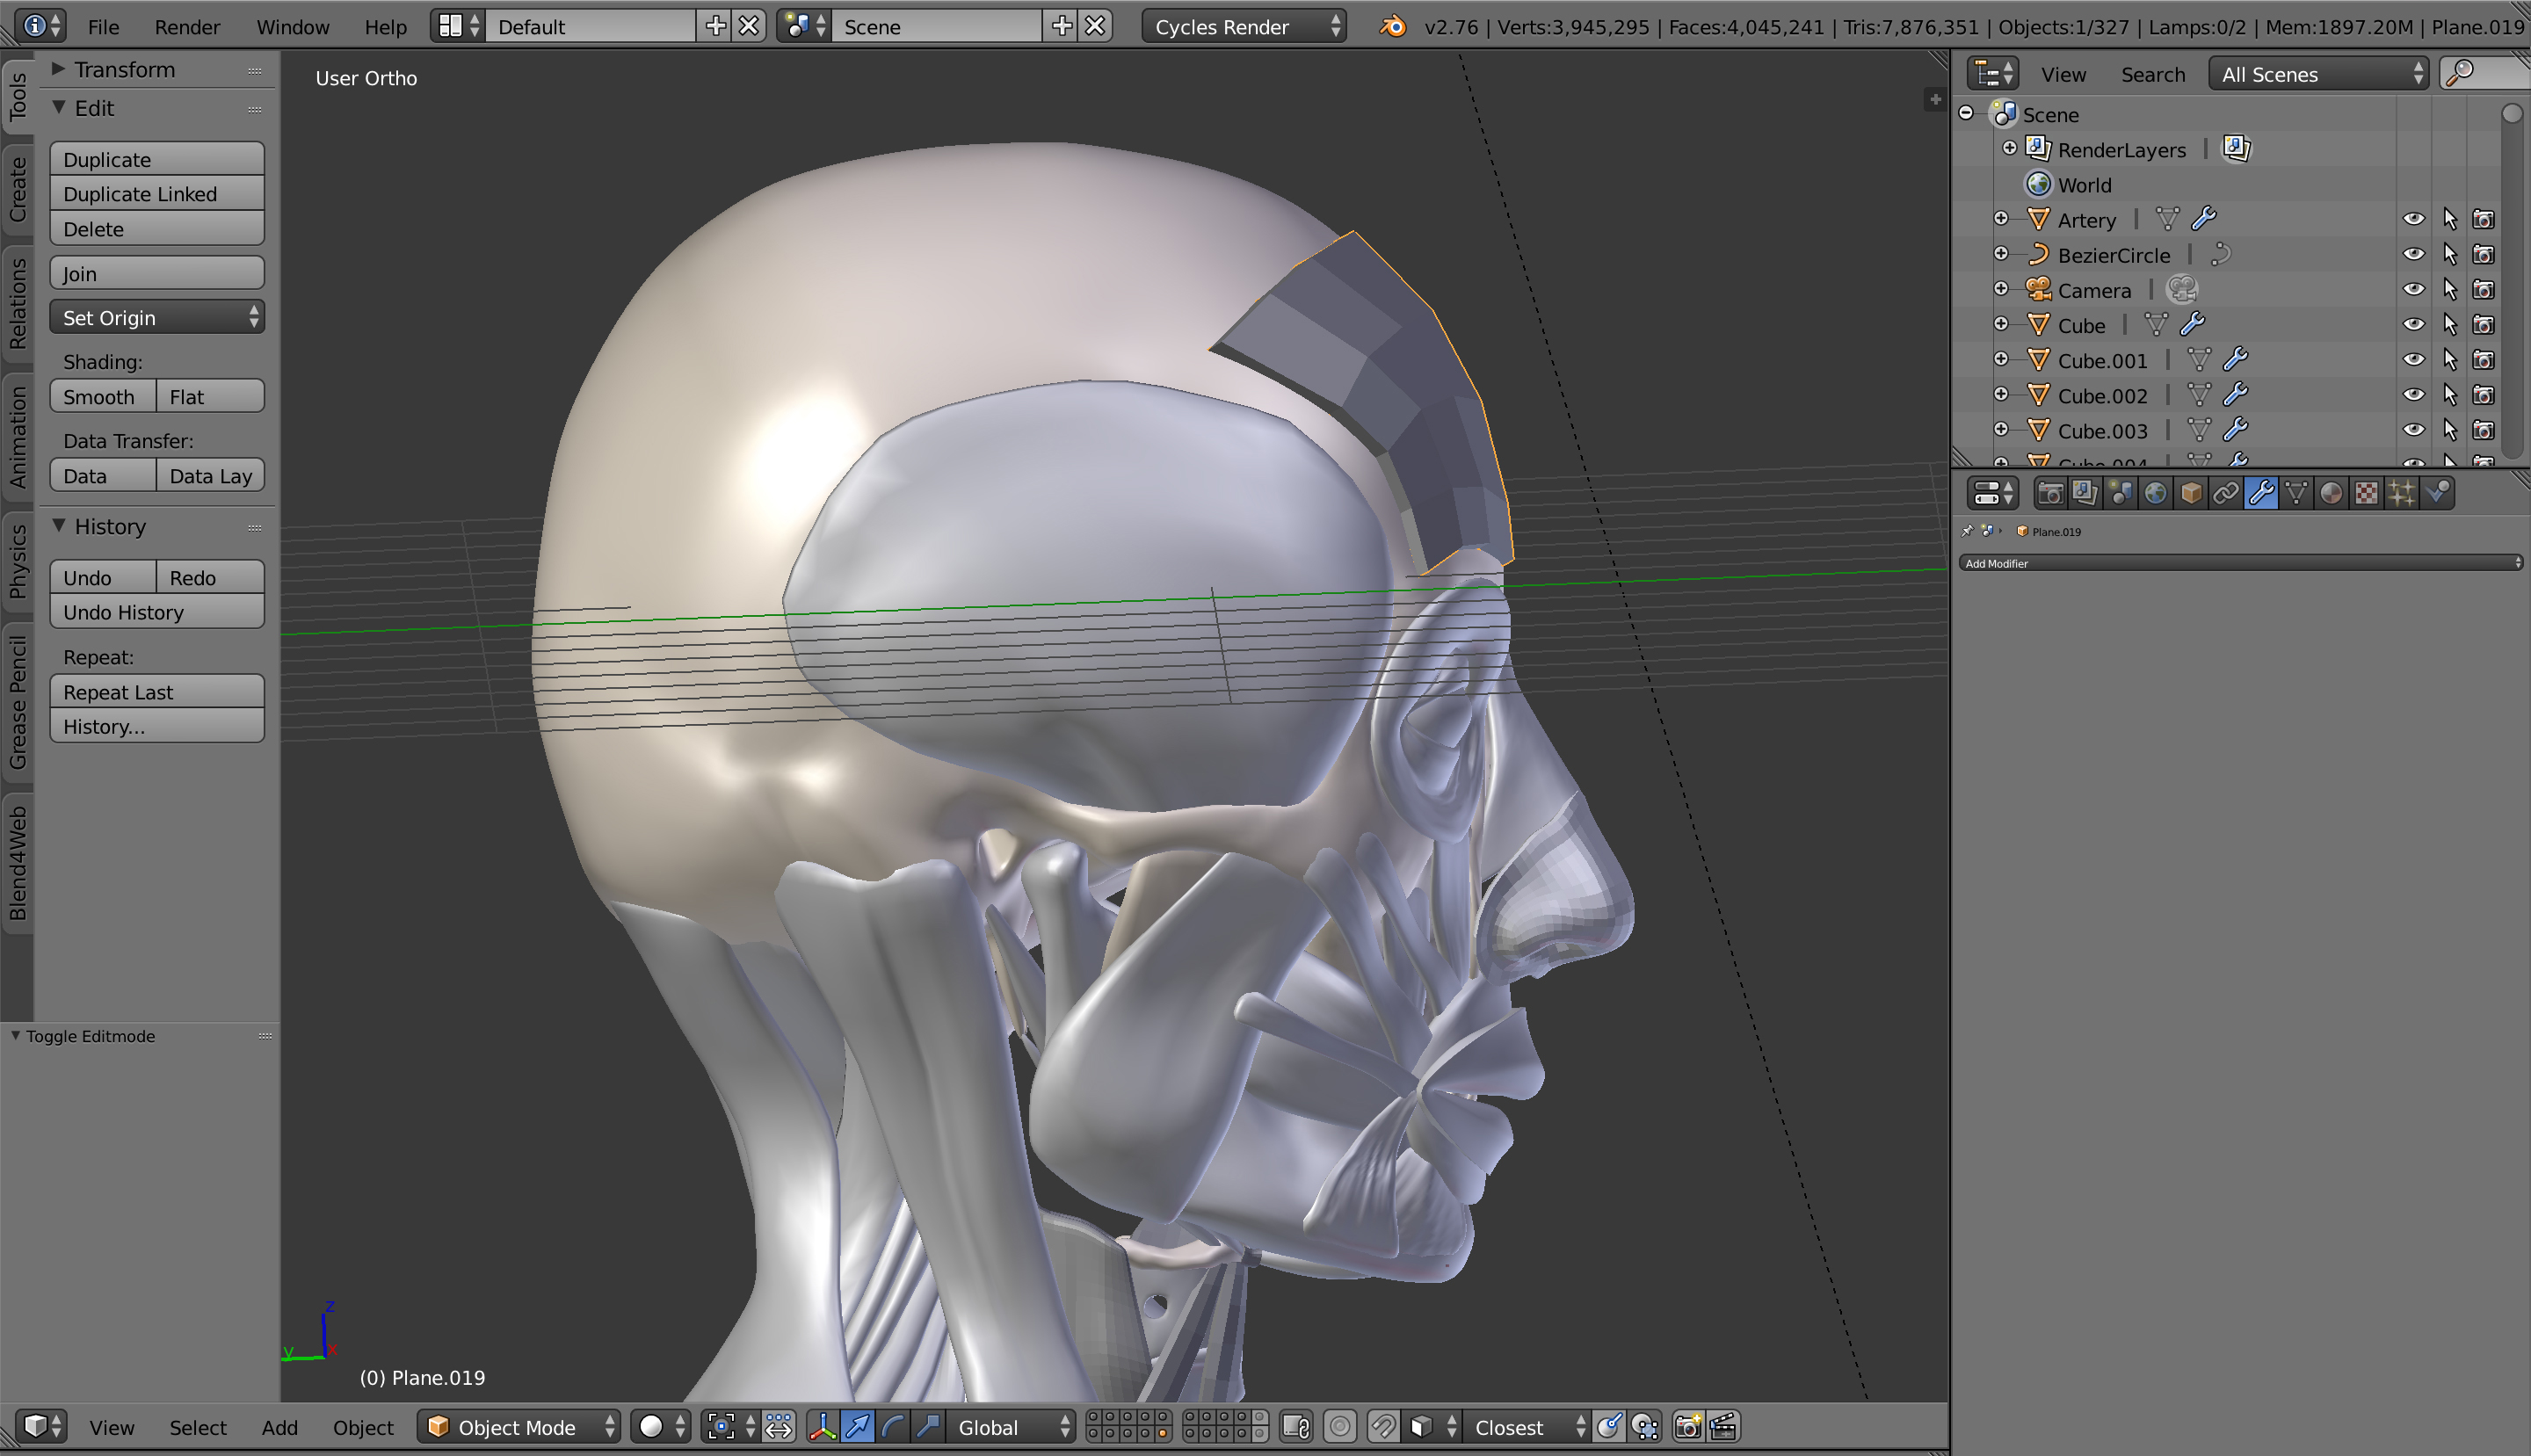
When adding muscle, it’s useful to know where the muscle originates on the bone and where it inserts. The best way to do this is to find reference images showing you outlined areas on the skeleton indicating the origin and insertion sites.
You can then ensure each end of the muscle covers the correct skeletal region and this information also gives you clues as to where the muscles are positioned in relation to each other.
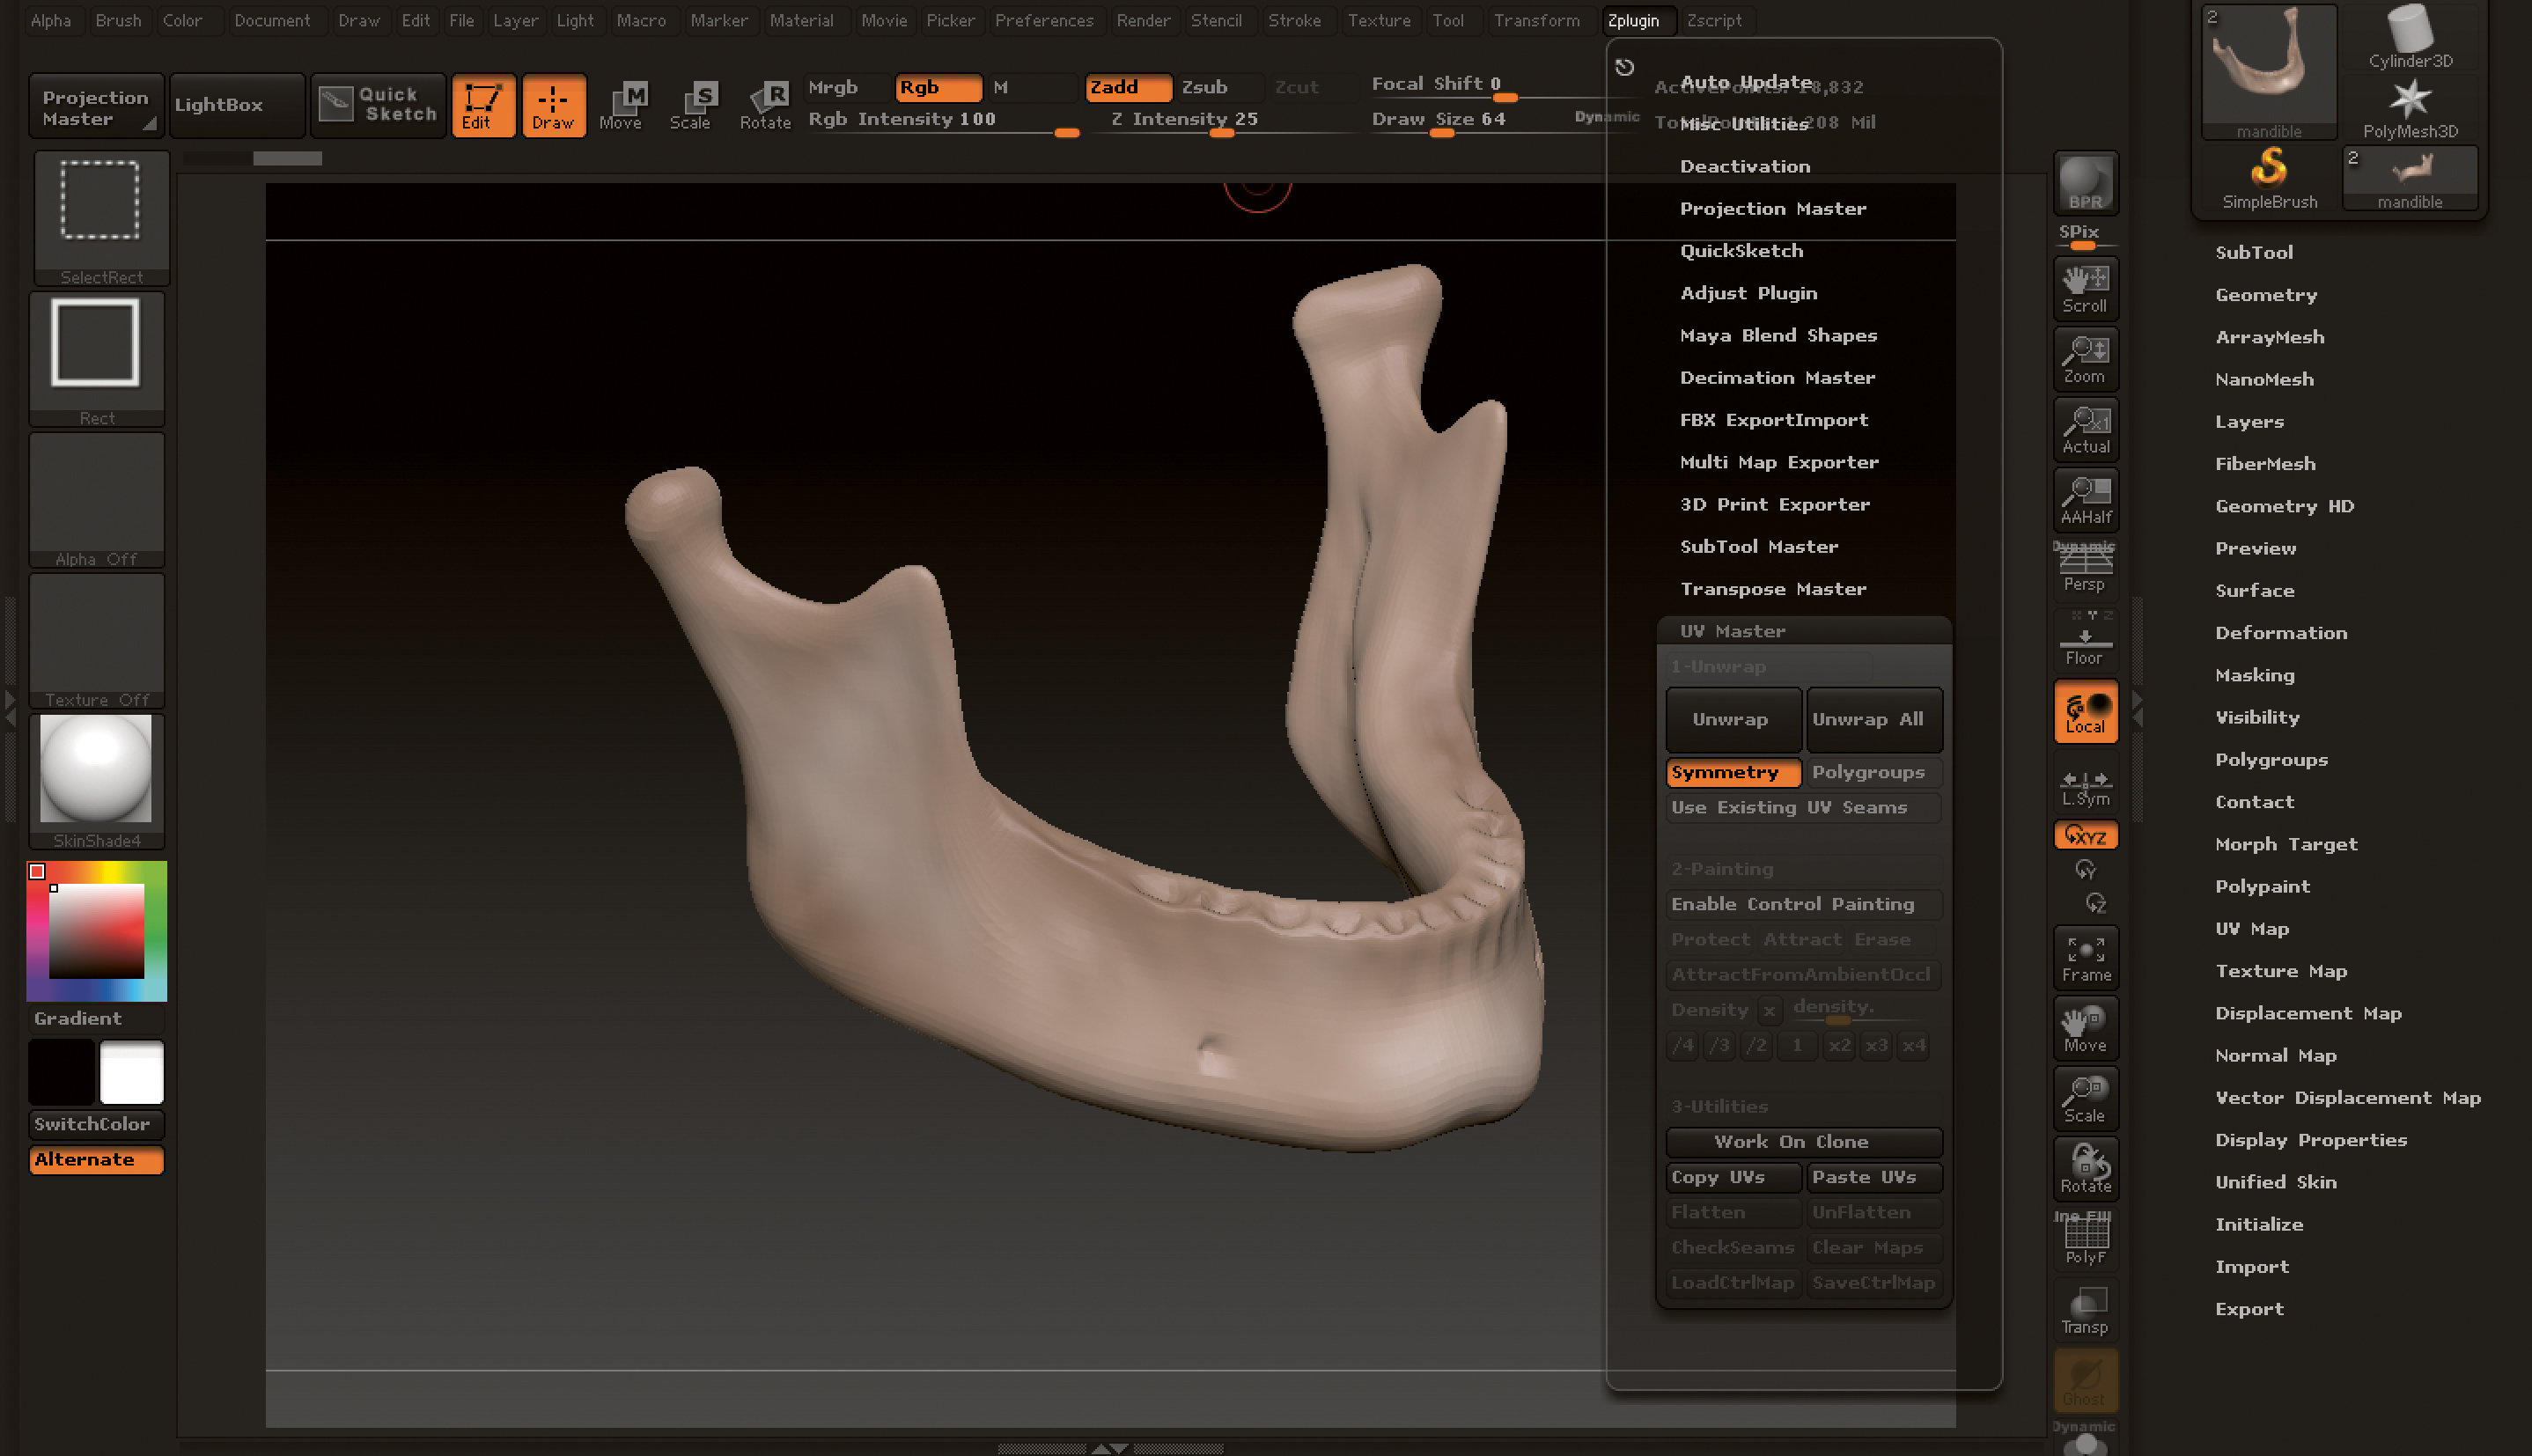
Unwrapping models can be time-consuming. I use a feature in ZBrush called UV Master, which automatically unwraps your model for you. This saves a huge amount of time and is surprisingly accurate, even on complex models. Click on ZPlugin and select UV Master.
Select Unwrap and ensure your model is at its lowest subdivision level. Then go to Texture Map and select Create from Polypaint. When you export the model from ZBrush, a texture map will be generated with the .obj file.
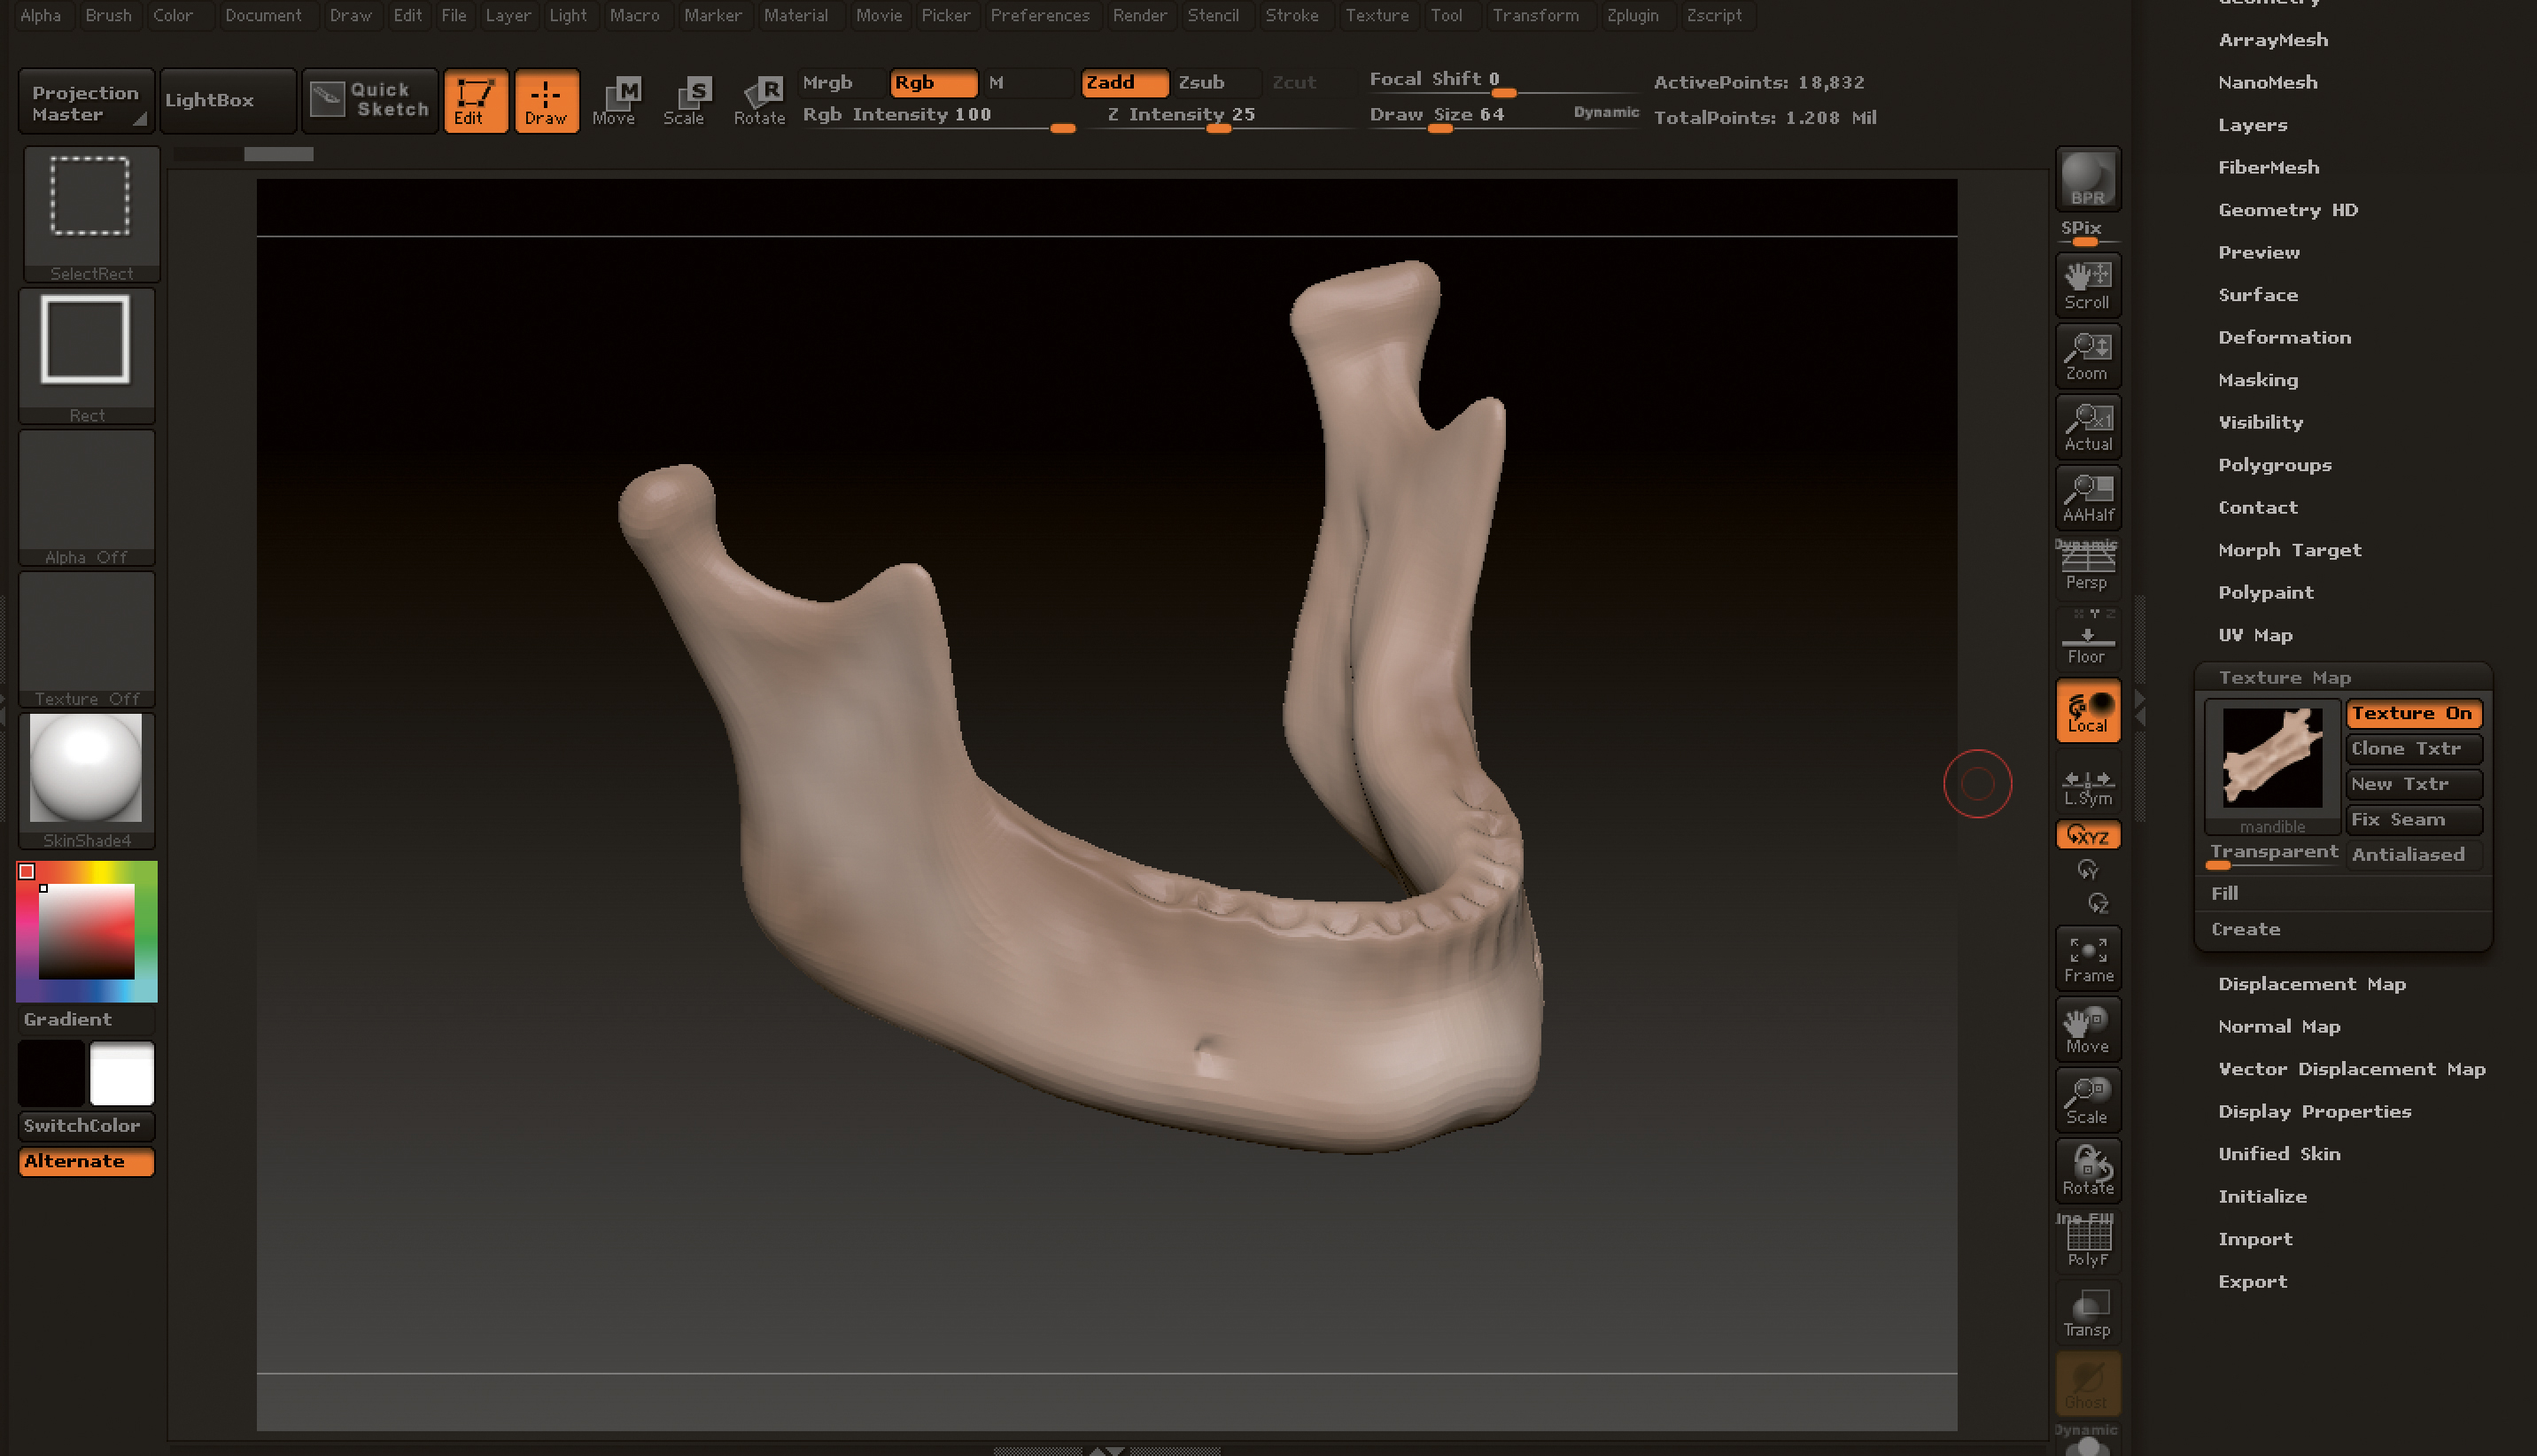
The human body is composed of countless major anatomical structures, which means your model will become quite dense with increasing numbers of objects, therefore it’s important to keep the polycount reasonably low without compromising the quality or limiting the detail. To do this unwrap the model in ZBrush at its lowest subdivision level and create a texture map.
Use Flip V to flip the image
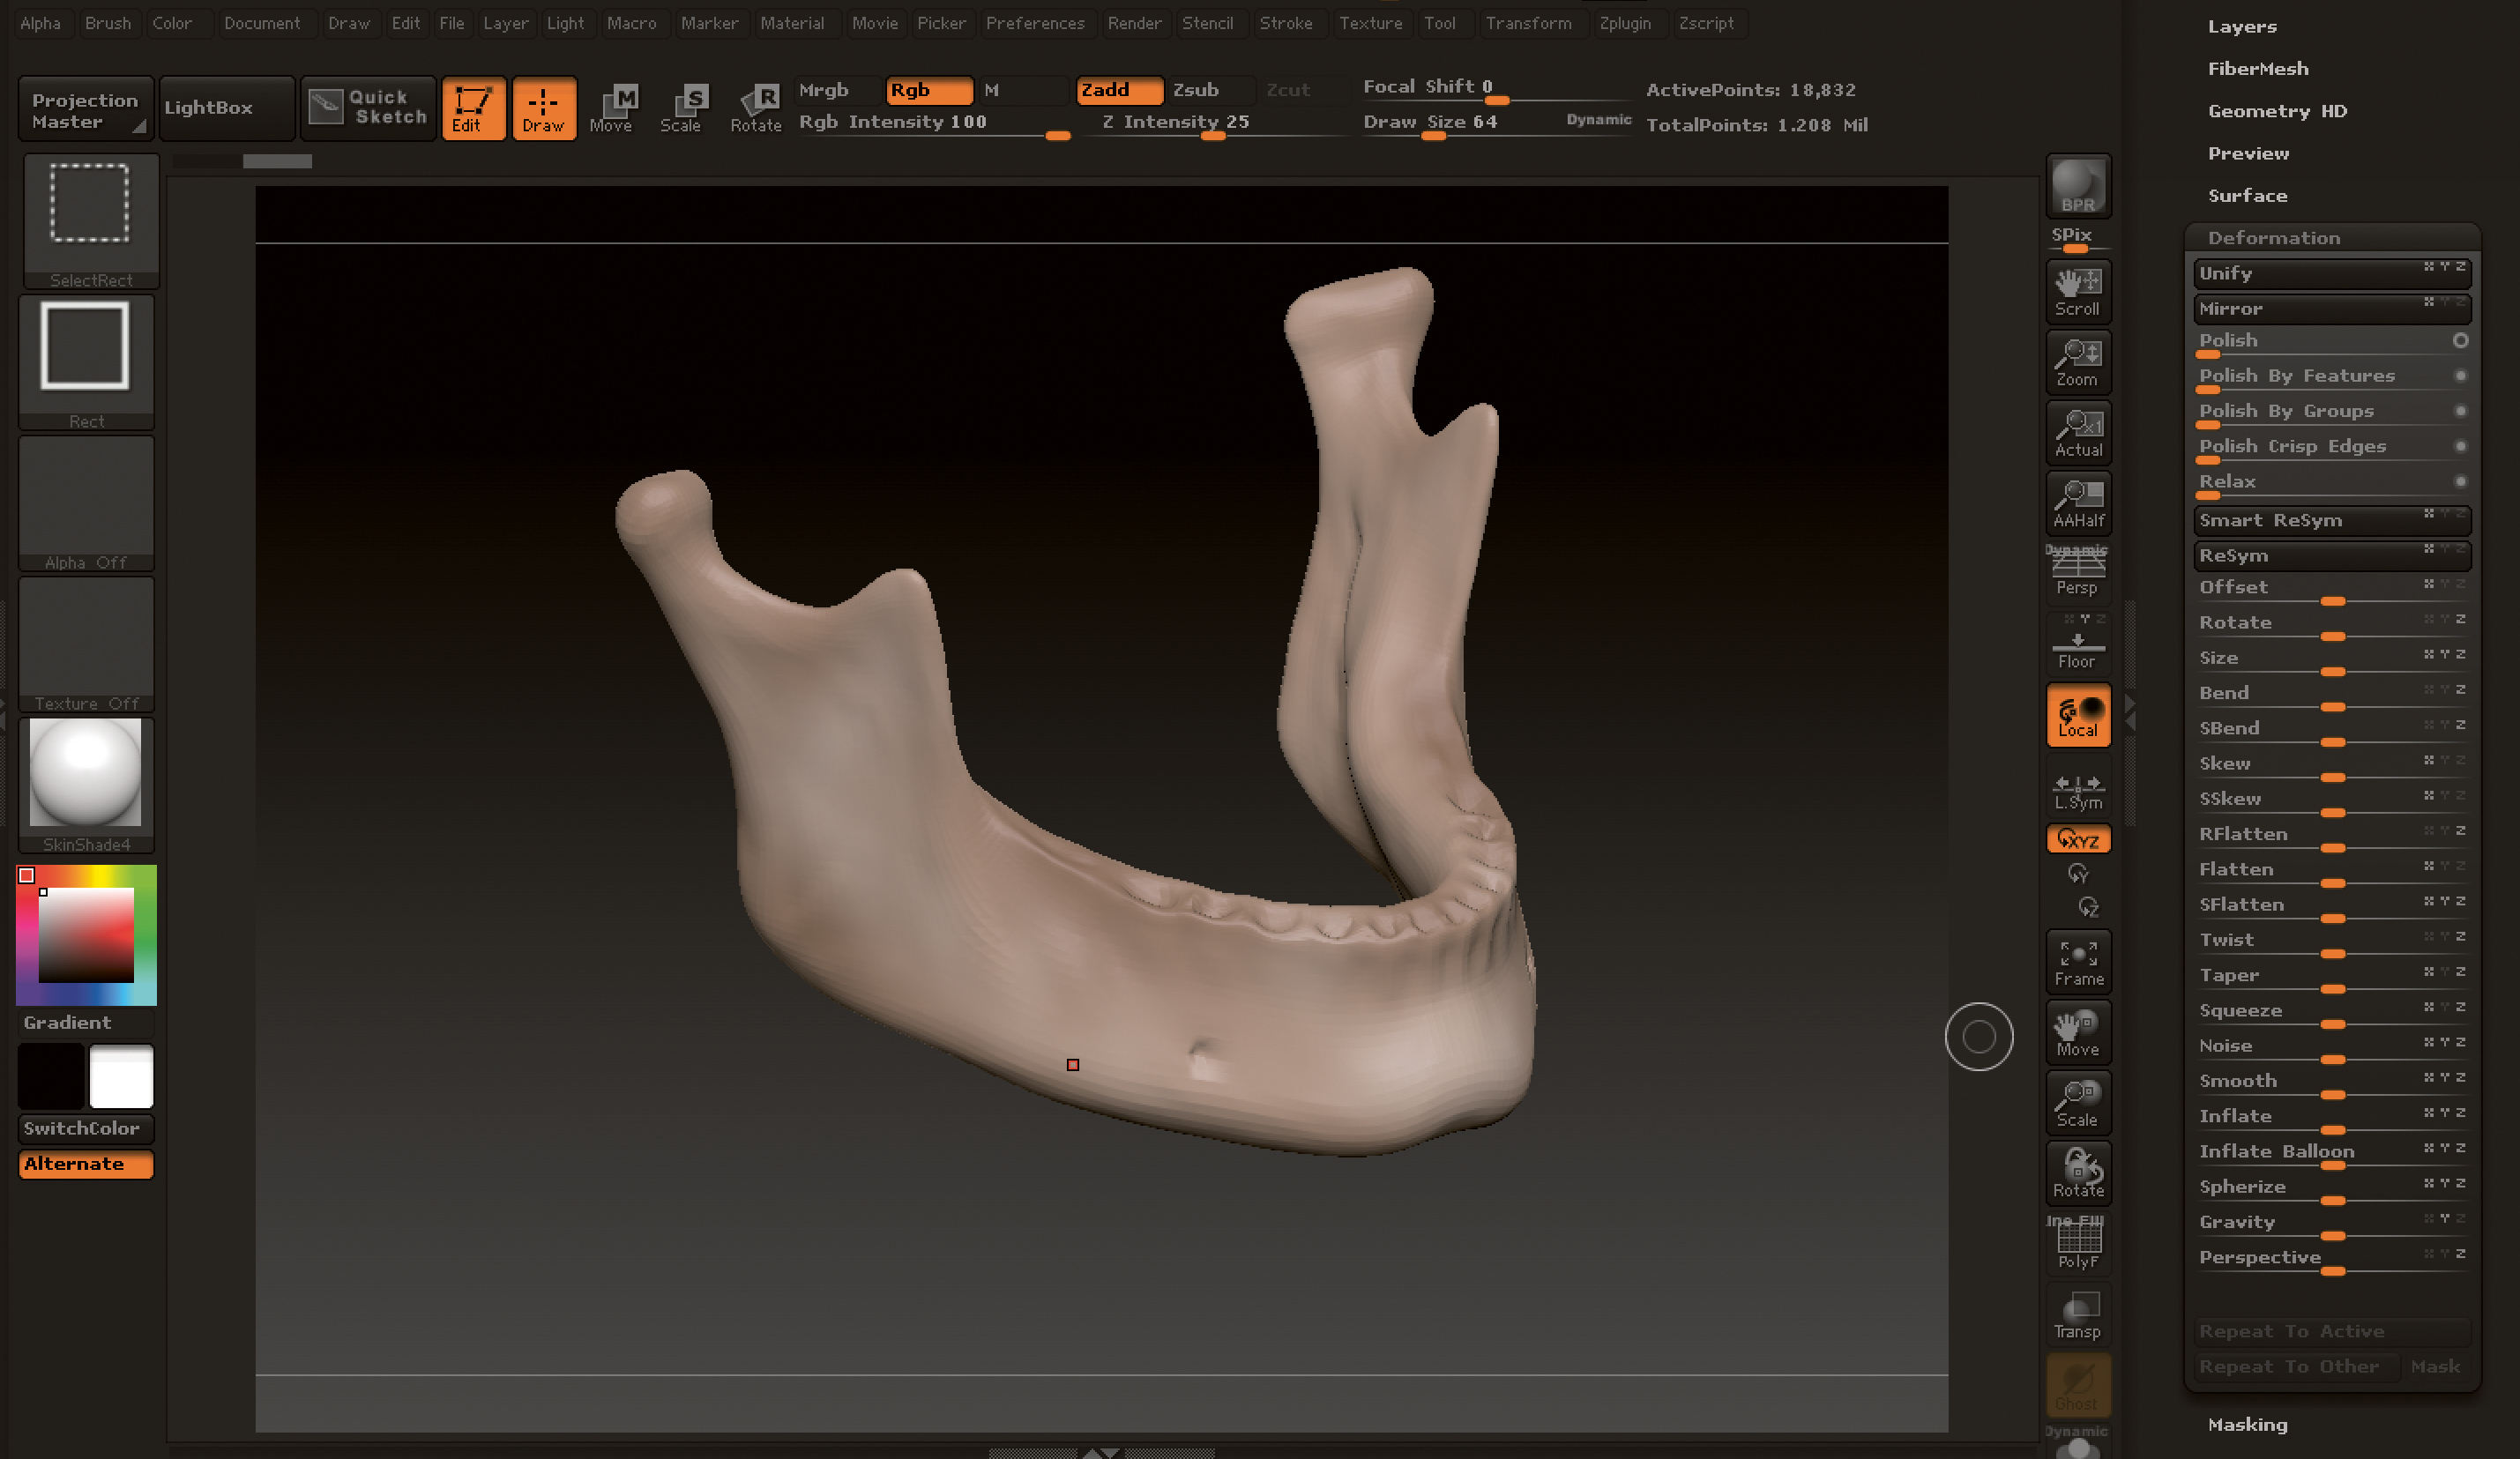
Select Create Displacement Map and ensure Flip V is selected (to flip the image), otherwise the displacement map will be upside down when imported into Blender. You can then add the displacement map to the model in Blender using the Node Editor.
I find that when importing models into ZBrush, some volume is lost after subdividing the geometry. To get around this, I always inflate the object slightly before sculpting. Select Deformation and then use the slider on Inflate to add a small amount of volume.
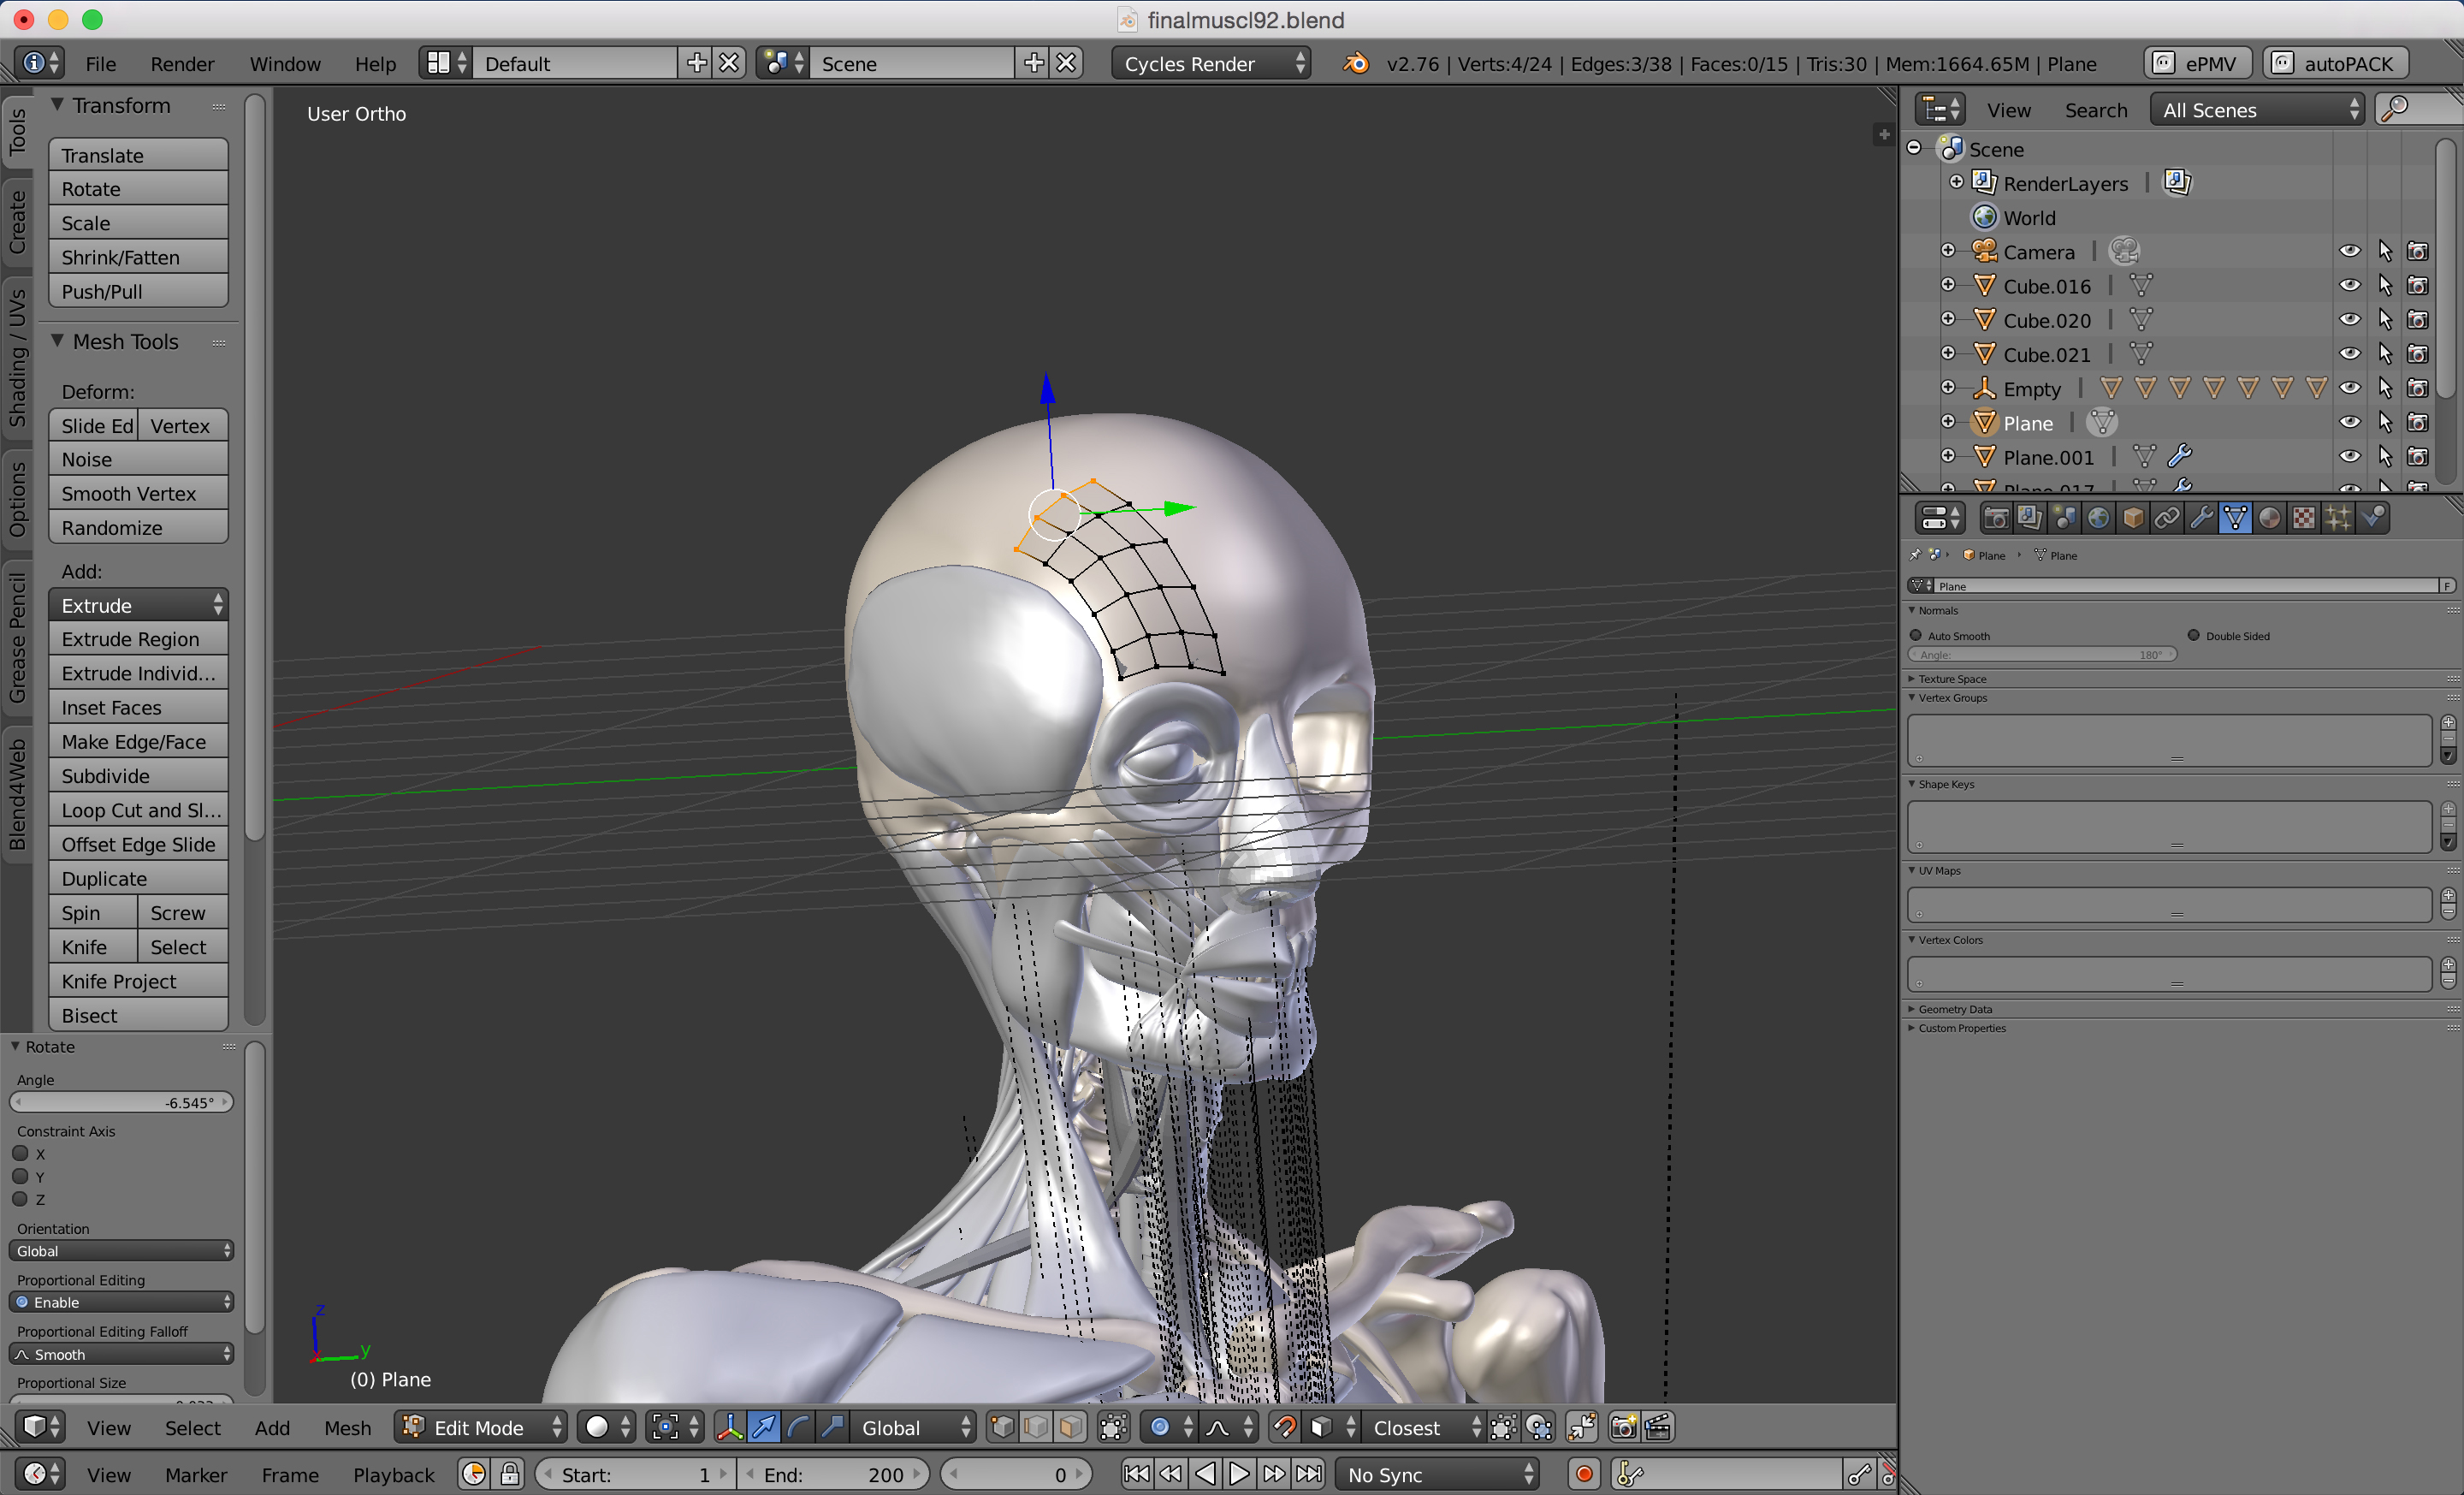
When making certain muscles in Blender, such as the facial muscles, use the Magnet tool to snap the geometry to the surface of the skull. Start with a plane and then in Edit mode position the geometry over the skull.
Extrude the geometry and the vertices will stick to the surface of the bone. This will automatically give you the shape of the muscle. You can use a Solidify modifier to create the thickness you require. Here is my process:
Click the magnet icon on the menu bar.
Select Face from the Snap Element menu next to the magnet icon.
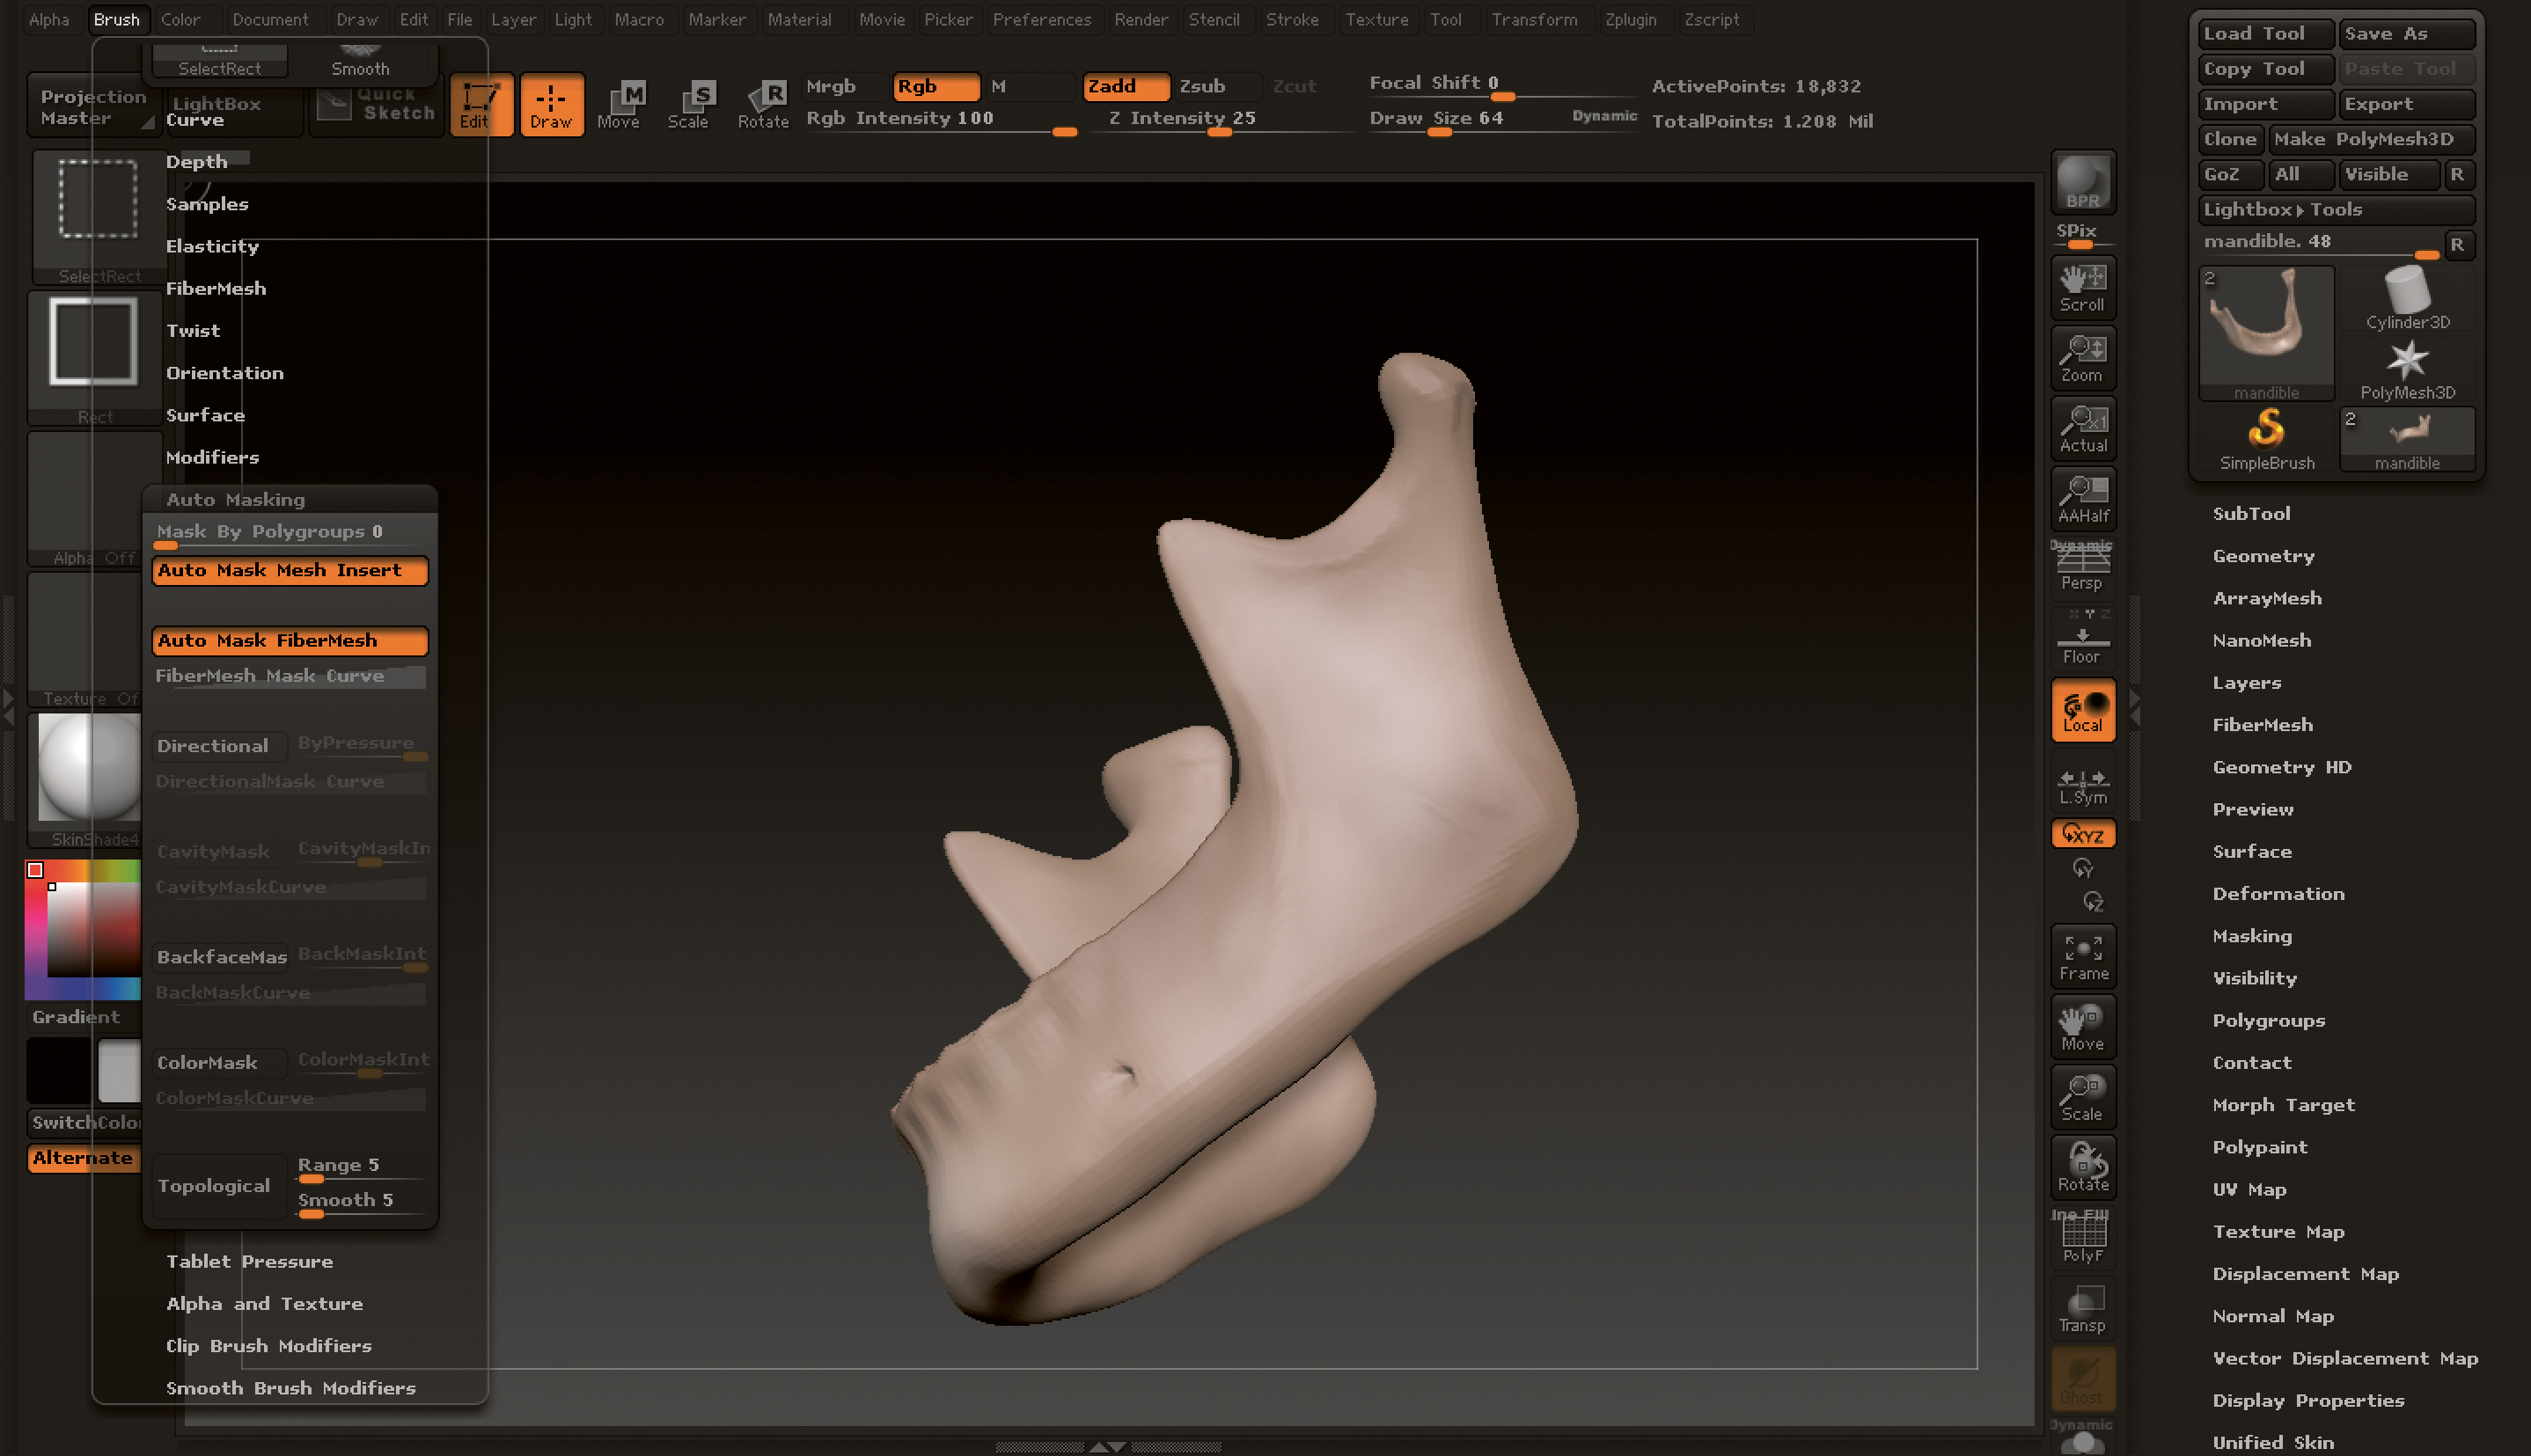
When certain areas of your model become quite thin, such as the coronoid process of the mandible, it can be quite problematic when sculpting. This is because the brush also affects the geometry behind the surface you want to sculpt.
In order to avoid this, click ‘on’ Auto Masking and then select Backfacemask. This will automatically mask off the geometry behind and prevent unwanted deformation.
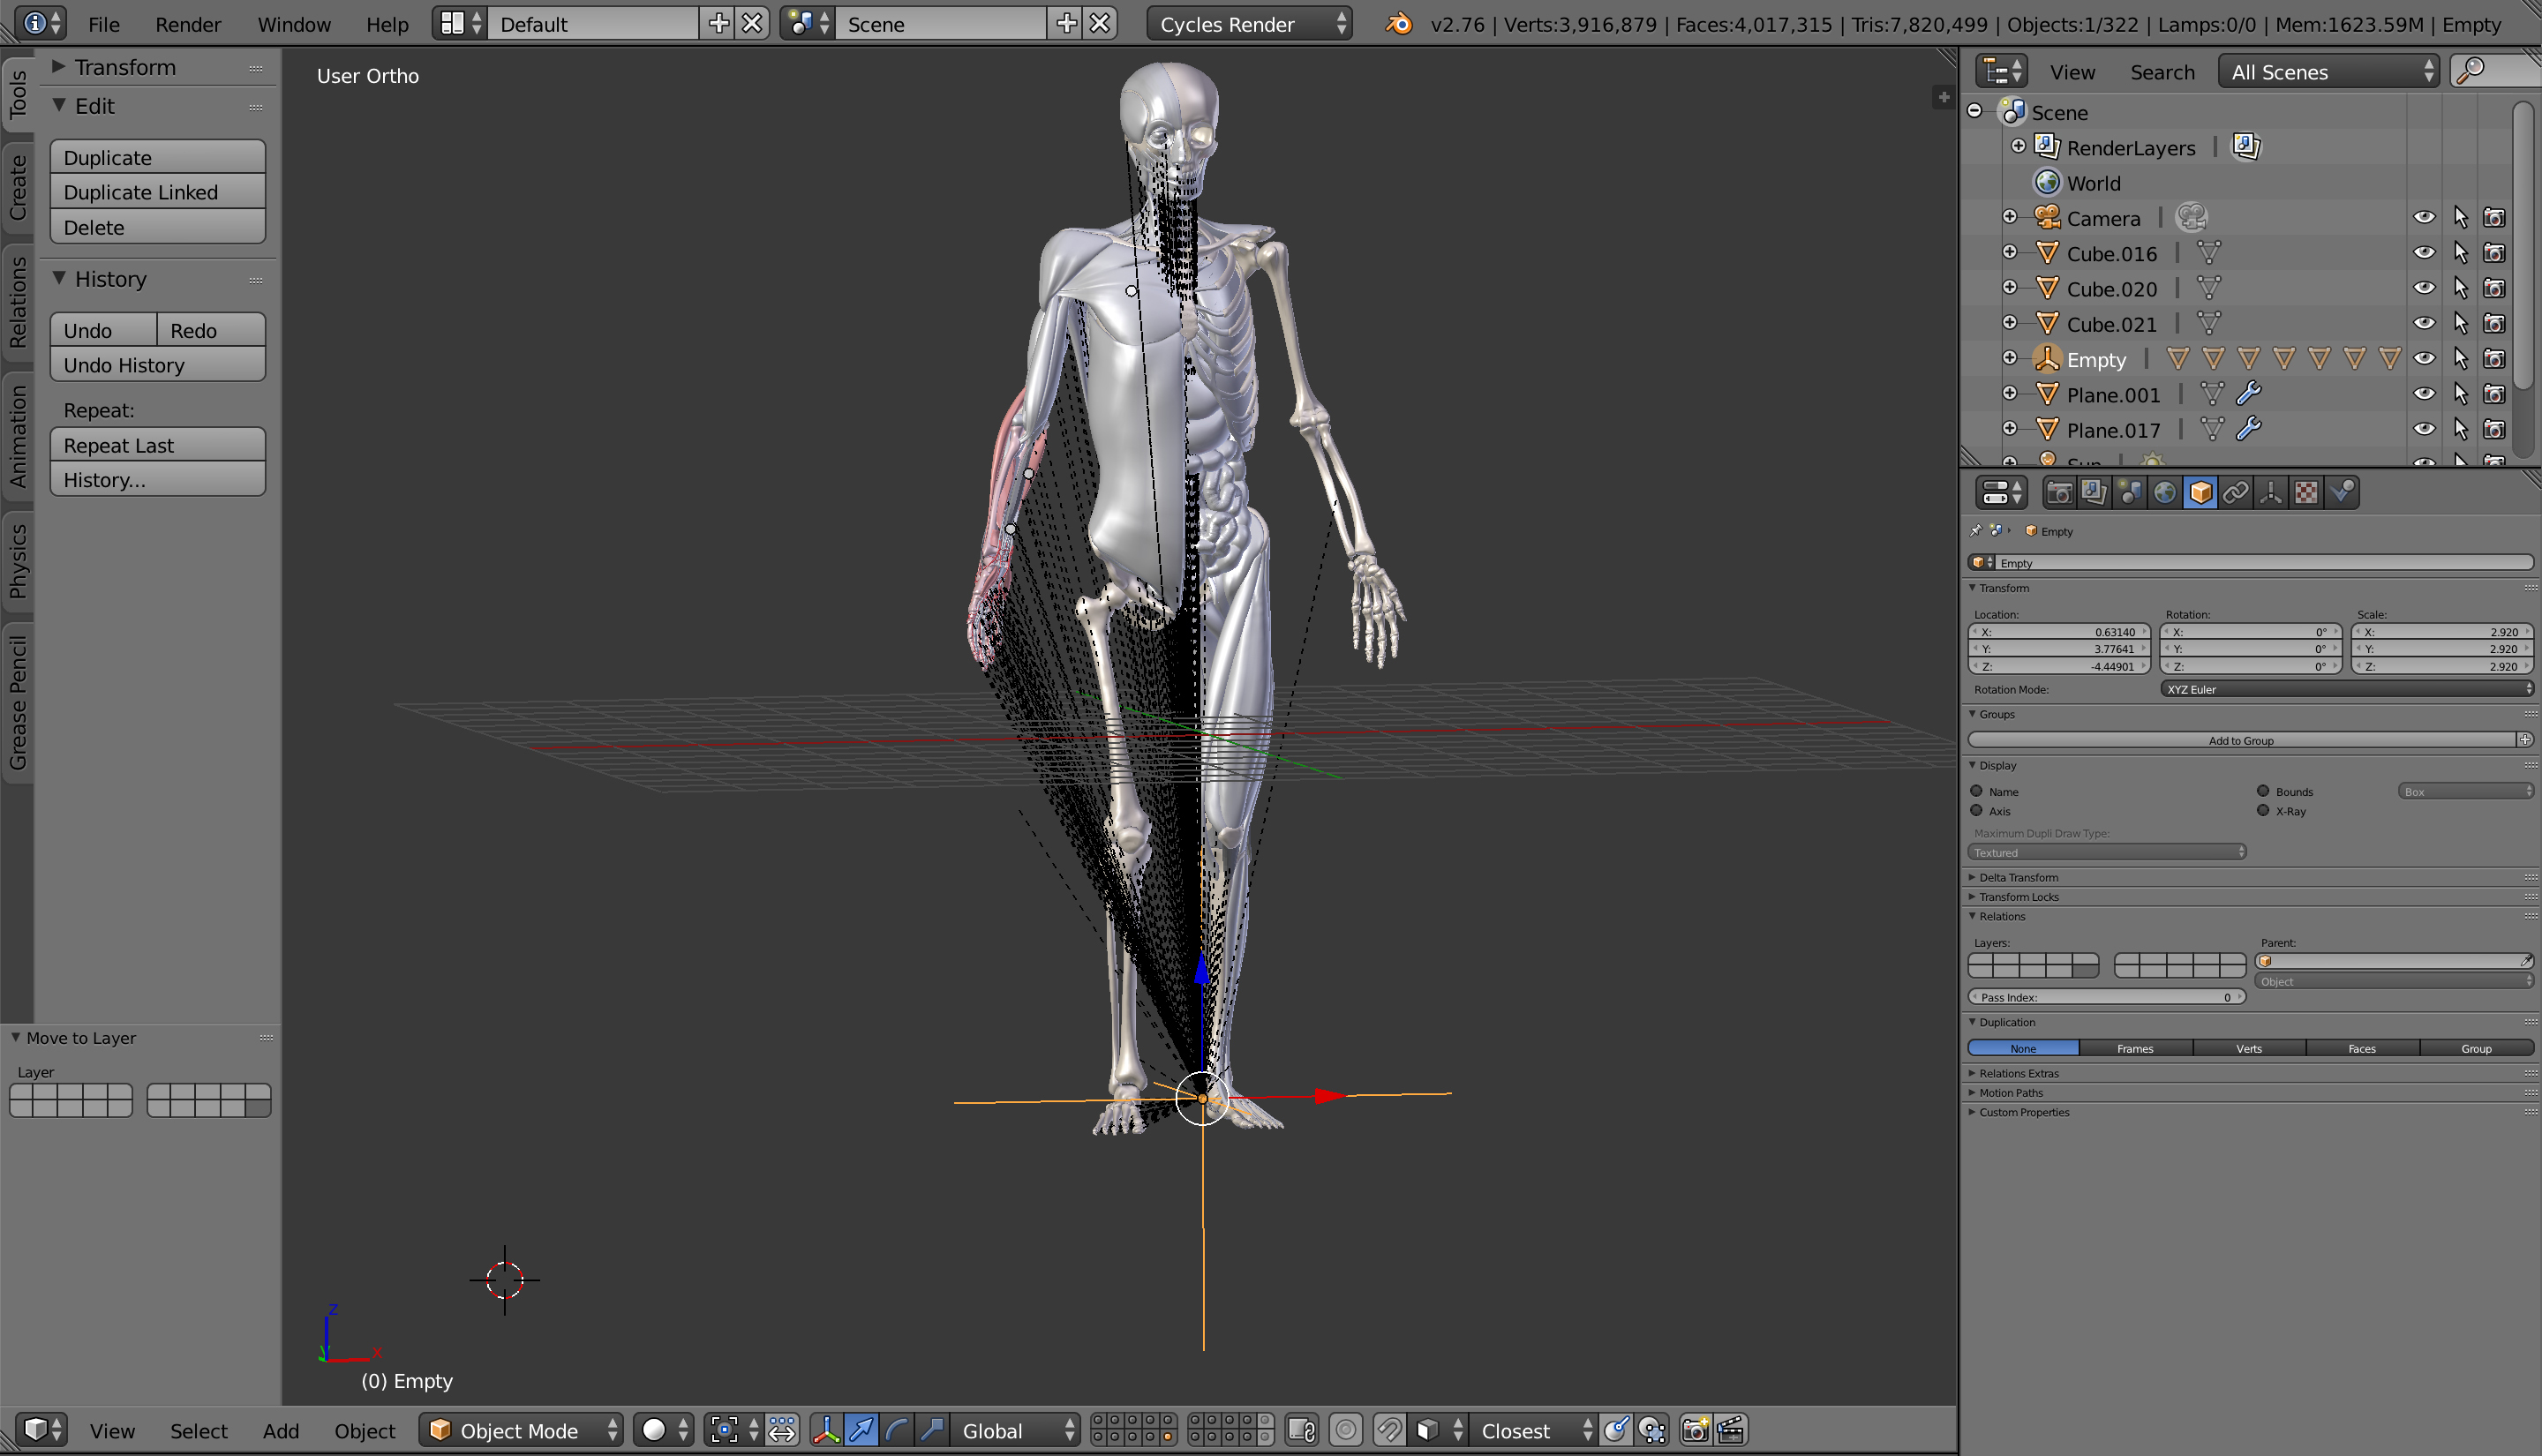
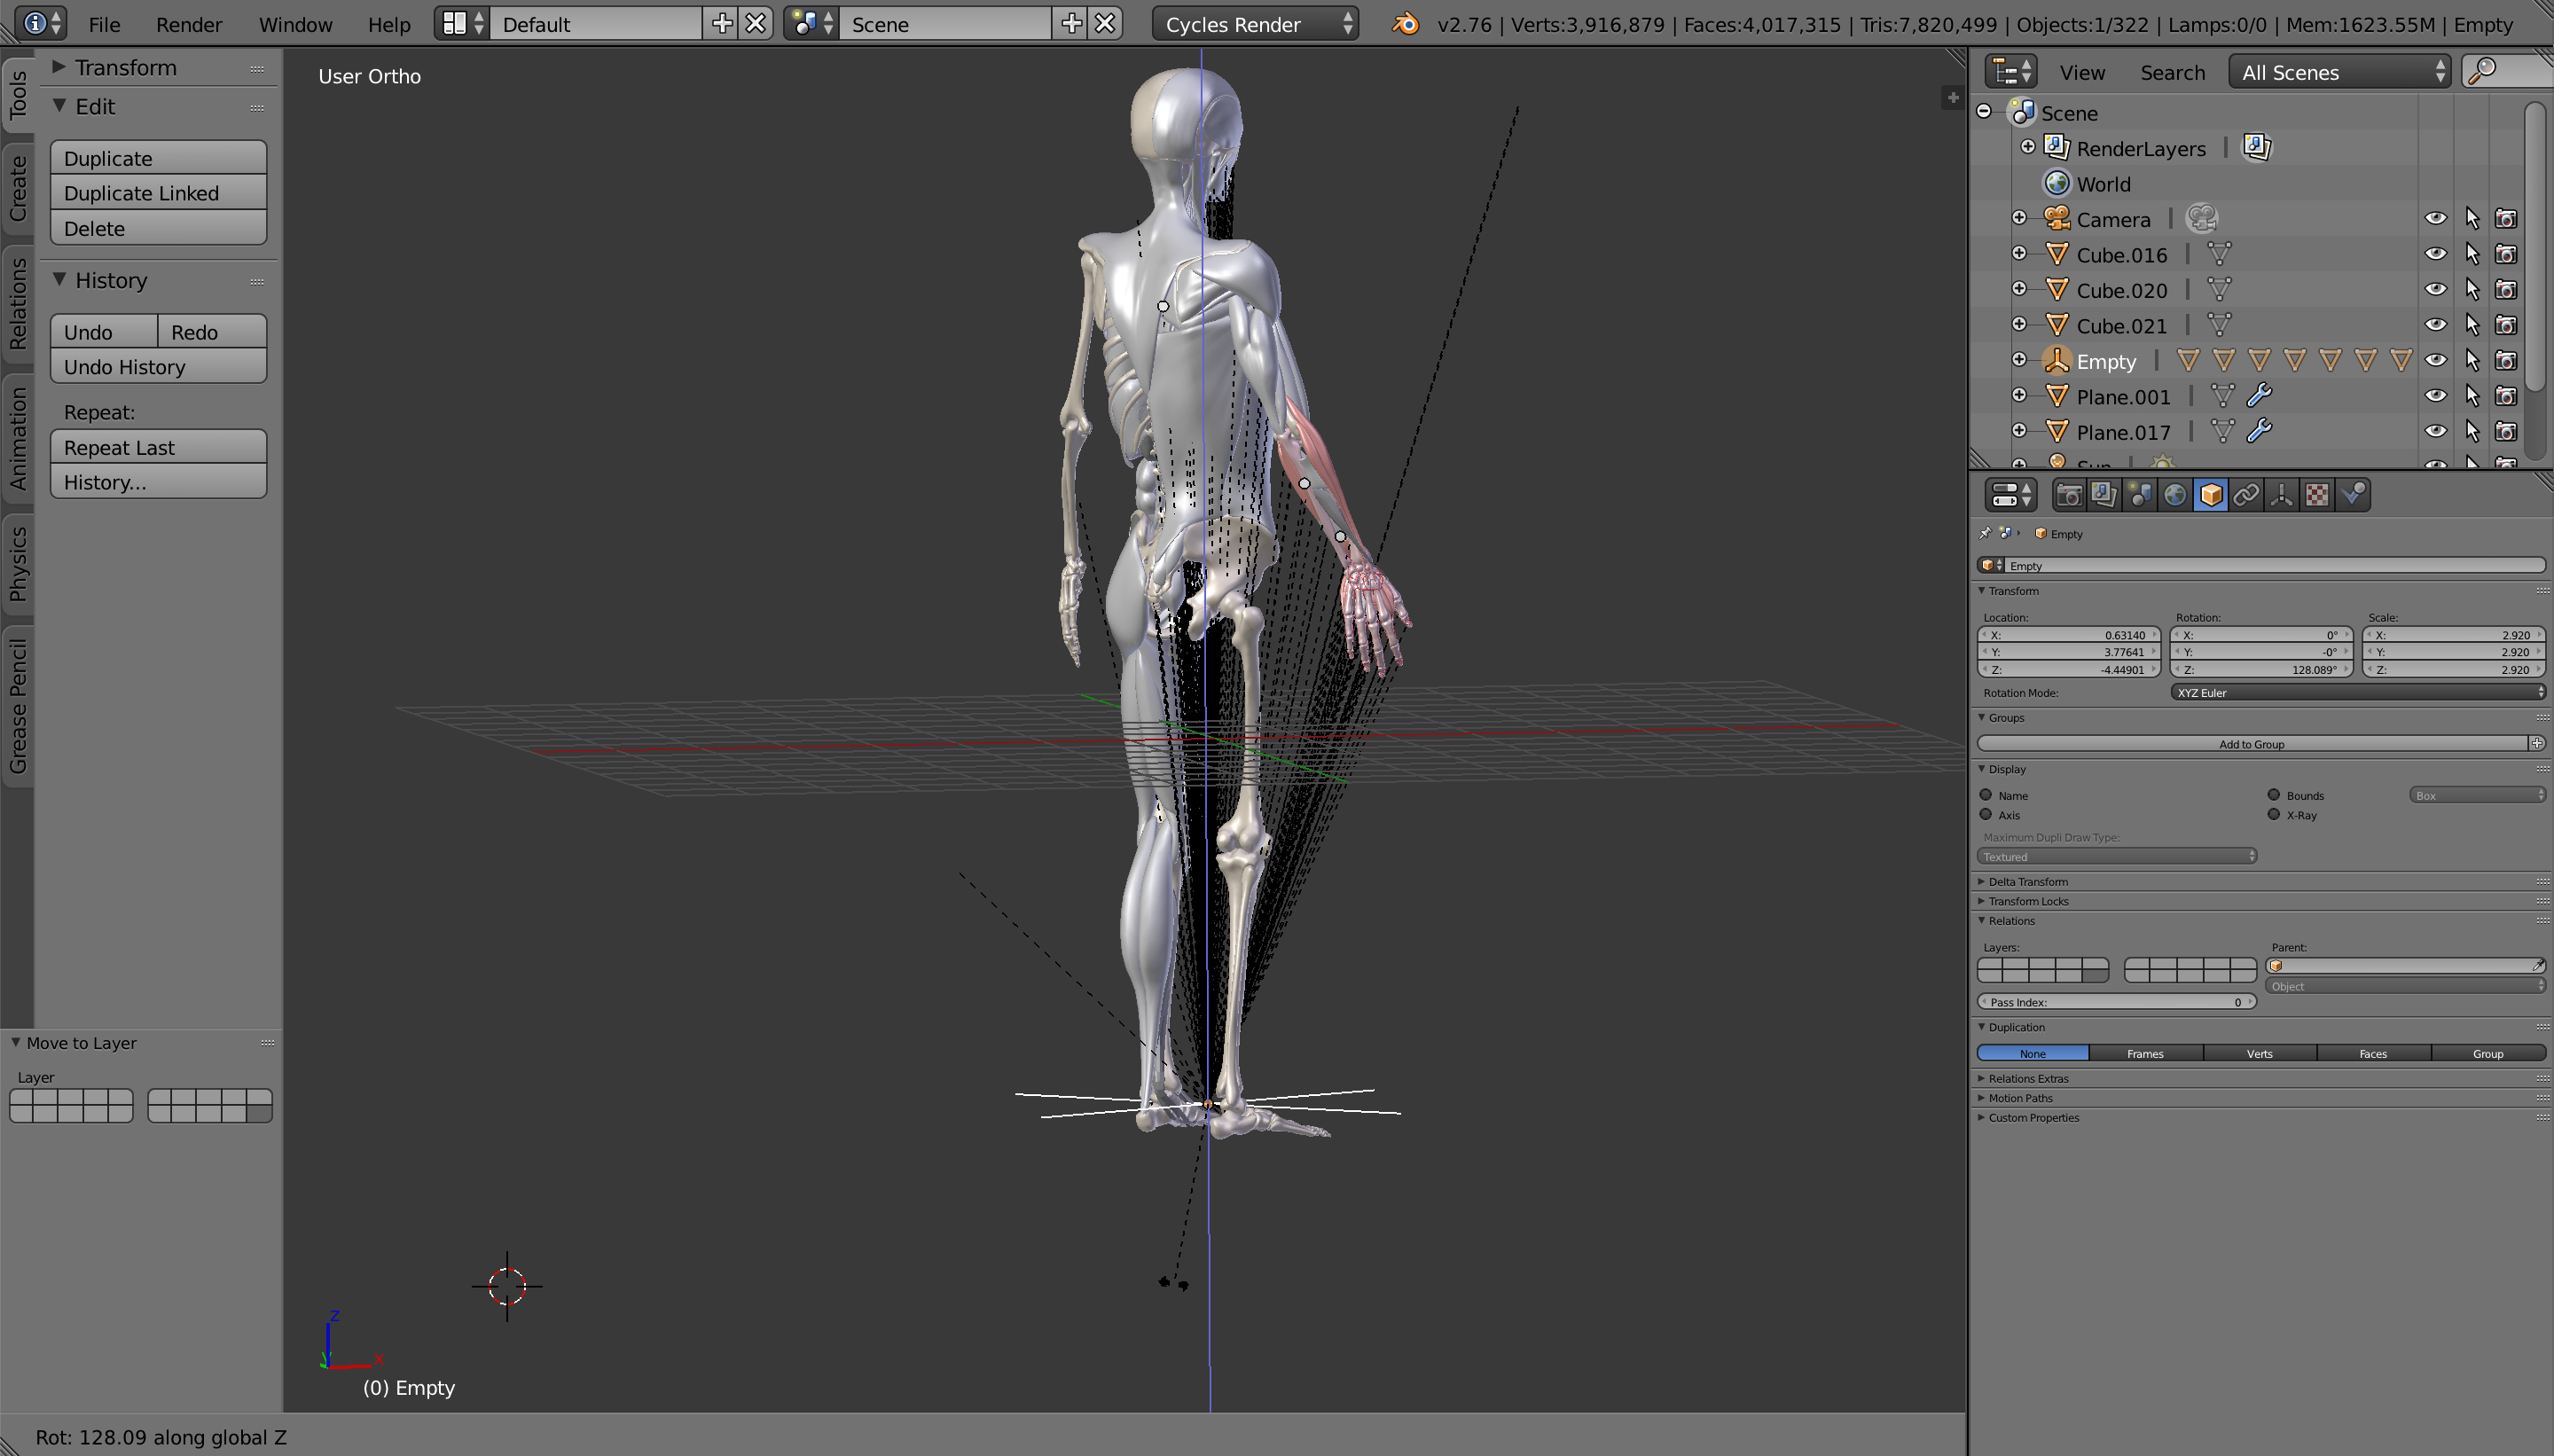
When modelling, it’s useful to make multiple renders from different angles to check the overall form. You may want to keep the lighting set-up in the same place and rotate the model itself. By parenting all the objects that make up your model to an ‘empty’, you can easily control the rotation of the entire model by keyframing the empty.
Create an empty by pressing [Shift]+[A] and selecting Empty from the menu, then choose Plain Axis. Position the empty at the feet of the model. Select all the objects in your model and then [Shift]- select the empty in that order, as the empty will be the parent object. Press [Ctrl]+[P] and select object from the list that appears. You can then move, scale or rotate the entire model using just the empty.
You never really finish a model like this one, anatomy is a complex, endless subject and you could spend a lifetime trying to illustrate all of the systems and structures that make up the human body. Inevitably, you will make mistakes so it’s important to constantly revise your model and strive to make the anatomy as accurate as you can.
I have been working on this project for many years, continually making adjustments and modifications. I have completely rebuilt the model from scratch several times and I am continually adding new bones, muscles, nerves and other anatomical structures. You will soon notice that each time you revise your model, the quality and accuracy will also improve.
This article was originally published in issue 215 of 3D World, the world's best-selling magazine for CG artists – packed with expert tutorials, inspiration and reviews. Subscribe to 3D World here.
Matt Briggs has worked as a medical artist for over 12 years and teaches at the University of Sunderland. He is also a council member of the Medical Artists’ Association of Great Britain.