How to master creature anatomy
Create a believable imagined creature with this handy guide to mastering anatomy.
Sign up to Creative Bloq's daily newsletter, which brings you the latest news and inspiration from the worlds of art, design and technology.
You are now subscribed
Your newsletter sign-up was successful
Want to add more newsletters?
Five times a week
CreativeBloq
Sign up to Creative Bloq's daily newsletter, which brings you the latest news and inspiration from the worlds of art, design and technology.
Once a week
By Design
Sign up to Creative Bloq's daily newsletter, which brings you the latest news and inspiration from the worlds of art, design and technology.
Once a week
State of the Art
Sign up to Creative Bloq's daily newsletter, which brings you the latest news and inspiration from the worlds of art, design and technology.

Seasonal (around events)
Brand Impact Awards
Sign up to Creative Bloq's daily newsletter, which brings you the latest news and inspiration from the worlds of art, design and technology.
When it comes to drawing believable creatures, you need to focus on the skeletal, muscular and vascular systems. This process becomes even more interesting once you start working in 3D.
So, first things first: to follow this 3D creature anatomy project, you'll need the right 3D software – we'll be using ZBrush.
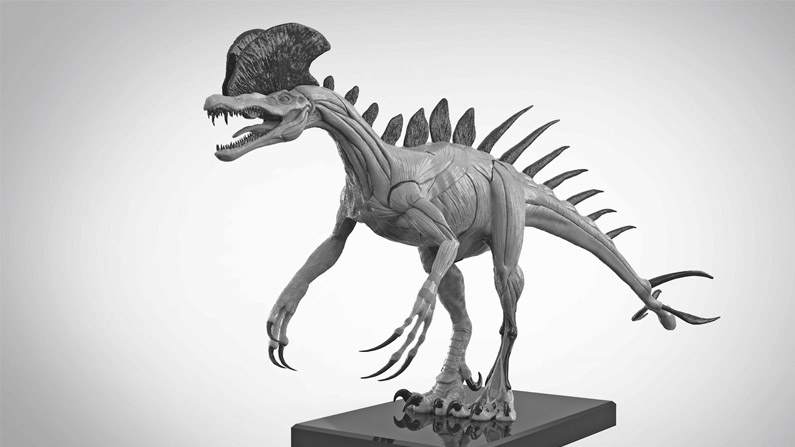
I had the privilege of working with American scientific and academically trained illustrator Terryl Whitlatch. You can also find the Pyrosuvious in Terryl’s book, Principles of Creature Design.
The purpose of this project is to create an anatomy of a believable imagined creature. Creating a creature that does not exist is already a challenging task, especially since we see creatures in movies, commercials and games, all the time.
Making a non-existing creature look believable and convincing is the hardest part. There are plenty of resources available on the human anatomy for artists, but not so much for imagined animals and creatures.
This project focuses on modelling a popular style of imagined creature: a bipedal dinosaur hybrid. The Pyrosuvious is basically a mixture of a Tyrannosaurus Rex, Spinosaurus and Dromaeosaurids-like creature. Luckily, I had Terryl’s scientific illustrations and collaboration to serve as a great conceptual foundation for an inspirational and educational challenge.
In this tutorial you can follow my step-by-step sculpting process in ZBrush, and advice on how to create a 3D print-friendly file.
Sign up to Creative Bloq's daily newsletter, which brings you the latest news and inspiration from the worlds of art, design and technology.
01. Using references
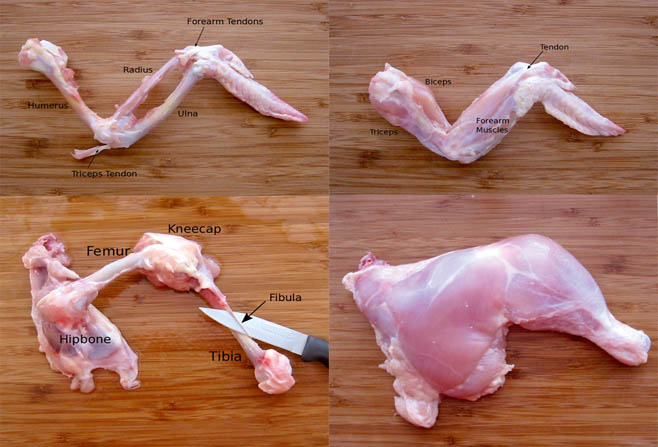
It’s helpful to find real life animal references for the part you are focusing on at a given time. For example, when focusing on the small, detailed scales, I relied heavily on the Carolina anole lizard and neighbouring species for reference.
Many dinosaurs share anatomic features with chickens, especially in the limbs. In this case, I even kept many frozen chicken parts to have on hand as a real-life limb study. I also recommend Unfeathered Bird by Katrina van Grouw as a reference book.
02. Design story
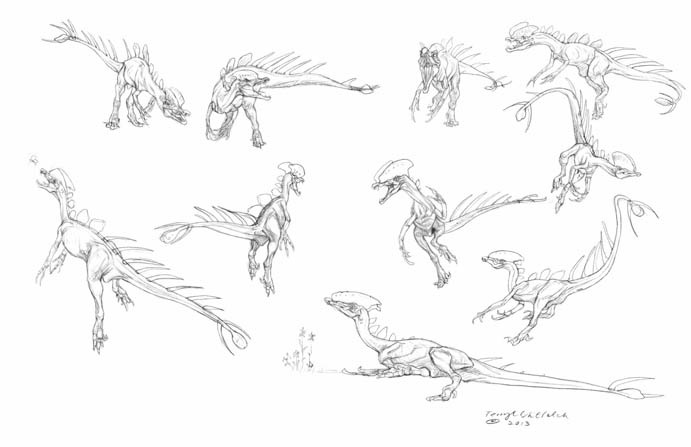
The Pyrosuvious was originally created by Terryl’s rough compositional doodle and sketches based and inspired by the 1925 film, The Lost World. The Pyrosuvious is a combination of at least six or seven different dinosaur species and is designed to be a scaly reptile. The chapter about the Pyrosuvious is in Terryl’s latest book, Principles of Creature Design.
03. Zsphere base mesh
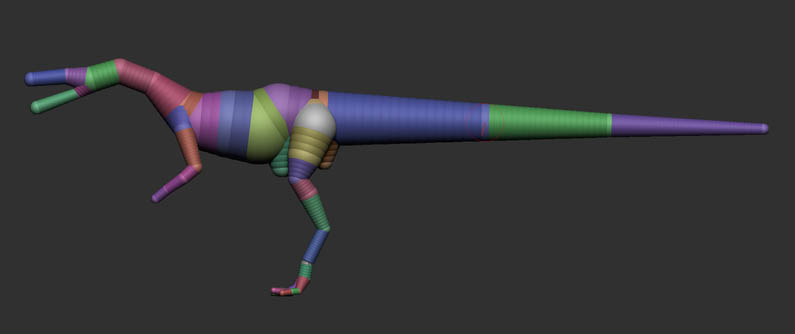
I use ZSphere, a ZBrush tool, to start my main base mesh. Depending on the project, sometimes I start with DynaMesh, but since I have incredible line drawings from Terryl I started with ZSphere to have a little bit more control over my mesh.
I turn off the perspective view and start to build my spheres. You can press [A] to see what your mesh looks like at any time. You can add volumes by creating more ZSpheres. Press [Q] to add more ZSpheres.
04. Skeletal anatomy
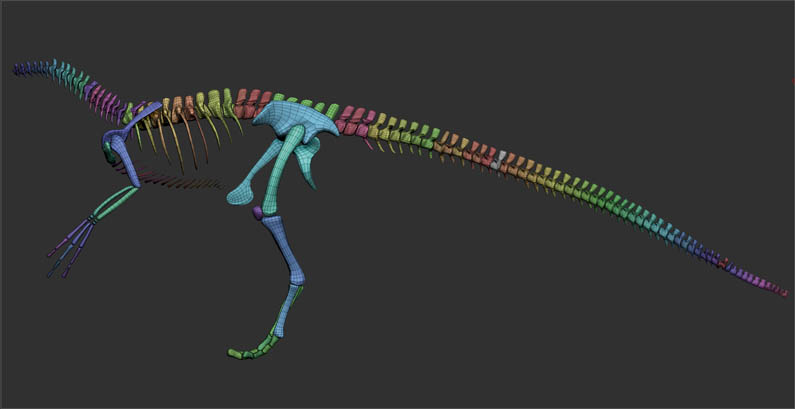
Initially, building the skeletal anatomy wasn’t required for this project, but I think it helps to understand the muscles and their transitions into bones, as well as understand the structure of the overall mass.
Terryl provided me with skeletal front and side view drawings for this task and I built them in ZBrush. If your final sculpt does not call for skeletal structure, I might still suggest completing it to help guide the rest of your muscle and tissue development.
05. Block out the main shapes
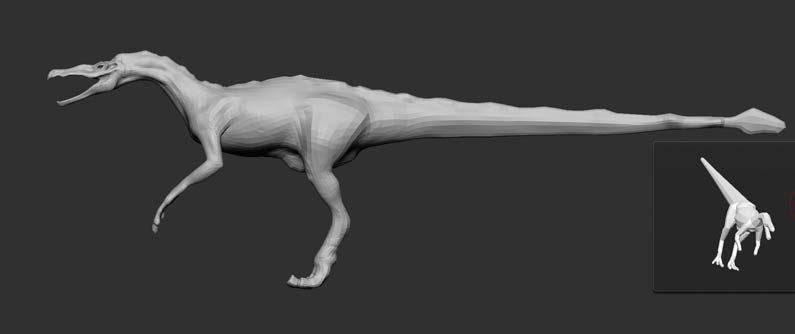
I have front and side view drawings, my base mesh and skeletal system. Now I’ll spend time on the overall silhouette using the Move brush. Concept drawings should give an idea of body mass and shape, but don’t get too hung up on the details yet; it’s important to have a low-resolution model in the beginning while you are making big changes.
Press the shortcut BMT for the Move Topological brush (to move vertices) and shortcut BMV for the Move brush (to move big mass).
06. Add muscle mass
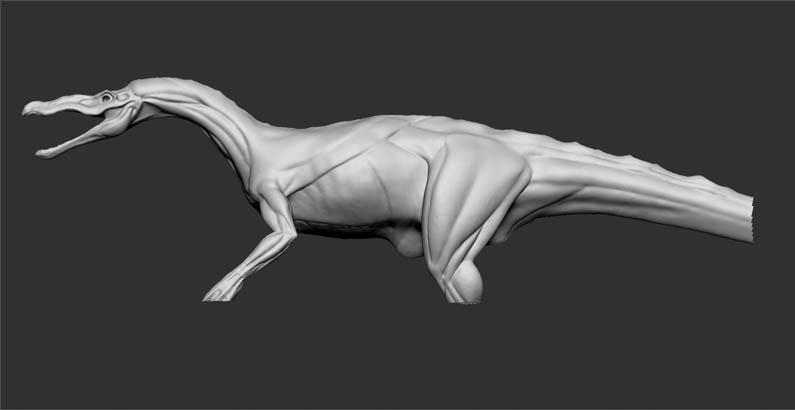
I use the Clay Buildup brush to add muscle mass. Next I isolate the areas that I want to focus on and work on them separately. Use the Clay Buildup brush, smooth it and gently draw muscle lines with the Dam_Standard brush.
Slowly build up the fines of the form and move to a different part. Change the Imbed Intensity to 5 and Brush Intensity to 10 for the Clay Buildup brush. Go to Brush>Depth>Imbed. Imbed controls how much deformation the brush stroke will give you.
07. Adding weight
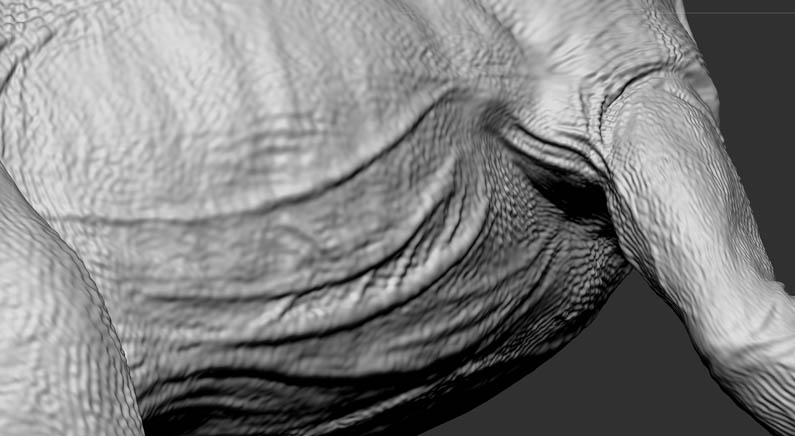
Weight is one of the most important elements in organic forms. It defines the heaviness and gives us the sense of how this creature would fit into our world. Usually the areas that are intersecting, articulating or the loose skin and membranous parts will need the most time and polish here.
If you don’t add weight onto your sculpt it will look less organic. Try looking at your model with a shader that has specularity to see the surface highlights.
08. Surface detail
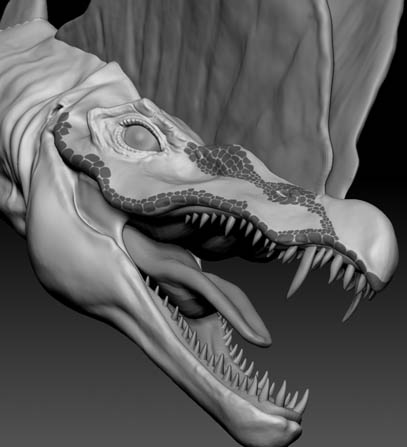
Surface detail should be added last to make the surface look rich and vibrant; it shouldn’t change the silhouette of the model. At this point I create the main scale patterns by hand, and for the rest of the details I use skin alpha brushes which you can easily find on ZBrush Central.
You can also paint your surface details and convert them into Displacement maps to be projected in ZBrush. Both methods are very useful for creating surface details.
09. Anatomy side carving
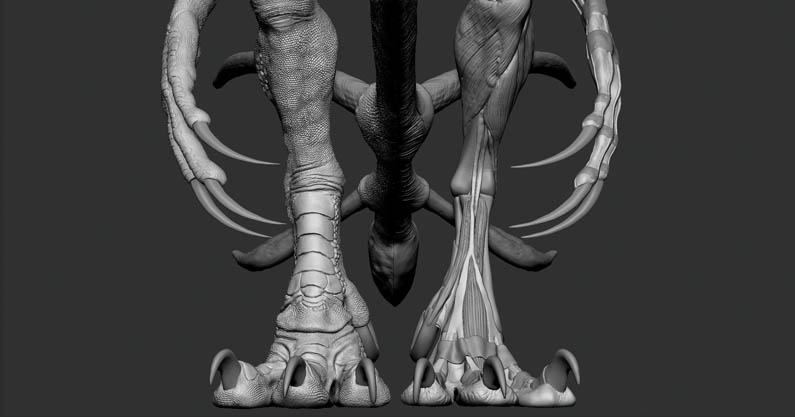
Once I’m happy with the overall weight and mass on this creature, I start carving my surface. As you start working on the major muscle groups and their relationships with the skeletal system, having access to your concept artist or using real animal references is helpful.
I mainly used the Dam_Standard, Clay Buildup and Clay brush here. Working with layers at this stage is very important. I can keep everything organised with layering and take control of the blending.
10. Exaggerate finer details
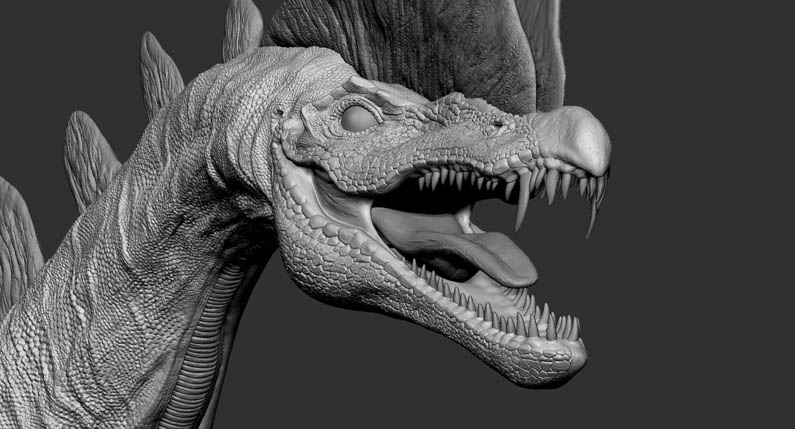
Details will often need to be exaggerated in order to be readable when printed. Fine scale details might look good on your screen, however when you 3D print them they usually get lost.
The good news is, when you take advantage of your layers in ZBrush, you can adjust the exaggeration levels before you send it to be printed. I recommend giving an extra 2mm offset on finer details. Go to Tool>Layers then select the layer and change the layer intensity.
11. Decimation master
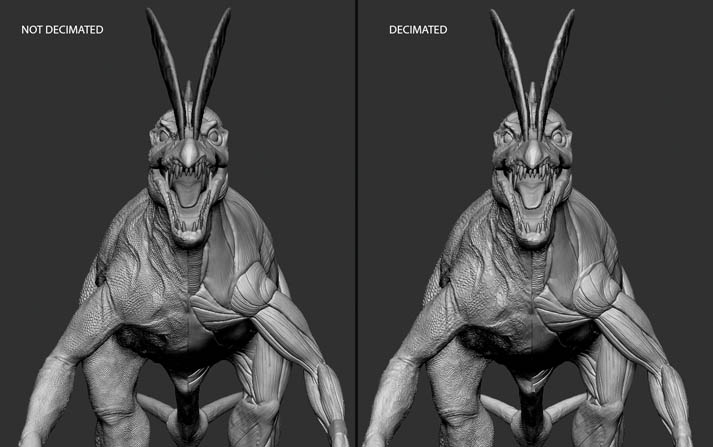
I’ve included the decimated printable écorché of the Pyrosuvious as an .obj file. To buy the original ZBrush file with separated layers and subtools, go to here. Decimation Master is simple to use: enter the number of polygons needed for the mesh or the percentage of the decimation needed.
Go to ZPlugin>Decimation Master and hit Pre-process Current first and then Decimate Current. You can enter different numbers to re-calculate the decimation.
12. Final
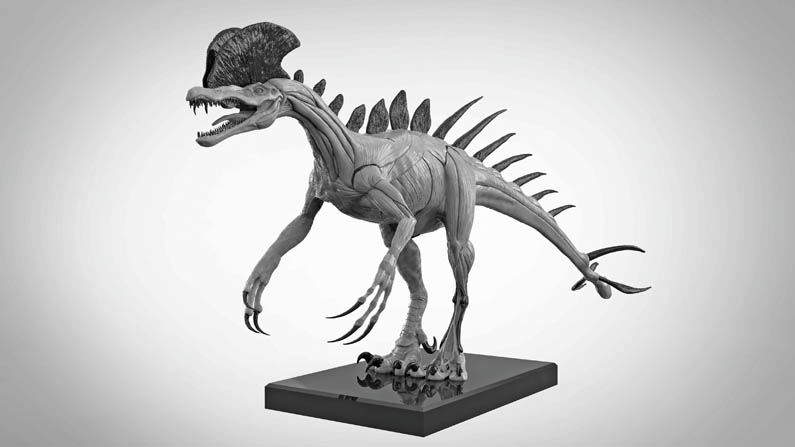
The more information and background you have about your creature, the more believable it will be. Nature is always the biggest inspiration and provides the guidelines for these types of projects.
However, I hope that the Pyrosuvious can also be a tool to guide artists in understanding their creature subject inside and out.
This article was originally published in 3D World, the world's best-selling magazine for CG artists. Subscribe to 3D World here.
